Tag Archives: #mtb

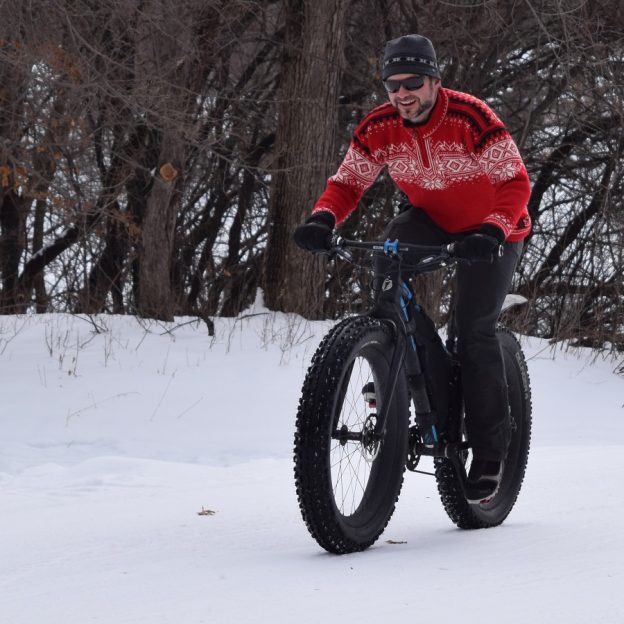
Mountain bike hacks: fat bike tips and tricks for winter fun!

by  John Brown. HaveFunBiking.com

For many of us, riding offroad through the winter is impossible without a fat bike. Our trails get covered with snow in December and don’t see the light of day again until April. While riding a fat bike is a great substitution for riding a mountain bike, it does behave differently than a standard mountain bike. Here are a few quick and easy hacks to riding fat bikes that will get you enjoying the snow in no time.

Why a fat bike

What makes a fat bike special is its ability to ride though deep snow with ease. The reason it is at home in snow is that these tires are between 4” to 5” wide. That width offers traction and flotation on the softest of terrains like snow and sandy ground cover.

Tire pressure

With wider tires comes a larger overall air volume, meaning that fat bikes have more space for air in their tires than a standard mountain bike. Due to that increased volume, fat bikes use a very different air pressure than your standard mountain bike tire. As an example, in very deep snow it’s not unheard of to run the tires as low as 8 psi. By contrast, a standard mountain bike tire at 8 psi would be completely un-rideable. Proper air pressure for a fat bike tire can be difficult to achieve if you don’t know what you are looking for. Basically, you want the tire to be able to deform easily over terrain, but not be so low that the tire “squirms” or collapses under hard turning efforts. I find it easy to get here by filling the tires until they are slightly less than firm, then lowering the air pressure incrementally over the first few minutes of a ride until the tires really perform well. You will know you let too much air out if the bike bobs up and down with each pedal stroke.

Turning

Due to the soft nature of snow, turning can be tricky. While turning on a normal mountain bike you move your body weight forward rely on the tires traction, then aggressively force the bike through the turn. Considering snow is soft and will not support that type of maneuver turning requires a slightly more finessed approach. First, leave your weight in a neutral position centered over the bicycle. Next, shift your weight toward the inside of the turn and begin turning the bars slightly toward the turn. The front wheel is more of a tiller than anything else.  Use it to direct the angle and direction of the bike, but resist the urge to load it up with weight. As the bike angles toward the turn, focus your weight on the rear wheel. If done properly, you will feel as if the bike is turning from the rear wheel rather than the front and your front tire won’t wash out.

fatbike

Weight back and rear wheel doing most the work.

Climbing with a fat tire bike

Climbing with limited traction can be difficult as well. Rather than putting your bike in its lowest gear and muscling up the hill you need to be wary of not letting the rear tire slip. If you drop the bike into its lowest gear, chances are the rear tire will have too much torque. Too much torque will cause your tire to rip through the snow and slip. The best thing to do is move your weight backward and pedal with as even a pressure and cadence as possible. Standing and pedaling, or jabbing on the pedals will most likely cause the rear wheel to break free.

Ice and studs on a fat tire bike

On snow covered trails that get ridden often it is possible for the trails to get packed in and begin to freeze solid. Once ice is on the trail it becomes very difficult to control the bike with standard rubber tires. For this reason, I recommend adding studs to your tires if your trail riding is susceptible to ice.

studded tire

MTB studded tire from Schwalbe (left) and stud detail of 45nrth tire (right)

Overall fun

The biggest tip I can give to fat biking is to keep it fun! Riding a fat bike is a totally different experience than riding a normal Mountain bike, and requires its own skills. Try not to get frustrated because it handles differently than your other off road bikes, just focus on building some new skills. Also, with riding in colder temperatures, enjoy the time you have. While a 4 hour mountain bike ride in the summer is great, you may not be able to stay warm that long through the winter. Beyond the different skills and time, enjoy the unique rewards only Fatbiking can give you.

No matter your level of bicycle riding skills, bike lights are essential to make sure you have a safe ride, day or night. Bike lights aren't only needed when the sun goes down.

With more darkness then daylight the zen and the art of night biking

by John Brown, HaveFunBiking.com

Seasons change and eventually we are left with more darkness than daylight, thus night biking. day. This annual march to the darkest day of the year was the inspiration Robert Frost needed to write Stopping by Woods on a Snowy Evening.  On occasion my “Little Horse” asks if “there is some mistake”, but of course Frost was talking about the animal and I the machine. The draw of the dark and cold is the same though, snow muffles sound and darkness can be beautiful. If you haven’t tried night mountain biking, I encourage it!

mountain biking at night

Snow, dark, and silence make mountain biking at night great.

Night biking, who turned off the lights?

You will need a good light to mountain bike at night. I recommend to start with something around 1000 lumens, but more if you can get it. Be aware of the beam pattern when you buy a light because while a wide and dim beam would be great to alert passing motorists of your presence. When mountain biking, you need all the light in front of you, so for that reason try to find a light with a rather narrow beam. Another consideration when buying a light is if it can be mounted on your helmet. Many riders prefer to sync their light with their sight line, so they can look around corners and up the trail if needed, while pointing the bike where it needs to go. By contrast, bar mounted lights only point toward where you are going at that moment.

Buddy system is best for night biking

Night riding is not a time to go it alone. It’s not as if the actual riding is any more dangerous or difficult, but if there is an issue, you are far less likely to run into a helpful passerby at night. Therefore, bring your helpful passerby along with you. The only issue I have had riding with others at night is the shadows that more than one light will produce. This issues is easily remedied by spreading out a bit further than you would in the daytime.

Night Riding in groups is fun and safe.

What to expect when night biking

The greatest part of night riding is it’s ability to surprise you. As an example, I find that trails I know by heart take on new dimensions when my light is focused but limited. This change of visual often directs me to take new lines and approach areas differently. Also, you see totally different wildlife in the woods at night. Coyote, owl, and bats are some of my more favorite night time friends. Finally, mountain biking at night gives you the feeling that you are going faster. I don’t exactly know the psychological reasons, but when you can only see 20-30 feet in front of you, those feet seem to accelerate faster than if your vision was unlimited.

Quiet

Riding a mountain bike at night is also a chance to enjoy the quiet. Fewer riders and less commotion helps me eliminate one more distraction and just enjoy the trail. Add in snow to muffle any sound that is there, and you have the recipe for a Zen like mountain biking experience.

mountain biking at night

Surroundings melt away leaving only the trail ahead.

“But I have promises to keep and miles to go before I sleep”

We all have a life outside of our bike, and far too little time to live it. Riding your mountain bike at night is a way to find hours you might not normally have to ride. After the kids are asleep, the dishes are done, lunches are packed and laundry folded, consider mountain biking an alternative to turning in for the night. You might just love what you find!


Now that I have had over a month of cold weather under my belt, I feel comfortable talking about the Sealskinz Winter Halo Glove.

A mid-term review of this amazing Sealskinz Halo Winter Glove

by John Brown, HaveFunBiking

Now that I have had over a month of cold weather under my belt, I feel comfortable talking about the Sealskinz Halo Winter Glove. The onset of Minnesota’s winter is probably colder than most peoples harsh winter months, so I feel that this mid-term review is probably a great indicator for 90 percent of America ’s riding needs.

The pros of the Sealskinz winter glove so far

I think we all agree, the major selling feature for any winter glove is warmth and this glove has that in spades. I have ridden well into the mid-teens and never once wanted for more insulation. Considering these gloves are a full five finger glove and lightweight, the fact that they are warm is unparalleled. Overall the gloves breath well, fit well and have a great amount of flexibility. I like the large Velcro flap that acts as the wrist closure and the palm material’s tacky grip on the bar.

The cons to date

The lighting system is one of the selling features for these gloves, but sadly it didn’t perform as stated. While the lights are bright their position on the glove doesn’t lend to amazing visibility. However, they do offer a really cool look when signaling your turns. Sadly, for me, one of the blinkers didn’t start well and didn’t last long. The bracket that holds the battery was loose from the factory and led to intermittent function. I was able to readjust the bracket (read bent) and the light functioned well. Unfortunately, maybe due to my work the wires broke free from the switch.

sealskinz

The wiring broke free on my Halo light (red circle). Luckily the part is replaceable

More Sealskinz  info coming

With the lighting system aside, these gloves have been amazing. Considering that the Sealskinz Glove is known for warmth and not electronics, this makes sense. I’m planning on riding these gloves right up until they can’t insulate anymore. So far they have done a better job than any of the dozen or so gloves I have sitting at home. I also hope to see how long the palm material stays grippy. That palm is starting to show some signs of wear, but overall, they are well intact.

sealskinz

Light wear on the Halo’s palm

Take a look below at some of the most common and damaging cycling mistakes and solutions made by newbies and seasoned riders alike.

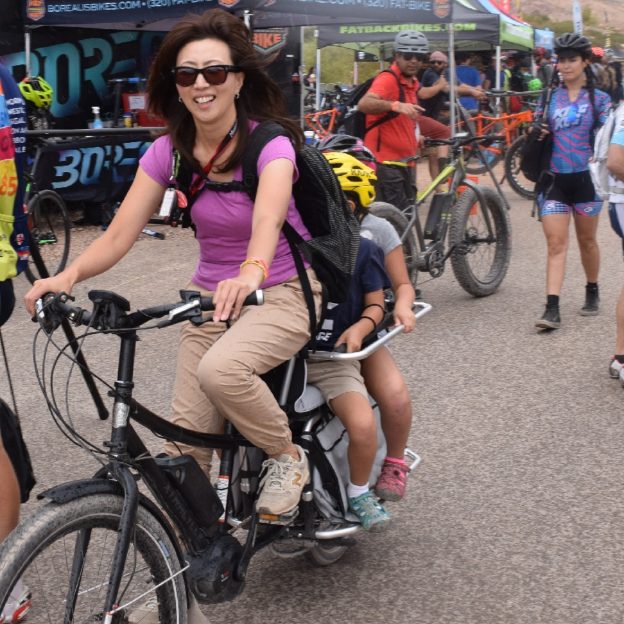
Some of the best E-Bikes available were shown at Interbike

by John Brown, HaveFunBiking.com

There was a consistent buzz throughout the week of Interbike and part of the high was the hum of some of the best e-Bikes out there. E-bikes have become big business in the biking world and for good reason. With the baby boomer generation aging, but refusing to slow down, there is a real need for motor assisted bicycles. E-Bikes offer extended range by giving the rider a boost of power when things get tough. Keep in mind, most of these bicycles don’t have a throttle as a standard feature and only activate a motor when the going gets tough. Take a look at some of the best e-bikes at the show.

Surface 604 was one of the best e-bikes

A welcome surprise at Dirt Demo was Surface E-Bikes. I spoke with Sam (the founder) for a while before testing out the bikes. Sam was a designer for a major bicycle company in Canada for years before having the impetus to start Surface 604. He knew that E-Bikes would soon sweep the nation, but saw a gap in the market where high quality/low cost bikes should be. Using his design and manufacturing experience he set out to fill that need. I’m happy to say I think he did it. The Rook is a trekking style bike (think hybrid with lights, fenders and a rack) designed to be comfortable and utilitarian. The bike rides well without the pedal assist and absolutely hums when the motor kicks in. The fit and finish of the Rook is every bit as nice as it’s more expensive counterparts and offers additional features that many overlook.

Interbike E Bikes

Surface Colt with detail of included headlight and tail light

In addition to the rook, Surface also produces the eye-catching Boar fatbike. It’s camouflage paint scheme and ability to go almost anywhere make it an ideal bike for any hunter or sportsperson.

Interbike E Bike

The Boar is as versatile as it is cool

Vintage Electric Bikes

Where Surface focused on the cost conscious, Vintage Electric Bicycles went to satiate the most discerning riders. Just one look at their unique model line will have you begging to throw a leg over and fly down the road. These E-Bikes are inspired by the classic style while boasting modern day technology. Great touches like die cast aluminum battery cases, make these bikes look like a custom café racer while elegantly storing the battery in a lightweight shell. Of all the bikes in their booth the Scrambler was the true show stopper. It seemed no detail and no cost was spared in making this modern day classic.

Interbike E Bike

Vintage Scrambler looks like it’s ready to take off!

Focus E-bikes

Focus is a bicycle brand based out of Germany. They are well known for their technologically advanced bicycles. Focus is also known for their bold and progressive paint schemes. When it comes to E-Mountain Bikes, Focus delivers on both technology and appearance. It was impossible to miss the BOLD2 with its clean lines and amazing appearance. Even though this bike wows you with its looks, the real story is in the BOLD2 ‘s function. Focus armed this E-Mountain Bike with Shimano’s new XT motor system that is specifically designed for off road use. Additionally, they use a smart collection of parts to ensure you can tackle any trail and a beautifully hydro-formed frame to help keep the weight low. Best of all is that this bike can use 27+ wheels (that’s a 27.5×3” tire) guaranteeing all the traction you will need.

Interbike E Bike

Great looking, Great power, and awesome function. Focus checks all the boxes with the Bold2

Overall the best e-bikes on the market are still evolving with new brands and parts arriving daily. If these options are any indication of things to come, we are all in luck.

I was amazed at how well the B17’s operated. Even when thrown down rocky chutes or around jagged turns this bike soaked up anything I threw at it.

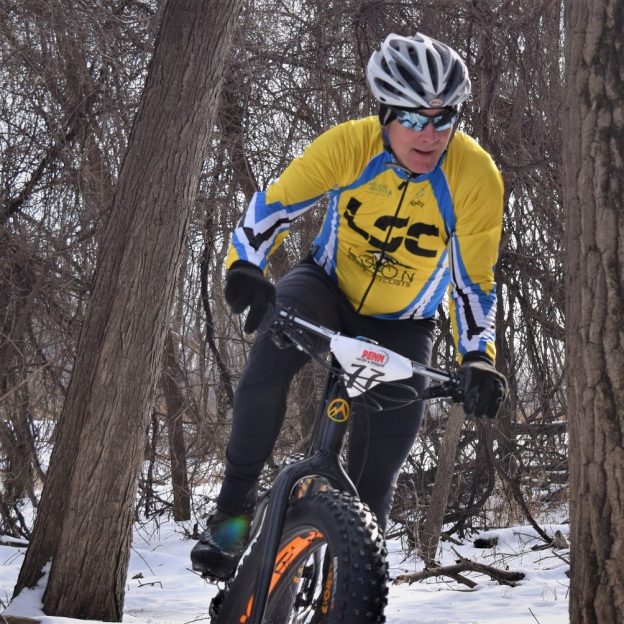
Dirt Demo Reviews: Thoughts and Feelings on the Marin B17

By John Brown, HaveFunBiking

Interbike’s Dirt Demo is always good for a few things, red dust, high winds, and some really expensive bikes just waiting to be ridden – and wow, was I impressed with the Marin B17. Typically the brands at Dirt Demo bring their biggest and best bikes in an effort to wow the throngs of bike shop staff members visiting. Happily, this year many brands brought their price point bikes and I have to say they were all awesome. OK, OK, I realize that calling them all awesome isn’t the type of hard hitting journalism that makes for a serious review. But, with that said, I honestly have to share just how much bike you get for a reasonable amount of money.

Bootleg Canyon

Dirt Demo is held about thirty miles east of Las Vegas in a place called Bootleg Canyon. This high plateau offers a great stage for dozens of brands to create a tent village from which to show their product. Bootleg also has paved bike paths, winding roads and miles of offroad trails. For these reviews, I used their trails, and small pumptrack. The trails are predominantly sand, rock and what riders call “kitty litter. While sand and rock is self explanatory, “kitty litter” needs some explanation. Basically “kitty litter” is loose rock, typically smaller than gravel, which is deposited over a firm surface. While sand will slow you down, and rock will make for fun obstacles, kitty litter requires a bike to have excellent traction, and handling to navigate it well.

Out in Bootleg Canyon there is plenty of room to test out the latest bikes manufactures are showcasing.

Out in Bootleg Canyon there is plenty of room to test out the latest bikes manufactures are showcasing.

Marin B17

This pump track was fun and a good way to see how the Marin B17 handled

The Marin B17

The first bike I tried was the Marin B17. The B17 is one of the new crop of aluminum full suspension bikes using 27.5+ (27.5 x 3”) tires. It boasts 130mm of travel up front and 120mm in the rear and a 1×11 speed drivetrain.

Marin B17

The Marin B17 I rode

Thankfully, the B17 uses an air shocks which made it easy for the the Marin mechanics to quickly adjust the suspension to my riding weight. When testing out any bicycle, it is important to try to isolate problems, adjust, and see if you can get the bike to ride its best. Initially, I felt the suspension offering good control but the bike seemed a bit harsh. Rather than adjusting suspension though, I lowered the tire pressure. For the B17, the harshness came from the tire’s air pressure being too high. Happily, once I lowered it, the bike absolutely lit up.

I was amazed how well the bike handled! To start, it had a near telepathic handling character. Simply think about changing direction and the bike did it. Following that, I was amazed at how well the B17’s suspension operated. Even when thrown down rocky chutes, or off camber, jagged turns, the B17’s suspension soaked up anything I threw at it. Even more, when it was time to turn the bike uphill, the suspension resisted bobbing and transferred my pedaling effort to the rear wheel while still allowing the rear wheel to find traction.

Keeping things Consistent

I tested the B17 3 (Marin’s Top end model at $3699.99). While $3700 dollars isn’t exactly wallet friendly, Marin also produces a B17 1 AT $2099.99. That makes the B17 1 an excellent deal for such a full functioned bike. however, you may be concerned that the ride quality of B17 I rode was associated with the high end suspension parts and not the frame design. I ran both the fork and rear shock in their full “open” position. I did this to see if the frame design or shock function is responsible for the ride quality. If the function of the high end shocks were responsible the bike would behave differently in “full open”. Happily I can say that with the suspension setup in “full open” that the B17 happily climbed and descended with control and confidence.

More to come

Stay tuned for my Review of the Marin Wolf Ridge, Hawk Hill, and Haro Shift. As for right now, I am off to Dirt Demo to bring you more great product reviews. Feel free to comment below if there is anything you want to see in more detail.

In the U.S. bike markets it all happens at Interbike.

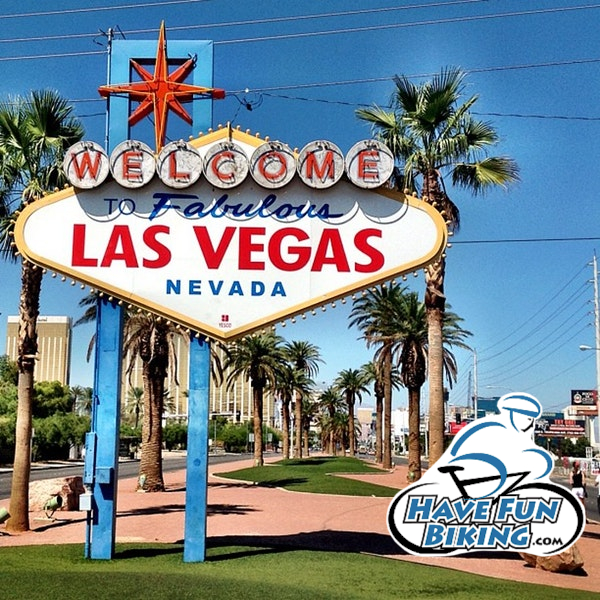
HaveFunBiking will share many new bike products from Interbike

by John Brown, Havefunbiking.com

Show season is at hand in the cycling industry and HaveFunBiking.com will be on the show floor. We are excited to try the newest product and deliver to our readers the most curated list of new products over the next couple months. On Monday September 18th , before dawn, we embark to Las Vegas to try countless bikes at Interbike’s Dirt Demo. Following that, on Wednesday the 20th, the doors open to the last Interbike in sin city. Stay tuned to our Blog to see all the newest products and news from the show floor at HaveFunBiking.

Interbike

Interbikes’s Dirt Demo is a great way to try new product.

HaveFunBiking goes to Interbike in Las Vegas

Don’t worry, the fun doesn’t stop when we leave Vegas. Following the show we will be reviewing product we will see over the course of next week, so stay tuned.

Here the manufactures of Tern Bicycles is showing and demonstrating the latest line of folding bikes out at the Iterbike's Canyon Demo location.

Here the manufactures from Tern Bicycles is showing and demonstrating the latest from their line of folding bikes out at the Interbike’s Canyon Demo location.


Here a bike shop representative takes a fat bike out for a test ride so she can share the highlights with her customers.

Here a bike shop representative takes a fat bike out for a test ride so she can share the highlights with her customers.


On Wednesdays Interbike official begins with several thousand exhibitors showing off their latest products in bike wear and fad.


Interbike

Miles of product at Interbike 2017!

Here the manufactures of Alter Bicycles is showing and demonstrating the latest line of there line of bikes at Interbike.

Here the manufactures of Alter Bicycles is showing and demonstrating the latest line from their their line of bikes at Interbike.


Here a manufacture is showing and demonstrating a colorful line of helmet mirrors at Interbike

This manufactures rep is demonstrating their colorful line of helmet mirrors at Interbike

Feel free to let us know what new products you want to hear about and what topics you need more info on.

With 20 years in development your disc brakes are more powerful and serviceable than ever before. Read on for some simple steps to keep them working well.

A simple look at your bikes disc brakes function and maintenance

by John Brown, HaveFunBiking.com

Disc brakes were introduced on bikes as early as the 1950’s with Shimano making an actual hydraulic disc in the mid 1970’s. There were versions of the Schwinn Stingray series (released in 1971) that came stock with a rear disc brake. Let’s fast forward more than 25 years to the first market acceptable disc brake -The Hayes Mag disc. From its release in 1997, disc brakes have found their way onto most mountain bike, hybrids and now road bikes. With 20 years in development, disc brakes are more powerful and more serviceable than ever before. Read on to learn the basics on how your disc brakes work and how to keep them working well.

Disc Brake

Original Schwinn disc and 1997 Mag brake, both made by Hayes

How Hydraulic Disc Brakes Work

At their most basic, the brake lever moves fluid through a system and that fluid flows to the pads that press on the rotor. There are more details that make one brake work better than another. However, at the root, all disc brakes are very simple. The reasons the system is so simple and works so well is based on the following. Both the pad and rotor materials produce excellent friction. Additionally, the natural properties of fluids help transfer lever force without compression and absorb excess heat.

How Mechanical Disc Brakes Work

Mechanical disc brakes share the same pad materials and rotors as hydraulic systems; Therefore, they have very similar stopping power. Where mechanical system differ is they use a standard brake cable to actuate the brake instead of hydraulic fluid. Mechanical discs have a small lever on the brake caliper that is pulled by the brake cable, moving the brake pads and stopping the bike. The benefits to mechanical disc brakes is a larger lever shape choice, lower cost, and easier adjustment. On the other hand, because mechanical systems don’t use fluid, they are not as powerful and don’t manage heat as well as hydraulic systems. For that reason, on longer descents, mechanical brakes can under perform compared to their hydraulic counterparts.

Why disc brakes are more efficient

Unlike rim brakes, disc brakes don’t rely on a wheel being straight and round. Even if you were to accidentally dent of bend your rim, with a disc, you can still brake confidently. Another reason disc brakes are more efficient is that they produce a massive amount of friction. That friction, in concert with the venting on the disc rotors clears debris off the rotor and allows the brakes to work through all conditions. Ultimately, disc brakes are more efficient because they require less maintenance. In fact, hydraulic disc brakes self-adjust for pad wear they don’t require you to adjust them.

Why adjust the disc brakes caliper

Adjusting the brakes caliper is necessary if you hear the brake rubbing, or if they aren’t helping you stop well. Before adjusting a hydraulic brake, squeeze the lever to determine if you system needs to bled. If the lever feels spongy when you squeeze it, you need to bleed the system. It’s best to take it to your local shop and have the pros handle it. However, If the lever moves freely through its range, then has a firm feel once the pads hit the rotor, you can proceed without bleeding the system.

How to adjust the caliper to eliminate noise on hydraulic brakes

To adjust the caliper, loosen the two fixing bolts on top of the caliper (they may be under the chainstay on road bikes or in front of the rear quick release). Then snug both bolts up until the caliper stays in place, but is still move able with some effort on your part. WARNING! The rotor can be sharp and cause serious injury to your fingers. While spinning the wheel, keep your fingers clear of any spinning part.

While looking into the caliper, try to position it so there is equal space between each pad and the rotor. Once the caliper is centered spin the wheel slowly – in a perfect world there is no noise. If you are hearing the rotor rub on the pads, readjust until you get no noise. In some cases, you may need to straighten the rotor, this is a job best left to a bike shop professional. Once you are happy with the calipers position, tighten down the fixing bolts and you are done!

disc brake

Here you can see equal between the rotor and pads on both sides.

Adjusting mechanical brake performance

If your mechanical disc brakes have recently lost power, or the levers pull too close to the bar, you can easily adjust them for better performance. Before you adjust the brake, inspect the rotor and pads for any contaminants. Usually, contaminants come int he form of chain lube splattered from an over lubricated chain. If you see any oily residue on the rotor, the rotor needs to be cleaned, the pads will also need to be cleaned or replaced before you can proceed (denatured alcohol works well).

Most mechanical disc brakes have a fixed pad, and a moving pad. The moving pad pushes the rotor into the fixed pad, and creates stopping power.  Because these brakes operate differently than a hydraulic system, they need to be adjusted differently. First, you want to align the caliper so the rotor is as close as possible to the moving pad without touching. Next, thread the fixed pad in until it is as close to the rotor, but not touching. With both pads in place, loosen the cable pinch bolt on the side of the mechanical brake, pull the cable tight, then snug the pinch bolt again. Continue to adjust until you get the performance and lever feel you prefer.

disc brake

The Lever (green) is pulled, pushing the moving pad (also green) into the rotor (red). The Rotor is then flexed into the fixed pad (blue).

Trouble shooting disc brakes

Lever squeeze

Hydraulic brakes have a mechanism built into the master cylinder that auto adjusts for pad wear. It’s a great little valve that eliminates the need to re-bleed the brake continually as the pad wears. This valve can also lead to problems if you squeeze the brake lever without the wheel in your bike. The brake will adjust as if you just wore through 3mm of pad material (the thickness of the rotor) and not leave enough room between the pads to fit the rotor back in. To solve this issue you can either take the bike into a local shop or find a wide, flat, clean, metal tool to fit within the pads, and pry them apart again.

In cold temperatures

In temperatures below freezing, hydraulic discs that use mineral oil as a fluid can behave differently. As the mercury drops, the mineral oil can thicken and make the lever feel sluggish. You will find that once the temps rise, the brake will feel normal again.

Overall, disc brakes are the next step in brake evolution. They are more consistent, more powerful and easier to actuate than any other type of brake on the market. With every new evolutionary step, there will be some hesitation to try “the new”. Even though there may be some hesitation, you should not fear buying a bike with disc brakes. Thanks to years of iteration and market demand we now have disc brakes that are inexpensive and functional.

Another mountain biker having fun in Lebanon Hills Park.

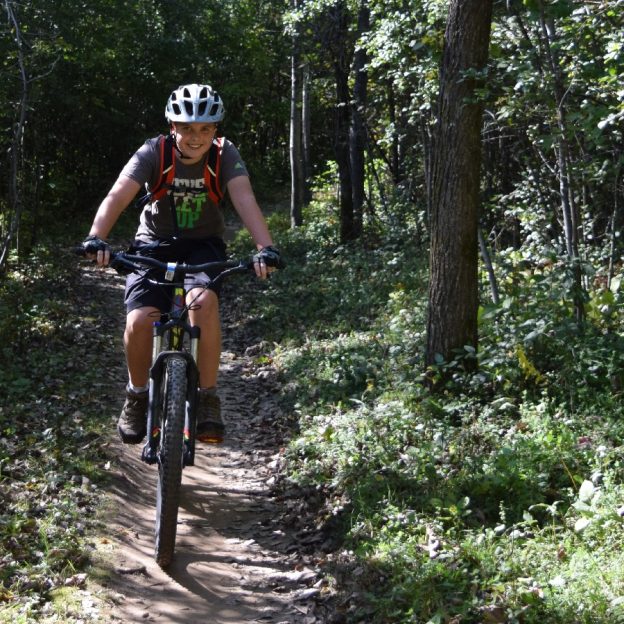
Bike Pic Aug 22, another mountain biker having fun in Lebanon Hills Park

Another mountain biker having fun in Lebanon Hills Park. Check MORC trail conditions to see which trail systems may be closed after another day of rain yesterday.

What better way to continue your summer fun and your #NextBikeAdventure. View all the fun ideas and bike destinations in the latest Minnesota Bike/Hike Guide. Then plan your next outing with family and friends in one of Minnesota’s HaveFunBiking Destinations.

Thanks for Viewing Our ‘Mountain Biker’ Pic of the Day  

We are now rolling into our 10th year as a bike tourism media. As we pedal forward our goal is to continue to encourage more people to bike and have fun while we highlight all the unforgettable places for you to ride. As we continue to showcase more places to have fun, we hope the photos we shoot are worth a grin. Enjoy the information and stories we have posted as you scroll through.

Do you have a fun bicycle related photo of yourself or someone you may know that we should post? If so, please send your picture(s) to: [email protected]. Include a brief caption (for each) of who is in the photo (if you know) and where the picture was taken. Photo(s) should be a minimum of 1,000 pixels wide or larger to be considered. If we use your photo, you will receive photo credit and acknowledgment on Facebook and Instagram.

As we continue to encourage more people to bike, please view our Destination section at HaveFunBiking.com for your #NextBikeAdventure – Also, check out the MN Bike Guide, now mobile friendly, as we enter into our 8th year of producing this hand information booklet full of maps.

Remember, bookmark HaveFunBiking.com on your cell phone and find your next adventure at your fingertips! Please share our pics with your friends and don’t forget to smile. We may be around the corner with one of our cameras ready to document your next cameo apperance while you are riding and having fun. You could be in one of our next Pic’s of the Day.

Have a great day!

The trails of Lebanon Hills offer some of the most enjoyable mountain biking in the Twin Cities Area.

Enjoy fun and nature on Lebanon Hills fantastic mountain bike trails

by John Brown, HaveFunBiking.com

The newly expanded trailhead of Lebanon Hills acts as a gateway to some of the most enjoyable trails in the Twin Cities Area. With nearly 12 miles of one way singletrack trails, Lebanon Hills has become one of the go-to trails in Minnesota. The trails feature riding for all skill levels combined with world-class facilities to enhance your riding experience. All the bike trails are built and maintained by the Minnesota Off-Road Cyclists (MORC).

Where Lebanon Hills is

Another happy mountain biker riding through the forests of Lebanon Hills Park.

Another happy mountain biker riding through the forests of Lebanon Hills Park.

The Lebanon Hills Mountain Bike trails (Leb to the locals) are located in Eagan Minnesota off Johnny Cake Ridge Road. The newly expanded trailhead boasts ample parking, clean bathrooms, public grills and picnic areas as well as a skills course appropriate for all ability levels. Leb is a part of the larger Lebanon Hills Regional Park system that includes two swimming lakes, nearly a dozen hiking areas, three camping areas and close proximity to the Minnesota Zoo.

What to expect in Lebanon Hills

The first thing you will notice about riding in Leb is the amazing condition of the trails. Thank the Minnesota Off Road Cyclist organization (MORC) for the smooth berms, clear trails and exciting features. Ride into the first trail and enjoy the sweet smell of pine trees while you wind through a healthy forest. First, you are given the choice of staying on the beginner trails or hanging a hard right onto the intermediate loop. Staying on the beginner trails will lead you to five 8’ tall berms that are a total blast to ride. From those berms you can branch off into another intermediate loop or head into a skills section that including a berm, roller, and jump line.

Another fun run through an open meadow.

Another fun run through an open meadow in Lebanon.

If you choose that first right onto the intermediate loop, you are rewarded with twisty sections, a rock drop, and high speed downhill sections. That intermediate section brings you out to the far end of the park. Once out there, you can enter into the truly advance loops built on rock gardens, step climbs and steep descents. The trails on the far side of the park meet at one point, perfect for a quick break between loops.

Here on the advanced trail in Lebanon Hills you will find some obstacles to challenge you.

Here on the advanced trail in Lebanon Hills you will find some obstacles to challenge you.


Best part of the trails

Leb gives its riders amazing trails as well as awesome views. The best part of Leb is how well it integrates into nature. Even though the trails of Leb are well trafficked, Places like the “lake loop” give the impression of sanctuary for hundreds of riders a weekend. Because all the trails are directional, there is a great feeling of isolation even though other riders may be just a few hundred feet away. Overall, Lebanon hills is a great way to enjoy the beauties of nature in the Twin Cities area.

Here is a place for all ages to build on their skill levels.

Here in Lebanon Hills is a place for all ages to build on their skill levels.

How to help

If you ride and enjoy the trails at Leb, consider volunteering for trail maintenance. The Minnesota Off Road Cycling organization (MORC) schedule trail work sessions on Tuesdays through the summer. The group meets in the parking lot at 6 O’clock and welcomes anyone interested in helping. Wear long pants, boots, and work gloves because you will be doing hard labor. You will find that the hard labor is enjoyable because you are giving back to fellow riders.

Best seasons to ride

Those with fatty's are finding Lebanon Hills the perfect trail system year round.

Those with fatty’s are finding Lebanon Hills the perfect trail system year round.

If you love the trails at Leb during the summer, rejoice, they are open through the winter as well. Not only are the trails open when the snow falls, but well traveled. Because of that traffic, the trails stay clear and ride-able right up until the spring thaw. With that said, once the thaw begins, the trails are usually closed for about six weeks while things dry out. A quick check on MORC’s trail conditions website will let you know when the trails are open.


Beyond Laws and rules, we should work to employ some common courtesy toward each other while riding our bikes on the road and trail.

Riding Courtesy; Great Ways to Consider Others on Your Next Adventure

by John Brown, HaveFunBiking.com

Did you know that bicycle traffic laws are different in many states? While these laws guide how you should operate on your bicycle, they also regulate how drivers should treat you. Laws are designed to keep both drivers and cyclists safe. Then there is offroad riding and most trail systems have guidelines that match up with the published list of rules from IMBA (International Mountain Bicycling Association). Beyond the laws and rules, we should also employ some common courtesy toward each other on both the road and trail.

Offroad Courtesy To Other Riders

Courtesy offroad is all about sharing the trail, leaving the environment as pure as possible, and not negatively impacting others experience. The simplest way to share the trail is to maintain control. Careening down a trail at Mach 5 with no ability to stop in time is a quick recipe for disaster. If you can’t control yourself, you are more prone to run into others or at the very least scare them. In order to maintain the environment, consider the trails off limits when wet. Trail systems that are wet are far more susceptible to damage from riders by leaving deep ruts in the dirt. In addition to leaving ruts, leaving any trash behind is unacceptable as well. Take care to pack any trash, like powerbar wrappers, inner tube boxes, or gel packs out with you. Finally, be concerned with others experience. There is nothing easier to reach that goal than to yield the trail when appropriate. If an overtaking rider wants to pass, slow down and make room for them to get by. When others are climbing up a steep grade, wait at the top of that trail for them to pass, before heading down.

Trail Courtesy To Other Riders

Be courteous on the trail especially when a one-way merges into a two-way.

Be courteous on the trail especially when a one-way merges into a two-way.

While riding on the bike paths, small amounts of courtesy can go a long way to keep you and those around you safe. To begin, always pull off the trail when stopping. Making yourself a big roadblock in the middle of the trail puts all those who must get around you at a risk. Don’t assume others know where you are going, hand signals help for those looking, but also feel free to tell people (especially people you are passing) what is going on. A simple “on your left” can make a pass far safer.

Road Courtesy To Other Riders

While stopping along a road pulling off to the shoulder is being courteous to motorists and the safest thing we can do.

Road riding courtesy is most needed when riding in a group and drafting. Safety in a group is about two things – Consistency and communication. For Consistency, be sure to ride a steady line, don’t swerve from side to side. Also, try to keep a consistent pace, If riders are drafting behind you, it can be difficult and tiring if you constantly speed up and slow down. For communication, be sure to signal If you are stopping, where debris in the road is, and what direction the group is turning.

Trail and Road Courtesy To Traffic

Courtesy to traffic is as easy as being predictable. Try to ride at the same distance from the curb as consistently as possible. Also use hand signals when turning, and be clear when stopping (by placing your open palm down at your side). Using a bell is also a great way to signal your approach to parked cars. Ultimately, you want drivers to know where you are and where you are going so they can make safe choices as well.

Keeping Yourself Safe

Riding courteously is just another way to keep you and those around you safe while riding. Once you begin to employ these tips, and make them second nature, you will find that your rides become less stressful. Eventually, I hope you help remind others what courteous bike riding can do for everyone.

Please pass this information on to friends and family – Thanks!