Tag Archives: road riding

The easiest way to eliminate accidents is to assess road hazards in advance.Read on to learn about the most common road hazards and how to manage them.

Staying Safe by Assessing and Avoiding Road Hazards

by John Brown, HaveFunBiking.com

Nothing spoils a great ride like a bad accident, but most accidents are avoidable. The easiest way to eliminate accidents is to assess road hazards in advance and avoid them. Read on to learn about the most common road hazards and how to manage them.

Road hazards broken and uneven pavement

The easiest road hazard to spot is broken or uneven pavement. Oftentimes starting at the roads edge (where many of us ride), pavement begins to break and crumble from annual hot/cold cycles. The first and best option is just avoid loose sections entirely, but anyone can tell you that’s not always possible. When you are riding through bad pavement, try to raise your body off your saddle by an inch or so and allow your legs and arms to absorb impact. Concentrate on being loose, allowing the bike to move around underneath you, and keeping your momentum directed to where you want to go. Focusing on where you want to go is the most important part, focusing on objects you don’t want to hit increases the chance of hitting them.

road hazards

Narrow roadways

Sometimes the road narrows, and doesn’t allow for you and drivers to occupy the road together safely. In these situations, it is important to take control of your safety.  Do not try to be off to the side as far as possible, this will only encourage drivers to attempt to make an unwise pass. Instead, give yourself space on the road, and try to be as visible and deliberate as possible. Narrow roadways are the ideal place to use hand signals. Additionally, be aware of what is behind you by looking back more frequently than usual. Looking to see who is behind you will give you the information you need, and let drivers know that you see them. Oftentimes drivers will be more patient if they know you are aware of the situation.

road hazards

Blind turns, driveways, and alleys

You can’t easily avoid what you can’t see, especially if you are going fast. When approaching any blind road or path section, slow down and assume there is someone coming around the corner. Approach the corner with caution, and only accelerate once the coast is clear.

Loose debris on hard surfaces

Sand, Gravel and dirt on pavement can be a recipe for disaster. Any loose debris on the road robs you of the traction you need to ride confidently. Shy of vacuuming every road or trail before your ride, there is no way to avoid the inevitability of debris. What you can do however, is use good judgement when you do encounter it. First, don’t slam on the brakes. Braking shifts your weight forward onto the front wheel making you more unstable in loose conditions. Instead, apply your brakes gently and evenly while trying to remain loose on the bike in case your tires break free. Second, try to keep the bike as vertical as possible and turn only if necessary.

road hazards

Ice and water

Water and its colder cousin ice are a serious road hazard. You will find that roads and paths that are wet offer far less grip than when dry. Therefore, keep your overall speed down on wet days and brake before turning. If ice is in the forecast, the best measure is to avoid it. Start by ditching the polarized sunglasses that will make the ice difficult to see. Polarized glasses eliminate most glare, and glare is a prime means to identify ice. If you do find yourself on ice, be careful! It takes almost no side motion to put you on the ground when riding on ice. I find it best to do almost nothing until you make your way off the ice, that means no braking, no turning, no movement, Just coast.

road hazards

Paint and slippery surfaces (metal, marble, tile) train tracks

The last set of road hazards worth mentioning are slick surfaces. These surfaces include metal (train tracks, manholes, and sewer grates), painted pavement, and smooth aggregate (like marble or tile often found in industrial zones). For metal, try to avoid it when wet (it’s as slick as ice) and cross train tracks as perpendicularly as possible. Painted surfaces and smooth aggregate need to be avoided when wet as well. While they have more traction when dry, it’s still worth being careful.

road hazards

After reading this, you may feel like everything on the road is out to get you. Nothing could be further from the truth. In fact, you have probably encountered all these hazards on your last ride and survived. Overall, road hazards rarely cause an accident but are something to be cognizant of.


Beyond Laws and rules, we should work to employ some common courtesy toward each other while riding our bikes on the road and trail.

Riding Courtesy; Great Ways to Consider Others on Your Next Adventure

by John Brown, HaveFunBiking.com

Did you know that bicycle traffic laws are different in many states? While these laws guide how you should operate on your bicycle, they also regulate how drivers should treat you. Laws are designed to keep both drivers and cyclists safe. Then there is offroad riding and most trail systems have guidelines that match up with the published list of rules from IMBA (International Mountain Bicycling Association). Beyond the laws and rules, we should also employ some common courtesy toward each other on both the road and trail.

Offroad Courtesy To Other Riders

Courtesy offroad is all about sharing the trail, leaving the environment as pure as possible, and not negatively impacting others experience. The simplest way to share the trail is to maintain control. Careening down a trail at Mach 5 with no ability to stop in time is a quick recipe for disaster. If you can’t control yourself, you are more prone to run into others or at the very least scare them. In order to maintain the environment, consider the trails off limits when wet. Trail systems that are wet are far more susceptible to damage from riders by leaving deep ruts in the dirt. In addition to leaving ruts, leaving any trash behind is unacceptable as well. Take care to pack any trash, like powerbar wrappers, inner tube boxes, or gel packs out with you. Finally, be concerned with others experience. There is nothing easier to reach that goal than to yield the trail when appropriate. If an overtaking rider wants to pass, slow down and make room for them to get by. When others are climbing up a steep grade, wait at the top of that trail for them to pass, before heading down.

Trail Courtesy To Other Riders

Be courteous on the trail especially when a one-way merges into a two-way.

Be courteous on the trail especially when a one-way merges into a two-way.

While riding on the bike paths, small amounts of courtesy can go a long way to keep you and those around you safe. To begin, always pull off the trail when stopping. Making yourself a big roadblock in the middle of the trail puts all those who must get around you at a risk. Don’t assume others know where you are going, hand signals help for those looking, but also feel free to tell people (especially people you are passing) what is going on. A simple “on your left” can make a pass far safer.

Road Courtesy To Other Riders

While stopping along a road pulling off to the shoulder is being courteous to motorists and the safest thing we can do.

Road riding courtesy is most needed when riding in a group and drafting. Safety in a group is about two things – Consistency and communication. For Consistency, be sure to ride a steady line, don’t swerve from side to side. Also, try to keep a consistent pace, If riders are drafting behind you, it can be difficult and tiring if you constantly speed up and slow down. For communication, be sure to signal If you are stopping, where debris in the road is, and what direction the group is turning.

Trail and Road Courtesy To Traffic

Courtesy to traffic is as easy as being predictable. Try to ride at the same distance from the curb as consistently as possible. Also use hand signals when turning, and be clear when stopping (by placing your open palm down at your side). Using a bell is also a great way to signal your approach to parked cars. Ultimately, you want drivers to know where you are and where you are going so they can make safe choices as well.

Keeping Yourself Safe

Riding courteously is just another way to keep you and those around you safe while riding. Once you begin to employ these tips, and make them second nature, you will find that your rides become less stressful. Eventually, I hope you help remind others what courteous bike riding can do for everyone.

Please pass this information on to friends and family – Thanks!

Road Bike Hacks: Descending with Confidence and Skill on Your Road Bike

What goes up must come down. Descending on your road bike can be fun and safe if you learn some basic skills.

Weight down

If you have ever watched a motorcycle race, you will have seen those riders get off the side of the bike and touch the ground during turns. The purpose of that position is to get their center of gravity as low as possible. I don’t recommend matching that position on your road bike, but we can take some lessons from them. First thing, the lower your weight, the more stable you will be. Try lowering one foot to the bottom of the pedal stroke while descending in a straight line. When turning, drop your outside foot to the bottom of the pedal stroke and lean your hips toward the inside of the turn.

Hands in drops

Most riders use their drops about 10% of the time. It should be a position you can be in comfortably, if not, be sure to have your fit checked. Being in the drops while descending does two very important things. First, it lowers your upper body weight. Second, it gives you a greater mechanical advantage on your brake levers. Be careful with this new found braking power. Get comfortable with the different brake feel on gradual grades before tackling steep roads with speed.

Brake power

As you descend you are putting more weight on your front tire than rear tire. Additionally, as you apply the brakes, even more weight gets distributed onto the front wheel. With your weight shifting forward, you will notice that a rear wheel is far more likely to skid and break free while going downhill than on flat ground. The best thing to do while braking downhill, is to use the front brake to stop and slow the bike and the rear brake to control speed. New riders get taught that the best way to stop is to use both brakes evenly and that if we use too much front brake we are prone to crash “over the bars”. While going “over the bars” is a real concern it can be combated with a little practice. Simply put, as you begin to stop, brace yourself with your arms and get your weight low.

Look ahead

The world comes at you fast when heading downhill. For this reason, focus farther down the road than you would on flat ground. Keep eyes peeled for cars, pedestrians, painted road surfaces, gravel, or anything else that you will want to avoid. Also, look for the best approach for upcoming turns. When preparing for a turn, be cognizant of the exit to the turn as well as the entry. By planning how to enter, navigate, and exit a turn safely and efficiently, you will stay in control.

Trust your tires

Tires are literally where the rubber hits the road. Even though your tires only make about 3 square inches of contact with the road, they can do a lot to keep you planted. You can do a simple test to build confidence in the traction your tires give you. Try to find a place where the road surface is banked and ride along it. Under highway overpasses often have banked concrete surfaces with a sidewalk separating them and the road. Ride along that bank slowly and see how well the tires hold. You will find that the tires continue to hold fast even when the pitch becomes very steep.

Warning signs and speed wobbles

There are some normal things you want to avoid while going downhill. The most concerning things like sand, gravel, leaves, or debris could rob you of traction. Beyond outside influences, speed wobbles are an uncommon but frightening situation that some cyclist encounter. Speed wobbles are exactly what they sound like. As you get up to a certain speed, your bike will begin to wobble. There are many causes for speed wobbles, but only two things you can do when you encounter them. You can go faster (not recommended) or slow down carefully. Slowing out of a speed wobble is a matter of riding straight, and slowing under control.

Ride within your abilities

More important than the skills to ride downhill is the mentality. Riding at speeds you are comfortable with will keep you mentally, and by extension, physically calm. Calm riders make better and safer decisions. Be sure to take unknown descents with caution and build up to speed after you try it a few times. Overall, remember that it becomes harder to control your bike at higher speeds, so take it slow to start.

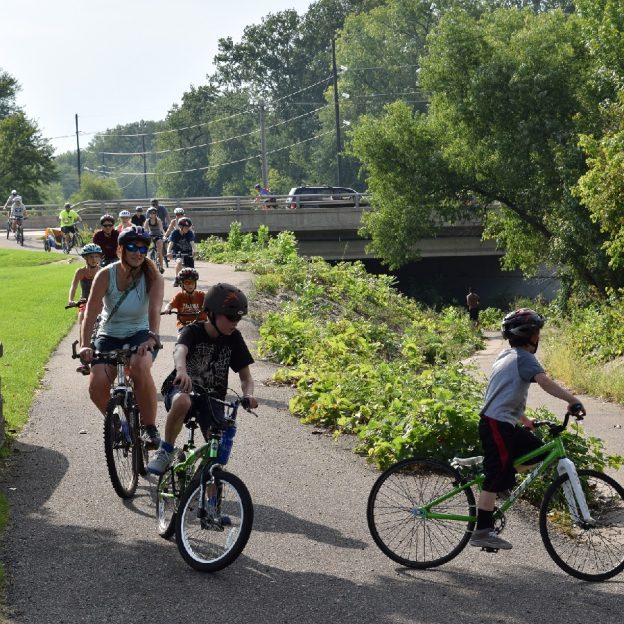
Bike Pic June 6, family fun on the bike trail

Families having fun on the bike trail in La Crosse, Wi. See more on riding along the bluff of the Mississippi River, in the Driftless Area.

Find many more bike friendly places to ride and explore in the new Minnesota Bike/Hike Guide.

Thanks for viewing the Bike Pic of the Day here at HaveFunBiking (HFB). 

Now rolling into our 10th year as a bicycle tourism media source, our goal is to continue to encourage more people to bike, while showcasing unforgettable places to ride. As HFB searches and presents more fun cycling related photos, worth a grin, scroll through the information and stories we have posted that may help you Find Your Next Adventure. Then, while out there if you see us along a paved or mountain bike trail, next to the route you regularly commute on, or at an event you plan to attend, be prepared to smile. You never know where our cameras will be and what we will post next!

Do you have a fun bicycle related photo of yourself or someone you know that you would like to see us post? If so, please send it our way and we may use it. Send your picture(s) to: [email protected] with a brief caption (of each), including who is in the photo (if you know?) and where it was taken. Photo(s) should be a minimum of 800 pixels wide or larger for us to consider using them. If we do use your photo, you will receive photo credit and an acknowledgment on Facebook and Instagram.

As HaveFunBiking continues to encourage more people to ride, please reference our blog and the annual print and quarterly digital Minnesota Bike/Hike Guide to Find Your Next Adventure. We are proud of the updated  At-a-Glance information and maps we are known for at the HFB Destination section on our website and in the guide. Now, as the Guide goes into its seventh year of production, we are adding a whole new dimension of information, now available for mobile devices.

So bookmark HaveFunBiking.com and find your next adventure – we may capture you in one of the next photos we post.

Have a great day!