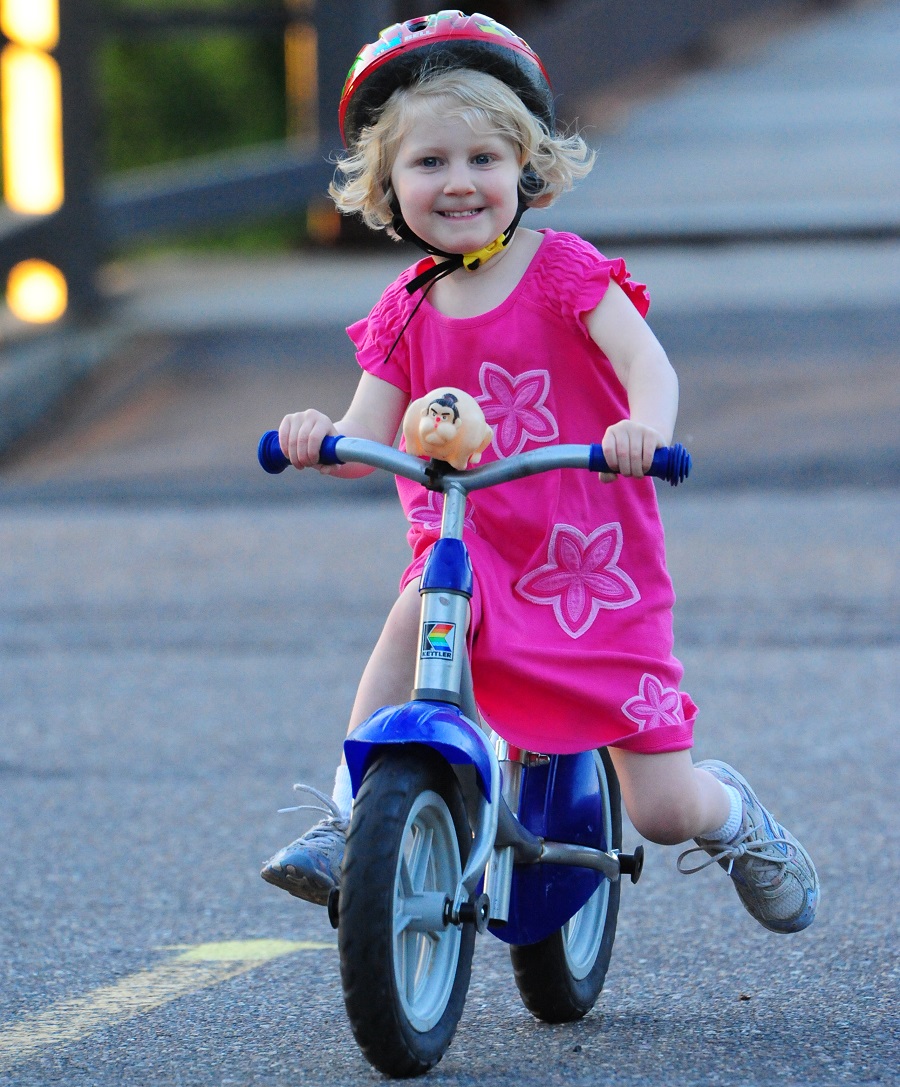
Welcome. We're your premier source for fun places to explore by bicycle or on foot. Offering guides, maps and articles on road and trail riding for the novice to seasoned cyclist - helping you find your #NextBikeAdventure
If you look between the isles of Interbike (figuratively) you can see the future. I’m excited to say, when it comes to bicycles, children’s bikes are the future. Interbike had loads of unique and exciting bikes, accessories and programs for all the little riders out there.
Children’s bikes are the future
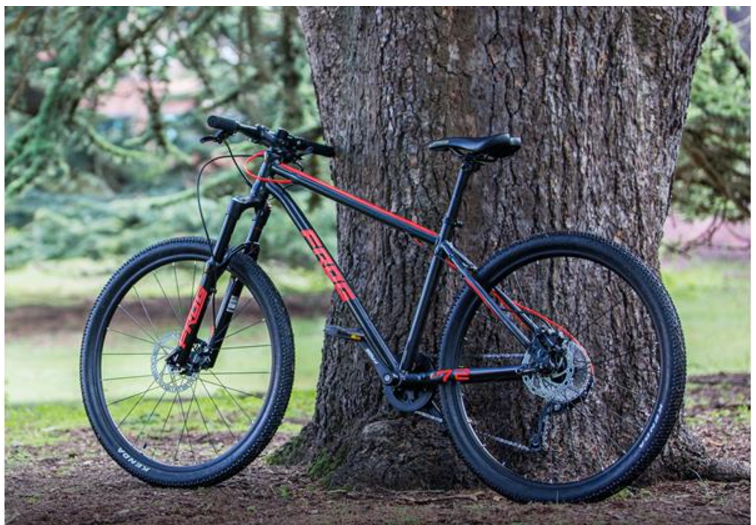
Most bicycle companies make kids bikes as part of their overall line, but very few make only kids bikes. Frog Bicycles exclusively produces children’s bicycles and was born out of a doctoral thesis on proper fit for kids bikes in England. Through exhaustive testing, it was found that children need a more unique bike fit than what the standard bike offers. Frog used that exhaustive research to develop their first bicycles and has been flying down the road ever since. Through clever frame design they are able to build bikes that fit kids with almost no proprietary parts. This leaves no concerns about replacing any hard to find bits if little Timmy breaks anything. Additionally, all the Frog Bikes are tested to adult standards rather than the less demanding children’s standards. Hopefully that can give you some peace of mind as your child’s body and abilities grow.
Frog Bicycles are making children’s bikes more comfortable through smart design.
Parts for kid’s bikes
While most of us aren’t going to start pulling our kid’s bikes apart to upgrade them with fancy components, there are plenty of high performance products available. One of the great things about your bike shop attending Interbike is, if they look closely, they can see things that aren’t readily available now, but will show up on production bikes the following year.
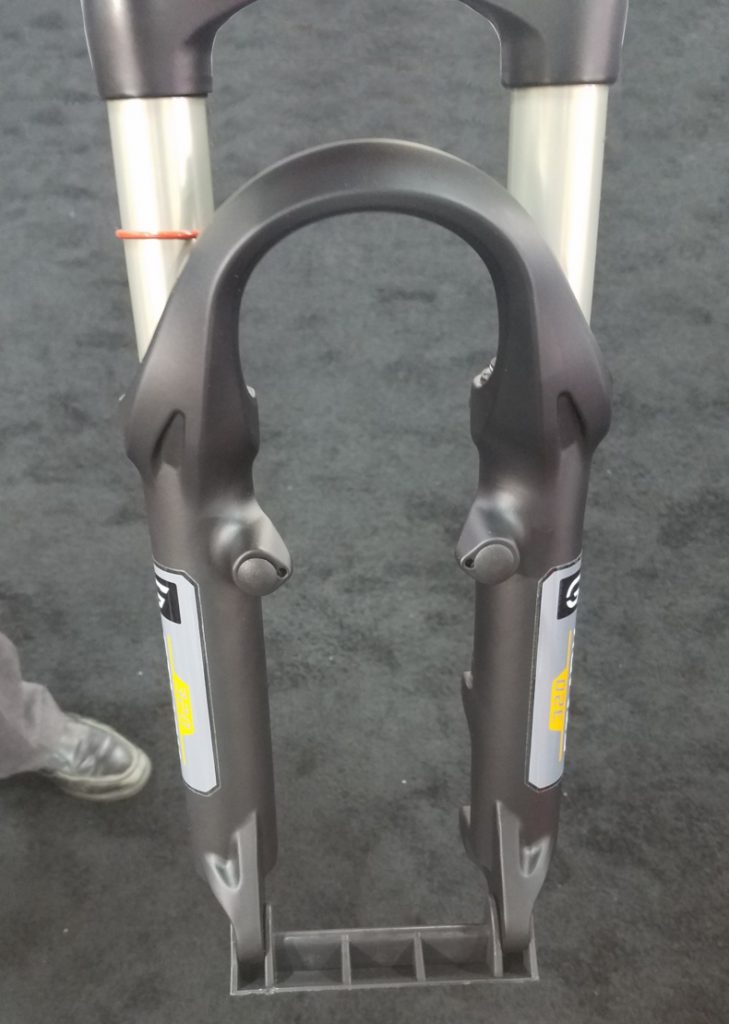
This lightweight suspension fork is made by Kay Xin Technologies for 20″ wheeled kid’s bikes
As I combed the Isles of manufacturers, it was impossible to miss suspension forks designed to meet the specific needs of smaller riders, brakes that allow children to easily control their bicycles and cranks and pedals made for smaller feet and legs.
Teaching them young
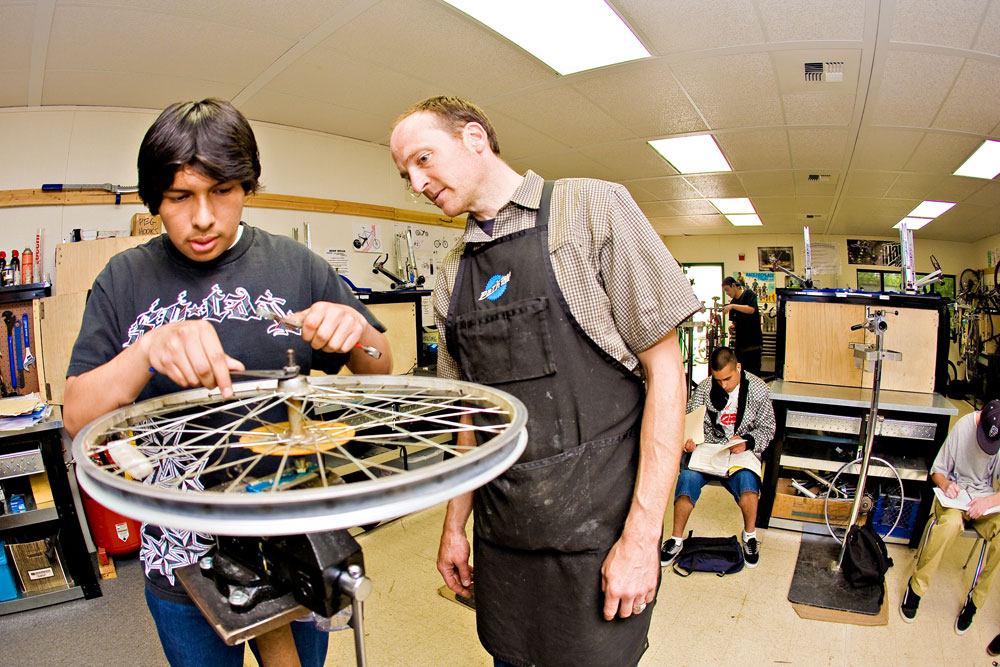
Project Bike Tech is a new program designed to getting school aged kids in front of a bicycle with a wrench in their hands. By working with local schools, they develop programs that tach kids engineering, and mechanical skills through bicycle maintenance. Although this program is in very few schools, it has been in existence for over ten years, and has introduced over 3000 students to the cycling industry.
A student of the Project Bike Tech learning to adjust a hub bearing
Sharing the experience
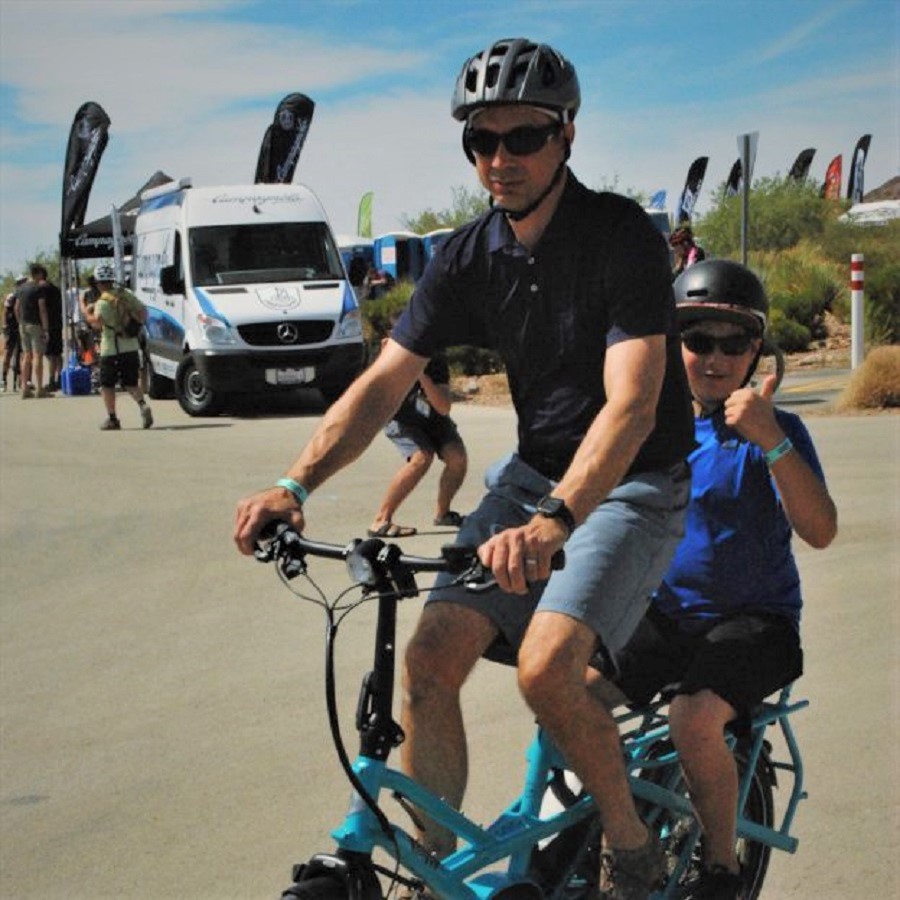
On top of all the products for kids, there were also ample ways to carry your kids along for the ride. Tern Bicycles showed their GSD, a new folding E-bike built with the capability of carrying your kids on the back. Additionally, Burley trailers had their line of children’s trailers on display.
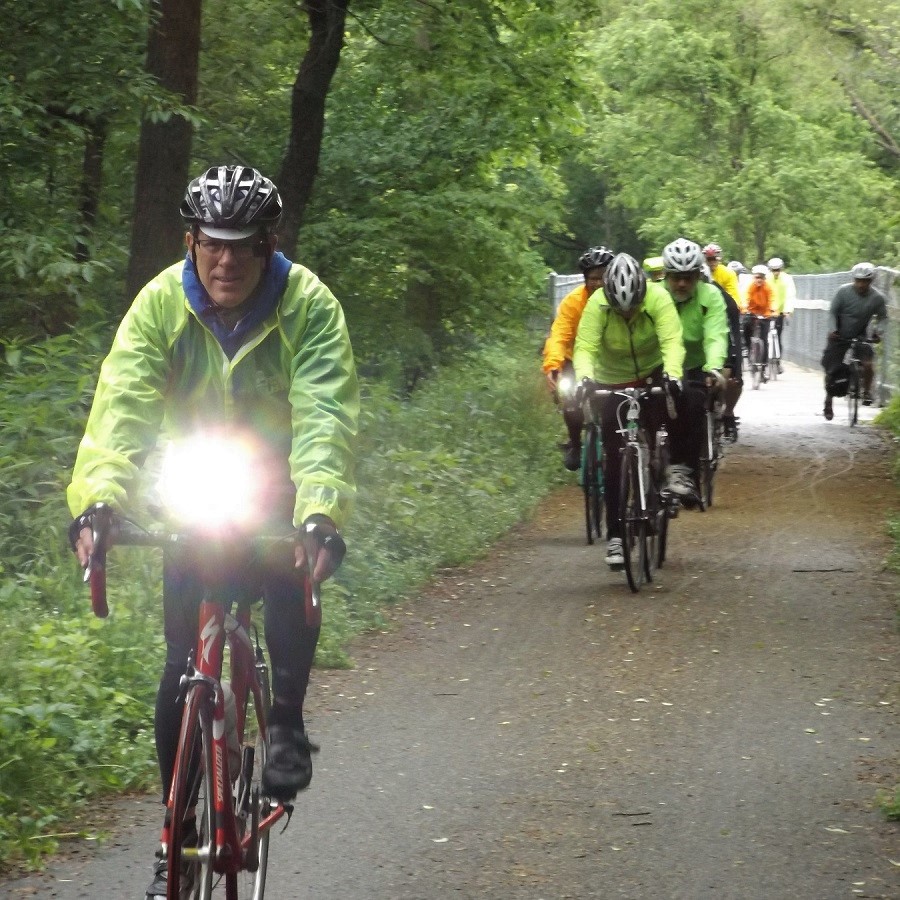
Now that the kids have gone back to school, the days are getting shorter and temperatures begin to drop it is the best time of year to ride your bike. From a trail perspective, the dirt becomes softer as the fall rolls in because of lower temperatures and increased rainfall. Additionally, riding off road in the fall is a beautiful way to enjoy the change in foliage. That doesn’t mean you can’t enjoy the leaves changing if you choose to ride on the path or road. In fact, great fall rides often have specific vista points built into the ride. With all the great things about riding through the fall there are some dangers as well. Read on to learn how to enjoy the fall riding season safely.
Fall bike riding road hazards
Those beautiful fall colors are enjoyable, but also a sign of falls largest hazard. Falling leaves that mix with fall rains begin to break down and decompose on road surfaces. What is left behind is a slick slurry of organic matter perfectly suited to eliminate traction and cause a crash. As you ride in the fall, avoid riding too far off the edge of the road. Likewise, don’t ride too far into the middle of the road where leaves tend to accumulate.
Fall bike riding off road hazards
The same problems with traction and decomposing leaves exists off road, but it’s not as large an issue as on the road. Thanks to the soft dirt and rough surface, riders have a better chance of finding traction when the leaves get wet. What you should be on the lookout for is what you can’t see. Makes total sense, right?! Whenever you are on a trail that has fallen leaves, objects can hide in those leaf piles.
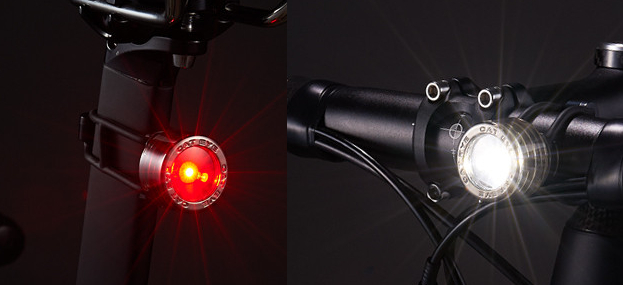
Being seen while fall bike riding
As the days get shorter, you need to be concerned with being seen in low light situations, that’s where proper lighting comes in. Lights, no matter your level of bike riding skill, are essential to make sure you have the safest ride possible. Plus, most states require bike lights to ride on a roadway (here is Minnesota’s law). The two types of lights on the market are lights that allow you to see, and lights that allow others to see you.
Seeing the trail
A great side effect to the shortened days is going for night rides with your mountain bike. Night riding was first born out of the necessity of riding, but has quickly become a fun part of the sport in and of itself. With this in mind, get yourself a high output light, strap it to your bike and head into the woods. In the long run you will see that riding at night changes how you see your local trails, and makes then new and fun.
Dressing the part for fall bike riding
Universally across on or off-road riders, the fall brings colder temperatures. To combat these temps you want to dress accordingly. Early fall rides force us to break out the arm and knee warmers, with long sleeve jerseys marching quickly behind. When dressing for colder weather, be sure to not overdress. Being too insulated will cause you to sweat past your cycling clothings ability to move moisture. At that point, you get wet, and cold, which defeats the purpose of wearing more clothing.
Falls unique events
Many charity rides are scheduled through the fall because of its great weather, and ambient beauty. One event type that is completely exclusive to fall is the sport of Cyclocross. What is Cyclocross you ask? Well, the best way to describe it is it’s just fun. A Cyclocross race is a timed (30,45,60 minutes) event that covers a one-mile course including, road, off road, grass, and sand sections with manmade and natural barriers. The best part of Cyclocross is that spectators can enjoy the action easily. Additionally, Cyclocross races are very family friendly and usually include things like food trucks, kids bike rodeos, and beer tastings.
How ever you decide to spend you fall, try and spend it outside on your bike. The Fall is a great time to get back on the bike, steal a few more hours in the saddle, or enjoy natures last show before the winters long sleep.
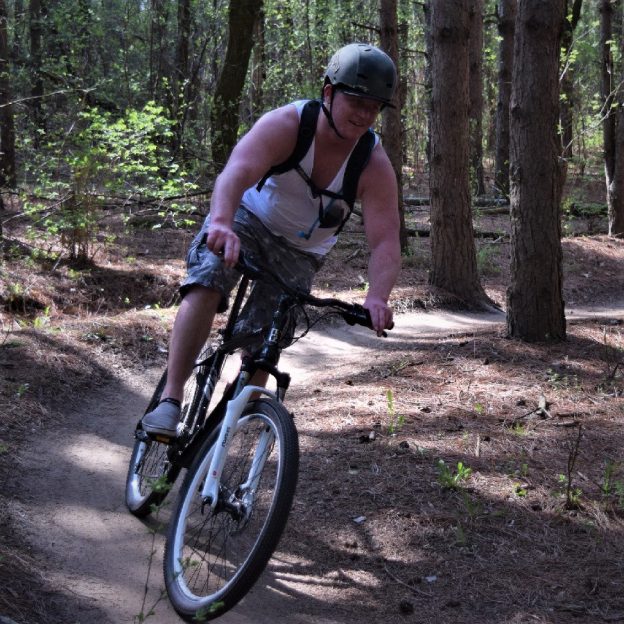
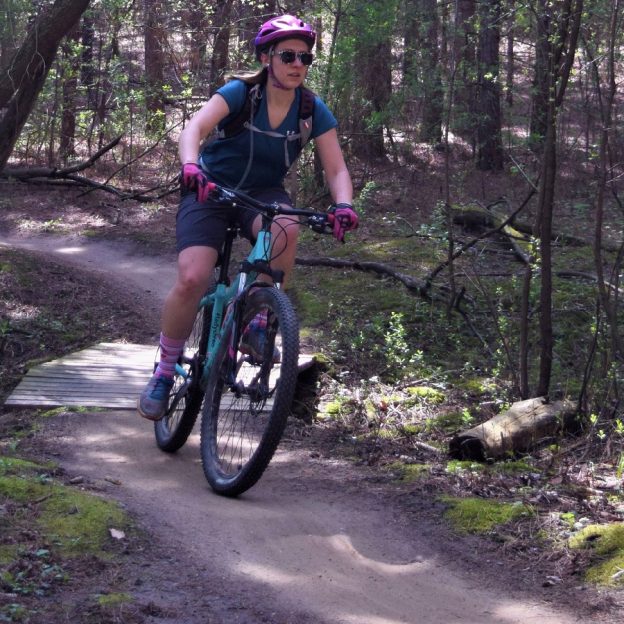
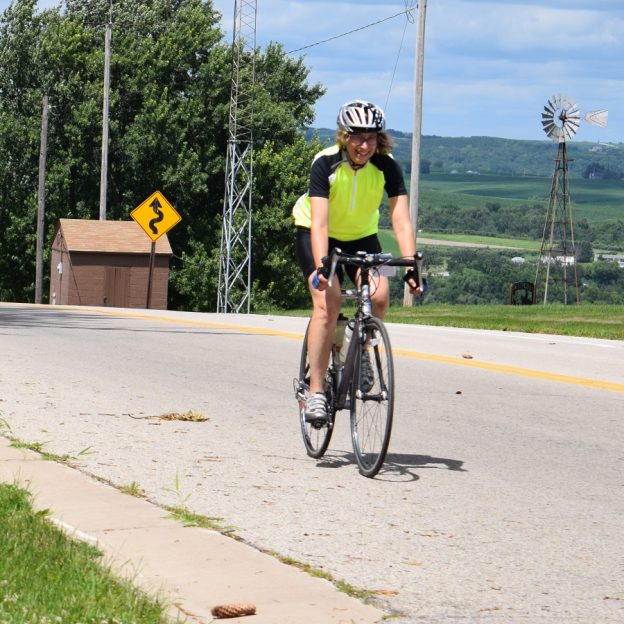
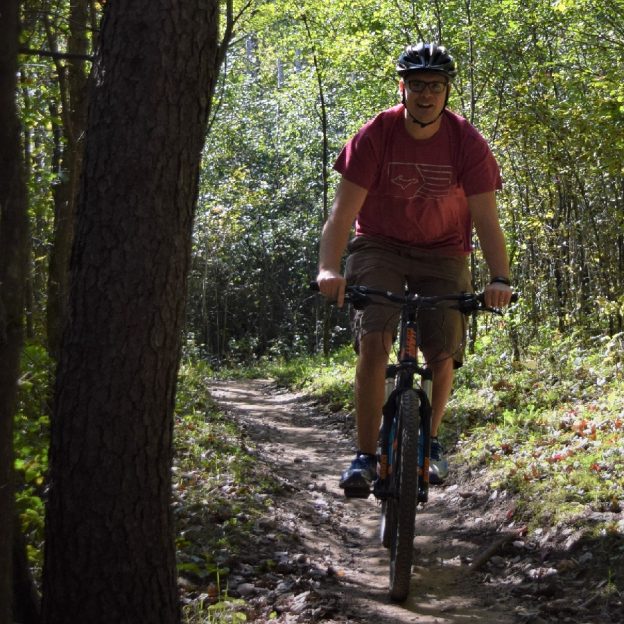
Back in the mountain bike saddle after a long holiday weekend, excited for the next challenge, here is our bike pic to start your week.
What better way to continue your summer fun and your #NextBikeAdventure. View all the fun ideas and bike destinations in the latest Minnesota Bike/Hike Guide. Then plan your next outing with family and friends in one of Minnesota’s HaveFunBiking Destinations.
Thanks for Viewing Our ‘Bike Pic’ of the Day
We are now rolling into our 10th year as a bike tourism media. As we pedal forward our goal is to continue to encourage more people to bike and have fun while we highlight all the unforgettable places for you to ride. As we continue to showcase more places to have fun, we hope the photos we shoot are worth a grin. Enjoy the information and stories we have posted as you scroll through.
Do you have a fun bicycle related photo of yourself or someone you may know that we should post? If so, please send your picture(s) to: [email protected]. Include a brief caption (for each) of who is in the photo (if you know) and where the picture was taken. Photo(s) should be a minimum of 1,000 pixels wide or larger to be considered. If we use your photo, you will receive photo credit and acknowledgment on Facebook and Instagram.
As we continue to encourage more people to bike, please view our Destination section at HaveFunBiking.com for your #NextBikeAdventure – Also, check out the MN Bike Guide, now mobile friendly, as we enter into our 8th year of producing this hand information booklet full of maps.
Remember, bookmark HaveFunBiking.com on your cell phone and find your next adventure at your fingertips! Please share our pics with your friends and don’t forget to smile. We may be around the corner with one of our cameras ready to document your next cameo apperance while you are riding and having fun. You could be in one of our next Pic’s of the Day.
Tuesday morning and this mountain biking chick finds a dry trail to enjoy. In Minnesota, check MORC trail conditions to see which trail systems may be open after all the rain, the last couple days.
What better way to continue your summer fun and your #NextBikeAdventure. View all the fun ideas and bike destinations in the latest Minnesota Bike/Hike Guide. Then plan your next outing with family and friends in one of Minnesota’s HaveFunBiking Destinations.
Thanks for Viewing Our ‘Mountain Biking’ Pic of the Day
We are now rolling into our 10th year as a bike tourism media. As we pedal forward our goal is to continue to encourage more people to bike and have fun while we highlight all the unforgettable places for you to ride. As we continue to showcase more places to have fun, we hope the photos we shoot are worth a grin. Enjoy the information and stories we have posted as you scroll through.
Do you have a fun bicycle related photo of yourself or someone you may know that we should post? If so, please send your picture(s) to: [email protected]. Include a brief caption (for each) of who is in the photo (if you know) and where the picture was taken. Photo(s) should be a minimum of 1,000 pixels wide or larger to be considered. If we use your photo, you will receive photo credit and acknowledgment on Facebook and Instagram.
As we continue to encourage more people to bike, please view our Destination section at HaveFunBiking.com for your #NextBikeAdventure – Also, check out the MN Bike Guide, now mobile friendly, as we enter into our 8th year of producing this hand information booklet full of maps.
Remember, bookmark HaveFunBiking.com on your cell phone and find your next adventure at your fingertips! Please share our pics with your friends and don’t forget to smile. We may be around the corner with one of our cameras ready to document your next cameo apperance while you are riding and having fun. You could be in one of our next Pic’s of the Day.
In the western part of the Twin Cities, nestled between Golden Valley and Minneapolis is Theodore Wirth Park. A space almost as large as New York City’s Central park. With in Wirth (as it’s known to the locals) you will find several scenic, natural areas around Birch pond and Wirth Lake, plus two golf courses and a fabulous mountain bike trail system.
For Twin Cities cyclists, it’s a natural playground you should be exited too explore.
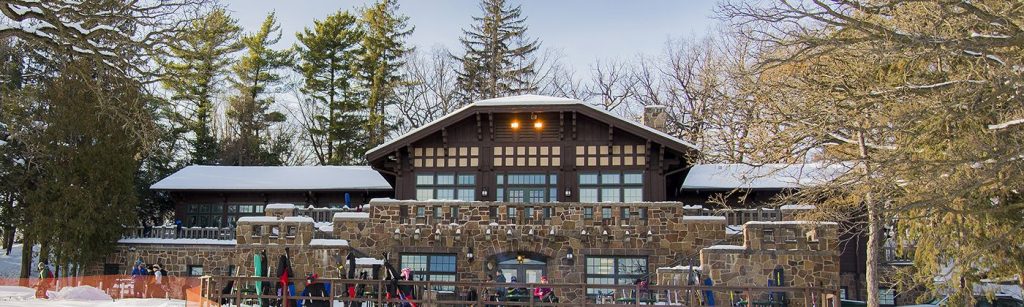
Theodore Wirth Park History
What would become Theodore Wirth Park started in 1889 when 66 acres were purchased and established as a park. Now Theodore Wirth park (named after the park system’s superintendent from 1906 to 1936) has over 750 acres. The Central to the park is the Wirth Chalet, a stone and timber structure that offers events, and product rentals for snow sports.
Where to go in Theodore Wirth Park
If you are interested in riding the mountain bike trails of Wirth park, I find it easiest to park at the beach house off Glenwood avenue. From there it’s a quick spin west over to the trailhead. If your interest are in the golf courses or Grand Rounds and Luce Line trails, the Golf Clubhouse on Theodore Wirth Parkway is your best starting point.
What are the trails like in Theodore Wirth Park
The trails at Wirth are predominantly designed for the intermediate rider. As you enter the trails at southern entrance you are greeted with a twisting climb up thorough rolling prairie and into well established woods. The trails themselves are well manicured and smooth with ample bermed turns. Expect to see narrow ribbons of brown winding through ample green surroundings. When you find your way into the northern trails, more rocks get introduced. The majority of the rocks are well embedded into the trails and act as exciting obstacles to manage. The northern trails also exist in denser forests, with far fewer field areas. Overall, the Trails at Wirth are fun and flowie, offer challenges for the most advanced riders while being accessible to casual riders.
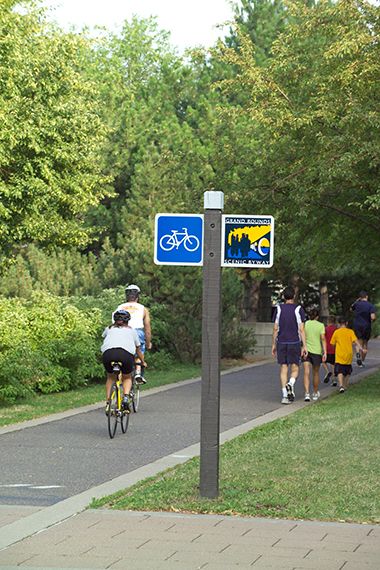
Grand Rounds Trail
The Grand Rounds Scenic Byway is one of the countries longest continuous urban parkways. It is a connecting trail to more than 300 miles of regional trail around Twin Cities Metro Area. It also acts as the connecting trail between most of the parks in the Twin Cities area. That said, you can enjoy a day trip on the Grand Rounds Trail all over the Twin Cities via protected and paved bike lanes. The Grand Rounds travels through 7 districts: Chain of Lakes (13.3 miles), Minnehaha (12.6 miles), The Mississippi River (9.2 miles), Downtown Riverfront (1.2 miles), Northeast (6 miles), Victory Memorial (3.8 miles) and Theodore Wirth Park (4 miles). Additionally, this trail is cleared by 6am every day through the winter if you choose to use it for commuting.
Luce Line Trail
The Grand Rounds Bike trail here connects to the binning of the Luce Line trail.
The Luce Line trail is a 63 mile limestone path stretching from Cosmos in western Minnesota to Wirth park. It is available for Biking, hiking, running, jogging, and snow activities in specified areas. This trail is an exceptional way to explore neighborhoods and destinations west of the city.
How to help
If you ride and enjoy the trails at Wirth, consider volunteering for trail maintenance. The Minnesota Off Road Cycling organization (MORC) schedule trail work sessions on Wednesdays through the summer. Consequently, the group meets at 6 O’clock and welcomes anyone interested in helping. Wear long pants, boots, and work gloves because you will be doing hard labor. Moreover, you will find that the hard labor is enjoyable because you are giving back to fellow riders.
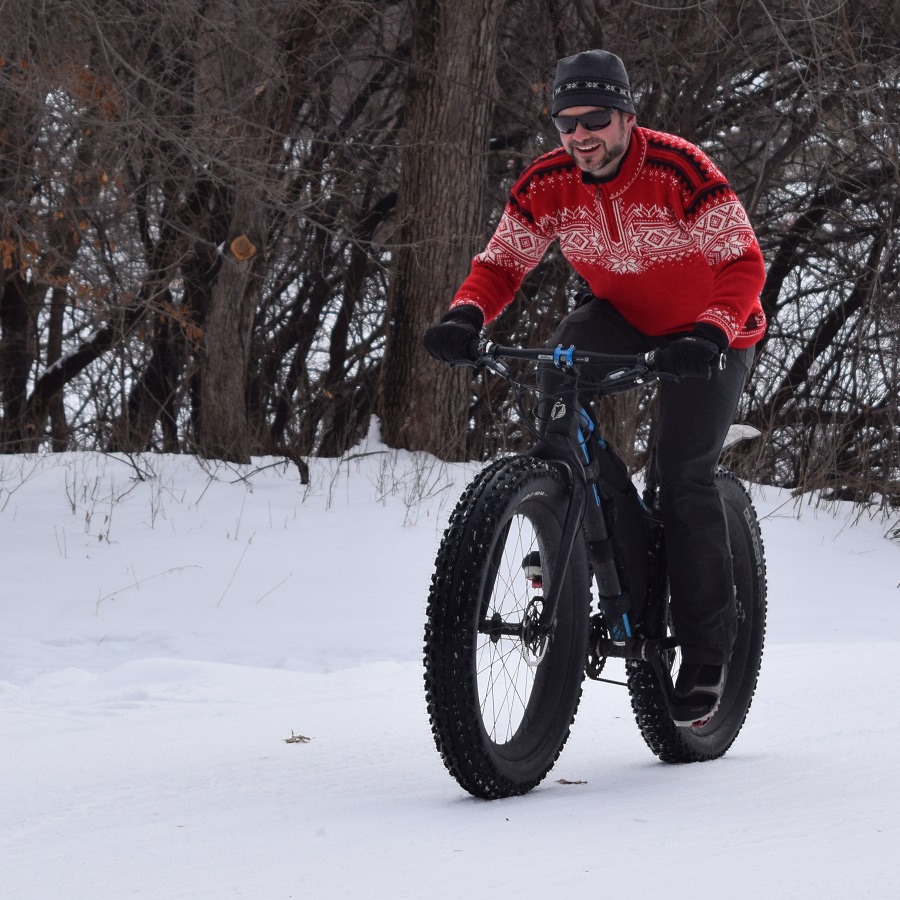
Winter riding in Wirth
The mountain bike trails in Wirth Park are extra fun in the winter on a fatty.
While the trails are open through the winter, Fatbiking is not the only sport you can enjoy at Wirth. Therefore, snowshoeing, cross country skiing, tubing, sledding, skating, and, ice fishing are all available within the park. When planning a ride in the fall and spring, be sure to check the MORC website for trail conditions.
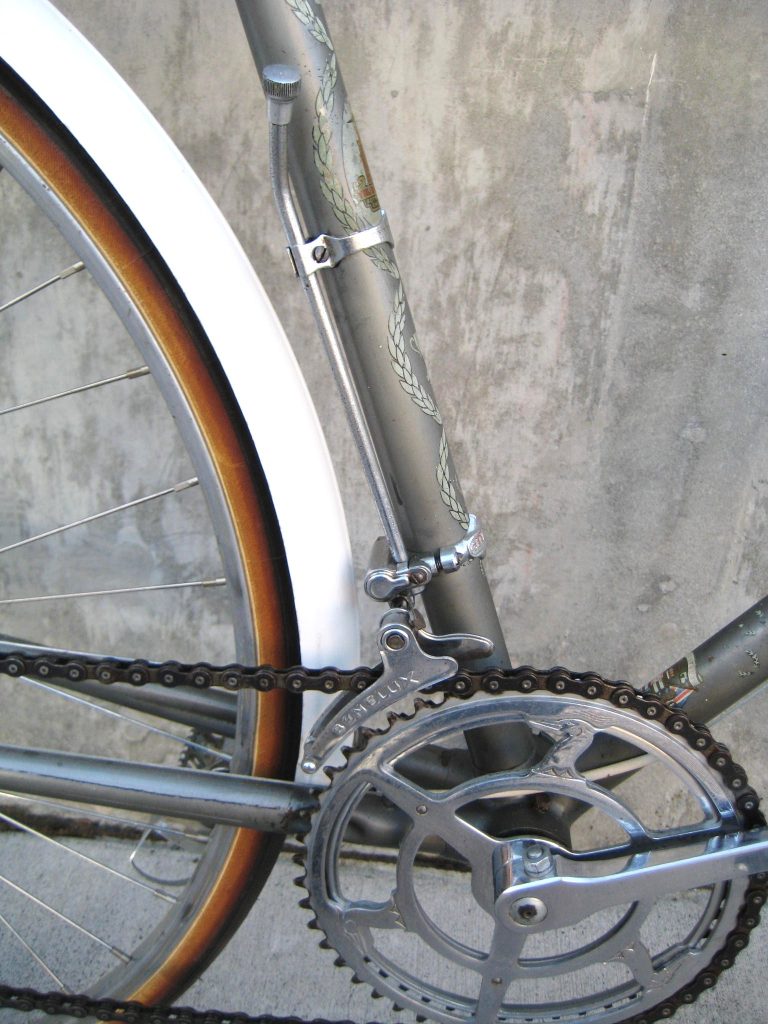
In the late 1920’s, in France, there was a bike race under way and it wasn’t the Tour De France. Instead, this race was a technological race that brought the derailleur into the light. Before 1928, bicycles had a maximum of two speeds, and you needed to remove the rear wheel to change those gears. As there was need for quicker shifting, the bicycle derailleur was born. Initial derailleurs consisted of nothing more than paddles that were actuated by steel rods located between the rider’s legs. Needless to say, there was a lot of finesse that went into shifting those bikes. Then after the second world war parallelogram derailleurs, what we use today, were developed so riders could shift their gears with ease. Read on to see how to get the most out of 100 years of technological advancements. You will find adjusting your front derailleur is easy if you follow these steps.
Early “Rod Style” Benelux front derailleur – Yikes
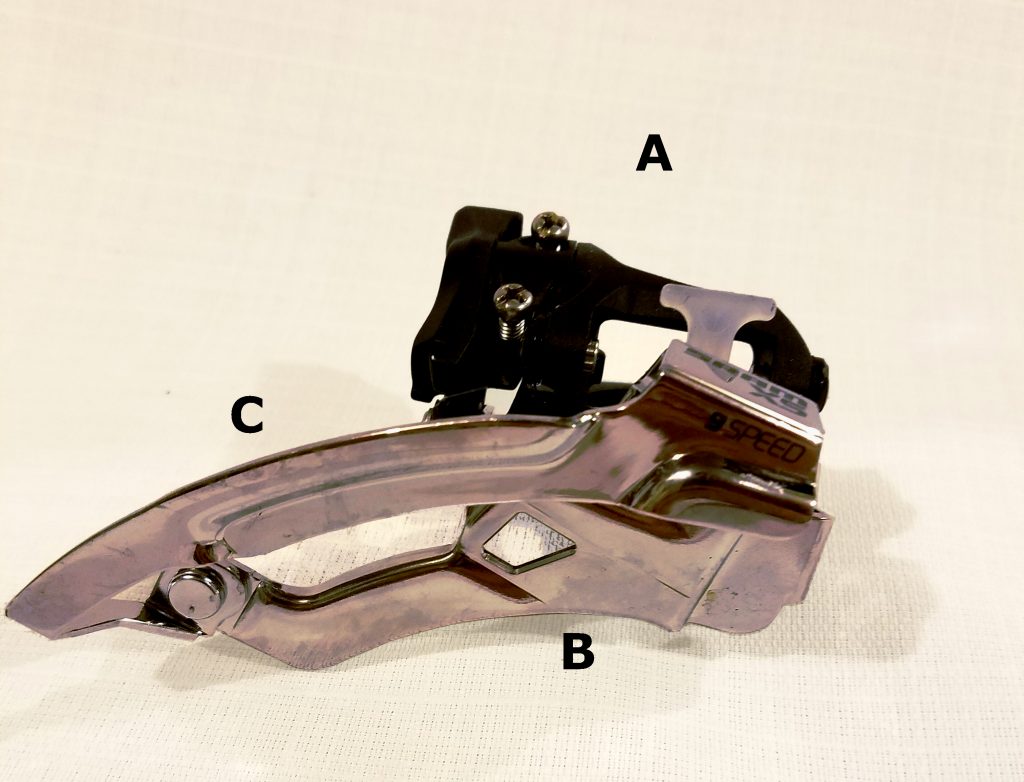
Front Derailleur parts
Limit screws (A) – The front derailleur needs to work within the largest and smallest ring. Limit screws work to stop the front derailleur from shifting outside of its intended range. They are adjustable as to match different types of cranks.
Derailleur Cage – The cage is what holds the chain on gear and what presses on the chain to move it from one gear to the next. The outer portion of the cage (C) is what helps the chain move from larger gears to smaller ones. In contrast, the inner portion of the cage (B) forces the chain from smaller gears to larger ones.
Common parallelogram front derailleur found on Hybrid and Mountainbikes
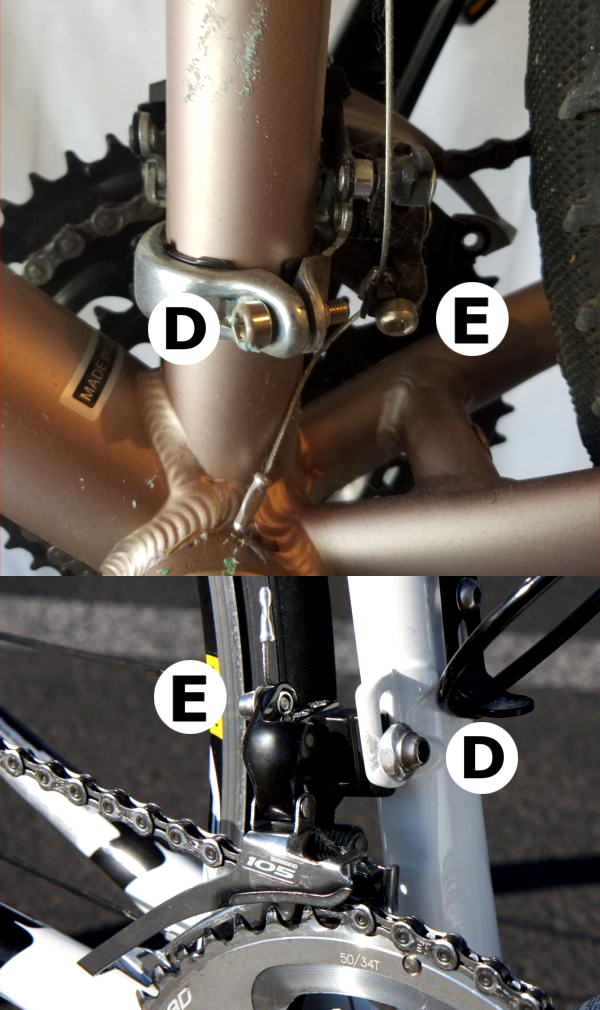
Derailleur Fixing Bolt (D) – The bolt that holds the derailleur in place on the frame. By loosening this bolt, you can re-position the derailleur for angle and height.
Cable Pinch Bolt (E) – The Cable that controls shifting needs to be held firmly in place. The pinch bolt does that job.
Different Pinch bolt and fixing bolt position for MTB/Hybrid (above) and Road (below) derailleurs
Location, location, location
You guessed it, the most important part of adjusting the front derailleur is its location. If the derailleur is not positioned properly, you will never achieve proper, noise free, shifting in all gears. The reason location is so important is that the front derailleur cage is formed to position the chain in very specific locations.
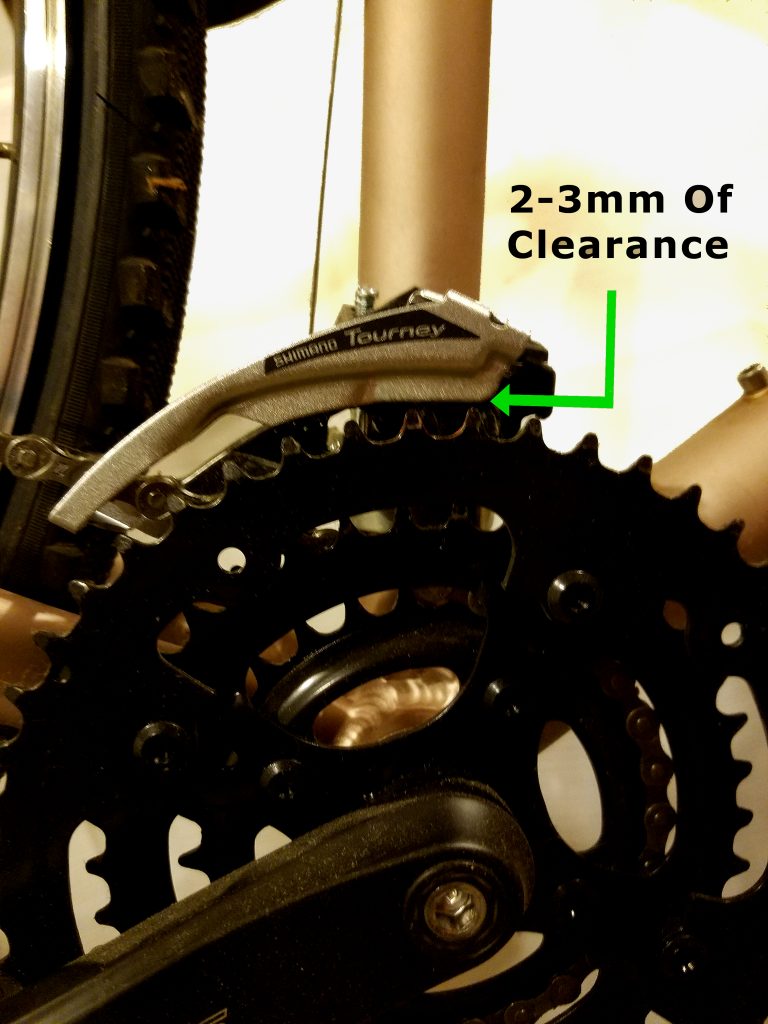
First step in adjusting the front derailleurs location is to set its height. You need enough room to fit a Nickel between the teeth on the largest chainring and the bottom of the outer cage when they are lined up. Any more clearance than that and the derailleur tends to have issues pulling the chain down from larger gears.
you should be able to fit a Nickle between the derailleur cage and chainring
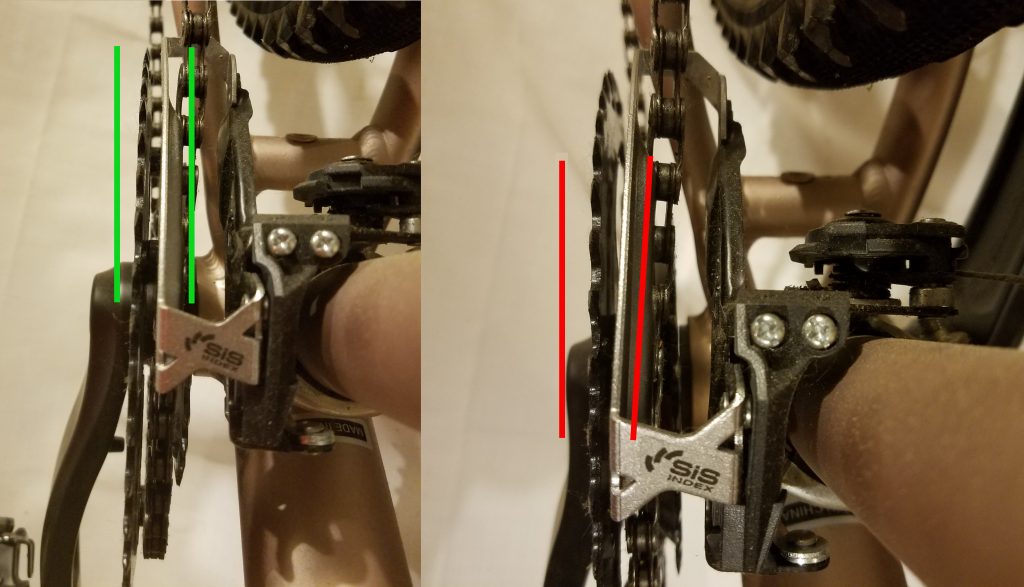
Once you have the height set, adjust the angle of the front derailleur so that the outer cage and chainrings are parallel. Any misalignment will result in poor shifting and excess noise.
Proper alignment on the left, and misalignment on the right
Lower Limit
Set the lower limit by adjusting the screw marked “L”. To do this, shift the rear derailleur all the way up into the largest cog. Next check to see if there is clearance between the chain and the front derailleurs inner cage with the chain on the smallest chainring. If the chain is running on the inner cage, thread the limit screw out until you have 2-3mm (that nickel distance again!) between the chain and inner cage. When the opposite is true and you have too much clearance between the inner cage and chain, thread the limit screw in until there is 2-3mm of clearance.
Cable tension
Your Front derailleur should be properly aligned and the lower limit should be set at this point. The next step is to attach the cable to the Pinch bolt. Attach that cable by first making sure your shifter is in its lowest gear, Then pull the cable tight, and finally tighten the pinch bolt onto your cable. Usually, you can shift smoothly up from the smallest ring into the next gear right away, but if there is hesitation going up add cable tension either through a barrel adjuster or by loosening the pinch bolt, pulling the cable tighter, and tightening the pinch bolt down again. If the chain wants to shift up from the small ring over the next ring, release some tension. You know you have it right when the chain can pass from one gear to another smoothly and confidently without any banging or skipping noises.
Upper Limit
Setting the upper limit is as easy as getting the chain onto the largest chainring and threading the limit screw to offer 2-3mm of clearance between the chain and the outer cage. While shifting, ensure the chain cannot be shifted over the large ring and off the crank.
Trouble shooting
This guide is great if all the parts are new, but won’t overcome many issues related to worn or dirty parts. The most common shifting issue with older gears is poor upshifting. Chainrings are built with ramps on the inner surface to easily guide the chain from smaller to larger rings. As chainrings wear, these ramps wear as well. If you are having serious issues going from smaller to larger gears, but the gears are silent and problem free otherwise, you may want to consider replacing the chain, chainrings, and gears in the rear.
These Praxis Works chain rings have some of the best shifting thanks to carefully placed ramps.
Another key wear item is the front derailleur itself. Derailleurs are designed to pivot off a parallelogram design that requires each pivot run smooth and precisely. As the Front Derailleur wears, these pivots can begin to bind, while they generate play, leading to poor shifting.
Finally, dirty or corroded cables are a key cause in poor shifting. Replace cables once a year and lube them intermittently to keep them running smooth and freely.
When is enough, enough
Working on your bike is fun, but can be frustrating if things aren’t going according to plan. When things get out of hand, don’t be afraid to start from scratch and go back to step one. Any missed initial steps will make further steps impossible to complete. Also, remember that if it gets too tough, your local bike shop is happy to walk you through the process. You will pay a fee, but the one on one instruction is well worth it.
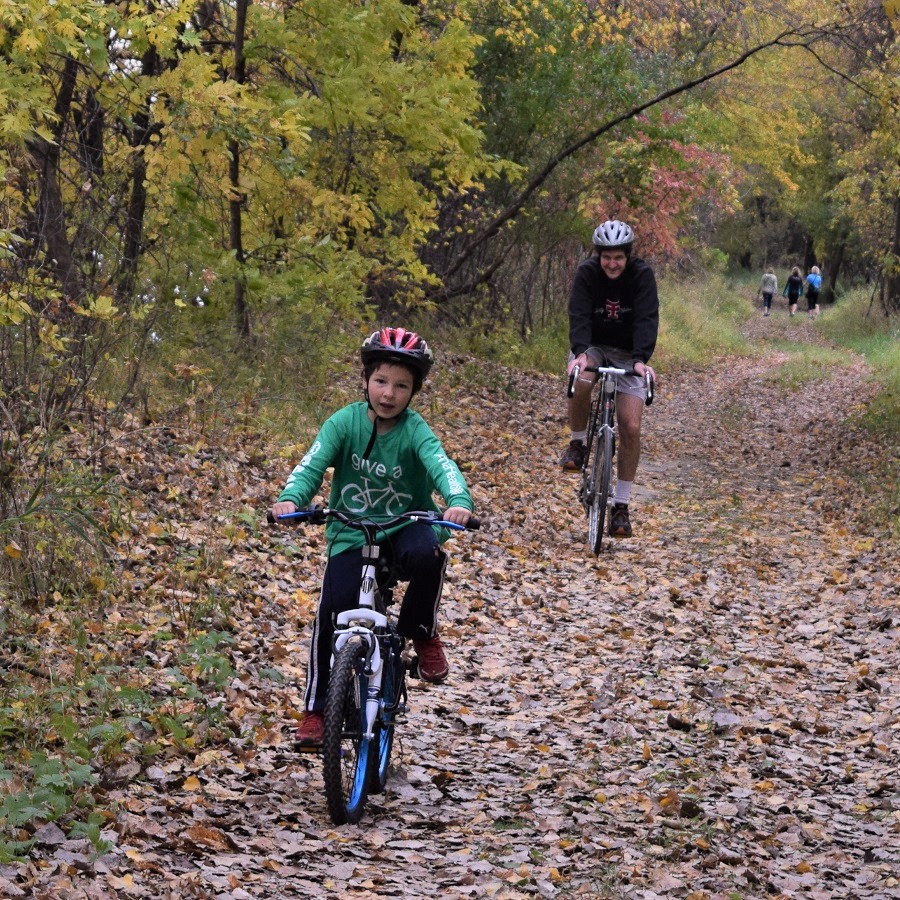
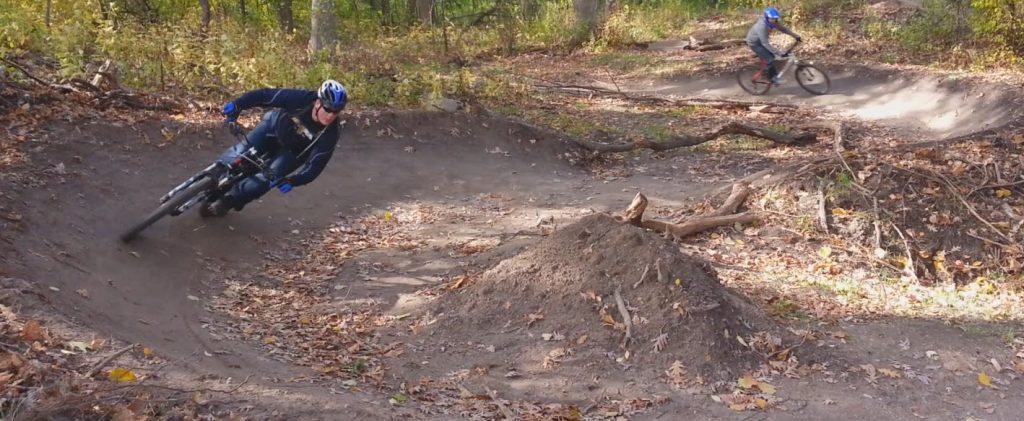
Saturday morning and this mountain bike rider finds a dry trail along the Minnesota River bottoms in Bloomington MN. to enjoy. In Minnesota, check MORC trail conditions to see which trail systems may be open after all the rain, the last couple days.
What better way to continue your summer fun and your #NextBikeAdventure. View all the fun ideas and bike destinations in the latest Minnesota Bike/Hike Guide. Then plan your next outing with family and friends in one of Minnesota’s HaveFunBiking Destinations.
Thanks for Viewing Our ‘Mountain Bike Skills’ Pic of the Day
We are now rolling into our 10th year as a bike tourism media. As we pedal forward our goal is to continue to encourage more people to bike and have fun while we highlight all the unforgettable places for you to ride. As we continue to showcase more places to have fun, we hope the photos we shoot are worth a grin. Enjoy the information and stories we have posted as you scroll through.
Do you have a fun bicycle related photo of yourself or someone you may know that we should post? If so, please send your picture(s) to: [email protected]. Include a brief caption (for each) of who is in the photo (if you know) and where the picture was taken. Photo(s) should be a minimum of 1,000 pixels wide or larger to be considered. If we use your photo, you will receive photo credit and acknowledgment on Facebook and Instagram.
As we continue to encourage more people to bike, please view our Destination section at HaveFunBiking.com for your #NextBikeAdventure – Also, check out the MN Bike Guide, now mobile friendly, as we enter into our 8th year of producing this hand information booklet full of maps.
Remember, bookmark HaveFunBiking.com on your cell phone and find your next adventure at your fingertips! Please share our pics with your friends and don’t forget to smile. We may be around the corner with one of our cameras ready to document your next cameo apperance while you are riding and having fun. You could be in one of our next Pic’s of the Day.
As more people take to bicycling for recreation and transportation it is nice to know there is someone to come to rescue if a bike breaks down. In a move to support bicyclists, AAA is now offering support. Recently, the company announced that it was extending its popular automotive AAA Roadside Service to include bikes. Here at HaveFunBiking.com, hearing the news is exciting. This is a perfect service that will assure cyclist, someone will be there if they breakdown.
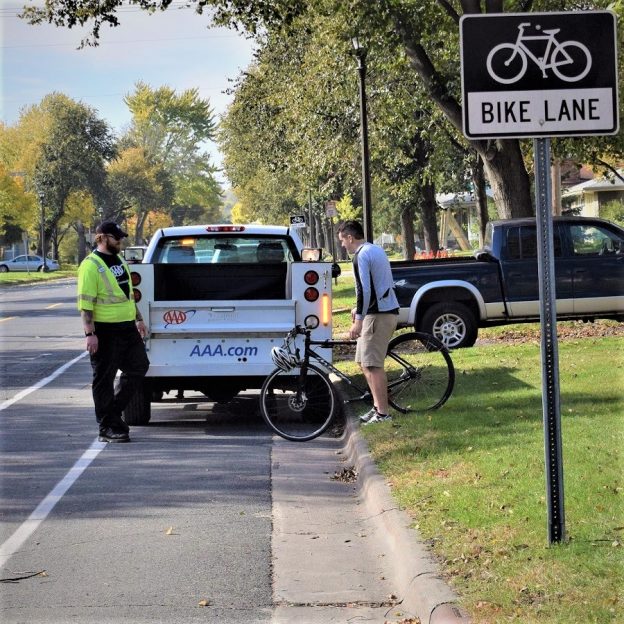
Any bike you are riding is covered by AAA Roadside Service
If this rider had AAA Roadside Service, he wouldn’t be carrying his bike home because of a mechanical issue.
How the program works? For as little as $49 a year you can purchase a AAA membership that offers Roadside Service for both your car and bike. If you are already a member you are now covered when bicycling. Just call your roadside assistance number on the back of your membership card.
Like the automotive Roadside Assistance Program any bike you are riding (road, mountain, recumbent, e-bike, tandem bikes, bike rentals and bicycle trailers) is eligible. Coverage applies to any qualified bike a member is riding at the time the bicycle becomes disabled. A member should be with the bicycle and have their AAA Membership Card in hand at the time of service. Keep in mind, the Roadside Service is provided only for the rider whose bicycle has become disabled or inoperable. However, any accompanying minors of a member is covered.
When a quick fix isn’t an option, AAA Roadside Service is there
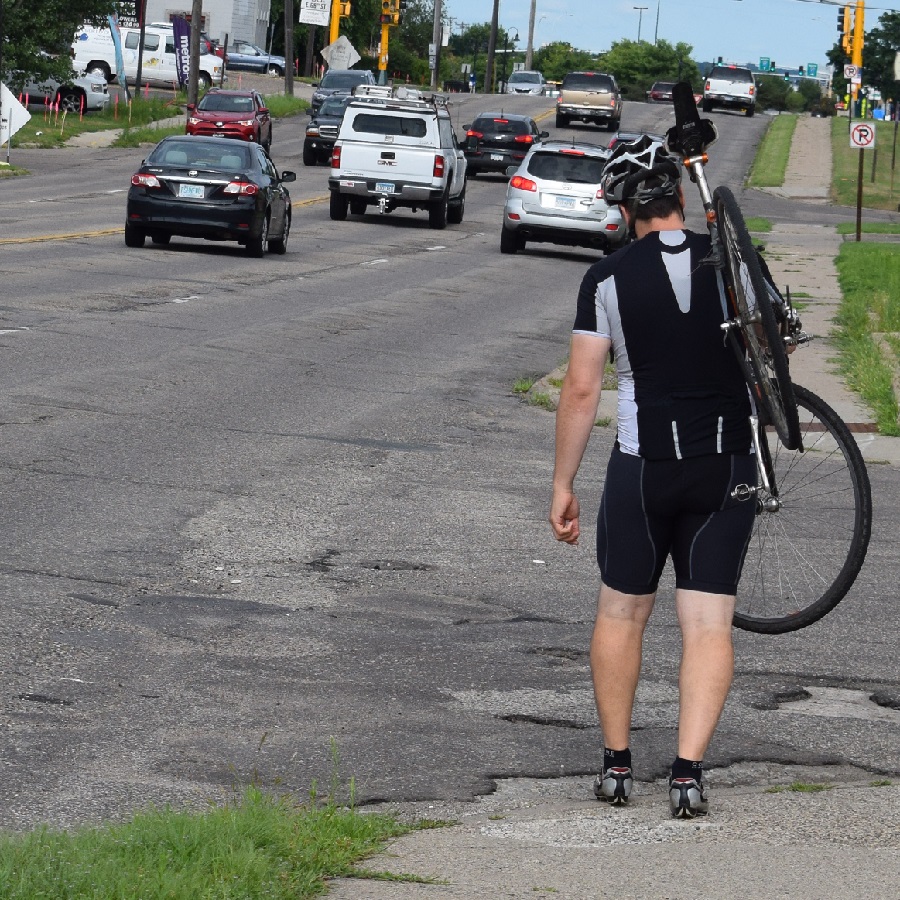
The second most common mechanical problem to a flat tire is a broken chain.
If a quick fix isn’t an option, (examples: you blew a tire; some spokes broke; or the chain busted) first call a family member or friend. Then, if no one is available to assist, AAA Roadside Service may be your best option.
It’s like “Having a SAG Wagon in your back pocket,” especially when you are touring away from home, on vacation, etc. This roadside service is something that will give a cyclist peace of mind.
Three levels of SAG (service and gear) support for you and your bike
Under the new terms of the roadside pickup service. AAA will transport you and your disabled bike to any point of safety within the limits of your coverage. This is based on three available levels of membership below:
The Classic: Gives you up to four transports of your bike or car, within a 5-mile radius of the breakdown per year
The Plus: Gives you up to four transports of your bike or car, within a 100-mile radius of the bicycle breakdown
The Premier: Gives you one transport of your bike or car, up to a 200-mile radius of the breakdown; remaining transports are 100 miles.
This is exciting news if you are a casual, touring cyclist or a bike commuter! Mary Miller, from South St. Paul was ecstatic to hear the news. She stated, ” now I feel comfortable riding my bike more often knowing that I can call AAA to come and get me if I breakdown.”
What You Don’t Get
The service is strictly a pickup and delivery service and does not offer any repair amenities or supplies. If you are capable of fixing a flat, repairing a broken chain or spoke and continuing your ride, please do so. The service is designed when you have run out of quick repair options. In fact, there is a laundry list of “services not included:
Airing or changing a flat tire
Pickup from anywhere not reachable from a paved, “regularly traveled” road
Parts, including tires
Pickup of bicyclists who are physical unable to continue with the ride
Locksmith services, in case you accidentally lock up your bike and lose the key or combination.
AAA Roadside Service is available in many states across the U.S.
“We are tremendously excited about this great new bike benefit program available to AAA members across most of the upper Midwest, Southeast and much of our country,” stated Gail Weinholzer, Director of Public Affairs, AAA – The Auto Club Group.
The new bicycle service is available throughout the entire territory served by AAA. The Auto Club Group which includes all of: Florida, Georgia, Iowa, Michigan, Nebraska, North Dakota, Tennessee and Wisconsin; most of Illinois and Minnesota; and a portion of Indiana.
For bicycle coverage outside the above states and for full details on AAA Roadside Membership visit AAA.com/Bicycle.
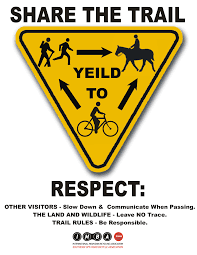
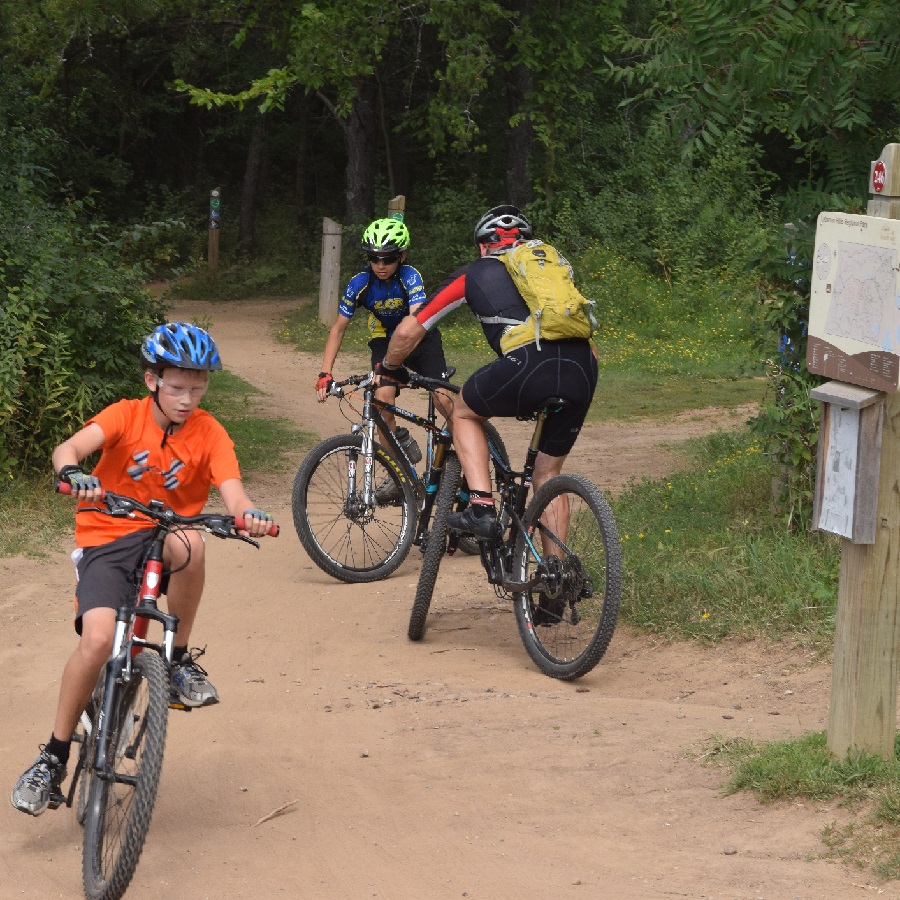
Did you know that bicycle traffic laws are different in many states? While these laws guide how you should operate on your bicycle, they also regulate how drivers should treat you. Laws are designed to keep both drivers and cyclists safe. Then there is offroad riding and most trail systems have guidelines that match up with the published list of rules from IMBA (International Mountain Bicycling Association). Beyond the laws and rules, we should also employ some common courtesy toward each other on both the road and trail.
Offroad Courtesy To Other Riders
Courtesy offroad is all about sharing the trail, leaving the environment as pure as possible, and not negatively impacting others experience. The simplest way to share the trail is to maintain control. Careening down a trail at Mach 5 with no ability to stop in time is a quick recipe for disaster. If you can’t control yourself, you are more prone to run into others or at the very least scare them. In order to maintain the environment, consider the trails off limits when wet. Trail systems that are wet are far more susceptible to damage from riders by leaving deep ruts in the dirt. In addition to leaving ruts, leaving any trash behind is unacceptable as well. Take care to pack any trash, like powerbar wrappers, inner tube boxes, or gel packs out with you. Finally, be concerned with others experience. There is nothing easier to reach that goal than to yield the trail when appropriate. If an overtaking rider wants to pass, slow down and make room for them to get by. When others are climbing up a steep grade, wait at the top of that trail for them to pass, before heading down.
Trail Courtesy To Other Riders
Be courteous on the trail especially when a one-way merges into a two-way.
While riding on the bike paths, small amounts of courtesy can go a long way to keep you and those around you safe. To begin, always pull off the trail when stopping. Making yourself a big roadblock in the middle of the trail puts all those who must get around you at a risk. Don’t assume others know where you are going, hand signals help for those looking, but also feel free to tell people (especially people you are passing) what is going on. A simple “on your left” can make a pass far safer.
Road Courtesy To Other Riders
While stopping along a road pulling off to the shoulder is being courteous to motorists and the safest thing we can do.
Road riding courtesy is most needed when riding in a group and drafting. Safety in a group is about two things – Consistency and communication. For Consistency, be sure to ride a steady line, don’t swerve from side to side. Also, try to keep a consistent pace, If riders are drafting behind you, it can be difficult and tiring if you constantly speed up and slow down. For communication, be sure to signal If you are stopping, where debris in the road is, and what direction the group is turning.
Trail and Road Courtesy To Traffic
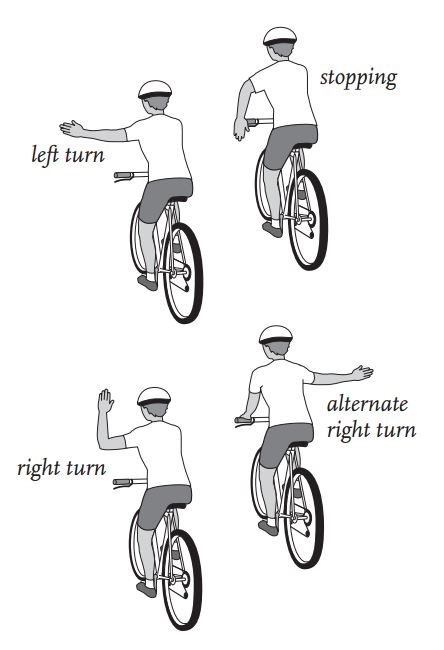
Courtesy to traffic is as easy as being predictable. Try to ride at the same distance from the curb as consistently as possible. Also use hand signals when turning, and be clear when stopping (by placing your open palm down at your side). Using a bell is also a great way to signal your approach to parked cars. Ultimately, you want drivers to know where you are and where you are going so they can make safe choices as well.
Keeping Yourself Safe
Riding courteously is just another way to keep you and those around you safe while riding. Once you begin to employ these tips, and make them second nature, you will find that your rides become less stressful. Eventually, I hope you help remind others what courteous bike riding can do for everyone.
Please pass this information on to friends and family – Thanks!
Not all trails are smooth and flat. Many time’s we encounter large rocks, roots, ledges, and logs. The bunny hop and wheelie hop are simple moves that you can learn to traverse these obstacles with speed. Below, we have spelled out a step by step process to learn to hop.
Bunny hop
The Bunny hop has been around forever. While there are a few ways to pull one off, the basic motion of the bunny hop is to lift the bike without pedaling. Specifically, a bunny hop motion is to lift the front wheel, lift your legs and weight, and roll your wrists (and by extension the bicycle) over an object. The bunny hop is great move to clear obstacles at speed and while heading downhill.
Wheelie hop
The wheelie hop is similar to the bunny hop, except, rather than using your body motion to lift the front wheel, you use the pedals. Once that front wheel is up, the wheelie hop uses all the same motions as the bunny hop. The wheelie hop a is great move to use on uphill obstacles and low speed situations.
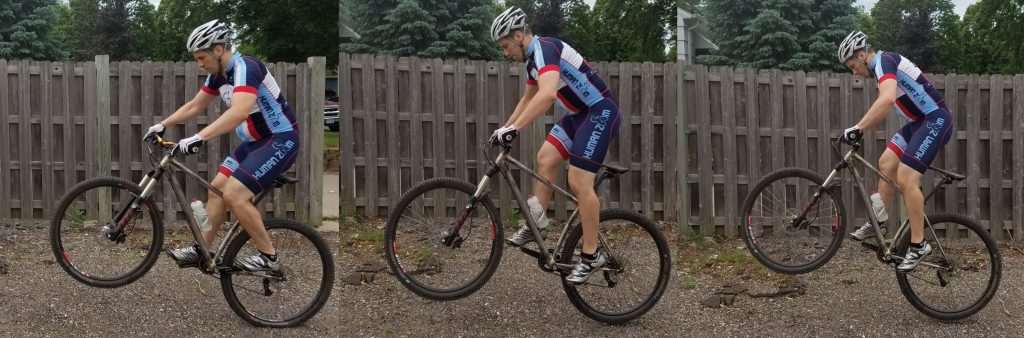
Pull up
The first motion in the bunny hop is to lift the front wheel above the height of the obstacle. To start this, stand up on the pedals, bend your knees and elbows, and lower your center of gravity. Next, spring your arms and knees, propelling your weight up and slightly backward. As your weight is traveling up and back, your front wheel should begin lifting off the ground. The basic concept is to rotate your weight and use the point where your rear wheel touches the ground as a fulcrum.
Prepare to spring up by bending your knees, elbows, and lowering your weight
Pedal up
The pedal up is slightly different from the pull up, but, still ends up with your front wheel in the air. Start in a seated position with your arms locked. Make sure you are in a relatively easy gear and jab your pedal through the pedal stroke as you pull the bars into your body. In about one pedal stroke your front wheel should be off the ground. Your weight should be centered over the rear wheel, your arms should have a good bent to them, preparing to spring your weight up.
Wheelie hops start by pedaling the front wheel up.
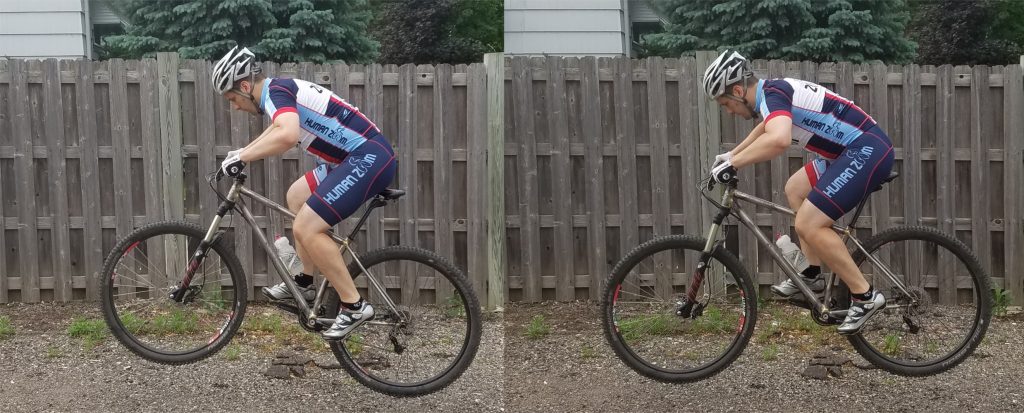
Lift your feet and weight
Although the first part of the Bunny hop and Wheelie hop are different, the rest of the motions are the same. Once you have the front wheel in the air, begin lifting your own weight up and off the bike. To do this, focus your weight on the rear wheel and move your body up, unweighting the bike.
Spring your weight up.
Roll your wrists
Once, both your front wheel and your weight are moving up it’s time to get your rear wheel off the ground. This is done when you roll your wrists and bars forward while your momentum is moving upward. Basically, your weight is moving up with the front wheel leading the way. Rolling your wrists forward redirects that upward momentum forward, leveling out the bike, and clearing the object in your path
Roll your wrists forward, leveling out the bike.
Practice on a curb
A great place to practice these hops is on a curb. Approach the curb at a slow speed, pop the front wheel up and onto the curb, then complete the motion and try to get the rear wheel up without hitting the square edge of the curb. Begin with a very low curb then work your way up to something higher. Once you are comfortable with the motion, try moving faster.
On the trail
There is a new variable that gets introduced when you use your bunny hop on the trail. That variable is the landing. While practicing on pavement, you can be confident that your landing will be onto a flat surface. On the trail, landings can be rocky and rough, couple that with your weight moving around the bike and you can get bucked off the bike rather easily. Therefore, try to keep your weight back on the bike while landing on the trail to resists getting bucked.
Slab Jab
So, while a slab jab is not technically a bunny hop, it does use a similar movement. Basically, a slab jab involves getting your front wheel up onto a tall object (like a rock or log) then pivoting the rest of the bike up onto the object using your front wheel as the fulcrum. Just like a bunny hop or wheelie hop, get your front wheel into the air, but unlike a hop, plant that front wheel onto an object. Next, while lifting your weight and rolling your wrists aggressively jab the bars forward. If done right, the jab motion will force your front wheel over the object and lift your rear wheel up onto it. With the front wheel over the object and your rear wheel on it, let off the brakes and simply roll on.
Like learning to descend, ride rocks, or any other riding skills, the bunny hop is a skill you should slowly build. Start on small objects and work within your comfort zone, maintaining control all the time. After a few months of practice, you will find that you can bounce around the trail like a bunny.