Tag Archives: HaveFunBiking

I am happy to say that Sealskinz recently sent us a care package of product right in time for winter. Take a look for details on the Super Thin Pro Socks.

First thoughts and impressions of Sealskinz Socks

by John Brown, HaveFunBiking.com

It was impossible to miss the Sealskinz booth at Interbike this year. There in the center of the exhibit was a huge tub of water with a woman standing in the middle wearing nothing on her feet but socks! When I asked if her feet were wet or cold, she responded casually “nope, I’ve been standing here for an hour and my feet are still dry and warm.” I was intrigued, but not convinced, because I couldn’t help but think “how could it be soft and waterproof”? Well, fast forward a few weeks and I am happy to say that Sealskinz recently sent us a care package of products right in time for winter. Take a look for details on the Super Thin Pro Socks.

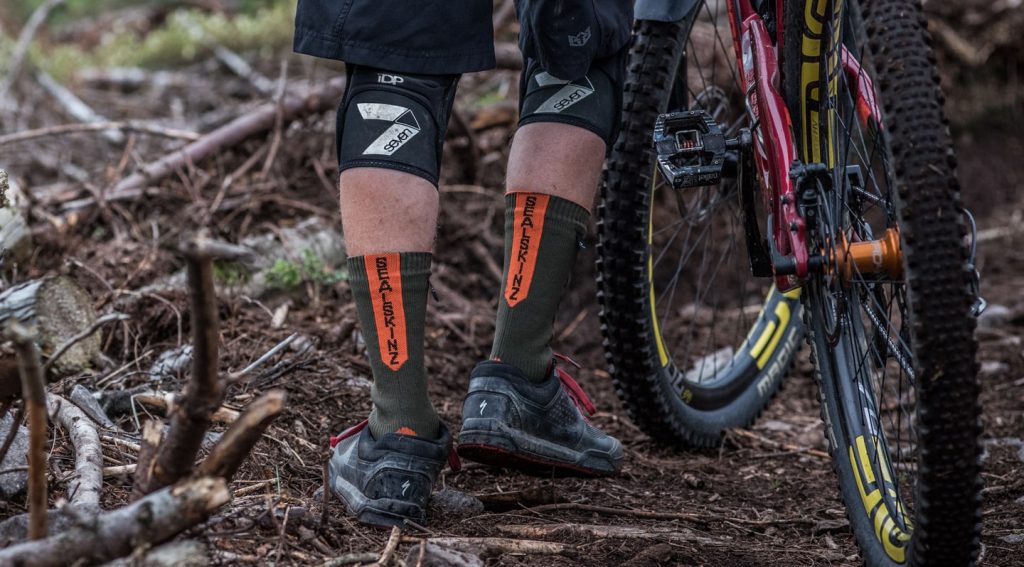
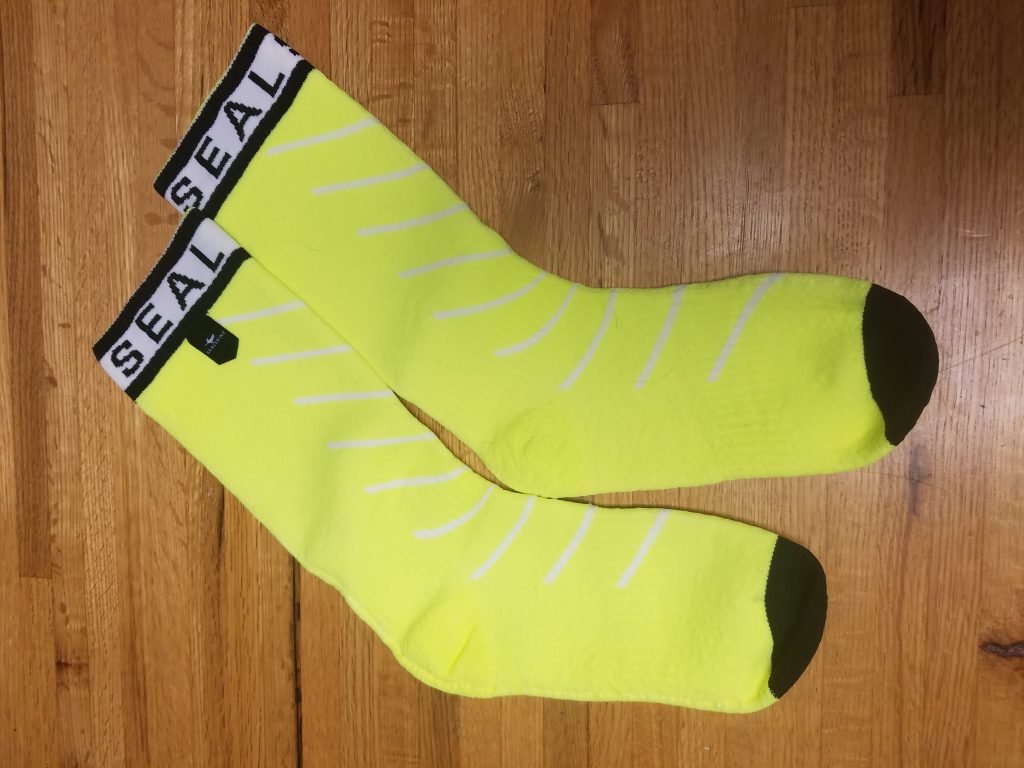
Sealskinz socks construction

The Sealskinz’ seminal product was a waterproof, insulated sock designed for the rigors of wet English winters. We received SealSkinz’ new Super Thin Pro sock. The great thing about this sock is it retains all the waterproof and insulating properties of their exiting socks with a third less weight and bulk. To achieve a lighter sock, Sealskinz employed a new knit pattern for the outer layer and bamboo fiber for the insulation layer. Because a sock has a huge hole in the top of it to accept your foot, they cant be 100% waterproof. What Sealskinz does to combat water coming in from the top of the sock, is to employ a silicon band along the inner cuff of the sock. It rests against the skin and seals off most of the water that would normally migrate down into your sock.

How they fit

Immediately upon putting them on I could feel the liner embedded in the fabric. Why they feel different is the waterproof membrane gives the socks a structure that is more substantial than your normal socks. The fabric bonded on the inside and outside of membrane is really soft to the touch and comfortable on your skin. I did have a concern that the socks would not be able to stretch and flex enough to conform to my feet, but I was proven wrong, again. nearly immediately. Also, I had concerns about the silicon cuff. On many cycling shorts with “grippers” at the bottom of the leg cuff can be uncomfortable. I am happy to report that I never felt any discomfort with the Sealskinz cuff.

Socks in the real world

Although I haven’t had a ton of time to ride these socks, I did have an exceptional first experience. My commute to work is about 40 minutes through the rolling terrain of the Twin Cities suburbs. The day I received the socks was just under 30 degrees and spitting a rain/snow mix. I left for work wearing my standard cycling shoes and a good quality wool cycling sock. In those conditions, I arrived at the office with numb toes that when thawed, hurt a ton. Fast forward to the end of the day, where conditions were exactly the same as the morning, yeah! (More freezing temps and rain). In the evening, I wore that Super Thin Pro Sock instead of my wool sock. In contrast to my ride in, by the time I got home, my feet were still nice and toasty. To clarify, I rode 40 minutes in rain/snow mix and 30 degrees with my feet warm and cozy.

Additional testing

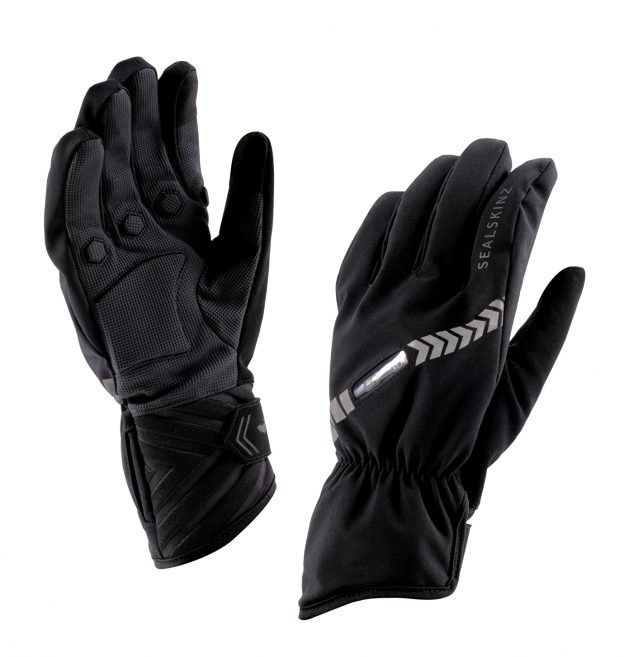
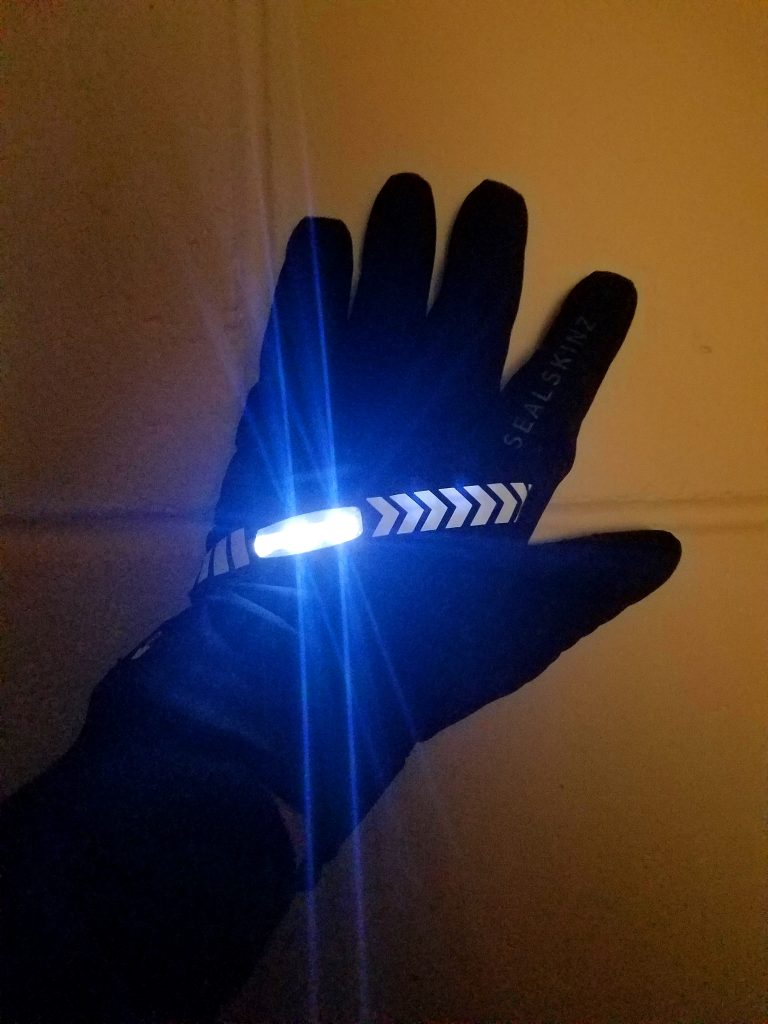
So the Super Thin Pro Sock has passed all my initial tests. However, I’m not done yet. So over the next few weeks, I will test them again. As Minnesota’s temperatures continue to drop I plan to find the lowest temp these socks will work on my feet. Additionally, I have gloves and booties from Sealskinz that will be subjected to the worst Minnesota has to dish out. Stay tuned for more!


The Frog 62 is special because it is at the spear tip of a new movement in children’s bicycle development that fits better and weighs less.

The Frog 62 shows off a new approach in kid’s bike design

by John Brown, HaveFunbiking.com

It almost feels like Christmas here at HaveFunBiking.com. Why such a great day?…..Because we have a new bike to review! The Frog 62, our review bike, is special because for the first time this writer won’t be the one reviewing it (more about that in a bit). Frog Bicycles is at the spear tip of a new movement in children’s bikes. They develop bicycles exclusively for children that fit better and weigh less than anything else. Considering I am not a child, I won’t be riding this bike. Instead, that duty of reviewing the Frog 62 is being passed along to my nine year old son.

The Frog 62 Bike

The Frog 62 uses an aluminum frame and fork designed to accept 24” wheels, and is very light weight for a kid’s bike (sub 20lbs). On paper, the Frog 62 could look like almost any other kids bike, but looks can be deceiving as Frog has hidden a few amazing fit-features in plain sight. To start, the handlebar and stem combination on this bike is custom for Frog. It is shorter, lighter and perfectly sized for small riders. On that subject, Frog also produces a custom crank that has arms that are both shorter and narrower to accommodate children’s shorter legs and narrower stance. To accept a narrower crank, Frog needs to build their frames specifically to accept those custom cranks. Out of the box, the Frog 62 comes standard with two sets of tires (knobby and smooth) as well as a complete fender set.

Frog 62

Frog 62 in all its green splendor.

Durability

I know what you are going to say. “My little Billy destroys every bike we get him, why do I want to buy a bike with custom parts I can’t replace when Billy does what Billy does?” I knew what you were going to say and so did Frog, that’s why Frog designed their bike around that very issue. In my experience, kids find new ways to destroy bikes every year, but almost never break the crank or stem. So with the Frog 62, that is where they stop with proprietary parts. The rest of the bike is put together with readily available components. While most are readily available, Frog did use the best combination of parts to fit children better than ever before.

Frog 62

Frog’s custom crank in action.

The Fit

The biggest selling feature of a Frog bicycle is the fit. Many mid-sized children’s bikes are just scaled up, tiny, kid’s bikes. By this I mean there is little allotment for size, the bars are typically too high, top tubes are short and they are designed as if the child doesn’t know how to ride a bike. Frog bikes on the other hand uses ongoing scientific testing at Brunel University to drive their bicycle fit dimensions. Due to the results of their testing, the bikes are built to fit children better, handle more accurately, and weigh substantially less than the competition.

Frog 62

Next steps

With Minnesota locked in winter, my son and I won’t be heading out onto the bike paths any time soon. Instead, I plan to use this bike first as a teaching opportunity while the ground is covered with snow. Meaning, that my son and I will build the bike together. Then, I plan to complete a full bicycle fit for him. Paying careful attention to see just how well the engineers at Frog designed this bike for children’s proportions. Also. the knobby tires and fenders will be great for when the weather finally breaks. Stay tuned to learn how the bike fit and build go.

Sealskinz' has evolved their product line to include the Halo Bike Glove.See what makes these gloves interesting for winter rides.

Out of the box first impression of Sealskinz’ Halo Glove for winter rides

by John Brown, HaveFunBiking.com

In a previous article, I talked at length about the Sealskinz’ new Super Light Pro Sock. While Sealskinz as a company began with socks, they have evolved their product line to include headwear and gloves for winter rides. One of the products that piqued my interest was the Halo glove. It drew my attention because it is a waterproof, winter glove with an active blinker system built in. Read on to see what makes these gloves interesting and some of my initial thoughts.

The Halo Glove for winter rides

Even though Sealskinz made a name for themselves with socks, they didn’t allow themselves to get caught on their heels (HEELS! Get it!). Sealskinz is committed to keeping all your extremities warm and dry. That mission is the inspiration behind the Sealskinz gloves we will be reviewing for winter rides. My first review will be on the Halo glove, a unique waterproof glove with powerful LED lights built into the back of the hand.

Halo Glove

Waterproof doesn’t stop at the product for Sealskinz. Even the packaging that holds your glove is considered. Rather than punching holes in the glove to mount it to a backer card like most brands, Sealskinz sews loops into the glove to ensure it never gets damaged.

The Halo bike glove is an $80 investment full of many features. It is constructed with a synthetic suede palm, incorporating gel pads for greater comfort on winter rides. The outer shell is completely waterproof, and the glove is machine washable. Additionally, the liner uses an anti-slip material that won’t pull out of the glove when you remove them. Finally, the cuff closes with soft Velcro straps that are large enough to be manipulated with a gloved hand.

Bicycling Glove Features

One thing that is unique to cycling gloves is the way they insulate. Most cycling gloves are windproof, waterproof, and have minimal insulation. I can hear you asking already “minimal insulation?”, yes minimal. Cycling gloves rely on you to generate heat by exercising on winter rides. Under those circumstances, the glove holds the heat you create, keeping you warm. By being water/windproof and relatively thin, cycling gloves offer better dexterity than a normal winter glove.

First Impressions

Immediately upon putting the gloves on, I was impressed. The liner is soft and warm to the touch, and the glove fit was great. All the fingers articulate well without any pulling of material folding uncomfortably. Additionally, the lights activate easily and are really bright.


The first time I rode with the Halo bike glove the temperature was just below freezing and rainy. Luckly, it wasn’t a real downpour and more of just a misting, but it was wet none the less. My forty minute commute ended with all my fingers being warm and toasty. Since that day I have ridden down to about 20 degrees and the gloves never left me wanting in the warmth department. My commuter bike has a flat handlebar, so when the Halo’s lights are activated, they shine forward giving me more visibility to oncoming traffic. In the case of a drop handlebar, the Halo glove will shine to your sides.

halo glove

The Halo’s lights are really bright, and really lightweight.

Moving Forward

I hope to push these gloves as far into the cold as I can handle. Once I reach the Halo’s limits, I get to switch to Sealskinz Highland Claw Glove for the colder temps. Overall, I am really excited to see what the life of the lights on the Halo glove is and if they can survive the cold and moisture of Minnesota’s winter. Stay tuned for more info.

Based on our quick MTB review at Interbike’s Dirt Demo, we have a demo Marin B-17 2 for a long term review. Read on for our "out of the box" review.

The Marin B-17 MTB review – out of the box and ready for the trail

by John Brown, HaveFunBiking.com

Based on our quick MTB review at Interbike’s Dirt Demo, we have been extended a Marin mountain bike demo for a long term review. This week, a big brown box showed up at our office. What was inside was a Marin B-17, a full suspension trail bike just waiting for me to put together and ride. However, before I ride it and give you a full MTB review let me share with you what is actually coming out of that box.

The Marin B-17 MTB review out of the box

The first thing I have to note about this bike, is that it isn’t a brand new bike. While it’s new to me, It has been to a few demos before. That being said, I have to note the immaculate condition this bike it arrived in.  Whereas the tires show signs of wear  the frame and components were cleaned to a level I have never seen before. Overall, the bike built up quickly and easily for a quick spin around the block.

Marin B-17

The Marin B-17 2 in all its glory. It won’t be so clean soon.

The Frame

The B-17 is an aluminum trail bike that uses Marin’s MultiTrac suspension system for 120mm of travel. The MultiTrac system is tuned to absorb large and small hits equally, while still maintaining pedaling efficiency. It accepts both 27.5” x 2.8” wheels as well as standard 29” wheels. On first inspection, the frame design is clean, with the cables running internally within the frame. The rear shock is tucked neatly in line with  the seat tube allowing for the use of a normal water bottle cage. For additional stand over clearance, the Top tube is welded low on the seat tube and uses a jack brace for strength. Overall, the B-17 frame looks like someone sweat all the details.

Marin B17

Here you can clearly see the cables enter the frame. Also, take a look at how each tube is shaped specifically shaped to its intended purpose.

The Parts

The version of the B-17 I am riding is an early production demo unit. For that reason, the parts are slightly different from the final retail bike. Most notably, my demo unit uses a Rockshox Pike rather than the Rockshox Revalation  suspension fork. For the most part the two forks will ride similarly, with the Pike being a bit smoother in operation. The rest of the bike uses Shimano parts for shifting (SLX) and brakes, which ensures great shifting and stopping. This model B-17 also uses a dropper seatpost, to let me get my weight back and low on the trail.

Throughout the rest of the bike, Marin uses house brand components for the rims, bar and stem. While this may have been an area of concern in the past, most brands are sourcing some exceptional parts. Any remarks of the house brand components would be incomplete if I didn’t remark on how well Marin has tied these products into the rest of the bike. The same graphic touches that make the frame look classy are carried through to the parts. The graphic are clean and understated, without overstating the bicycles brand name.

Marin B-17

Some Classy details as seen on the Marin B-17

What I am looking forward to

I really want to see if this bike handles as well on my home trails as it did in Las Vegas. Our parks have limited climbing and smooth features, so it will be interesting to see if the plus sized tires have the same dominance on these trails as they did in the steep, rocky terrain of Nevada. Finally, I can’t wait to really tune the suspension and see what it is capable of. Stay tuned for the long term review in the next few weeks.


bicycle maintanace

Riding through the fall, a great way to spend time with your kids

by John Brown, HaveFunBiking.com

For many, fall and the beginning of the winter signals the end of bike riding, especially kids. But why should the fun stop just because the mercury drops? Instead of ending the rides, get your kids excited to ride through the fall foliage. Here are some tips for encouraging kids to keep the fun rolling.

The Right Clothes for Fall Riding

There are some easy ways to keep your kids comfortable while riding but none as important as clothing. It’s easy to make the mistake of just bundling them up in heavy pants and hoodies, but that will only lead to them being cold in the long run. It’s better to reach for synthetic fabrics that wick moisture while insulating. Cotton will insulate, however it also absorbs sweat and will quickly leave your kids wet and cold. With a synthetic material, sweat is carried off the skin and allowed to evaporate quickly.

Fall

This ride might get cut short thanks to a cotton t-shirt and a lack of gloves. Keep warm and dry for fun fall rides.

Once you have your kids dressed well, take a moment to consider their hands and feet. Even if there is no wind, riding a bike at any speed will create a wind chill for the rider. Take special note of fingers and toes by wearing gloves and socks that are a bit heavier than the weather would normally call for.

The Right Trail Conditions

I know how tempting it is to try and squeeze every last moment of riding time out in the fall months. With that said, no kid will have fun if they are wet and cold. It’s best to avoid the trails if you have recently had rain. For one, the trails are more susceptible to damage and all that water is sure to find it’s place on your kids. A better idea is to enjoy the local bike paths that are paved and dry out quickly.

Wet pavement dries far faster than wet trails. Keep your kids happy and dry, by staying off wet trails.

Wet pavement dries far faster than wet trails. Keep your kids happy and dry, by staying off wet trails.

The Reward

I found the best way to encourage riding in less than perfect conditions is to shamelessly bribe my kids. If you can plan a destination, like a favorite burger joint or ice cream shop, your kids will usually be really excited to head out. If a destination isn’t possible, I like to put together a reward like hot chocolate once they get home. You will see that the Pavlovian effect takes hold after just a few tries.

Its Ice Cream Smiles Sunday around the world. Here in the Netherlands these young bikers stops along the canal route to enjoy a creamy cool treat before resuming her bicycle ride..

These young bikers stops along the canal route to enjoy a creamy cool treat before resuming her bicycle ride.

The best reasons

Finally, the best reason to enjoy the cooler months is that most others won’t. Having trails and paths to yourself is safer and allows everyone to focus more on each other. So whether you are heading into the woods, onto the roads, or just around the block, the fall is a perfect time to be with your family.

Having fun preparing for the Minnesota High School Cycling Leagues, State Championship, to be held on Mt. Kato, in Mankato, MN,

Bic Pic Oct 19, fun preparing for the MN HS Mountain Bike Championship

Having fun preparing for the Minnesota High School Cycling Leagues, State Championship, that will be held on Mt. Kato, in Mankato, MN, October 28-29. Volunteer with the Minnesota chapter of the National Interscholastic Cycling Association or find out more how your school can participate in 2018.

What better way to continue your fall fun and your #NextBikeAdventure. View all the fun ideas and bike destinations in the latest Minnesota Bike/Hike Guide. Then plan your next outing with family and friends in one of our HaveFunBiking Destinations.

Thanks for Viewing Our ‘Fun Mountain Bike’ Pic of the Day  

We are now rolling into our 10th year as a bike tourism media. As we pedal forward our goal is to continue to encourage more people to bike and have fun while we highlight all the unforgettable places for you to ride. As we continue to showcase more places to have fun, we hope the photos we shoot are worth a grin. Enjoy the information and stories we have posted as you scroll through.

Do you have a fun bicycle related photo of yourself or someone you may know that we should post? If so, please send your picture(s) to: [email protected]. Include a brief caption (for each) of who is in the photo (if you know) and where the picture was taken. Photo(s) should be a minimum of 1,000 pixels wide or larger to be considered. If we use your photo, you will receive photo credit and acknowledgment on Facebook and Instagram.

As we continue to encourage more people to bike, please view our Destination section at HaveFunBiking.com for your #NextBikeAdventure – Also, check out the MN Bike Guide, now mobile friendly, as we enter into our 8th year of producing this hand information booklet full of maps.

Remember, bookmark HaveFunBiking.com on your cell phone and find your next adventure at your fingertips! Please share our pics with your friends and don’t forget to smile. We may be around the corner with one of our cameras ready to document your next cameo apperance while you are riding and having fun. You could be in one of our next Pic’s of the Day.

Have a great day!

If you look between the isles at Interbike you can see the future. I’m excited to say, when it comes to bicycles, children's bikes are the future.

Interbike’s Cascade of Clever Concepts for Children’s Bikes

by John Brown, HaveFunBiking.com

If you look between the isles of Interbike (figuratively) you can see the future. I’m excited to say, when it comes to bicycles, children’s bikes are the future. Interbike had loads of unique and exciting bikes, accessories and programs for all the little riders out there.

Children’s bikes are the future

Most bicycle companies make kids bikes as part of their overall line, but very few make only kids bikes. Frog Bicycles exclusively produces children’s bicycles and was born out of a doctoral thesis on proper fit for kids bikes in England. Through exhaustive testing, it was found that children need a more unique bike fit than what the standard bike offers. Frog used that exhaustive research to develop their first bicycles and has been flying down the road ever since. Through clever frame design they are able to build bikes that fit kids with almost no proprietary parts. This leaves no concerns about replacing any hard to find bits if little Timmy breaks anything. Additionally, all the Frog Bikes are tested to adult standards rather than the less demanding children’s standards. Hopefully that can give you some peace of mind as your child’s body and abilities grow.

Frog Bicycles are making children’s bikes more comfortable through smart design.

Parts for kid’s bikes

While most of us aren’t going to start pulling our kid’s bikes apart to upgrade them with fancy components, there are plenty of high performance products available. One of the great things about your bike shop attending Interbike is, if they look closely, they can see things that aren’t readily available now, but will show up on production bikes the following year.

This lightweight suspension fork is made by Kay Xin Technologies for 20″ wheeled kid’s bikes

As I combed the Isles of manufacturers, it was impossible to miss suspension forks designed to meet the specific needs of smaller riders, brakes that allow children to easily control their bicycles and cranks and pedals made for smaller feet and legs.

Teaching them young

Project Bike Tech is a new program designed to getting school aged kids in front of a bicycle with a wrench in their hands. By working with local schools, they develop programs that tach kids engineering, and mechanical skills through bicycle maintenance. Although this program is in very few schools, it has been in existence for over ten years, and has introduced over 3000 students to the cycling industry.

A student of the Project Bike Tech learning to adjust a hub bearing

Sharing the experience

On top of all the products for kids, there were also ample ways to carry your kids along for the ride. Tern Bicycles showed their GSD, a new folding E-bike built with the capability of carrying your kids on the back. Additionally, Burley trailers had their line of children’s trailers on display.

Super fun on the Tern GSD

You can also see our recent article Kid’s Bikes; Why they are different and what’s best for your kids.

If you look between the isles of Interbike (figuratively) you can see the future. I’m excited to say, when it comes to bicycles, kid's bikes are the future.

If you look between the isles of Interbike you can see the future. I’m excited to say, its kid’s bikes.


With all the great things about fall bike riding there are some dangers as well. Read on to learn how to enjoy the fall riding season safely.

Finding fun and fitness in fall bike riding through the colorful foliage

by John Brown, HaveFunBiking.com

Now that the kids have gone back to school, the days are getting shorter and temperatures begin to drop it is the best time of year to ride your bike. From a trail perspective, the dirt becomes softer as the fall rolls in because of lower temperatures and increased rainfall. Additionally, riding off road in the fall is a beautiful way to enjoy the change in foliage. That doesn’t mean you can’t enjoy the leaves changing if you choose to ride on the path or road. In fact, great fall rides often have specific vista points built into the ride. With all the great things about riding through the fall there are some dangers as well. Read on to learn how to enjoy the fall riding season safely.

Fall bike riding road hazards

Those beautiful fall colors are enjoyable, but also a sign of falls largest hazard. Falling leaves that mix with fall rains begin to break down and decompose on road surfaces. What is left behind is a slick slurry of organic matter perfectly suited to eliminate traction and cause a crash. As you ride in the fall, avoid riding too far off the edge of the road. Likewise, don’t ride too far into the middle of the road where leaves tend to accumulate.

Fall bike riding off road hazards

The same problems with traction and decomposing leaves exists off road, but it’s not as large an issue as on the road. Thanks to the soft dirt and rough surface, riders have a better chance of finding traction when the leaves get wet. What you should be on the lookout for is what you can’t see. Makes total sense, right?! Whenever you are on a trail that has fallen leaves, objects can hide in those leaf piles.

Being seen while fall bike riding

As the days get shorter, you need to be concerned with being seen in low light situations, that’s where proper lighting comes in. Lights, no matter your level of bike riding skill, are essential to make sure you have the safest ride possible. Plus, most states require bike lights to ride on a roadway (here is Minnesota’s law). The two types of lights on the market are lights that allow you to see, and lights that allow others to see you.

Seeing the trail

A great side effect to the shortened days is going for night rides with your mountain bike. Night riding was first born out of the necessity of riding, but has quickly become a fun part of the sport in and of itself. With this in mind, get yourself a high output light, strap it to your bike and head into the woods. In the long run you will see that riding at night changes how you see your local trails, and makes then new and fun.

Dressing the part for fall bike riding

Universally across on or off-road riders, the fall brings colder temperatures. To combat these temps you want to dress accordingly. Early fall rides force us to break out the arm and knee warmers, with long sleeve jerseys marching quickly behind. When dressing for colder weather, be sure to not overdress. Being too insulated will cause you to sweat past your cycling clothings ability to move moisture. At that point, you get wet, and cold, which defeats the purpose of wearing more clothing.

Lights are essential to make sure you have the safest ride possible. Here in this photo Brian Will, from Iowa's Cedar Valley Cycling Club lead a safe ride using trails and roads near sunset.

Falls unique events

Many charity rides are scheduled through the fall because of its great weather, and ambient beauty. One event type that is completely exclusive to fall is the sport of Cyclocross. What is Cyclocross you ask? Well, the best way to describe it is it’s just fun. A Cyclocross race is a timed (30,45,60 minutes) event that covers a one-mile course including, road, off road, grass, and sand sections with manmade and natural barriers. The best part of Cyclocross is that spectators can enjoy the action easily. Additionally, Cyclocross races are very family friendly and usually include things like food trucks, kids bike rodeos, and beer tastings.

How ever you decide to spend you fall, try and spend it outside on your bike. The Fall is a great time to get back on the bike, steal a few more hours in the saddle, or enjoy natures last show before the winters long sleep.

See how to get the most out of 100 years of technological advancements. You will find adjusting your front derailleur is easy if you follow these steps.

How to adjust your front derailleur for perfect and silent shifting

by John Brown, HaveFunBiking.com

In the late 1920’s, in France, there was a bike race under way and it wasn’t the Tour De France. Instead, this race was a technological race that brought the derailleur into the light. Before 1928, bicycles had a maximum of two speeds, and you needed to remove the rear wheel to change those gears. As there was need for quicker shifting, the bicycle derailleur was born. Initial derailleurs consisted of nothing more than paddles that were actuated by steel rods located between the rider’s legs. Needless to say, there was a lot of finesse that went into shifting those bikes. Then after the second world war parallelogram derailleurs, what we use today, were developed so riders could shift their gears with ease. Read on to see how to get the most out of 100 years of technological advancements. You will find adjusting your front derailleur is easy if you follow these steps.

Front Derailleur

Early “Rod Style” Benelux front derailleur – Yikes

Front Derailleur parts

Limit screws (A) – The front derailleur needs to work within the largest and smallest ring. Limit screws work to stop the front derailleur from shifting outside of its intended range. They are adjustable as to match different types of cranks.

Derailleur Cage – The cage is what holds the chain on gear and what presses on the chain to move it from one gear to the next. The outer portion of the cage (C) is what helps the chain move from larger gears to smaller ones. In contrast, the inner portion of the cage (B) forces the chain from smaller gears to larger ones.

front derailleur

Common parallelogram front derailleur found on Hybrid and Mountainbikes

Derailleur Fixing Bolt (D) – The bolt that holds the derailleur in place on the frame. By loosening this bolt, you can re-position the derailleur for angle and height.

Cable Pinch Bolt (E) – The Cable that controls shifting needs to be held firmly in place. The pinch bolt does that job.

front derailleur

Different Pinch bolt and fixing bolt position for MTB/Hybrid (above) and Road (below) derailleurs

Location, location, location

You guessed it, the most important part of adjusting the front derailleur is its location. If the derailleur is not positioned properly, you will never achieve proper, noise free, shifting in all gears. The reason location is so important is that the front derailleur cage is formed to position the chain in very specific locations.

First step in adjusting the front derailleurs location is to set its height. You need enough room to fit a Nickel between the teeth on the largest chainring and the bottom of the outer cage when they are lined up. Any more clearance than that and the derailleur tends to have issues pulling the chain down from larger gears.

front derailleur

you should be able to fit a Nickle between the derailleur cage and chainring

Once you have the height set, adjust the angle of the front derailleur so that the outer cage and chainrings are parallel. Any misalignment will result in poor shifting and excess noise.

front derailleur

Proper alignment on the left, and misalignment on the right

Lower Limit

Set the lower limit by adjusting the screw marked “L”. To do this, shift the rear derailleur all the way up into the largest cog. Next check to see if there is clearance between the chain and the front derailleurs inner cage with the chain on the smallest chainring. If the chain is running on the inner cage, thread the limit screw out until you have 2-3mm (that nickel distance again!) between the chain and inner cage. When the opposite is true and you have too much clearance between the inner cage and chain, thread the limit screw in until there is 2-3mm of clearance.

Cable tension

Your Front derailleur should be properly aligned and the lower limit should be set at this point. The next step is to attach the cable to the Pinch bolt. Attach that cable by first making sure your shifter is in its lowest gear, Then pull the cable tight, and finally tighten the pinch bolt onto your cable. Usually, you can shift smoothly up from the smallest ring into the next gear right away, but if there is hesitation going up add cable tension either through a barrel adjuster or by loosening the pinch bolt, pulling the cable tighter, and tightening the pinch bolt down again. If the chain wants to shift up from the small ring over the next ring, release some tension. You know you have it right when the chain can pass from one gear to another smoothly and confidently without any banging or skipping noises.

Upper Limit

Setting the upper limit is as easy as getting the chain onto the largest chainring and threading the limit screw to offer 2-3mm of clearance between the chain and the outer cage. While shifting, ensure the chain cannot be shifted over the large ring and off the crank.

Trouble shooting

This guide is great if all the parts are new, but won’t overcome many issues related to worn or dirty parts. The most common shifting issue with older gears is poor upshifting. Chainrings are built with ramps on the inner surface to easily guide the chain from smaller to larger rings. As chainrings wear, these ramps wear as well. If you are having serious issues going from smaller to larger gears, but the gears are silent and problem free otherwise, you may want to consider replacing the chain, chainrings, and gears in the rear.

front derailleur

These Praxis Works chain rings have some of the best shifting thanks to carefully placed ramps.

Another key wear item is the front derailleur itself. Derailleurs are designed to pivot off a parallelogram design that requires each pivot run smooth and precisely. As the Front Derailleur wears, these pivots can begin to bind, while they generate play, leading to poor shifting.

Finally, dirty or corroded cables are a key cause in poor shifting. Replace cables once a year and lube them intermittently to keep them running smooth and freely.

When is enough, enough

Working on your bike is fun, but can be frustrating if things aren’t going according to plan. When things get out of hand, don’t be afraid to start from scratch and go back to step one. Any missed initial steps will make further steps impossible to complete. Also, remember that if it gets too tough, your local bike shop is happy to walk you through the process. You will pay a fee, but the one on one instruction is well worth it.


The summer travel season is right around the corner and planning for your next adventure can be easy with this detailed bike travel checklist.

The Ultimate Bike Travel Checklist for Guaranteed Fun on Your Next Adventure

The summer travel season is right around the corner and planning for your next adventure can be easy with this detailed bike travel checklist. In the photo above, a touring cyclist on the Root River Bluff & Valley Bike Tour is looking over the items she packed for the three-day bike ride. Whether its an overnight trip, a weekend getaway or a full multi-day bicycle tour, here is a handy checklist of items you may want to consider for your #nextbikeadventure:

(Please note  – some of the items have links to interesting articles to help you further)

THE PRE-DEPARTURE BIKE TRAVEL CHECKLIST:

___ Newspaper Stop                       ___ Mail Stop                  ___ Kennel Pets Reservation

___ Tune-up Bike/                           ___Clean                          ___ Yard Work

___ Check Weather Forecast         ___Pack/Ship Bicycle

___ Set Cylcometer to zero           ___ Large blanket to cover bike in truck

___ Remove both bike pedals by turning wrench toward back of bike.

___ Put pedals in bike shoe(s) in duffle bag!!!

CASUAL TIME CHECKLIST:

___ Bags (50 lbs max per bag)               ___ Wallet                             ___ Insurance Cards

___ Cash ($50/day est.)                           ___ Route Map                     ___ Cap/Hat

___ I.D.’s/Road ID Bracelet                     ___ Cell Phone &Charger   ___ Umbrella

___ Laptop/Tablet /Chargers                 ___ Sunglasses                     ___ Eyeglasses /Case/Straps

___ Eye Contacts/Solution                     ___ Sun Block                        ___ Chap Stick (SPF)

___Bug  Repellent                                   ___ Music / Earphones         ___ Address Book

___ Notebook Journal / Pen                  ___ Business Cards              ___ Fanny Pack / Backpack

___Stamps                                                ___ Tylenol or Ibuprofen     ___Charger

___ Camera/Cell Phone                          ___ Batteries (AA, etc.)         ___ Gatorade Powder

___ Bath Towels                                       ___ Pillow/Covers                 ___ Toiletries

___ Toilet Paper                                       ___ Bio Degradable Soap    ___ Medications

___ Ear Plugs (for sleeping)                    ___ Baby Powder                 ___ Swimsuit

___ Shorts                                                ___T-shirts                             ___ Shoes /Flip Flops

___ Long Sleeve T-shirt/Sweatshirt     ___ Dirty Clothes Bag           ___ Solar Shower Bag 3 gal.

___ ‘Woolite’ (if you wash)                     ___ Gum                                  ___ Hand Wipes

___ Kleenex (travel size)                        ___ Can Koozie                       ___ Bungie Cords

___ Book / Magazine                             ___Garbage Bags                   ___ Zip Lock Bags = SM, LG, XL

___ Plastic Grocery Bags (to cover bike seat at night)

___Heavy duty rubber bands (you’ll find a use)

CAMPING CHECKLIST:

___ Tent/Stakes/Mallet/Ground Tarp       ___ Tent Fan                      ___ Waterproofed Tent

___ Sleeping Bag / Air Mattress                 ___ Clothes Line / Pins    ___ Tent Whisk Broom

___Water Filter                                             ___Camp Stove                 ___Cooking utensils

___Eating utensils                                        ___Camp light

BIKE GEAR CHECKLIST:

___ Bike (remove pedals!)        ___ Cycling Shoes                       ___ Panniers/Bike Bags

___ Tire Pump/ CO2                  ___ Front & Rear Bike Lights     ___ On-Bike First Aid Kit

___ Bike Tools / Rags / Oil        ___ Tubes / Patch Kit                  ___ Bike Lock

___ Helmet                                 ___ Gloves (2)                               ___Bandannas / Headbands

___ Jerseys                                 ___Bike Shorts                              ___ Chamois Butt’r

___ Rain Gear                            ___ Water Bottles / Camel Back ___ Face towel (for on bike)

___ Head strap light                 ___ Ace Wraps, etc                       ___ Power or Granola Bars

___Shift/Brake Cable               ___Spare Spokes Front                ___Spare Spokes Rear (L&R side)                

Here at HaveFunBiking.com we hope you find the following this Bike Travel Checklist helpful in planning your #nextbikeadventure.

Printable Version Bike Trip Checklist