Tag: Bike lights
-
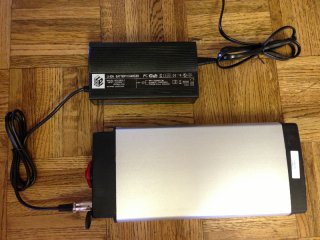
5 Tips to extend a lithium battery life for e-bikes and other power tools
Electric bicycles and e-power tools are becoming increasingly common in most countries worldwide. Here are some tips to extend the lithium battery life.
-

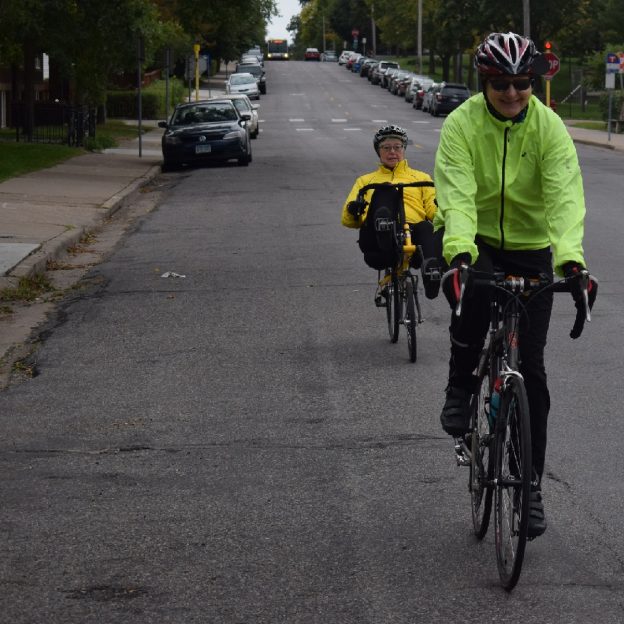
Being visible and noticed doesn’t end when the sun comes up
Now that spring is here and riding and walking outdoors are in full swing, stay visible and noticed. Wear clothing that makes you stand out when riding your bike or walking along the road or trail. Being noticed by others is the key to avoiding accidents. Focus on the two forms, passive and active visibility,…
-
Bike Pic Oct 29, bright clothing adds to a comfortable ride!
This cool-weather Wednesday, bright clothing adds to a comfortable ride!
-
Bike Pic Oct 4,visibility is key to a safe ride as days shorten
This Saturday, as the days become shorter stay visible
-

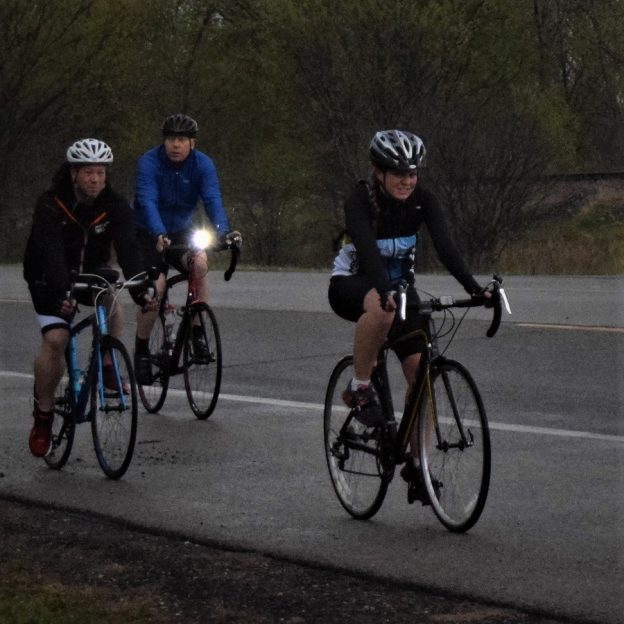
Bike lights will improve your safety day and night!
No matter your bicycle riding skills, bike lights are essential to ensure a safe ride, day or night. Lights aren’t only needed when the sun goes down. In fact, lights are beneficial when riding in conditions where traffic may be present or visibility is limited. That’s where proper lighting can be a great asset. Additionally,…
-

Added visibility for safety and fun in fall’s limited light
Now that fall is just around the corner and the days are getting shorter, we must consider visibility while staying active amongst the autumn colors. As the leaves change and then drop, we need to focus on passive and active visibility. Features like reflectors and bright colors are passive forms of visibility, whereas lights and blinkers are…
-
Five helpful tips for a memorable fall bike ride
Biking in the fall can present numerous challenges, yet it can also be very gratifying. For some, the bicycle season may be coming to a close. In contrast, many others wish to continue exploring the incredible autumn landscape on their favorite mode of transportation: the bike. Pedaling along the colorful autumn roads or trails is…
-

Add visibility in fall’s limited light for a memorable ride.
With fall session riding in full swing, using passively bright gear is a critical component to being better seen while riding our bikes. The two primary forms of visibility we need to focus on are passive and active visibility. Things like reflectors and bright colors are forms of passive visibility. In contrast, lights and blinkers…
-

A dynamo light is an upgrade you should consider for this fall!
Being visible is paramount to staying safe while riding and there are many different types of lights available to help with that pursuit. But, the king of them all is the Dynamo light. These lights use a bicycle mounted generator for power, staying lit while you ride. Read on to learn how Dynamo systems work and…
-

Rotlicht: Out of the box review for a one of a kind rear blinker
Along with Lupine’s SL-A7 we received a smaller package containing the Rotlicht blinker. With a brightness of 160 lumens this light might just be the best rear blinker ever made. Read on to see what else is hiding inside.