Tag Archives: headlights

Being visible is paramount to staying safe while riding and there are many different types of lights available to help with that pursuit. But, the king of them all is the Dynamo light.

A dynamo light is an upgrade you should consider for this fall!

by John Brown, HaveFunBiking.com

Being visible is paramount to staying safe while riding and there are many different types of lights available to help with that pursuit. But, the king of them all is the Dynamo light. Dynamo lights use a bicycle mounted generator for power, staying lit while riding at night and low visibility times of the day. Read on to learn how Dynamo systems work and why they are so dependable.

Dynamo Light: Where Does The Power Come From

With no battery, you generate power with your motion. For a Dynamo light to work you need to attach a generator to your bicycle. Generators are rated for either 3.0 watts to power both a headlight and taillight, or 2.4 watts to power just a headlight.

Generator types

The two main generator types are hub type and bottle type. The hub type is built into a front wheel and generates power as the front wheel spins. Bottle type generators mount onto a bikes frame or fork. Bottle generators have a small wheel that rests against the tire and generates electricity as the tire spins the wheel. Typically, the hub type generators have lower resistance than the bottle type and won’t wear out a tire as quickly. Bottle type generators are typically less expensive and can also be installed on your bike without rebuilding or replacing the front wheel. Another benefit of bottle type generators is that they can be disengaged during daylight hours so you can ride resistance free. That being said, as hub generators become more efficient and less expensive, the bottle generators are becoming less common.

Hub generator from Shimano and wheel generator from Busch + Müller (photo Courtesy of Busch + Müller)

Front Light types

Of all the light types on the market, high output LED headlights rule the roost. These HLED lights use very little power to deliver a ton of light. While we are talking about light, most headlight’s power are measured in LUX. The differences in power can be seen below. In addition to light while riding, most headlights have a capacitor to store power and allow the light to shine for a small period while the bike is stopped.

dynamo light

This is the same section of road under 20, 50, and 100 LUX lights

dynamo light

A few headlight options from Supernova and Busch + Müller

Rear light types

Rear lights use LEDs and blink while you ride. They can be mounted to the bicycle’s chainstay, seat post, or fender. These rear lights are typically wired from the front light, across the bike, and to the rear light. While it’s easy to run wiring through a bike built to accommodate them, it is difficult to cleanly run wiring on bikes not made for them.

Benefits

Lighting in general is one of the most important aspects of safety on the bike. While you don’t need a dynamo lighting system to be safe, they do offer some advantages over battery powered lights. First benefit is you can jump on your bike and go because you never need to charge a dynamo light like you do a battery system. Also, dynamo systems can be upgraded to charge products via a USB port. Finally, Dynamo lighting systems enjoy the feature of being extremely durable.

if you enjoy our articles, please sign up as a HaveFunBiking member to receive exclusive articles in our weekly E-Mag.


As thoughts turn to visibility on my daily commute. Here is some info and a few tips on staying visible while riding at night.

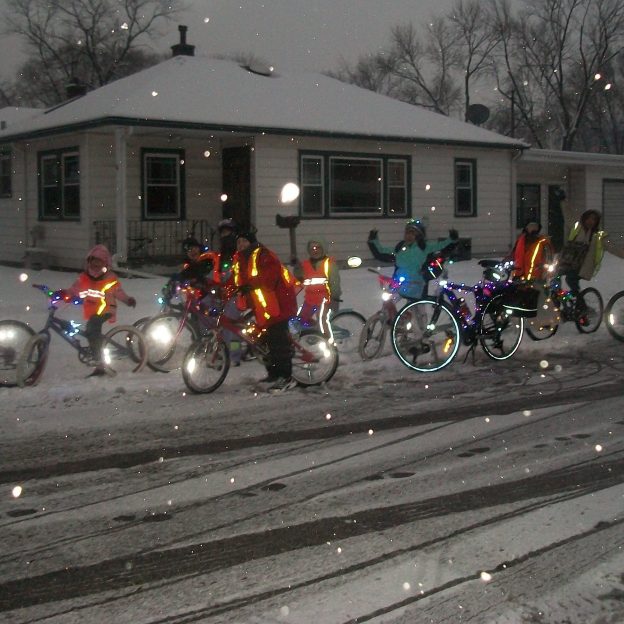
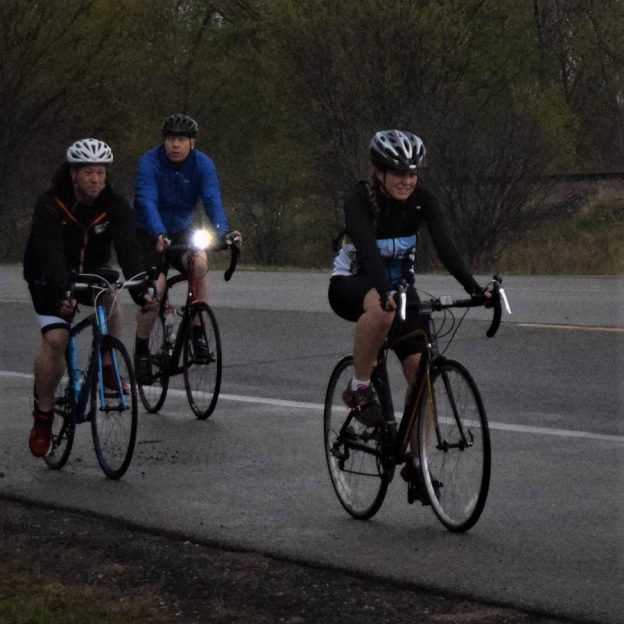
Visibility and you, staying safe while riding your bike at night

by John Brown, HaveFunBiking.com

With Thanksgiving long gone, we are firmly in the grip of winter. With colder days and darker nights, my thoughts turn to visibility on my daily commute. Here is some info and a few tips on staying visible while riding at night.

Types of Visibility

The main forms of clarity we focus on are passive and active. Things like reflectors and bright colors are forms of passive visibility, while lights and blinkers are great examples of an active visual form.

Passive visibility

Many rides start in the light and only devolve into darkness as the ride stretches on. Provided that your ride is under street lamps or some form of light, passive clarity will get you home safely. The lowly reflector is the most common form of passive visibility. Luckily, reflectors are required by the CPSC to be installed on all bicycles sold in the united states. Reflectors come in two colors, white (front and wheels) and Red (rear). Additionally, many apparel companies install reflective materials onto their products and work like the reflector on your bike, taking any light thrown at you and returning it back to the source. Where passive reflectivity falls short, is when there is no light source to activate the visibility.

Visibility

The simple reflector offers great visibility when seen by motorists.

visibility

High visibility clothing can help you stand out also.

Active visibility

When the area is devoid of a light source you need to create that light to keep yourself safe. For cyclists, Lights and blinkers are the most common visibility product. Where the light and the blinker differ is that blinkers are designed to be seen while lights allow a rider to both see and be seen.

Great lights are usually rechargeable and use an LED bulb. For riders who spend a lot of time off-road or on unlit paths, these lights are a necessity. While most mount onto the bars or helmet, there are a few companies who integrate lights into the bike or helmet.

visibility

You won’t get better lighting than the Magicshine Genie helmet with remote.

Blinkers are usually battery operated and use an LED to flash intermittently. These blinkers can easily be mounted to your bicycle and in some instances, are incorporated into helmets, gloves, shoes, saddles and handlebars.

visibility

Good rear blinkers like the Lupine Rotlicht are key.

What to use

Overall, think ahead before your next ride and pack to insure you can see and others can see you. Mount a pair of blinkers to the bike (one front and one back) so when you get stuck in low light conditions, you can simply switch the blinkers on. If your route is going to be unlit for any portion, a front light makes things safer. Additionally, be sure to wear highly visible clothing in combination with any other gadget.