Tag Archives: Rockshox

Based on our quick MTB review at Interbike’s Dirt Demo, we have a demo Marin B-17 2 for a long term review. Read on for our "out of the box" review.

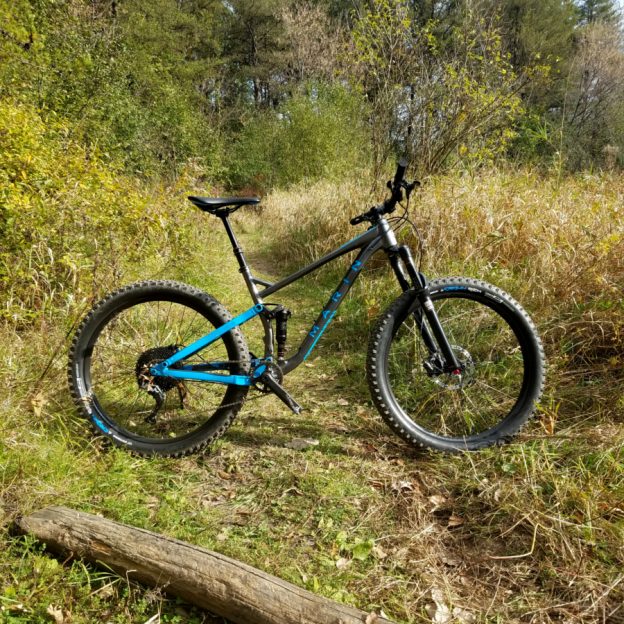
The Marin B-17 MTB review – out of the box and ready for the trail

by John Brown, HaveFunBiking.com

Based on our quick MTB review at Interbike’s Dirt Demo, we have been extended a Marin mountain bike demo for a long term review. This week, a big brown box showed up at our office. What was inside was a Marin B-17, a full suspension trail bike just waiting for me to put together and ride. However, before I ride it and give you a full MTB review let me share with you what is actually coming out of that box.

The Marin B-17 MTB review out of the box

The first thing I have to note about this bike, is that it isn’t a brand new bike. While it’s new to me, It has been to a few demos before. That being said, I have to note the immaculate condition this bike it arrived in.  Whereas the tires show signs of wear  the frame and components were cleaned to a level I have never seen before. Overall, the bike built up quickly and easily for a quick spin around the block.

Marin B-17

The Marin B-17 2 in all its glory. It won’t be so clean soon.

The Frame

The B-17 is an aluminum trail bike that uses Marin’s MultiTrac suspension system for 120mm of travel. The MultiTrac system is tuned to absorb large and small hits equally, while still maintaining pedaling efficiency. It accepts both 27.5” x 2.8” wheels as well as standard 29” wheels. On first inspection, the frame design is clean, with the cables running internally within the frame. The rear shock is tucked neatly in line with  the seat tube allowing for the use of a normal water bottle cage. For additional stand over clearance, the Top tube is welded low on the seat tube and uses a jack brace for strength. Overall, the B-17 frame looks like someone sweat all the details.

Marin B17

Here you can clearly see the cables enter the frame. Also, take a look at how each tube is shaped specifically shaped to its intended purpose.

The Parts

The version of the B-17 I am riding is an early production demo unit. For that reason, the parts are slightly different from the final retail bike. Most notably, my demo unit uses a Rockshox Pike rather than the Rockshox Revalation  suspension fork. For the most part the two forks will ride similarly, with the Pike being a bit smoother in operation. The rest of the bike uses Shimano parts for shifting (SLX) and brakes, which ensures great shifting and stopping. This model B-17 also uses a dropper seatpost, to let me get my weight back and low on the trail.

Throughout the rest of the bike, Marin uses house brand components for the rims, bar and stem. While this may have been an area of concern in the past, most brands are sourcing some exceptional parts. Any remarks of the house brand components would be incomplete if I didn’t remark on how well Marin has tied these products into the rest of the bike. The same graphic touches that make the frame look classy are carried through to the parts. The graphic are clean and understated, without overstating the bicycles brand name.

Marin B-17

Some Classy details as seen on the Marin B-17

What I am looking forward to

I really want to see if this bike handles as well on my home trails as it did in Las Vegas. Our parks have limited climbing and smooth features, so it will be interesting to see if the plus sized tires have the same dominance on these trails as they did in the steep, rocky terrain of Nevada. Finally, I can’t wait to really tune the suspension and see what it is capable of. Stay tuned for the long term review in the next few weeks.


Most mountain bikes today are coming equipped with a suspension. Learn how the right suspension setup can have you riding longer and in greater control.

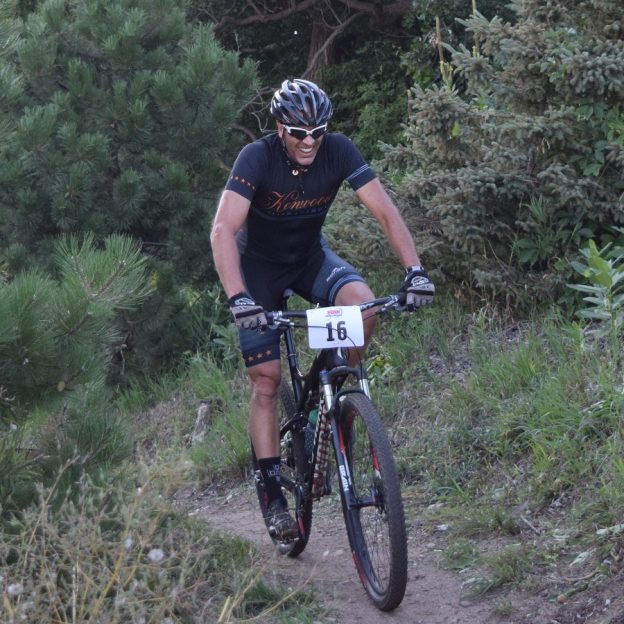
Suspension Setup For Your Smoothest, Fastest, and Best Ride Ever

by John Brown, HaveFunBiking.com

Most mountain bikes today are coming equipped with a suspension fork, many others are offering suspension for both the front and rear wheel. Additionally, the technology being employed in these suspension systems has become truly amazing. As good as suspension is, it does nothing unless setup correctly. Read on to learn how the right suspension setup can have you riding longer and in greater control.

Suspension Setup Terminology

To properly set up your suspension, it is first important to know what all the parts are called, and what they do. While shaped very different, suspension forks and rear shocks use the same terms and functions

Travel

Suspension travel is simply the distance your wheel can move. On suspension forks, this is easily measured on the fork itself, while measuring rear wheel travel is far more difficult. ON the bright side, most manufacturers publish the amount of rear wheel travel a bike has.

Spring

Suspension springs can be made of metal (coil spring) or air. Coil sprung suspension is great because it offers smooth motion from the initial movement to the end of its travel. Air springs are great because they are lighter than a coil, and have a wider range of adjustment (just add air to make the suspension stiffer, or remove it to make the suspension softer). The downsides of an air spring is that they suffer from a greater static friction (stiction) in the initial part of its movement than a coil spring. Additionally, to change pressure in an air spring, you need a specific shock pump.

Suspension Setup

These cutaway pictures show how a suspension fork works. Coil spring on the left (green) and air spring on the right (blue)

Damping

Damping is a way of controlling how fast the suspension can move. As an example, if a fork is un-damped, it would rebound as quickly as it was compressed, making your bike bounce around the trail like a pogo stick. A damper is the mechanical device inside the suspension that allows it to compress quickly when you hit an object, but return at a controllable rate. Damping comes in two common forms, Compression and Rebound. Compression damping controls how fast a suspension can be compressed and rebound damping controls how fast the suspension can return to full extension.

Preload

Preload is a set amount of compression force applied to the spring at its full extension. For instance, a coil spring might have some preload applied if a rider feels their suspension is too active. By applying some preload, you raise the force needed to begin the suspensions movement. In most cases, preload is handled by adjustment knobs on the top of a suspension fork.

Sag

Sag is the amount your suspension will compress when you are seated on your bike. Having some sag allows your wheels to track down into holes in the trail as well as compress if you hit an object. Overall, an optimal amount of sag is between 25-35% of the total travel.

Bottom out

Bottom out is when you compress suspension to its limit. Most suspension is designed with bumpers to protect metal parts from doing damage to one another during a bottom out.

Setting Sag

First, you will need something to mark your sag point. Most suspensions come with a rubber o-ring installed around the fork leg or rear shock. If they don’t have an o-ring, you can use a zip-tie that is loosely installed around the leg or rear shock.

Next, lean the bike up against a nearby wall and get on. Stand on the pedals with your hands on the bar and bounce up and down on the bike a few times. Now sit gently on your saddle with your weight forward (normal riding position).

Now push the o-ring down on the suspension against the seal and get off your bike carefully. You should see is some space between the o-ring and suspension seal (see image). That space is your sag measurement. Like stated earlier between 25-35% of total travel is optimal, so suspension with 100mm of travel should have 25-35mm of sag. If you have too little sag, stiffen the spring, too much then soften it.

Suspension Setup

The zip tie is flush against the fork seal under the weight of the rider, but when the rider steps off, 25mm of sag can be measured (left)

Suspension Setup and Air Spring Adjustment

Most manufacturers have a recommended air pressure based on your riding weight (remember to account for the weight of your gear and pack!). Before checking your sag, start by pressurizing your suspension to those recommended settings. Once you have checked sag, either increase or decrease the air pressure to make your suspension stiffer or softer.

Coil spring.

To adjust the sag amount on a coil spring you have two options. First option is to replace the spring for stiffer or softer versions. Replacing the spring will be necessary if you can’t achieve the proper sag by adjusting the preload setting. To adjust preload, simply turn the knob on the top of the suspension fork to the right to stiffen the fork, or the left to make it softer.

Setting Damping

Most suspensions only offer the ability to adjust rebound damping easily. Compression damping can always be adjusted, but it typically requires some disassembly. To initially setup your rebound damping, first find the adjustment knob usually located on the bottom of the right fork leg. Turn the damping knob to full open (typically represented by a “–“ symbol or a picture of a rabbit). Now, stand over the bars; press down then pull up quickly. You should feel the suspension spring back up as quickly as you compressed it. Turn the damping knob closed a small bit and repeat your compression test. Continue to compress and add damping until you feel the suspension is not quite able to keep up with your hands as they pull up.

Suspension Setup On the Trail

With your suspension setup now at a good starting point, take the bike out on the trail to fine tune it. First thing you want to ensure is that you bottom out your suspension under normal riding conditions a few times per ride. Bottoming out the suspension is a clear indicator that you are using all of your travel. However, be sure you aren’t bottoming out all the time. I know I just told you it’s OK to bottom out the suspension, but if you are doing it more than 2-3 times a ride, chances are you need to stiffen your spring.

If by chance you haven’t slowed the fork’s damping down enough, you will feel as if the bike wants to bounce away through rough sections. An under-damped fork will almost feel like the front end of the bike is trying to get away from you. The solution to this problem is to increase the amount of rebound damping you have.

As you add damping, be concerned with not allowing the fork to “pack up”. When you set your damping, you determined the rate at which the suspension can return to full extension. If your terrain is particularly rough, it is possible to set the damping to rebound slower than you need. As an example, if you go through a rock garden, hitting an object every second that compresses you fork 10mm, you want the damping to allow the suspension to rebound at least 10mm per second. If your suspension can only rebound 7mm per second, you will quickly be riding at less than full travel. The key indicator of this is the fork will feel stiffer through the rough stuff, but soft again when the trail smooths out. If you experience this, speed up the damping slightly until the feeling goes away.

Continuing adjustments

Over the first 6 months of owning your new suspension, never stop focusing on how it performs. As the forks wears in and begins to move more freely, the amount of damping you need may differ. Also, as you adjust your spring, it will slightly change the way your damping works. The best way I can describe suspension setup is as a dartboard. Rather than shooting for the bulls-eye in one shot, you are traveling down a spiral road getting closer to the bulls-eye with every new adjustment. With a little luck and focus, you will realize all the performance your suspension has to offer you.