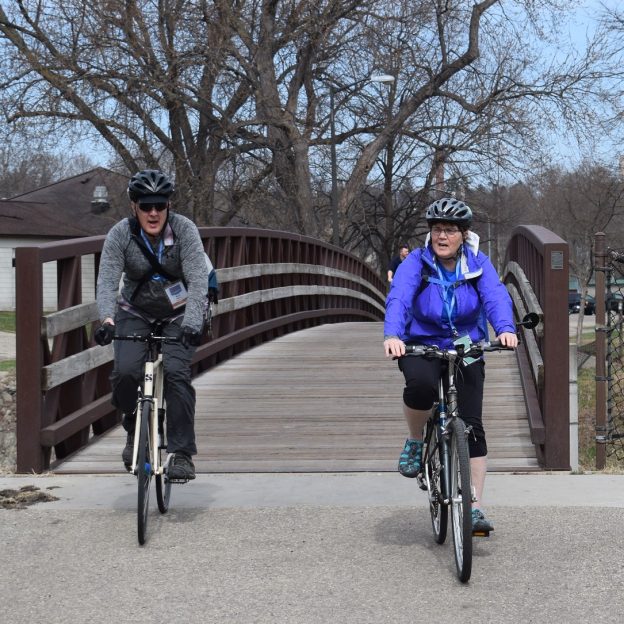
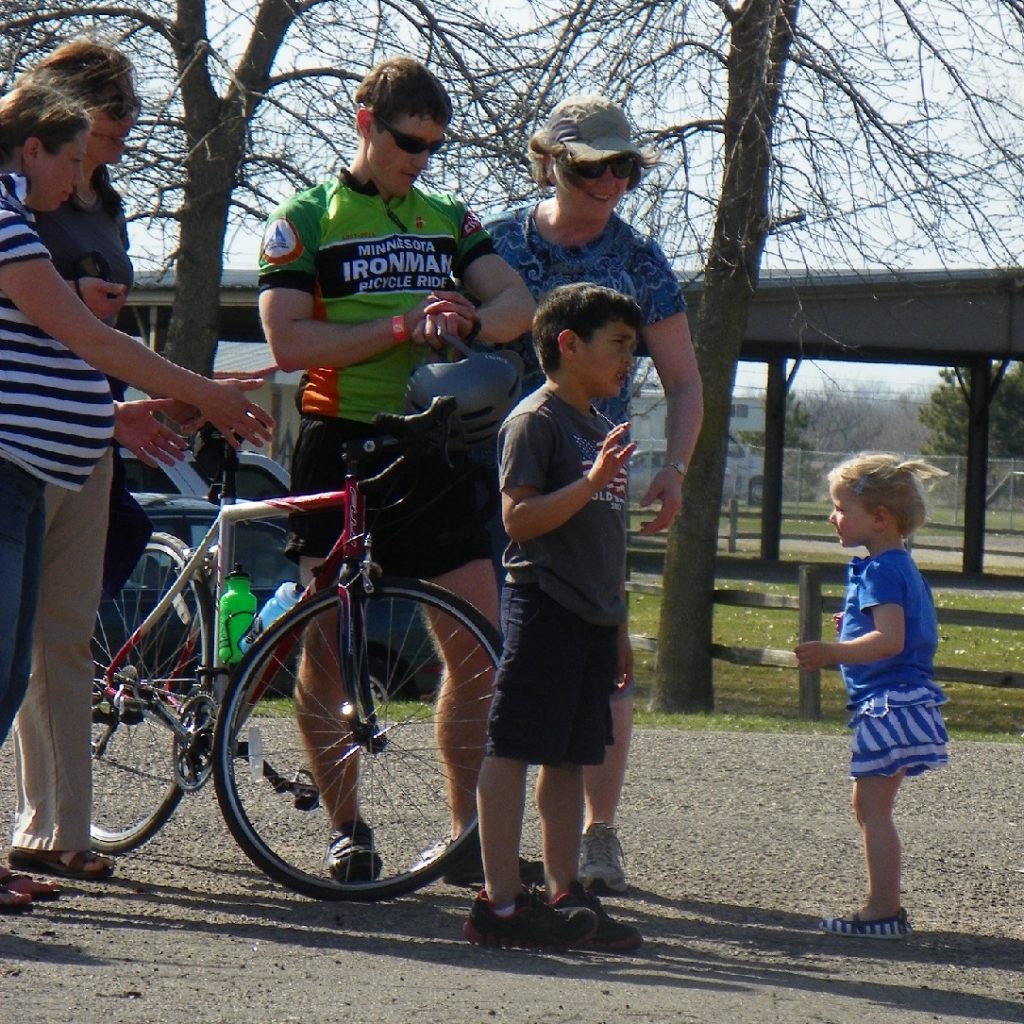
Welcome. We're your premier source for fun places to explore by bicycle or on foot. Offering guides, maps and articles on road and trail riding for the novice to seasoned cyclist - helping you find your #NextBikeAdventure
Thanks to the Bicycle Alliance of Minnesota (Bike MN) recent newsletter. Here are more spring bike/walk events scheduled for May and into the summer that might interest you.
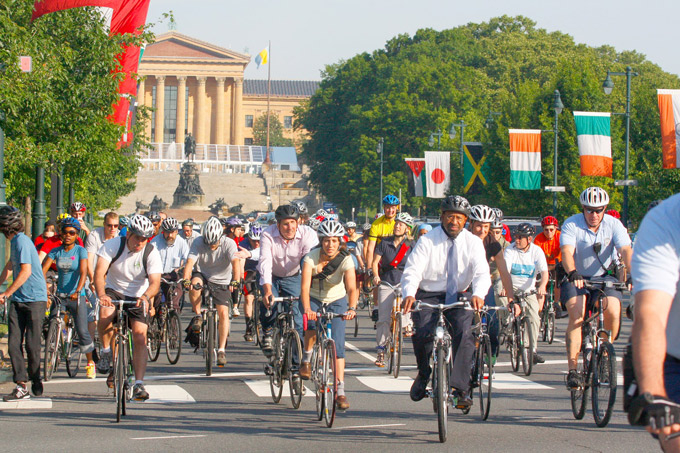
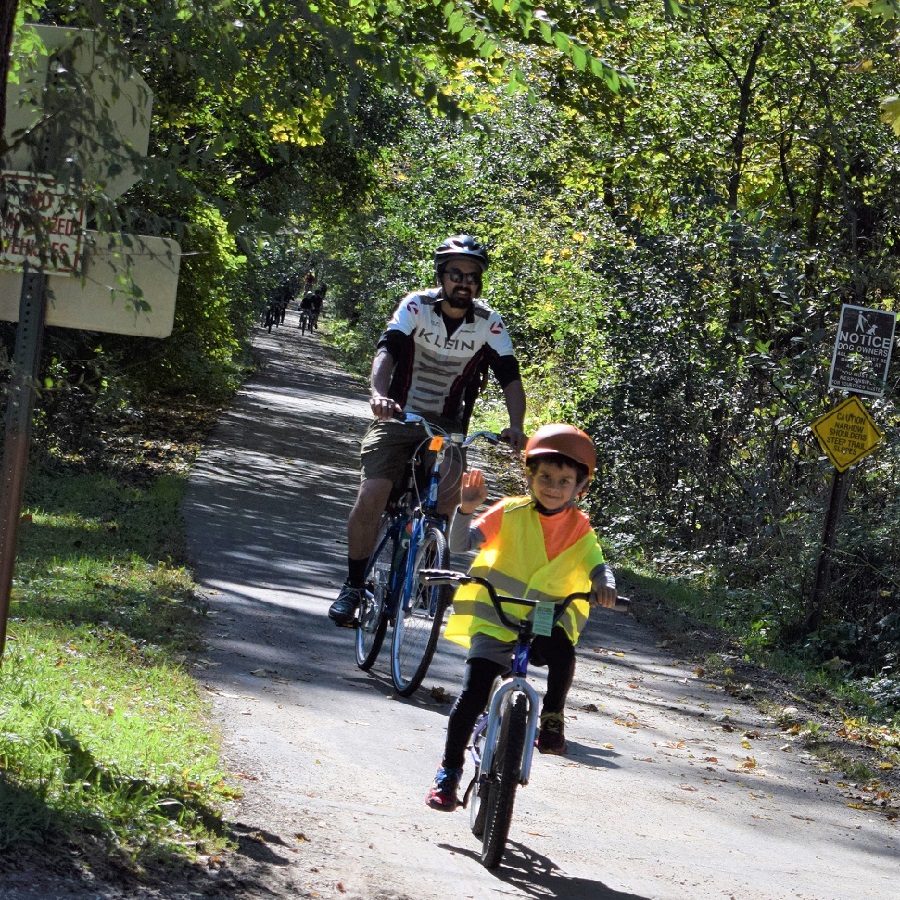
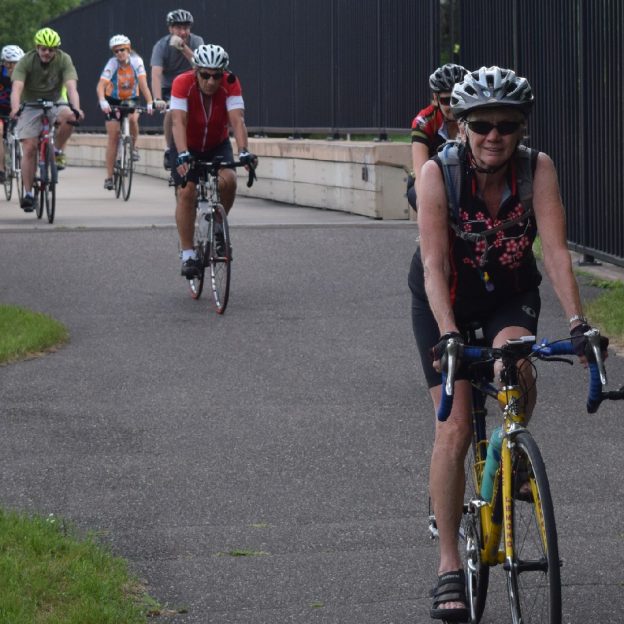
Kick-off Your Riding Season in Edina on May 4th
Join Edina Rotary for their first-ever Edina Rides for Education fundraiser! Fred Richards Park (7640 Parklawn Ave, Edina) check in between 9 AM and 11 AM and ride the family-friendly 5 or 10- mile loop on the beautiful Nine Mile Creek Trail. Early bird pricing through April 22nd. Come support Edina Education Initiatives!
On May 25th, the first annual Med City Meander takes place in Rochester. It is a 32-mile relaxed tour of Minnesota’s third largest city. Click here for BikeMN/We Bike Rochester member discounted registration, or use the button below if you’re not a member yet. Limited to 500 riders! From tree-canopied riverside paths to gentle Driftless bluffs, this carefully curated route will feature convenient rest stops all along the way!
MCM Details & Registration HereCan’t Get Enough 2024 Bike Walk SummitCheck out Streets.mn’s podcast featuring many great advocates across the state.
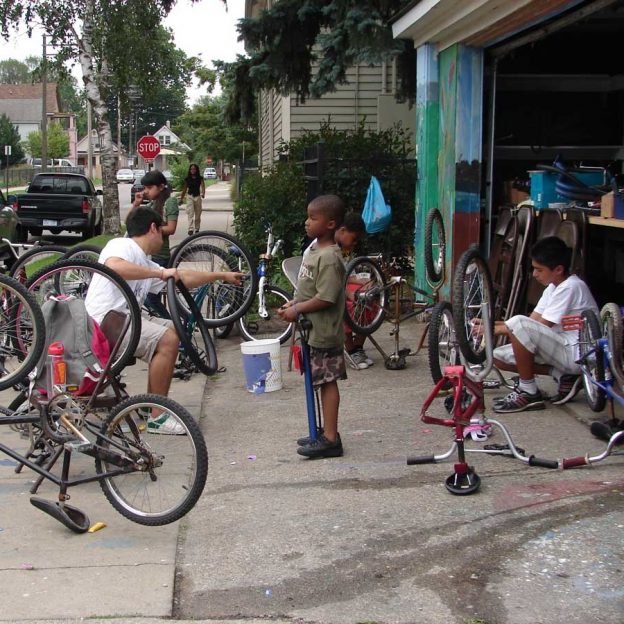
Doing Some Spring Cleaning? Donate that old bike.
We tend to think the best bikes to have are the ones that get ridden. Do you have something gathering dust that you may want to donate? Check out our resource page here for organizations you can donate used bikes to ranging from cities like Mankato, Rochester, the Twin Cities and Duluth. Did we miss any? Email us at [email protected] to get another organization added to the list.
Now You’ve Got More Space for More Bikes!
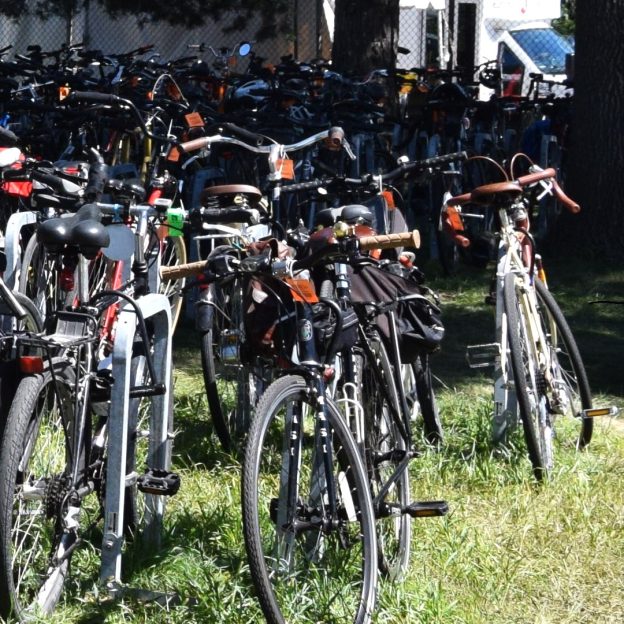
By this time, the Twin Cities Bicycle Club and Biking with Baddies bike swaps will have already occurred, but we’re aware of one more this spring, sure to have plenty of used bikes, parts, and accessories to dig through. Twin Cities Bike Swap May 19 Long Lake Park (a benefit for MN Cycling Center). Pro tip – come prepared as a buyer. Know what wheel and crank sizes you have, axle types and widths, and tire sizes you’re shopping for. Haggling is expected, but be Minnesota Nice!
Tour the Twin Cities with BikeMN this September!
Tour the Twin Cities with BikeMN this September!
Bringing together the great trail networks and organizations that make the Twin Cities a bicycling destination, the Twin Cities Bike Tour has something for everyone. We’ve even got a DJ/Joyful Riders led mass start for the short family-friendly route! Every route has a limited capacity so sign up today! Click here for your BikeMN member discount for the 20 or 46 mile route or use the button below to take advantage of early-bird pricing.
Join “We Bike Rochester” in southeast Minnesota as they celebrate the incredible trail network that meanders around the city with Med City Meander (MCM). For years, “We Bike Rochester” has been working to bring community engagement around biking and walking. MCM has partnered with the Bicycle Alliance of Minnesota (BikeMN) to create an event highlighting local businesses, beautiful natural areas, and outdoor fun in Rochester. Register today and save!
One of many art sculptures to enjoy when riding Rochester’s trails
A new annual tradition coming in May to southeast Minnesota
The Med City bicycle tour starts and ends at Cascade Lake Park on Saturday, May 25, in Rochester, MN. The MCM ride features a signature 32-mile relaxed tour of Rochester’s trail system, highlighting what makes the “Med City” a dynamic and vibrant community. From tree-canopied riverside paths to gentle driftless bluffs, this carefully curated route will feature convenient rest stops along the way! The city offers a vast network of trails and bike lanes. Ride the North and South Trails, along Cascade Creek, Bear Creek, and more! Check out some of the trails on the City of Rochester’s Parks and Recreation Map or the “We Bike Rochester” route library.
All MCM routes are on paved trails
The MCM features a signature relaxed tour of Rochester’s trail system, highlighting what makes Med City a dynamic and vibrant community. You can also do as many laps (2.5 miles) around Cascade Lake as you’d like. Registering is unnecessary if you only want to ride this lake loop. Just show up and have fun.
On the MCM 32-mile route, check-in is from 9 to 10 a.m. All riders should be underway by 10:15 a.m. Rest stops and SAG support services end at 2 p.m. Riders will enjoy food and drink at rest stops along the route. Helmets are required. Protect your melon! Safe cycling to all Meander riders!
All bikes are welcome!
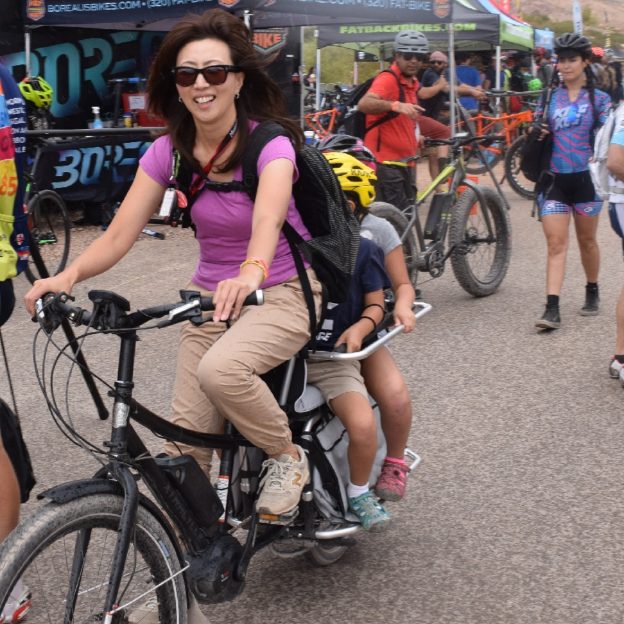
Electric assist bikes, as outlined in the Minnesota definition of e-bikes in Class I, II, or III. All bikes with pedals are welcome to join BikeMN rides. On the ride, no charging stations are provided, so make sure your battery is fully charged and the route you select suits your battery’s range. Analog bicycles, adaptive bikes, tandems, recumbents, tricycles, cargo bikes, burley-style kid trailers, and even well-behaved (and leashed) pets are welcome!
You are also encouraged to familiarize yourself with your bicycle before the ride and feel comfortable riding with larger groups.
Where to stay when visiting Rochester
Are you visiting Southeast Minnesota, and exploring more of the fun trail system here? Check out the lodging suggestions here at Experience Rochester.
About the Bicycle Alliance of Minnesota (BikeMN)
BikeMN is working to make Minnesota a state where bicycling is safe, easy, fun, and cool for everyone. The mission of BikeMN is to provide leadership and a unified voice for bicycle education, advocacy, and efforts to make Minnesota more bicycle-friendly so that more people will ride bicycles more often. See more at www.bikemn.org.
About “We Bike Rochester” Bike and Walk Advocates (WBR)
We Bike Rochester is a non-profit 501(c)3 and a chapter of the Bicycle Alliance of Minnesota. WBR encourages individuals and families to walk and bike as part of a healthy lifestyle. “We Bike Rochester” works with city, county, and state governments, businesses, and non-governmental organizations to improve the community’s infrastructure. To add new opportunities for walking and biking. This new ride is new, and profits from the Med City Meander will go to improve signage, outdoor kiosks, mountain bike trail construction, and other improvements in the Rochester area.
Mistakes are something humans can’t escape, but nobody is perfect. That said, we can try to eliminate some of the simple errors we may make without ever realizing we are proceeding down the wrong path. Consider taking a look below at some of the most common and damaging cycling mistakes made by newbies and seasoned riders alike.
Cycling Mistakes #1 – Wear your helmet only when you think it’s needed
Many riders make the mistake of thinking “I don’t need to wear a helmet, I’m only going around the block with the kids”. This mentality is often responsible for catastrophes. The truth is you never know when an accident can happen, so you should always be prepared. For example, the worst crash I have ever had was riding from a campsite, down a straight gravel path to the washroom. Before I knew it, I was smack dab on the ground faster than I could get my hands up to catch myself. The moral of the story Is to wear your helmet whenever you ride your bike.
Helmets are always in style
#2 – Believing you have plenty of air in the tires without checking
Frequently, I see riders headed down the trail with tires so low you can hear the rim bouncing off the ground with each pedal stroke. Low tire pressure can lead to pinch flats and, more importantly, loss of control. The innertube that holds the air in your tire is naturally porous and loses air naturally over time. In fact, a tube can lose between 3-5 PSI a day. At its extreme, your tire could go from full pressure to less than half pressure in the span of one week. Be sure to protect your ride by checking tire pressure before each ride.
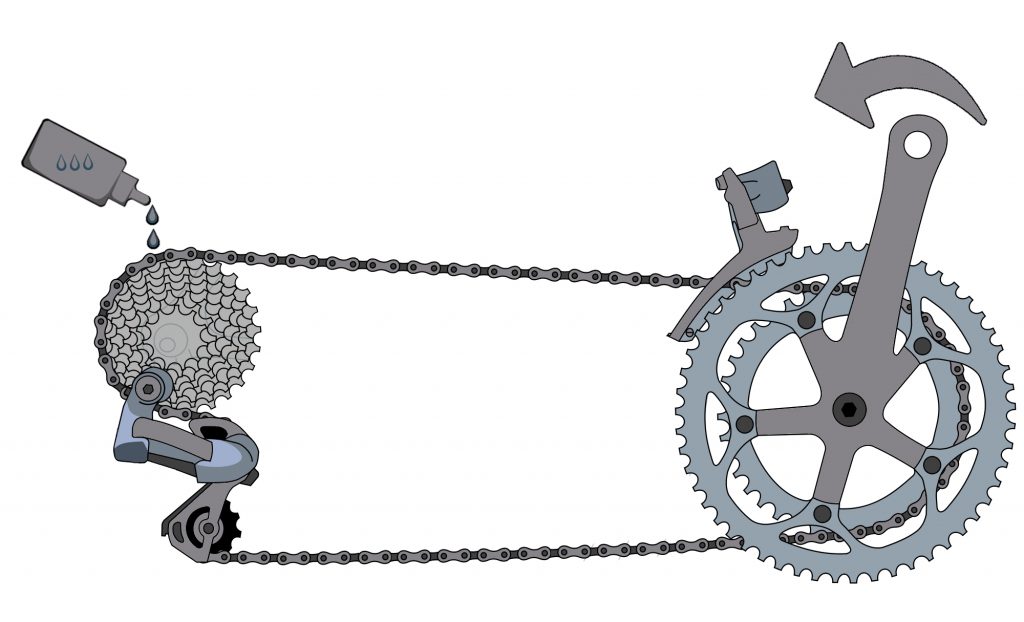
#3 – Lube the Chain After Every Ride
Believe it or not, an over-lubed chain is more damaging than an under-lubed chain. While I do not recommend riding around with a dry chain, knowing when to lube is essential. Having a ton of lube on your chain will not better protect it. In fact, too much lube will attract dirt and debris, creating a harsh slurry that covers and wears your drivetrain. The best way to lubricate your chain is to apply lube to the chain, allowing it to soak in for a minute, and then use a rag to wipe off as much excess as possible. When done, the chain should feel almost dry to the touch.
The right amount of lube is a great thing
#4 – Use the water hose to clean your bike
After a dusty or wet ride, many riders reach for the hose to spray dirt off the bike. Sadly, while the bike may look clean, it will be in worse shape than if it hadn’t been cleaned at all. Pressured water from a hose can displace grease and leave nothing behind. Now, with no grease, the bike wears out at an accelerated rate. Instead of using a hose, try a warm bucket of soapy water and a big sponge.
#5 – Bring water along only on some rides
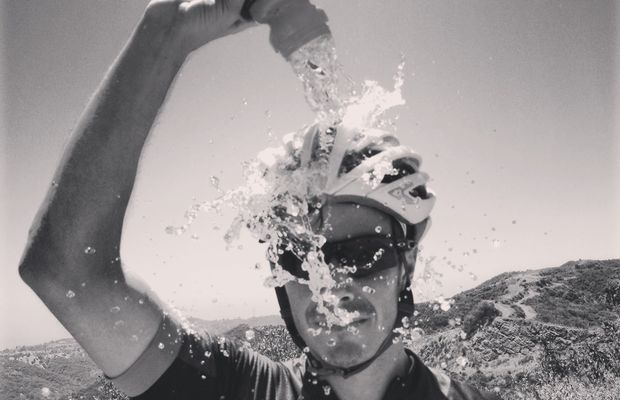
Many times, riders will assume that because the weather is cool or a ride is short, they don’t need to bring water with them. Truth be told, the biggest drain on your energy while riding can be related to dehydration. Stay hydrated by bringing water or a sports drink along on all rides.
Yay, Water!
#6 – Assume cycling shoes are only good for clipless pedals
If you don’t want to ride clipless pedals, I get that. There are many reasons clipless pedals are great, but at least as many reasons why they aren’t suitable for everybody. What you can do is use a cycling-specific shoe with your flat pedals. A cycling shoe has a stiff sole and additional arch support to disperse pedaling forces over the entire length of your foot. Therefore, you have more efficiency and less discomfort.
Mistakes in general
Overall, thinking about what you are doing before you ride your bike is a good idea. Make sure your bike is ready for the ride, be equipped to take care of yourself during the ride, and be prepared to reach out for help if needed. Once you go through that mental exercise, you will see the common cycling mistakes melt away. Have Fun!
About John Brown, the author
John operates Browns Bicycle in Richfield, MN as a lifelong cyclist and consummate tinkerer. It all started for him in grade school when the bike bug bit, and the fever still existed. Now, and over the past thirty years, he has worked at every level in the bike industry. He is starting, like most, sweeping floors and learning anything he can about bikes. He eventually graduated as a service manager and then as a store manager. Through the years, he has spent extensive time designing and sourcing bicycles and parts for some of the largest bike companies in the world. All the while focusing on helping as many people as possible enjoy the love of riding a bike. In that pursuit, he has taught classes (both scheduled and impromptu) on all things bikes. John also believes in helping every rider attain their optimal fit on the cycle of their dreams. Please feel free to stop in any time and talk about bikes, fit, and parts, or share your latest ride. You can also see John’s tricks and tips on the Brown Bicycle Facebook Page.
Since 1967, the Minnesota Ironman Bike Ride has challenged bicyclists around the upper Midwest yearly. Today, Free Bikes 4 Kidz (FB4K’z), the event’s benefactors, keeps everything cyclists love about Minnesota’s longest-running bike ride, fun. This year they are giving it a new name, a new look, and another new location and routes to the ride. The new name, Freebike, represents the future of the ride and your support of Free Bikes 4 Kidz MN (FB4K’z).
The Freebike Ride is family-friendly
Join FB4K’z as the MN Ironman Bike Ride evolves
Mark your calendar and register today for the FB4Ks 2024 ride and post-party as they roll out their new ride event. It will be a celebration worthy of this exciting milestone in our history.
Mark your calendar for June 1st for a day of fun
The ride will start this year at the Minnesota Twins Stadium (Target Field) and finish at Fulton Brewery in Minneapolis. Why the big change to the ride route?
Jay, from FB4K’z, tells us at HaveFunBiking the reasons. “First, the emergence of two great new event partners – The Minnesota Twins Foundation and Fulton Brewing. Second, and perhaps more importantly, riders will enjoy smoother pavement, wider shoulders, and better bike infrastructure to make their time on the bike as enjoyable as possible. Plus, our post-ride block party at the Fulton Taproom means riders will have a few extra hours. Rather than in past years, the rush to finish up the ride and make it back in time to celebrate before the party wraps up.”
All styles of cycles are welcome on the Freebike Ride
Three routes to test yourself and help the kids
On this year’s ride, choose from three epic routes (25, 50, and 100 miles), while supporting the mission of Free Bikes 4 Kidz MN.
Come out and join a community of riders, meet new friends to ride with, and stay for the block party at the end. Your registration fee will go to a great cause: providing free bikes for kids in need. You don’t want to miss it!
New for this year, entry fees are waived for all riders under 18 on all three ride lengths! Sign up at BikeReg in one of the youth entries categories, have an adult sign the electronic waiver, and join us on the road.
Donate to Free Bikes 4 Kidz MN so more children can ride
It only takes $35 to refurbish a bike and your donation, in any amount, helps bring free bikes to needy kids. In 2023, with the help of all the fabulous FB4K’z volunteers, over 90,000 bikes given away since 2008.
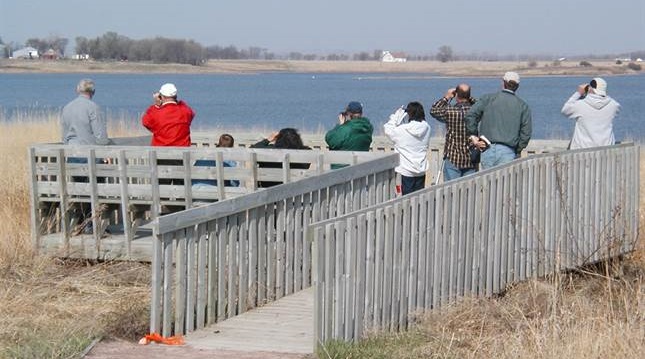
With temperature predicted to return into the 60’s, you will find the 46th Annual Salt Lake Birding Weekend on April 27th. Located in Western Minnesota, you will find this event is bike-friendly, and the perfect way to explore the bird haunts. Consider packing up the bikes and family for a spring birding weekend in the Prairie Waters Region area for fun activities. With many birding haunts on local gravel roads, both fat and gravel-tire bikes work well to quietly approach and view the many species of birds returning to the area.
Bird watchers, looking out at several species of waterfowl on Salt Lake.
More on the Salt Lake Birding weekend
Volunteers are available to guide birders around Lac qui Parle and southern Big Stone counties over the weekend. Perfect bird viewing spots are around Salt Lake, in Big Stone Refuge, and many other lakes, wetlands, and native prairie areas. The event is free and open to all interested people – plus, no pre-registration is needed.
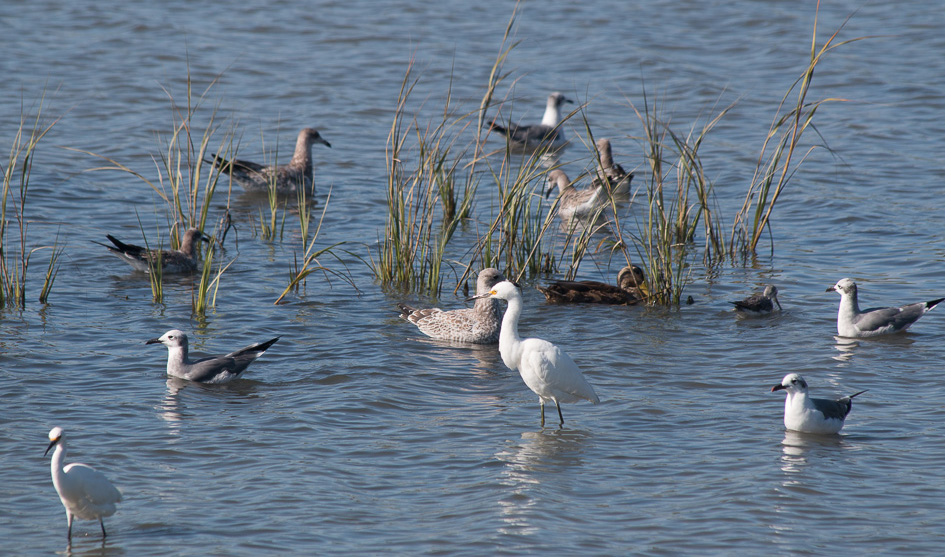
Each year birders will see many species of waterfowl, including Common Goldeneye and American Black Ducks. Also been spotted in past years. were Snowy and Cattle Egrets and White-faced Ibis. A number of birders located Bald Eagles and Great-horned Owls on nests in the area. Plus, birds usually found later in the year, including Black Tern, Least Flycatcher, and Black and White Warbler. The most unusual find was a Say’s Phoebe, the first time it’s been found by Salt Lake Birders here in Minnesota. Last year, over 90 birders found 143 different species of birds over the weekend. Check out this photo gallery of some of the birds you may see.
A number of species of waterfowl are out in front of the viewing platform, feeding.
It all happens on Saturday, April 29, with breakfast, at 7 a.m. at the Marietta American Legion. Located one block west of the intersection of County Road 7 and State Highway 40 (11 miles west of Madison).
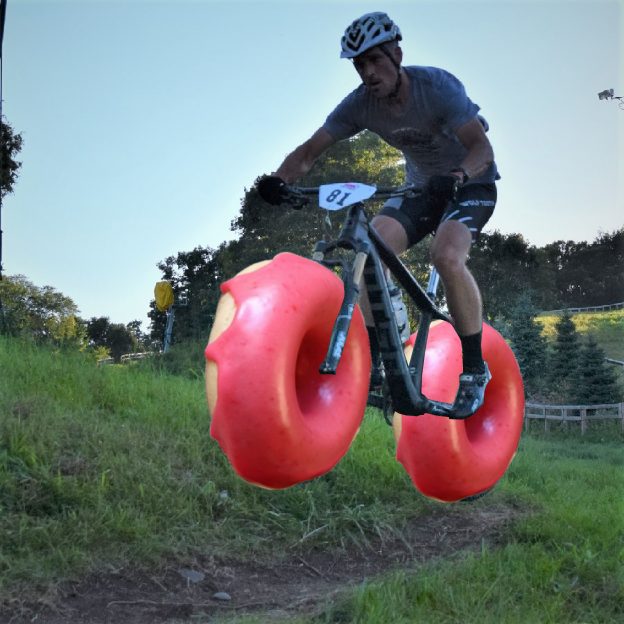
Recently I spent some time in the cradle of liberty, Philadelphia. While there, I enjoyed a few rides, but the most enjoyable one was the Trek of Philadelphia’s Doughnut Ride. I was reminded of the joys of simple rides and good company, rather than difficult efforts and a competitive pace. Now, with 30 days of Biking a few weeks away, here is a fun idea you may want to consider with friends, as warmer weather moves our way soon.
The Doughnut Ride of Philly
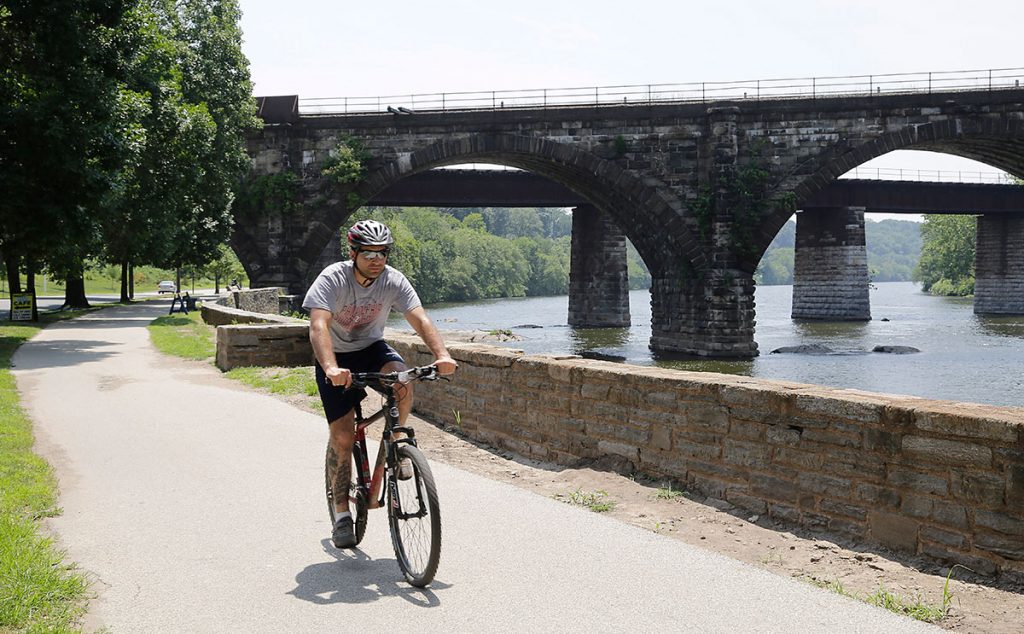
We left the shop with a group of eight. Our bikes were a mishmash of road bikes, commuter rigs, single-speed, and an e-bike. When we departed the shop and headed toward the center city, it was immediately clear the pace would be conversational. Our cruise headed out on the river drive bike path, through Fairmount Park, and toward the center city. Rather than stay on the path, we crossed the Falls Bridge onto West River Drive. On the weekends, Philadelphia closes West River Drive so we had our run of the entire roadway. After a bit of riding and a lot of talking, we found ourselves at the end of West River Drive and at the base of the Art Museum.
At the Art Museum, our ride began to slip through the surrounding neighborhoods until we reached our hallowed destination – Federal Doughnuts.
We hopped back on our bikes after stuffing our faces with warm doughnuts. Full of sugar and fat, we returned to the bike shop along the same route. Ultimately, the ride took under two hours, including the time spent eating. Everyone had fun, the conversation was great, and we all got the chance to meet new people.
Why does this ride work?
The ride was great because the pace and route were clearly stated in advance. Therefore, everyone knew what to expect and where to go. The route itself was carefully chosen to promote great conversation and a casual pace. Every rider could enjoy the trip stress-free by including traffic-free paths and streets and a casual destination. Additionally, the pace is controlled by the ride’s start time. For example, a competitive-minded rider has a list of fast-paced rides leaving on Saturday morning, so there would be no need to come to the Doughnut Ride to try and get a killer workout with so many other options. From start to finish, this ride is a winner.
How to plan your ride
If you already lead rides for a local club or shop, setting up a casual ride should be easy. If this is your first attempt at leading an organized ride, then there are a few things to remember. First off, you want people to be at your ride! To ensure you have attendees, start talking about and advertising (if you’re working with a local club or shop) at least two weeks in advance. Also, ensure all your information explains the pace and payoff (in this case, doughnuts) for your ride to build interest. Finally, make sure your route is friendly to a group of riders. For example, I’ve been on a few rides requiring riders to be single-file almost the entire time due to narrow roadways. in contrast, the Doughnut ride promoted conversation with wide paths and clear roads.
According to Paul T. at Perennial Cycle, Minneapolis does a great job with these types of rides and has a lot of them. Watch for the upcoming events there this season.
About John Brown, the author
John operates Browns Bicycle in Richfield, MN as a lifelong cyclist and consummate tinkerer. It all started for him in grade school when the bike bug bit, and the fever still existed. Now, and over the past thirty years, he has worked at every level in the bike industry. Starting, like most, sweeping floors and learning anything he could about bikes. He eventually graduated as a service manager and then as a store manager. Through the years, he has spent extensive time designing and sourcing bicycles and parts for some of the largest bike companies in the world. All the while focusing on helping as many people as possible enjoy the love of riding a bike. In that pursuit, he has taught classes (both scheduled and impromptu) on all things bikes. John also believes in helping every rider attain their optimal fit on the bike of their dreams. Please feel free to stop in any time and talk about bikes, fit, and parts, or just share your latest ride. You can also see more of John’s tricks and tips on the Brown Bicycle Facebook Page.
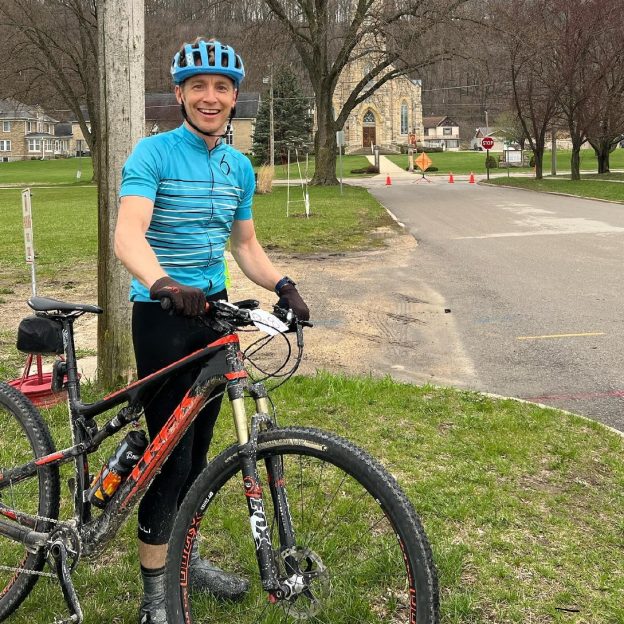
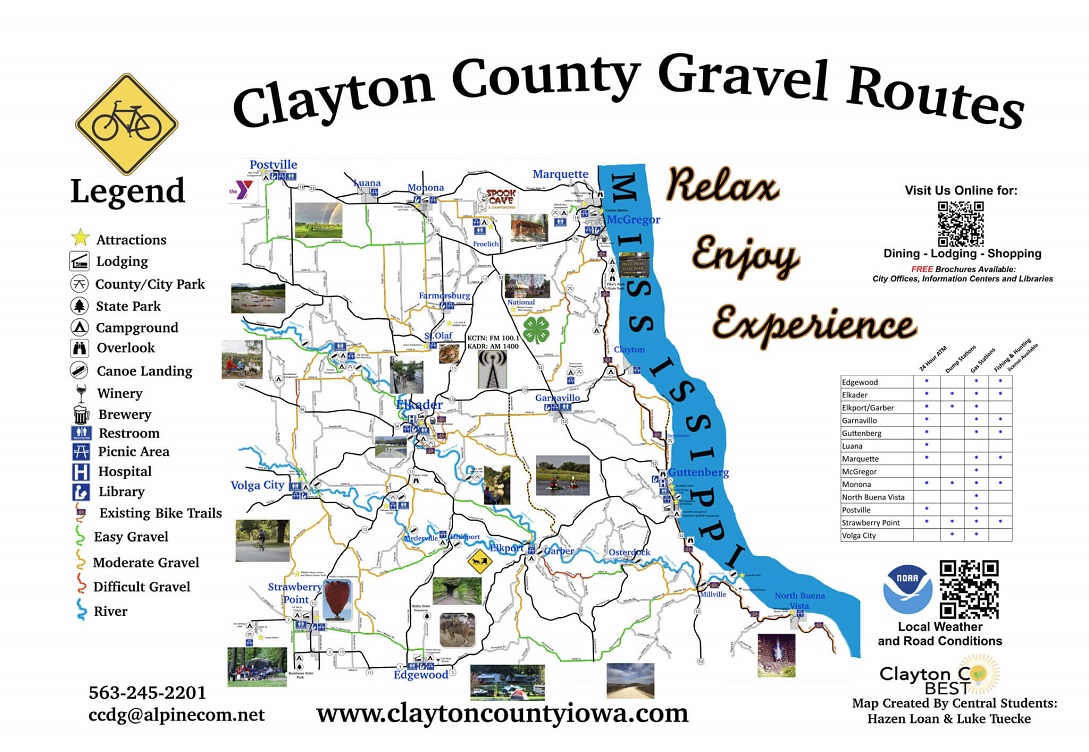
The Driftless 100 Ride Gravel Race is a hilly road race (mainly gravel) through Clayton County. And yes, this race is in Iowa, if your bike knows no borders. A short distance from the Minnesota border, you will find beautiful landscapes in one of Iowa’s best-kept secret places. If you are ready to get some training miles in, this gravel race is on Saturday, April 27th. The perfect way to kick off spring. Here, you will find over 10,000 feet of climbing on the 100, 50, and 25-mile race course.
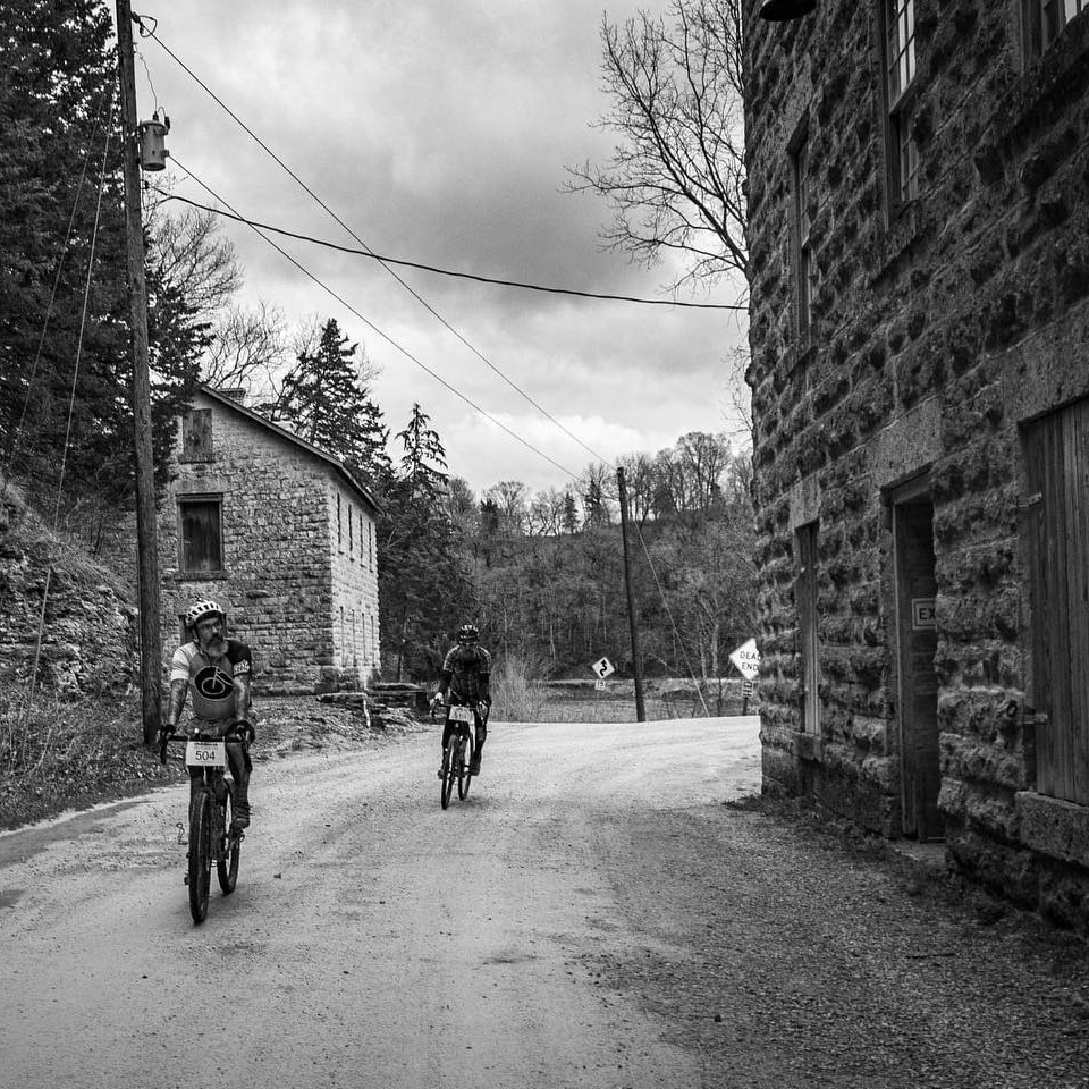
A scenic course through history.
The race is designed to showcase the Driftless region of the state. Where even the savviest gravel rider will find new heights. Over 90% of the race is on limestone gravel, with about 5% on pavement and 5% on level b/c roads.
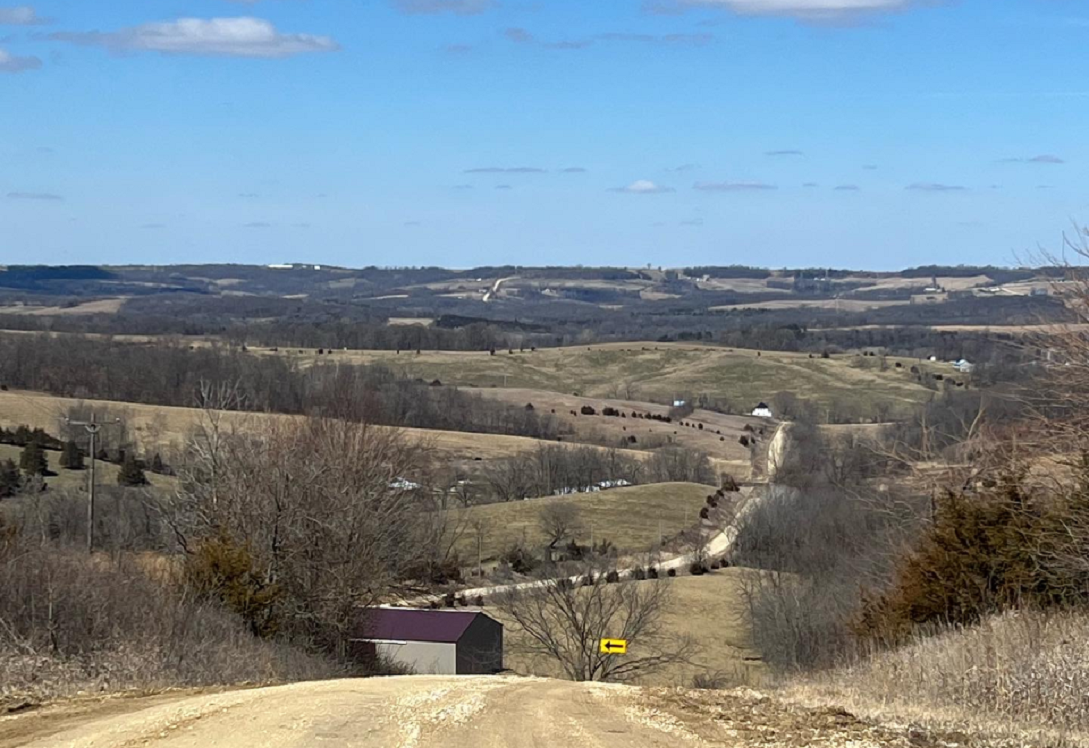
Gorgeous views as you climb the hills.
It is not designed to be a mud fest, but it is April, and the current forecast suggests the race may become sloppy. With course options ranging from 100 miles to 25 miles, the race will test your skills. Making it a perfect event to train for this coming season of rides and races.
The Driftless Branding Iron awaits your completion.
An added carrot for those who finish the 100-mile course in under 7 hours. They will be awarded a Driftless branding Iron for finishing. You do have to follow the official course and receive aid only at the aid stations to earn this award.
Can’t make it, ride gravel routes throughout the year
If you can’t make it to the Driftless 100 on April 27th and want to experience Clayton County’s scenic gravel roads. Here is a Gravel Touring Map to help you plan your next adventure. It also shows stops for local breweries, coffee shops, or wineries. Or, check out their events and entertainment before grabbing a bite at one of the county’s fine restaurants and cafés.
While visiting, you can also expand your knowledge of local history at a museum or browse the fine art galleries. Various retail shops and boutiques make visiting a family affair.
Visit Clayton County! Here, you can enjoy gorgeous views and much more while biking and hiking along the Mississippi River bluff.
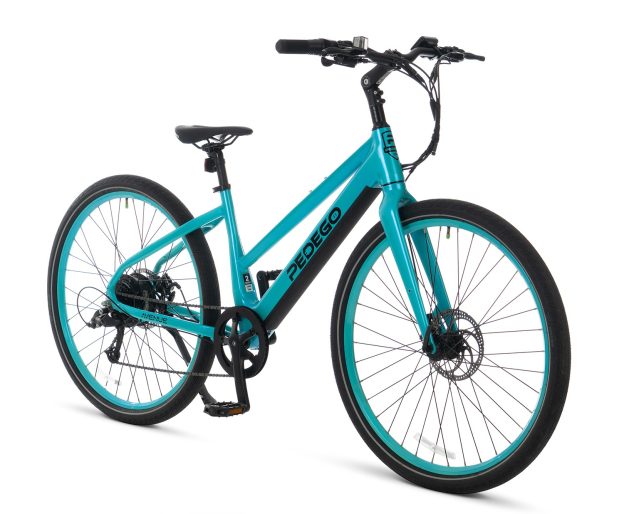
If you haven’t already, register today for a chance to win the all-new Avenue Electric Bike by Pedego. Just click here, for the HaveFunBiking e-bike contest!
When you register to win, you also receive a complimentary e-subscription to the HaveFunBiking blog. Featuring links to bike-friendly maps and tips off fun bike destinations to explore. Looking for new outdoor adventure locations or staying informed on what’s new for bicycle-related products and gadgets? We will keep you posted.
That’s it – Good luck, and share this contest for the Avenue E-bike with your friends!
About the e-bike contest and the Avenue Electric Bike
The Avenue is perfect for commuting and a beautifully designed electric bike ready for your next adventure. The Avenue empowers you to go farther and faster. The state-of-the-art watt motor achieves an ideal balance between power and efficiency. Offering a step-thru frame for easy mounting and dismounting. Powerful 500W 48V power system with a fully integrated battery.
Everyone’s favorite bike media is giving away an e-bike
Managed by Constant Contact, the HaveFunBiking (HFB) e-database is a news media source sharing outdoor activities, mainly centered around Minnesota destinations. Since 2003, we have kept our promise never to sell or share our email list, which still holds. Plus, you won’t be called or contacted for any sales appointments. And you can always opt-out at any time.
The fine print
Deadline to enter: 11:59:59 PM PT, September 15, 2024 Sweepstakes drawing date: September 16, 2024 Selection Process: The Grand Prize winner will be selected using a computer-generated program to ensure that each drawing is conducted entirely at random. We will notify the winner via email and phone. The selected winner will have 24 hours to respond before a new winner is again chosen randomly. Number of winners: 1 Eligibility: You must be 18 years old or older to win. Approximate Retail Value: $2,499 USD
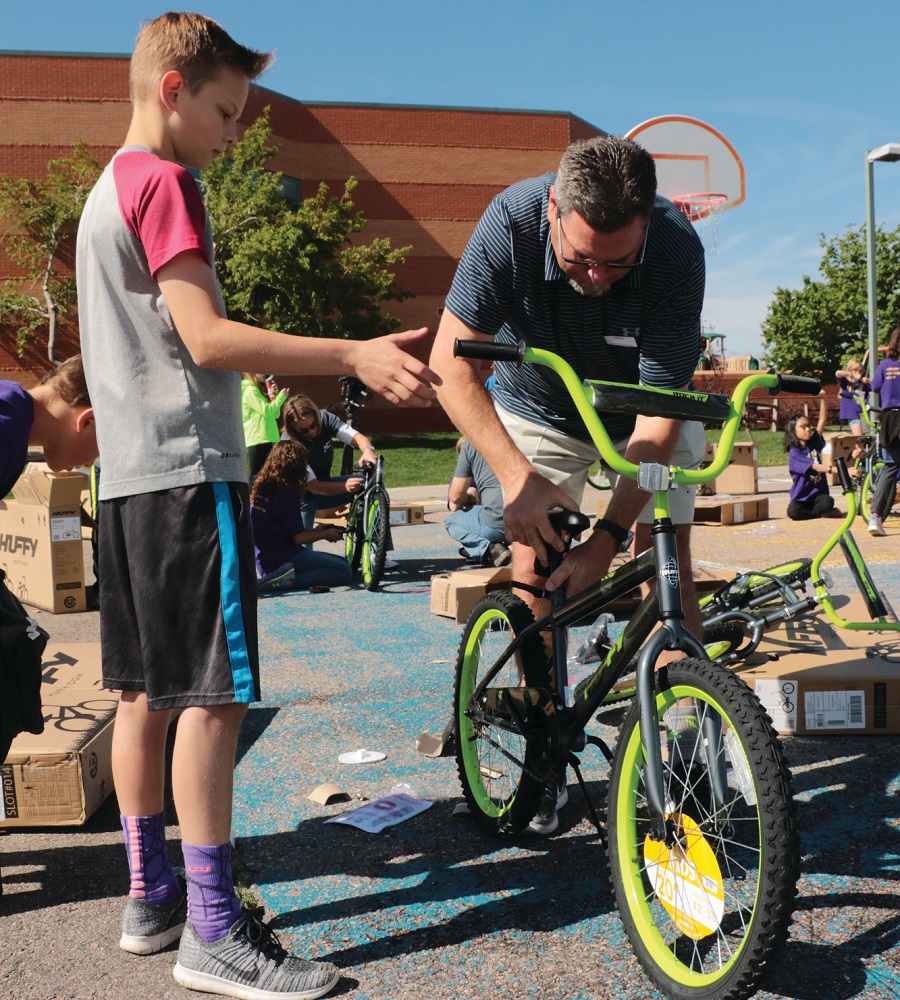
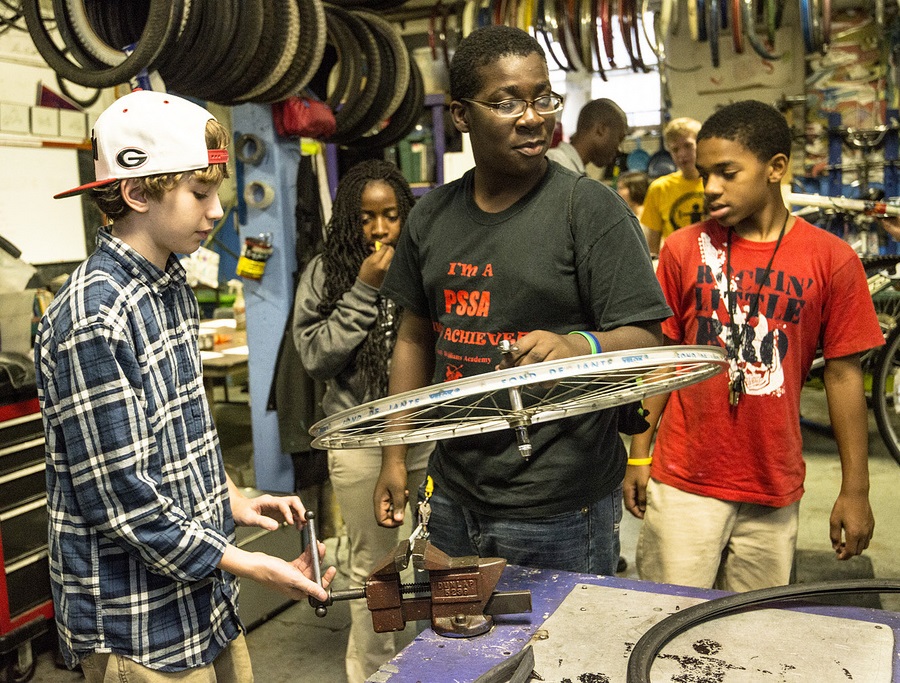
As a parent and tinkerer, one of the most fun activities I share with my two boys is teaching them how bicycle maintenance works. Now that my older son is riding more and helping me review a bike for HaveFunBiking, the time has come to teach him how a bike works. Almost everybody gets the basics, but after 20 years working in shops, I want to give as much of my experience to him as possible. Take a look at my plan for teaching my son bicycle maintenance.
Here this father-son team assembles a new bike for a school program.
Safety first in bicycle maintenance
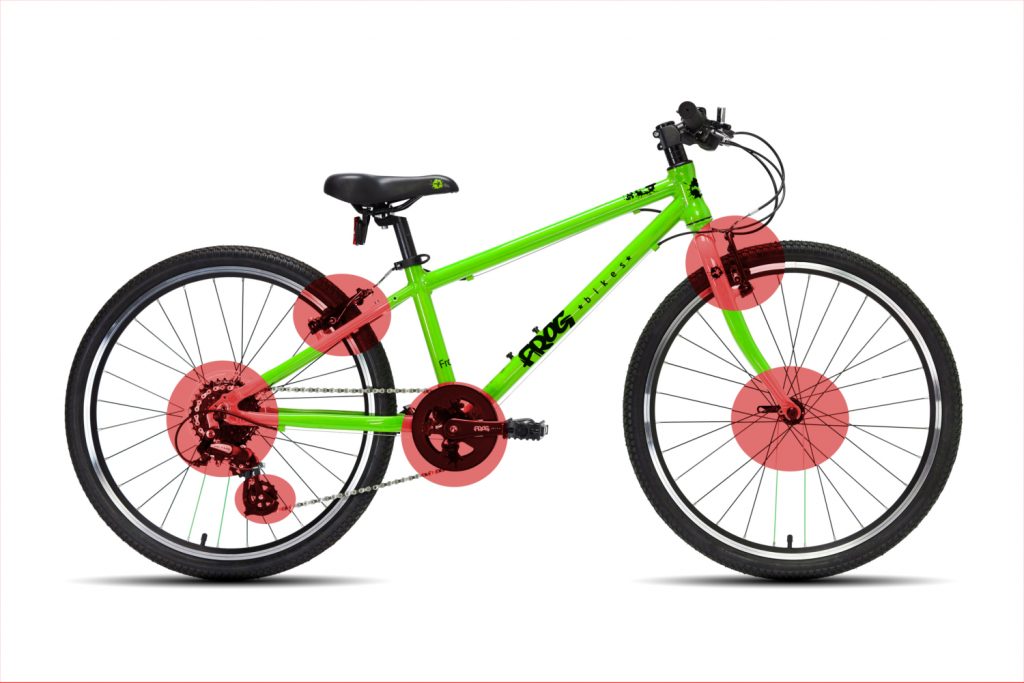
Like wearing a helmet when riding a bike, working on a bike also has safety gear. Eye protection is a must. With safety glasses on, the next step is to show your child the danger zones on a bike. Spinning wheels, spinning brake rotors, along with crank, chain, and cogs, are all dangerous to little fingers. Teach your children to avoid those areas when the bike is moving. On that subject, it is also essential for kids to wear snugly fitting clothing. Loose clothing can get caught in moving parts.
Caution areas are highlighted in red. These are the places fingers can get pinched.
Tools of the trade-in bicycle maintenance
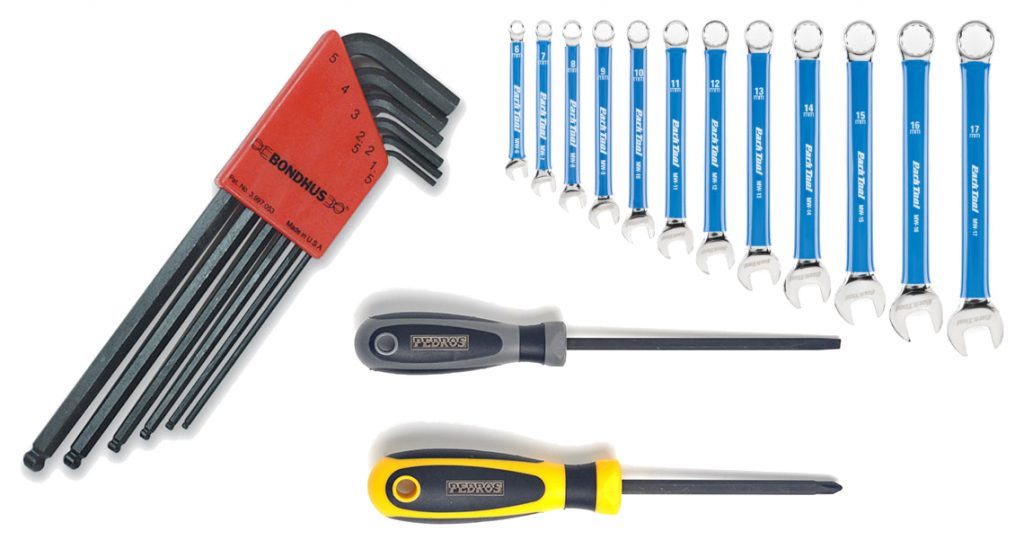
The next step is to teach your kid the tools and how to use them. The main tools used on bikes are metric hex wrenches, screwdrivers, and metric box wrenches. First, show your child how to hold each tool for best leverage and what part of the tool engages with the bike. Then, show them where each tool fits on the bike before beginning the fix.
Professional bike mechanics use hex wrenches, box wrenches, and screwdrivers.
Having fun with bicycle maintenance
Now that the safety and instruction portions are over, making the process fun! Your kid is likely dying to get their hands (and wrenches) on the bike as quickly as possible, so let them have at it. Considering you already gave them the safety and function basics, their bike exploration will be safe and enlightening. Once they play a little, ask your kid to teach you how the bike works! Have them exercise their brain and logic by explaining how the bike functions.
Teaching a little at a time
It’s easy for parents to get overzealous when teaching. If you are mechanically inclined, sharing that gift with your kids can be exciting, but try not to overwhelm them. Feel comfortable stopping the lesson when they lose interest. I like to start teaching with the rear brake (assuming it is a rim brake). The rear brake usually needs adjustment and is a rather simple example of how the rest of the bike functions. Once the rear brake is dialed and your kid is comfortable with the process, have them adjust the front brake.
Next, I start teaching about how to adjust the shifting system. Hopefully, you and your child had a good conversation when they “taught” you how the shifting worked because that conversation is an excellent baseline for teaching how to adjust the shifting. Because of the barrel adjuster on the rear derailleur, start with the rear shifting first. Once they get the hang of that, move to the front derailleur.
After the bike functions properly, teach your kids to adjust the seat, bars, and controls. You may ask why I would recommend the simple adjustments last. The simple answer is that these adjustments require the most leverage and are best saved once your child practices using the tools.
Test ride
Once your child completes the adjustments, it’s time to take a test ride. Have your kid test ride in a supervised area away from traffic (like a driveway). Once the test ride is complete, make any additional adjustments, and be sure all the hardware is tight.
Test rides are fun!
Learn through mistakes
Most of the fun of learning to work on bikes (or anything for that matter) is the process. Nobody gets it right on the first try, and we all learn from our mistakes. Mistakes are more valuable than successes. So the most important part of teaching your kids to work on bikes is to let them make mistakes and be a resource for the solutions if needed.
About John Brown, the author
As a lifelong cyclist and consummate tinkerer, John operates Browns Bicycle in Richfield, MN. It all started for him in grade school when the bike bug bit and that fever is still there. Now, and over the past thirty years, he has worked at every level in the bike industry. Starting, like most, sweeping floors and learning anything he could about bikes. He eventually graduated as a service manager and then to a store manager. Through the years, he has spent extensive time designing and sourcing bicycles and parts for some of the largest bike companies in the world. All the while focusing on helping as many people as possible enjoy the love of riding a bike. In that pursuit, he has taught classes (both scheduled and impromptu) on all things bikes. John also believes in helping every rider attain their optimal fit on the bike of their dreams. Please feel free to stop in any time and talk about bikes, fit, and parts or share your latest ride. You can also see John’s tricks and tips on the Brown Bicycle Facebook Page.
Bikes in general, are stolen often, but for a thief in today’s crazy world, an electric bike is the crown jewel. With e-bikes, normally a larger investment here are some bicycle theft prevention ideas to consider. To protect your bicycle investment, consider using a combination of a U-lock, or cable lock, along with a GPS-tracking air tag. You could also take the bike inside a building with you or use a mobile bike storage locker for storing your bike. Using a combination of the above locks will deter a thief. And with a GPS tracking device attached will help you retrieve your bike if it is stolen.
Types of bicycle theft prevention
Not all situations require the same level of security. Also, there isn’t a lock in existence that a motivated person can’t get open. Therefore, there are many different types of locks for different situations. Picking the right lock should dissuade a potential thief from even trying to take your bike.
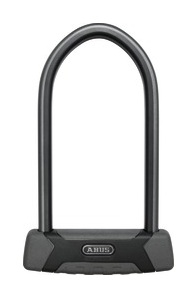
U-Lock
U-locks are a good bicycle theft prevention tool.
The most reliable bike locks are U-locks. They consist of a steel bar bent in a ‘U’ shape that fits into a straight locking mechanism. These locks are also resistant to bolt cutters and hacksaws, and a potential thief would need a lot of uninterrupted time and powerful tools to get through one. Many U-locks offer an insurance program where the lock manufacturer will pay you to replace your bike if it is stolen. All you have to do is register your bike.
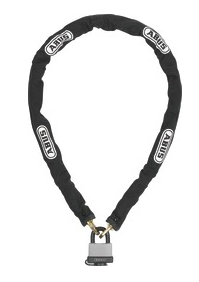
Chains
Chain locks are also popular. While some chains can be cut with bolt cutters, some versions rival the strongest U-locks in durability. Chains use hardened steel links and padlocks to keep your bike secure and offer much flexibility in what you can lock your bike to. Look for versions that have some better covering over the chain (either rubber or fabric), because it goes a long way in protecting the finish of your bicycle.
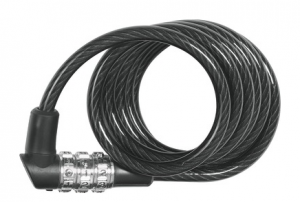
Cables
The least secure lock is a cable lock. Cable locks use steel cables with a built-in key or combination mechanisms to secure your bike. These locks are great for stopping someone from grabbing your bike and running off with it. But if a thief is prepared and motivated, they can cut through these locks in a few seconds. However, cables do offer the greatest flexibility in what you can lock your bike to.
GPS air tag devices and alarms
In combination with a bike lock, an external bike alarm system with GPS tracking capabilities is another option. For less than $60, the Apple Airtag, and Knog scout alarm and tracker are a coule options. And easy to mount under the bike saddle, or other places on the frame,
There are a lot of pros and cons to these devices, But for the price, I say it’s just an extra chance for recovery. Intalled inconspicuously, these tracking/internal bicycle alarm systems combine with a bicycle lock adds to the chance you are going to get your bicycle back if stolen.
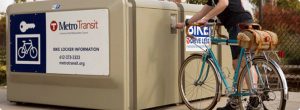
Secure indoor bike storage options
First and foremost, secure indoor storage is best! Especially in an area that stays above freezing, if you have an e-bike to protect its battery. If any of your bikes will be stored in a public area of your building, please use one of the bike lock systems above.
Safe, weatherproof storage lockers are like a garage for your bike.
Bike lockers are another bicycle theft prevention option and are available at many municipalities’ Park & Ride lots, near bus stops, and other community locations. Check your city’s website for a location near you. In Minneapolis, see info on Metro Transits bike lockers,
How to Lock
Location, Location, Location
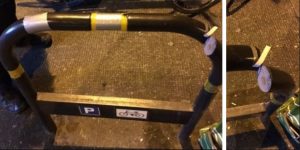
First and foremost: Lock your bike in a secure location. The ideal location is in plain sight with a lot of traffic. The more conspicuous a thief needs to be stealing your bike, the lower the chance is of them trying to take it. And always remember to lock your bike to something secure. For example, a parking meter might look secure, but if an industrious thief has removed the hardware that secures the meter to the post, they can quickly slide your bicycle and lock up the post and be on their way. So search for immovable objects like a bike rack that’s bolted to the ground.
This bike rack was cut and taped back together by a bike thief. Be sure what you lock to is secure.
Protect Your Bike Parts
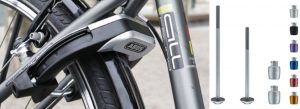
Bikes are built with quick-release wheels and seats. It’s fine to lock the frame, but a thief might just take a front or rear wheel if available. If you use a cable or chain, lace it through both wheels, the frame, and whatever you’re locking the bike to. If you’re using a U-lock, then remove the front wheel and place it next to the rear wheel. Then capture both wheels and the frame when you lock it up. Many manufacturers make component-specific locks that secure your wheels or seat to the bicycle frame.
Frame locks and locks that replace your wheel’s quick-release levers are common on commuter bicycles
If you follow these tips, then you’ll be on your way to making sure your bike isn’t stolen, and it’ll be one less thing for you to worry about.
If it is stolen, a GPS tracking device may help you get your bike back
Even with the best security measures, nothing is 100% theft-proof. With thefts unfortunately a sad reality of bicycle ownership, a tracker could help provide some peace of mind – and the means to find your bike – should the worst happen. Bicycle trackers are an emerging technology that allows riders to locate their bike, usually through a dedicated app. following a GPS chip.
About John Brown, the author
As a lifelong cyclist and consummate tinkerer, John operates Browns Bicycle in Richfield, MN. It all started for him in grade school when the bike bug bit him, and that particular fever is still there. Now, and over the past thirty years, he has worked at every level in the bike industry. Starting, like most, sweeping floors and learning anything he could about bikes. He eventually graduated as a service manager and then as a store manager. Through the years, he has spent extensive time designing and sourcing bicycles and parts for some of the largest bike companies in the world. All the while focusing on helping as many people as possible enjoy the love of riding a bike. In that pursuit, he has taught classes (both scheduled and impromptu) on all things bikes. John also believes in helping every rider attain their optimal fit on the bike of their dreams. Please feel free to stop in any time and talk about bikes, fit, and parts, or just share your latest ride. You can also see more of John’s tricks and tips on the Brown Bicycle Facebook Page.
 Join Edina Rotary for their first-ever Edina Rides for Education fundraiser! Fred Richards Park (7640 Parklawn Ave, Edina) check in between 9 AM and 11 AM and ride the family-friendly 5 or 10- mile loop on the beautiful Nine Mile Creek Trail. Early bird pricing through April 22nd. Come support Edina Education Initiatives!
  On May 25th, the first annual Med City Meander takes place in Rochester. It is a 32-mile relaxed tour of Minnesota’s third largest city. Click here for BikeMN/We Bike Rochester member discounted registration, or use the button below if you’re not a member yet. Limited to 500 riders! From tree-canopied riverside paths to gentle Driftless bluffs, this carefully curated route will feature convenient rest stops all along the way!
  We tend to think the best bikes to have are the ones that get ridden. Do you have something gathering dust that you may want to donate? Check out our resource page here for organizations you can donate used bikes to ranging from cities like Mankato, Rochester, the Twin Cities and Duluth. Did we miss any? Email us at [email protected] to get another organization added to the list.
 By this time, the Twin Cities Bicycle Club and Biking with Baddies bike swaps will have already occurred, but we’re aware of one more this spring, sure to have plenty of used bikes, parts, and accessories to dig through. Twin Cities Bike Swap May 19 Long Lake Park (a benefit for MN Cycling Center). Pro tip – come prepared as a buyer. Know what wheel and crank sizes you have, axle types and widths, and tire sizes you’re shopping for. Haggling is expected, but be Minnesota Nice!
 Bringing together the great trail networks and organizations that make the Twin Cities a bicycling destination, the Twin Cities Bike Tour has something for everyone. We’ve even got a DJ/Joyful Riders led mass start for the short family-friendly route! Every route has a limited capacity so sign up today! Click here for your BikeMN member discount for the 20 or 46 mile route or use the button below to take advantage of early-bird pricing.
 ALL APRIL LONG – 30 Days of Biking Continues!APR 17 – Saint Paul Bicycle Coalition Monthly MeetingAPR 18 – Saint Paul Bike Ride Season Kick Off with MoveMNAPR 20 – Powderhorn 4:20 – MplsAPR 23 – Webinar How to Use Cargo Bikes to Improve Your LifeAPR 26-28 – Driftless Gravel Camp – Winona AreaAPR 27 – Earth Day Gravel Grinder – NorthfieldAPR 28 – Miesville 56 – MiesvilleAPR 29 – Paved Paradise book topic discussion – Saint PaulAPR 30 – Paved Paradise book topic discussion – RochesterMay 4 – Hastings/Prescott Bike TourMay 4 – Fulton Gran Fondo – MplsMay 4 – Bird & Bison Bike Tour – HastingsMay 4 – Granny’s Gravel Grinder – PrincetonMay 4 – Edina Rides – EdinaMay 10&11 – Smart Cycling Course – Mpls Have an event to share? Add it to our statewide Community Calendar!