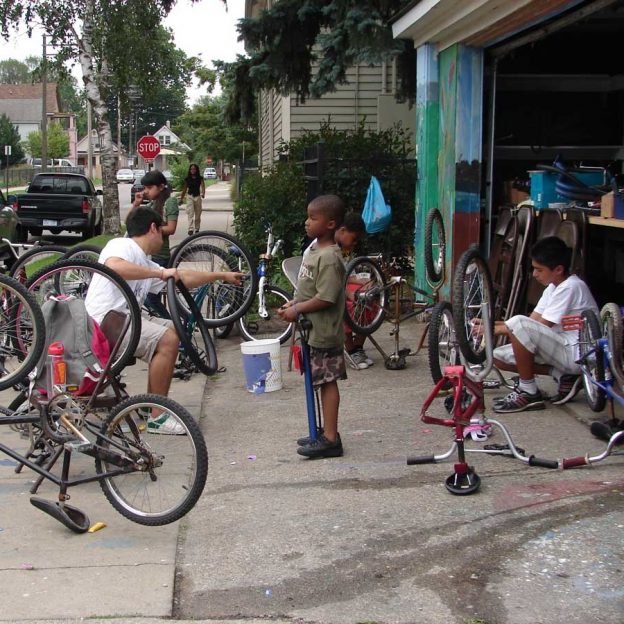
Tag Archives: children

Discovering how things work here is a group of neighborhood kids learning about bicycle maintenance. 

Teaching your child the ancient art of bicycle maintenance

by John Brown

As a parent and tinkerer, one of the most fun activities I share with my two boys is teaching them how bicycle maintenance works. Now that my older son is riding more and helping me review a bike for HaveFunBiking, the time has come to teach him how a bike works. Almost everybody gets the basics, but after 20 years working in shops, I want to give as much of my experience to him as possible. Take a look at my plan for teaching my son bicycle maintenance.

This father, son team assemble a bike for a school program.

Here this father-son team assembles a new bike for a school program.

Safety first in bicycle maintenance

Like wearing a helmet when riding a bike, working on a bike also has safety gear. Eye protection is a must. With safety glasses on, the next step is to show your child the danger zones on a bike. Spinning wheels, spinning brake rotors, along with crank, chain, and cogs, are all dangerous to little fingers. Teach your children to avoid those areas when the bike is moving. On that subject, it is also essential for kids to wear snugly fitting clothing. Loose clothing can get caught in moving parts.

bicycle maintenance

Caution areas are highlighted in red. These are the places fingers can get pinched.

Tools of the trade-in bicycle maintenance

The next step is to teach your kid the tools and how to use them. The main tools used on bikes are metric hex wrenches, screwdrivers, and metric box wrenches. First, show your child how to hold each tool for best leverage and what part of the tool engages with the bike. Then, show them where each tool fits on the bike before beginning the fix.

bicycle maintenance

Professional bike mechanics use hex wrenches, box wrenches, and screwdrivers.

Having fun with bicycle maintenance

Now that the safety and instruction portions are over, making the process fun! Your kid is likely dying to get their hands (and wrenches) on the bike as quickly as possible, so let them have at it. Considering you already gave them the safety and function basics, their bike exploration will be safe and enlightening. Once they play a little, ask your kid to teach you how the bike works! Have them exercise their brain and logic by explaining how the bike functions.

Teaching a little at a time

It’s easy for parents to get overzealous when teaching. If you are mechanically inclined, sharing that gift with your kids can be exciting, but try not to overwhelm them. Feel comfortable stopping the lesson when they lose interest. I like to start teaching with the rear brake (assuming it is a rim brake). The rear brake usually needs adjustment and is a rather simple example of how the rest of the bike functions. Once the rear brake is dialed and your kid is comfortable with the process, have them adjust the front brake.

Next, I start teaching about how to adjust the shifting system. Hopefully, you and your child had a good conversation when they “taught” you how the shifting worked because that conversation is an excellent baseline for teaching how to adjust the shifting. Because of the barrel adjuster on the rear derailleur, start with the rear shifting first. Once they get the hang of that, move to the front derailleur.

After the bike functions properly, teach your kids to adjust the seat, bars, and controls. You may ask why I would recommend the simple adjustments last. The simple answer is that these adjustments require the most leverage and are best saved once your child practices using the tools.

Test ride

Once your child completes the adjustments, it’s time to take a test ride. Have your kid test ride in a supervised area away from traffic (like a driveway). Once the test ride is complete, make any additional adjustments, and be sure all the hardware is tight.

bicycle maintenance

Test rides are fun!

Learn through mistakes

Most of the fun of learning to work on bikes (or anything for that matter) is the process. Nobody gets it right on the first try, and we all learn from our mistakes. Mistakes are more valuable than successes. So the most important part of teaching your kids to work on bikes is to let them make mistakes and be a resource for the solutions if needed.

About John Brown, the author

As a lifelong cyclist and consummate tinkerer, John operates Browns Bicycle in Richfield, MN. It all started for him in grade school when the bike bug bit and that fever is still there. Now, and over the past thirty years, he has worked at every level in the bike industry. Starting, like most, sweeping floors and learning anything he could about bikes. He eventually graduated as a service manager and then to a store manager.  Through the years, he has spent extensive time designing and sourcing bicycles and parts for some of the largest bike companies in the world. All the while focusing on helping as many people as possible enjoy the love of riding a bike. In that pursuit, he has taught classes (both scheduled and impromptu) on all things bikes. John also believes in helping every rider attain their optimal fit on the bike of their dreams. Please feel free to stop in any time and talk about bikes, fit, and parts or share your latest ride. You can also see John’s tricks and tips on the Brown Bicycle Facebook Page.
Family rides are the perfect time to teach your kids about riding safely.

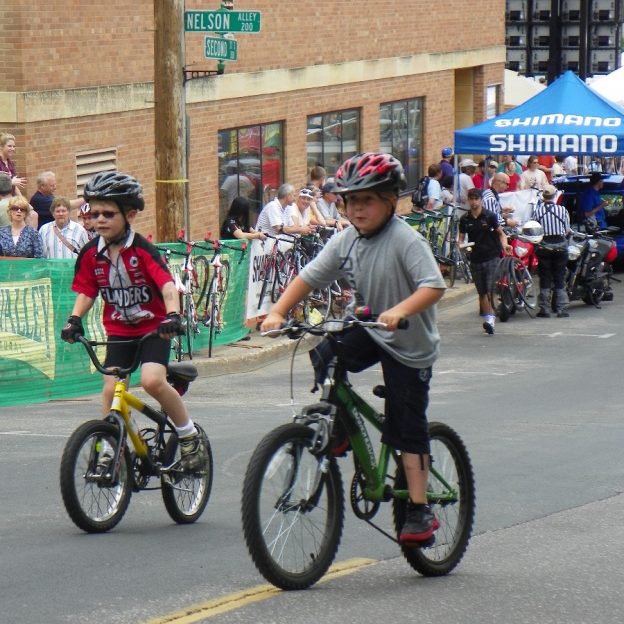
Demonstrating safe riding practices teaches kids valuable skills for life

by John Brown, HaveFunBiking.com

The summer months ahead will play host to countless hours of family riding fun. During these bicycle outings its the perfect time to teach your kids about riding safely. All things considered, there are just a few topics to teach. Please read below for the details.

Safe riding starts with a helmet

First and foremost, a well-fitting helmet cuts down the risk of serious injury by half. As a result, helmets are the single most important piece of cycling gear for kids, and sadly one that is not used by many riders under 14. As an example, a well-fitting helmet will be snug on the rider’s head. Additionally, the strap toggles are located about ½ inch below the ear lobe and the chin strap is tight enough to hold the helmet on your head, but not so tight it chokes you. Furthermore, be sure to consult the manufacturers recommendations for when to replace your helmet. Important to realize, is that helmets lose effectiveness over time, so review it’s production date.

Helmet fit

Be sure that your child is comfortable on their bicycle and it is sized properly. Bikes that are too small or too large are difficult for children to control. As an example, good fit is when your child can stand over the bike with 2-3 inches of clearance between the top tube of the bike and them. Also, the kid can easily sit on the bike and pedal without their knees raising so high it impedes their ability to ride. Additionally, a child should also be able to hold the bars without stretching so far they cannot confidently handle the bicycle. If you have concerns about the fit, visit your local bike shop to have the bike adjusted.

Bike function and riding safely

Verify that the brakes work, tires are inflated and controls are tight. Be sure that your child can squeeze the brake levers easily and stop the bike. If they struggle to squeeze the brakes, have the bike serviced at your local shop. Additionally, keeping proper air pressure in the tires will limit flat tires and aid in control.

Visibility and Riding Safely

Kids bikes are required to be sold with reflectors on the bars, seatpost, wheels, and pedals. Those reflectors should be considered the most basic level of visibility. Add to that visibility, by having your kids wear brightly colored clothes, installing lights and a flag on the bike. With young kids try to avoid riding at night or at twilight.

Riding skills

If your kids are better riders, they will be safer. Teaching basic skills can be fun and easy. Find a flat section of low grass (like a high school football field) and have them practice riding with one hand off the bar. Use the Board Trick to learn how to handle riding over obstacles. Another great way to learn riding skills is to enter into bicycle rodeos (many local shops put these on).

Learning to signal

When riding a bicycle on the road, you are required to follow posted traffic laws as well as signal your directions. Teach your kids the basics of signaling turns and navigating on roads.

Sidewalk and Bike Path Courtesy

Riding to the right is the most basic rule of riding on sidewalks and bikepaths. What is more important than that rule is the courtesy of riding around others. If you are trying to pass a rider you should verbally signal where you are passing. A quick “on your right” is all it takes, wait for the rider ahead to move over and allow you to pass safety. When being passed, be sure to yield the path by moving over and allowing the overtaking rider to pass safely. If you are stopping on a bikepath look for a wider section of trail or a clearing. Make sure that all members of your group are off the side of the trail and leaving ample area for others to ride past. Being courteous is the best way to make sure everyone has fun.

Ride with them

Kids learn a lot from the example set by their parents. Ride with your kids, show them the right things to do with your actions and teach them the right things to do with your words. Make safe riding part of the fun.

Keep senses clean

It’s tempting for kids to try and bring a phone or iPod on a ride with them. They may want to be able to check their texts, listen to music or just have their digital device with them. Those distractions are a detriment to your child’s safety. Keep your digital toys in a backpack or better yet at home and focus on the world around you.