Tag Archives: bike maintenance

Giving back to your cycling community you can enjoy some great ways to stockpile some good karma and it’s fun!

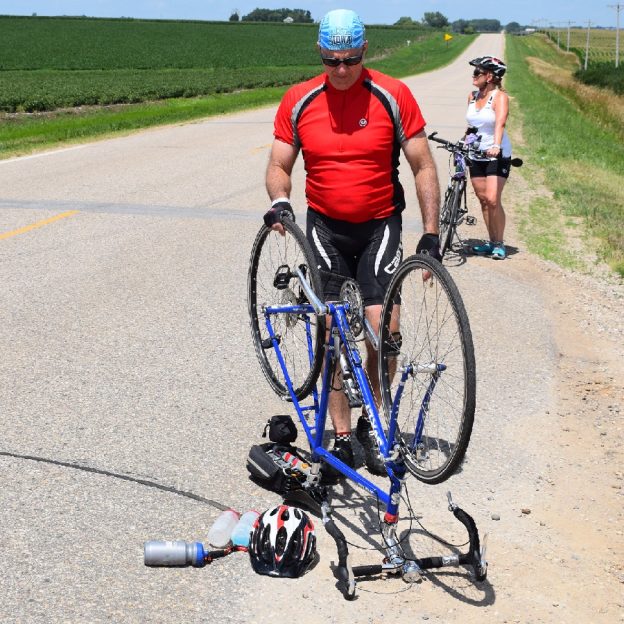
How to fix a flat tire on a bike is a skill every rider should have

by John Brown, HaveFunBiking.com

One inevitability of riding a bicycle is that you will get a flat tire. With a little practice and planning, you will be able to fix a flat tire and finish your ride, without a problem. To be prepared, you will need a few tools and to practice how to fix a flat on your bicycle a few times to get it down. Read below for a step by step on how to change your first flat.

Learning how to fix a flat tire is a part of bicycling.  With a little practice and planning, you too can fix a tire and finish your ride.

Needed items to fix a flat tire

To easily fix a flat tire be sure to carry the following items:

Pump

fix a flat pump

Pumps come in many shapes and sizes. Most are portable in a jersey pocket or on the bike. Be sure to look for a pump that is capable of meeting your tires pressure.

Tube

Fix a Flat tire tire size

Tubes are sized specifically to tires. Find the right size tube for your bike by looking on the sidewall of your tire. Common sizes are 700×23 and 26×2.1″. Tire sizes above are underlined in red. Tires size may also be molded into the sidewall of the tire.

Patch kit

Fixing a flat patch kit

Patches seal small holes in innertubes. There are glueless versions and versions that require glue.

Tire lever

fix a flat tire levers

Tire levers come in many shapes and colors, but almost all of them include the same features – A shovel shaped end to scoop the tire bead off the rim, and a hooked end to secure the lever onto the wheel.

FIX A FLAT: Getting Started

The first step to fix a flat is to remove the wheel from your bike. Consult your bicycles owner’s manual for the proper way to remove the wheels.

Begin by removing all the remaining air from the tire. Depress the valve while squeezing the tire until all remaining air is out. Also try to push the bead of the tire into the rim well, doing this will make it easier to remove the tire from the rim.

Taking the Punctured Tube Out

Fixing a flat terminology

Tire, Rim, and Tire Lever Terminology

With the wheel in one hand and the tire lever in the other, try to position the shovel end of the tire lever under the bead of the tire. (see picture below)

fix a flat tire lever in action

Once the lever is positioned beneath the tires bead, push the hook side of the lever down (using the rim as the fulcrum) and lift the tires bead. Once you have lifted the bead with the tire lever, you should be able to push the lever around the perimeter of the rim, freeing one bead from within the rim. (See Video)


Some tire and rim combinations are too tight to allow this method. If you can’t make headway pushing the tire lever around the rim, use the hook side of the tire lever to capture a spoke. Use a second tire lever a few inches away from the first to remove the bead, the bead should be loose enough to remove easily at this time (see pictures below).

Remove the innertube and either patch it or take out a new one. Before installing a new innertube, run your fingers along the inside of the tire while inspecting an area a few inches in front of your fingers.(See Video)

You are looking for the object that caused the flat. You won’t always find something in the tire, either it fell out, or stayed in the road.

Installing a New Tube

When putting the innertube back in the tire, inflating it a little helps. Add enough air to give the tube shape, but not so much that it doesn’t fit into the tire


Start by putting the valve through the valve hole in the rim, then feed the rest of the tube into the tire.

Once the tube is in the tire, begin moving the tube into the rim well.

Begin at the valve, and feed the tire bead back into the rim well. It will be easy to get the bead moved over the edge of the rim initially, but will get progressively more difficult as you get farther away from the valve. It is normal for the last few inches of bead to be the most difficult to seat, don’t get discouraged and don’t attempt to use a tire lever to put the bead back. Tire levers can pinch and puncture innertubes. Instead of a tire lever, use your thumbs and the heel of your palm to force the bead back onto the rim. (See Video)


Once the tire and new innertub are reinstalled begin airing the tire up. Once there is a small amount of pressure in the tire, check to see if it is seated properly. A quick spin usually tells you visually if everything is even. (See Video)

If you are sure the tire is seated evenly, bring the tire up to pressure completely. Tire pressures are usually marked on the sidewall of the tire if you aren’t sure of how much to put in. Put the wheel back into the bike, reengage the brake, and you are off.

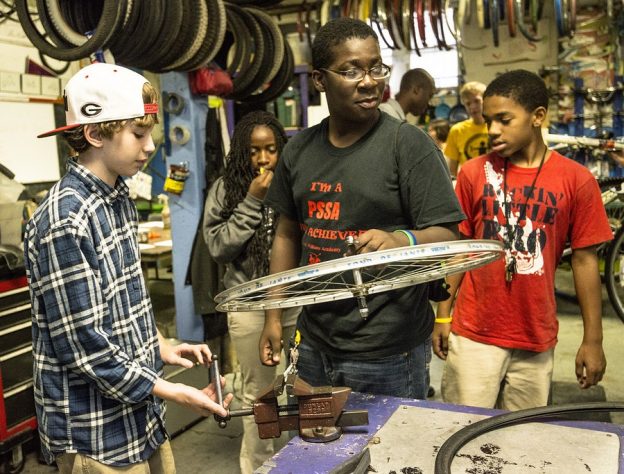
Round, straight and fast, wheel truing makes riding easier

by John Brown, HaveFunBiking.com

Wheel truing is a great way to take care of your bike while making it easier to ride. However, when you start adjusting your wheels, it’s important to know where to start. Please read on below for details on what makes your wheels work, and how to make them work better.

Wheel Truing and The Wheel Parts

Wheels are made up of four parts, the rim, the spokes, nipples, and the hub. The rim is the outside portion of a wheel that the tire mounts to. Nipples fit into the rim and thread onto the spokes and are the part of a wheel where you can adjust tension. Spokes are wire supports that stretch from the rim to the hub. Finally, the hub is where the wheel attaches to the bike, it houses bearings, supports the gears and in some cases a brake.

A wheel truing works by means of spoke tension. The tension on spokes is the force that suspends the hub (and by extension the bike and rider) inside the rim and tire. Spokes are attached to a centerline on the rim and one of two hub flanges that sit a few inches apart. Splitting the spokes between the left and right hub flanges triangulates the wheel’s tension and gives the wheel rotational and lateral stiffness. Splitting spokes between left and right flanges also allows rims to be “pulled” left or right by spoke tension to straighten a wheel.

Tools for Wheel Truing

Truing a wheel requires one special tool – a spoke wrench. Spoke wrenches are sized differently depending on the size of spoke nipple you have. When buying a spoke wrench, measure the nipple (standard square nipple sizes include 3.23mm/3.3mmm/3.45mm/3.96mm) or buy a multi-sized spoke wrench. Additionally, a truing stand is helpful (It’s a jig that holds the wheel in place and offers a gauge to help straighten the wheel) but not required.

Rim Material

Rims can be made from Wood, Steel, Aluminum, and Carbon fiber. Each material works differently and has its own pros and cons. Most likely, your rim is aluminum, which is a good thing. Aluminum is the easiest and most forgiving material to true.

Rim Condition

Truing a wheel is possible if the rim is in repairable shape. Things like large dents, cracks, excessive wear, and large bends make it impossible to straighten the wheel properly. By contrast, Small dings or warps of the wheel can easily be sorted out.

The Rim on the left has a small dent that could be repaired, while the rim on the right is beyond repair

Spoke Condition

Spokes are almost always made of stainless or high tensile steel. Because spokes are made of steel, they are incredibly durable and small bends or scratches aren’t a huge concern. In contrast, if you see large gouges or drastic bends, it’s best to replace that spoke (something I recommend you have a local bike shop do). Additionally, if there is excessive corrosion, the spokes may be too weak to support the rider. Also, be cognizant about uneven spoke tension. For example, if one side of the wheel has a high tension while the other side is loose, the wheel will be very difficult to true.

Nipple condition

Spoke nipples are made of either chrome plated brass or aluminum. Corrosion is one of the main concerns with spoke nipples. If a nipple is highly corroded, it might be difficult to turn, and eliminate the option of adjusting spoke tension. Before wheel truing bike, drop a small amount of oil where the spoke meets the nipple. Letting that oil soak into the threads will make truing your wheel easier.

How to True a Wheel

-True

Start by finding where the wheel is out of true. This can be done in a truing stand, or more easily between the brakes on your bike. Spin the wheel slowly to see where it gets closer the brake pads. To move the rim away from a brake pad you need to tighten an opposite side spoke, or loosen a near side spoke (see image). Also, when looking down on the rim, you will be turning the nipple to the left to tighten a spoke and the right loosen it (opposite of lefty loosy). Start by working in ¼ turn increments, meaning, don’t turn any nipple more than ¼ turn at a time. Work around the wheel, starting at the valve, and go around repeatedly until the wheel is straight.

Truing your wheels

To move the rim to the left, tighten the right side spokes and loosen the left side spokes

-Round

While you are working to make a wheel straight, be aware of how round it is as well. For the hops and dips that appear on a rim you should work in pairs of spokes (1 right, 1 left). Tightening spokes to eliminate hops, and loosen them to relieve dips.

by tightening a pair of spokes you can “pull” a hop out of a rim (left) and by loosening them you can correct for some dents (right)

Good Enough is Good Enough

Once a wheel becomes knocked out of true it is no longer perfect. Therefore, it may not be possible to bring it all the way back to being perfectly again. Once spokes become very tight or very loose, that’s an indication you have reached the end of a wheel’s adjustment range. Until you are very comfortable truing a wheel, work slowly and deliberately. By making small changes, you are more likely to catch any small errors before they become large problems. Take your time and have fun with it.

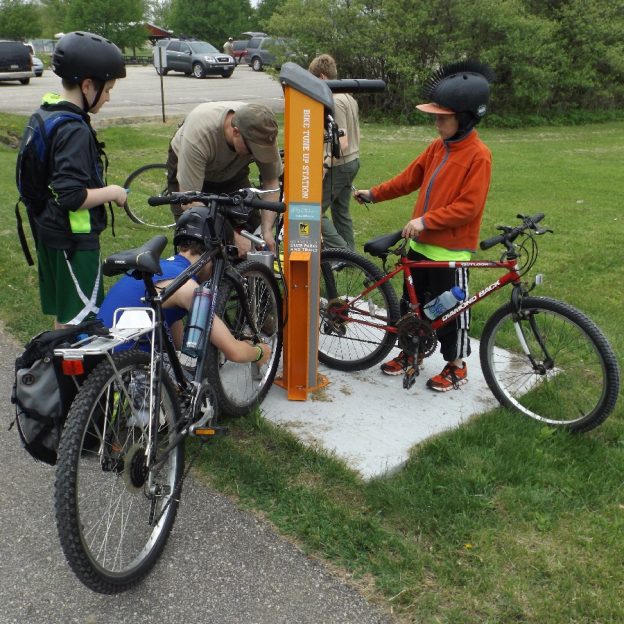
Quick and easy tips for adjusting your bicycle’s v-brakes

by John Brown, HaveFunBiking.com

For those who don’t have disc brakes, the V-brakes on your bike are your greatest single source of control. Take a look below for some tips and tricks on how to adjust your V-brakes.

What Condition is Your V-Brakes In?

Before diving into adjusting your V-brakes, be sure to inspect the brake itself. First thing to check for is excessive corrosion. Highly rusted bolts or springs can break resulting in a crash. Also look for any bent or broken parts. The cradle on the left brake arm is there to hold the brake noodle. If either the v-brakes noodle or cradle are bent (see picture), your brake might not function properly. Also review the brake pads. The easiest way to do this is to remove the wheel. Most pads have lines on them to indicate when they need to be replaced (see picture). Also inspect the pad surface for bits of metal that can damage the bicycles rim.

Cable condition

There are two parts you need to inspect. The Brake cables, and the brake housing. The cable is the wound steel cable that moves when you squeeze the lever. The brake housing can come in many different colors, but is almost always rubber coated and has the cable run through it. Check the cable for rust, frays or kinks and replace if needed. Check the housing for cracks or splitting. Finally, check that the cable moves through the housing freely without resistance.

Rim condition

Spin the wheel and check to see that your rim is straight and round. A wheel should not touch either brake pad as it rotates. It also needs to remain as round as possible. If the rim moves up or down too much, the brake pads can hit the tire, or run off the rim entirely. If the wheel isn’t straight and round, be sure to take it to your local bike shop to have it trued. The other concern when checking the rim is wear. Most rims now have a wear indicator built into the rim in the form of a recessed dot, or a recessed channel around the rim. Once the rim wears past the dot or channel it is time to replace the rim.

Wear line

Rim Dent

Pad placement

V-Brake pads get adjusted by way of a 5mm fitting on the back side of the brake pad. The pad sits on a pair of conical washers that allow the pad to be pivoted up to 20 degrees. I find the easiest way to adjust the brake pad is to hold the left brake with your right hand (or the right brake with your left hand) and place your pointer finger along the bottom of the pad (see image). Loosen the 5mm fitting with your hex wrench and use the wrench and your pointer finger to align the pad. To properly align the pad, you want to center the pad between the top and bottom edge of the rim. The pad should be positioned so that no part hits the tire or misses the face of the rim.

Centering

Once the pads are placed properly, the next thing to do is center the brakes. Centering the brakes entails adjusting the brake springs to ensure the pads are both an equal distance from the rim. Adjusting the brake springs is as simple as tightening or loosening the set screws at the bottom of each brake arm. I like to start on the brake arm that has the most adjustment. I determine the amount of adjustment by how far in or out the adjustment screws are in the brake (see image). The only real tricky part of centering the brake is remembering that screwing the adjustment in will move the pad away from the rim (the opposite of what you might expect).

Cable tension on v-brakes

Once the pads are adjusted and the brakes are centered, you need to make sure that the brake engages with the right amount of lever pull. I have found the easiest way to do this is to position the end of the cable noodle on the end of the brake cradle (1), loosen the cable pinch bolt, pull the cable tight, tighten the cable pinch bolt, then position the noodle correctly (2) and you are set (see image).

Troubleshooting

Once you get done, and test the brakes you may encounter some common problems like Squealing and grinding noises, or just no power.  A few simple tricks will resolve most of these issues.

  • 1- The brake pads may appear to be in great shape, but due to age, be to hard to operate properly. Switching out the old pads for new ones can help quiet noisy brakes and add power
  • 2- Pads that are exposed to long descents can generate a hard glaze over the pad surface. A few quick brushes with a flat file can knock off the glaze and quiet the brakes.
  • 3- The rim surface can get contaminated over time. Rubbing it down with sandpaper or steel wool can go a long way to increase braking power and reduce noise.
  • 4- Depending on the brake condition, there can be excessive flex in the brake arms. In order to combat noise you can “toe” the brake pads by having the leading edge make contact with the rim first.
  • 5- Finally, you can apply a little grease or oil to the brake cables where they enter the housing.

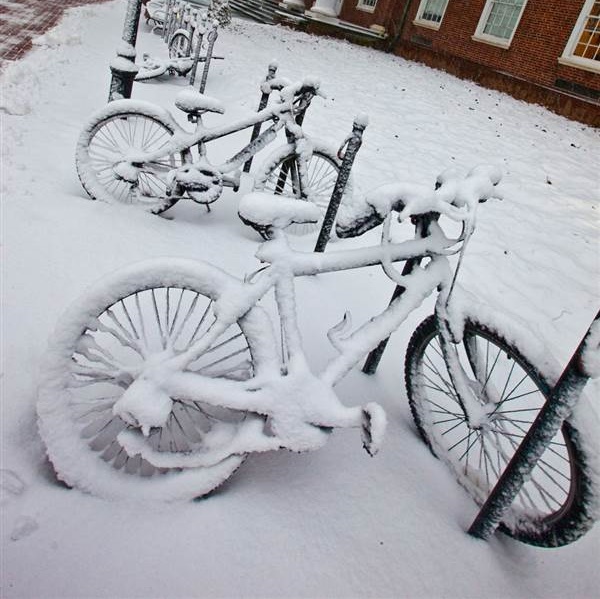
Outside Bike Storage: Preserving its Condition While Battling Mother Nature

by Jess Leong, HaveFunBiking.com

 If you’re like the many people who ride bikes, you may have selected or been forced to use outside bike storage where your bicycle has to fend for itself in all the elements. It’s nothing to be ashamed of, especially since many people don’t have a place to store their bikes inside.

We mentioned in a previous article that if you’re unable to store a bike indoors, that you can usually find a nearby bike shop that can store your bike for you – especially through the winter. However, sometimes even this isn’t possible and outside bike storage is your only option. Perhaps there are no bike shops that offer that service nearby, or perhaps the cost in doing that would be out of your budget. Whatever the reason, here’s what you need to know to store your bike outside for a couple day or indefinable.

What Happens When You Use Outside Bike Storage for your Bicycle

As many can guess, bikes left outside in rain or snow can rust.

Newer bikes fare better in the outside elements because the seals on the bike’s components are tighter than on older or more worn bicycles. Being well-sealed allows it to block out moisture from making its way inside and corroding the bike from inside and out. Leaving these new bikes out for a few days or even a week might not be a problem. However, the longer it is left outdoors, the more problems the rider will see – this is especially true for older bikes. Older bikes can degrade faster since they have been weathered down over time.

What you can expect to see is rust forming on the chain and gears before affecting the rest of the bike. This can make the drivetrain brittle over time, and cause problems when shifting gears and riding.

We know rain and moisture can cause problems, but did you know humidity and heat can also be a problem? In the summer, keeping your bike in direct sunlight can cause problems in certain areas on your bike as well. The direct light can cause rubber and plastic to harden, leaving tires, seats, grips, and cable housing brittle.

Additionally, bikes that are left outside also run the risk of being vandalized or stolen. According to the National Bike Registry, over 1.5 million bikes are stolen every year with less than 3 percent being returned. Besides running the risk of corrosion, you run the risk of never seeing your bike again.

What You Can Do If Using Outside Bike Storage

Place a Bike Tent Over Your Bike

It’s not recommended to place a tarp directly on your bike because it can work like a green house, accumulating heat and moisture. Heat can affect your plastic or rubber parts and degrade them. When it’s cold or rainy, it can trap the water vapor. The moisture can then settle on your bicycle, corroding it.

A bike tent, however, allows a shelter from the elements, while also allowing air to circulate any moisture away. Bike tents aren’t expensive compared to some options and are generally easy to put together.

If your bike does get wet, wipe down the bike so the water doesn’t sit to long.

 Lube and Grease Your Bike – Especcially with Outside Bike Storage

Place waterproof grease over areas that might be breached by water, such as screw holes, bolt heads, or bearings. The grease will create a barrier against water, stopping it from getting through. Lubing up your chain and other appropriate parts of the bike is also a helpful way to create a barrier from any moisture. Using a wet lube rather than dry lube is key. Dry bike lubricant will wash away easily and doesn’t provide any protection from corrosion.

Use the Bike

This doesn’t mean you should ride the bike outside during a blizzard. Instead, lift it up and turn the pedals. Moving it around can help with reducing rust. Over time, dust, dirt, or grime can get into the shifter and fine mechanical parts, so using the bike can knock this stuff off – especially if you’re riding it.

Remember, the salt from the road can affect the bike! Salt affects aluminum or alloy parts. So, if you take it for a spin, make sure to wipe down your bike afterwards and clean it.

Replacing Components to Last

Many factors affect how quickly and badly a bike can corrode. While storing a bike indoors is the best option, sometimes it’s not possible. Following the above steps should help minimize the buildup of rust. It can also limit mechanical problems that may occur.

Trying to limit corroding factors is the best you can do. Some people who know they will store bike outside under a cover or in a bike tent will opt to spend extra money to ‘upgrade’ their bikes. The bikes they tend to buy are already considered ‘durable’. Then, they change out parts to other materials that are less likely to rust over time. Some bikers also will opt for a ‘rustproof’ labeled chain. If this isn’t possible, then frequent bike maintenance and greasing is the way to go. This ends up being the key factor that many bikers rely on if they are storing their wheels outdoors.

Be aware, if you store your bike outside, there will be more maintenance required than if you stored your bike indoors. Keeping up with this maintenance might seem a little daunting, but it is well worth the effort. Why? Because come spring, your bike will be ready to go and have minimal rust and problems.

A friendly bike shop store front that invites you in.

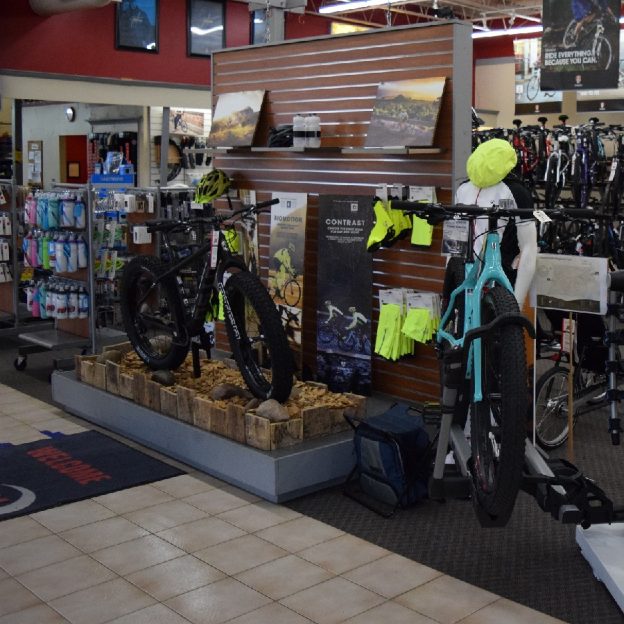
How to Find a Local Bike Shop that’s Perfect for You

Finding a Local Bike Shop with a Good Vibe to Fit Your Style

by Jess Leong, HaveFunBiking.com

Trying to find a local bike shop can seem daunting and more work than it’s worth. However, a great local shop that fits your needs can be invaluable as time goes on. When trying to find the right shop you need to consider what you value most. Is it a knowledgeable staff person, a great selection, great or quick service, or etc?

A friendly bike shop store front that invites you in.

Friendly bike shop store front, showing accessibility and community involvement, is like a welcome mat inviting you in.

Everyone, from beginners to experienced cyclists, can find that choosing a bike shop can be a tough decision, especially with many shops in a given area. While confident and knowledgeable staff members are important – we all want advice from experts who know what they are talking about. But other factors should also be considered.

Stepping into a bike shop can be overwhelming, but it is a necessity to find the right fit for you.

Key Factors to Consider When Checking Out a Bike Shop:

Knowledgeable Staff

Knowledgeable staff members that can give reliable advice and speak in a way that you can understand is key. If they are using words that may be unfamiliar to you or are not willing to clearly explain it, this might not be the shop for you. They should know what they’re talking about. If they don’t know the answer, they should be willing to find the answer out for you. Even experts can get stumped on good questions!

Friendly and Reliable Staff

hfb_0178

Knowledgeable bike shop staff, not afraid to do a little research for you, is the key to a great experience.

Expect friendly and reliable staff members at the shop you visit. You should feel comfortable approaching and asking all of your biking questions – no matter how stupid you might think a question is. (There is no such thing as a ‘stupid question.’ So, feel free to ask away!) Additionally, these staff members should be people you can rely on for your biking needs. If they aren’t focused on what you’re there for and are pushing products at you that you don’t really need, then this can be a deal breaker. You want people – at least a mechanic – who love and understand bikes. After all, you need to feel comfortable in entrusting them with your wheels.

Product Options

A decent range of products should be within the shop, unless they are a specialty shop. You want to have options and be able to look at different items and products within the shop so you can find the best fit for you – if you need it.

A good bike shop will have a large assortment of cycling accessories and other essentials to make your #nextbikeadventure memorable.

Most bike shops have a large assortment of accessories and essentials to make your #nextbikeadventure memorable.

A good bike shop will have a large assortment of cycling accessories and other essentials to make your #nextbikeadventure memorable.

Quick or Reasonable Repair Timeline

Having a bike shop mechanic who is knowledgeable and enjoys his work is an added plus.

Having a bike shop mechanic who is knowledgeable and enjoys his work is an added plus.

When a problem arises with your bike, you want it repaired in a quick manner so we could get out riding again, as soon as possible. No one wants to wait weeks for their bike to be repaired. A quick, or at least reasonable, repair time might be what’s most important for you. 

Shop Hours that Work for You

Reasonable hours that work for your schedule is something you can easily find out without ever going to the store. Today, you can look up stores online to find their hours and see if it will work for you.

Some bike shops are open only on the weekend, others are open from early morning and close by 5 p.m. or earlier, and yet others might be open late into the evening. Depending on what works for your schedule, this can help eliminate potential bike shops. If you have a job from 8 a.m. to 5 p.m. every day, a bike shop that is only open during the weekday during that period of time might not be the best fit.

Customer Satisfaction

A good shop will check in with the rider and ask them asking how they are. If a relationship is built they will ask about a product the rider might have bought. If a mistake occurs, the shop will work with the rider to try to correct it, or apologize.

It is important to note that while a bike shop might be perfect for one person, it may not be the ideal bike shop for another. While many bike shops have knowledge of different types of biking styles, some will have more specific knowledge of a particular type. In other words, every bike stop has different vibe and it just depends whether or not it suits you.

Tip: To save time, many riders would suggest checking on websites that rate bike shops to find ratings of their service, what they may offer, and if they are worth looking into.

Don’t lose heart, if after researching the first bike shop you discover it isn’t ideal for you, visit the next one. Many times, riders need to visit several shops, and sometimes go through a service or two, before finding the perfect fit for them.

Finding the shop that is best suited for you might take some time, and that’s okay. It’s worth it because if you ever have questions or your bike needs repair, they got your back. Plus, it ensures good service and fewer problems in the future.

Did your favorite bike shop make America’s Best Bike Shop list?

The National Bicycle Dealers Association has recently published its 2016 list of America’s Best Bike Shops. Retailers who made the cut this year not only offer great shopping experiences and expert staff, but are also rated on dedication to their communities and support for bicycle advocacy locally and nationally. See here if your bike shop made the cut.

In Review

Less hassle, better vibes is something we can all get behind. Happy shopping!

Jess Leong is a writer for HaveFunBiking.com.

A chainring tattoo is common on the right leg when the bike chain is dirty.

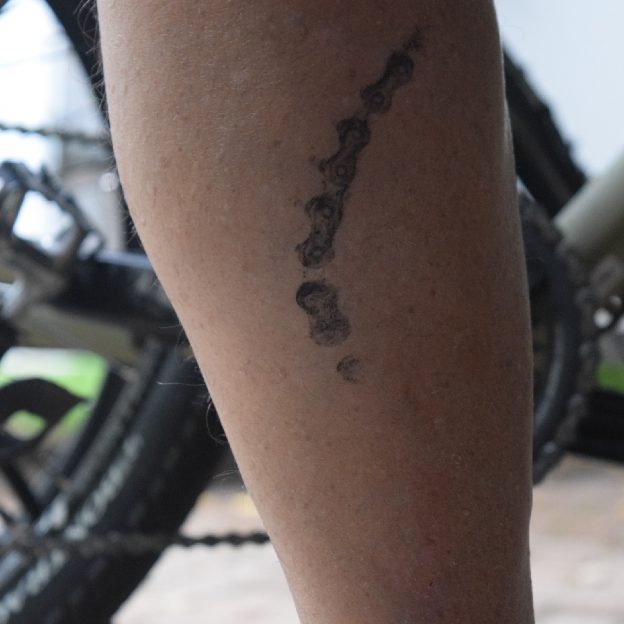
Bike Grease Mark: Avoiding a Chainring Tattoo

Cutting Through Bike Grease: Avoiding a Chainring Tattoo

by Jess Leong, HaveFunBiking.com

The accursed chainring tattoo is something that many bikers – whether a beginner or not – has experienced. While known as a ‘noob’s problem’ (a newbie or beginner’s problem), even experienced riders have had their fair share of chainring tattoos.


What is a Chainring Tattoo?

Characterized by the ebony spikes reminiscent of the triangular rays drawn on a sun picture, the design is made from oil and grease. Oil, grease, and debris can gather in the various components of a bike’s chain, cassette, and chainring. When this builds up, it can spill over and a calf can touch it.

The chainring tattoo is coined as such because the grease can be annoying to remove. How does this happen? It occurs when the rider accidentally presses their leg against the side of the bike where those components are. This generally happens at stoplights or stop signs when a rider puts down their leg to brace themselves, but the leg isn’t far enough from the bike. The leg may bump or touch the bike’s side and its very own tattoo.


Why is it Called a “Newbie’s Problem” Tattoo?

Plenty of seasoned riders and pros can be seen supporting a chainring tattoo if one pays close enough attention. However, generally it is considered a “Beginner’s Problem” because many riders learn tricks or find a method that works for them to avoid having their leg touch the bike’s chain, cassette, or chainring. It takes practice and experience, but sometimes that doesn’t even save their calves.

Rest assured that while beginners may seem to get it more often, there are seasoned riders and pros that can still be affected – you just might not notice it!

Having a chainring tattoo just marks you as a rider – and some people go so far as to actually get an ink tattoo. For those riders, the tattoo will stay with them forever as a tribute to how much they love riding their bikes. As some riders say: It’s a mark of a true cyclist.


What’s the Easiest Way to Remove it?

Since it is grease, regular hand soap and water isn’t likely to remove the tattoo from your calf. Instead, opt for some dishwashing soap, water, and a rag or paper towel. Dishwashing soap generally is made with surfactants to remove grease. While different dish soaps can vary in effectiveness to cut through grease, they still work well for us cyclists. Plus, they’re safe to use!

A bicyclist with a dirty bike chain can easily experience a chainring tattoo.

A bicyclist with a dirty bike chain can easily experience a chainring tattoo.

Additionally, you can also use olive oil or baby oil to remove the chainring tattoo with ease. Some riders will either leave the grease on their calves until they return home. Others will carry around some wipes and oil to help remove it on the go.

How Can I Avoid Getting the Tattoo?

Besides trying to avoid touching your leg to your bike when stopping or getting off/on your bike, there’s a few options that other cyclists have been throwing around and some have found useful.

  • Use dry lube rather than wet lube: There is a much lower chance of getting grease stains because dry lube is a lighter lube and therefore isn’t as sticky. Wet lube – what most use for bike maintenance – is known to be a lot stickier. It, therefore, picks up more debris while one is riding their bike. The downside with dry lube is that it tends to need to be put on more frequently and since it is a light lube, it is easily washed away if it gets wet, whereas wet lube would not wash away and has more ‘staying’ power. Dry lube should be used in drier times/climates whereas wet lube should be used in wet locations. Either way, make sure not to layer the two lubricants on one another. Also, always remove excess lubricant to reduce buildup of grease.
  • Clean your chain, cassette, and chainring fairly often. The reality is that grease, debris, and oil builds up: Cleaning your bike chain can be a hassle, but it is something worth doing. It keeps the bike lifespan long and gives less grease marks! Check out our article for information and tips on how to clean your bike chain in 5 simple steps.
  • Chain guard: This puts a physical barrier between you and the culprit. It ensure that your leg doesn’t touch any of the components that can give you a grease tattoo.

Can’t Avoid it? Cover it Up!

  • Roll up your pants legs: This won’t necessarily stop you from getting the grease on your calves, but at least it won’t be on your clothing. Plus, after you get to where you’re going, you can roll down those pants legs and cover up any tattoos. It’s like they were never there!
Cleaning your bike chain and crank ring will help in avoiding a chainring tattoo.

Cleaning your bike chain and crank ring will help in avoiding a chainring tattoo.

Whether or not you decide to support the chainring tattoo with pride or want to cover it up, don’t let it get in the way of your next bike adventure. HaveFun and just Ride On!


Jess Leong is a writer for HaveFunBiking.com.

Make Winter Bike Commuting Fun

by Fred Oswald
Winter commuting offers challenges and rewards to those who use a bicycle for work or to just run errands and here are some suggestions for safe riding.

Winter ride -13a

With the proper layers of clothing staying active can be fun


 Layers

The cold weather requires keeping hands, feet and especially ears warm while not overheating elsewhere.  The solution is layers of clothing with ventilating zippers using wool and other synthetic clothes products and stay away from wearing anything cotton which will  trap perspiration and make you cold.

Winter ride -4

Making a stop along the Minneapolis Greenway

For top layers a breathable wind shell over a wicking fabric works well.  Lined nylon running pants with leg zippers can keep legs warm.  Elastic sewn on the right cuff helps keep it away from the chainring.  An ear band or balaclava under the helmet will keep your head warm. 

Below freezing, wear liner gloves and possibly mitts. in really cold weather, keeping feet warm may be difficult.  Neoprene shoe covers will help.  A cheaper alternative may be insulated hiking boots and one of the many varieties of pedals with little pegs for gripping, available at your favorite bike shop.

Fenders

To protect both yourself and the bike from salt splash thrown up from wet roads, get fenders. 

Winter ride -1

Extend your rear fender with a flattened milk jug

If fenders do not extend low enough, add homemade flaps made from a material such as from a plastic milk jug.


Handling Black Ice

A special winter hazard is black ice.  My worst fall was in a place where the road looked clear except the blacktop was just a little “too black”. Some cyclists ride with chains or studded tires and now with the availability of fat tire bikes riding on ice have become much more stable – Though others wait for dryer roads for safe riding. 

Winter ride -3

Handling Visibility

Another problem is visibility.  In the early morning or late afternoon you may be invisible to a motorist dazzled by low sun.  Be wary and wear clothing that makes you stand out from your surroundings.

Winter commuting usually means riding in the dark, at least one-way.  Don’t even think of riding at night without a headlight!  Bright clothing and reflectors are not enough.  Some people use a flashing strobe for a headlight.  This is a good supplement to a standard headlight but not enough alone.  Follow the standard “color code”:  white in front, red or orange in back. PennCycle_728x90a

A strobe (flashing light) on the back of the bike will help motorists notice you but is not so good at providing depth information to following drivers.  I supplement the small standard red rear reflector with both a 3″ amber SAE auto reflector that is 8-10 times brighter plus an LED strobe.  If you mount the reflector off to the side it is less likely to get caked with mud thrown up by the wheel.

IWinter bike -8f you are caught in the dark without lights, don’t try to sneak down the sidewalk.  Walk your bike home! Reflectors and reflectorized clothing alone are not enough.  To understand why, read John Schubert’s interesting explanation “Why reflectors sometimes don’t work,” at SheldonBrown.com


Bike Maintenance

Finally, the salt and wet grit are tough on bearings, chain and wheel rims (abrasive grit imbeds in the brake pads).  Better bikes have seals to protect wheel bearings (but re-grease in the spring).  You should lube your chain every week or so and learn how to measure the wear (sometimes incorrectly called “chain stretch”).  Once a chain wears so it is about one percent longer (1/8″ on a 1-foot ruler), it will be damaging your cassette cogs.  It should be replaced before then.

Winter ride -5


A serious bike commuter will want more than one bike to cover different situations.  You may find it useful to have:  a light road bike for fast riding in good conditions; a sturdy steed that can handle panniers to carry clothes, etc.; and a fat tire bike or a “clunker” with fenders and knobby tires for bad weather and winter.  Having more than one bike saves you from being late for work if you find a flat tire or other mechanical problem in the morning.

Winter ride -7There are many benefits to winter commuting to work or just to run errands.  One of the biggest is maintaining fitness year ’round.  You no longer have to “get in shape” in the spring.  You experience the delight of spinning past frost covered trees on a crisp winter morning.  And it is fun to tell your shivering co-workers and friends how hot you got on that bitter, cold day.


Fred Oswald, is a certified “League Cycling Instructor” and a professional engineer in Ohio.