Tag Archives: flat tire

Giving back to your cycling community you can enjoy some great ways to stockpile some good karma and it’s fun!

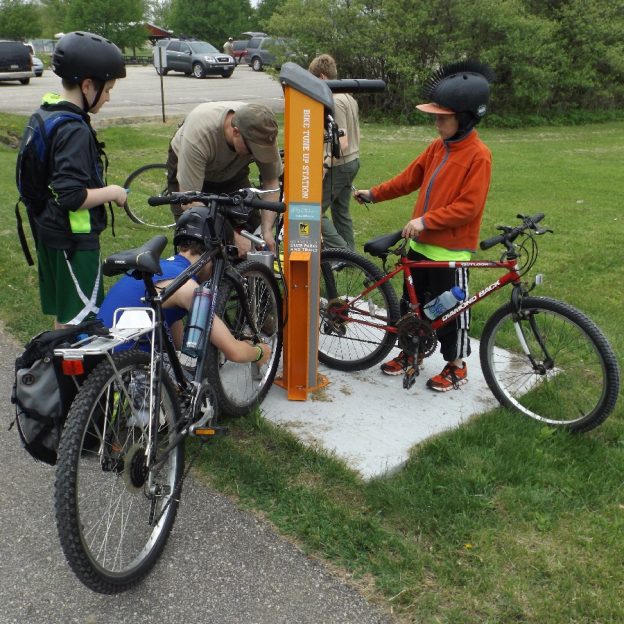
How to fix a flat tire on a bike is a skill every rider should have

by John Brown, HaveFunBiking.com

One inevitability of riding a bicycle is that you will get a flat tire. With a little practice and planning, you will be able to fix a flat tire and finish your ride, without a problem. To be prepared, you will need a few tools and to practice how to fix a flat on your bicycle a few times to get it down. Read below for a step by step on how to change your first flat.

Learning how to fix a flat tire is a part of bicycling.  With a little practice and planning, you too can fix a tire and finish your ride.

Needed items to fix a flat tire

To easily fix a flat tire be sure to carry the following items:

Pump

fix a flat pump

Pumps come in many shapes and sizes. Most are portable in a jersey pocket or on the bike. Be sure to look for a pump that is capable of meeting your tires pressure.

Tube

Fix a Flat tire tire size

Tubes are sized specifically to tires. Find the right size tube for your bike by looking on the sidewall of your tire. Common sizes are 700×23 and 26×2.1″. Tire sizes above are underlined in red. Tires size may also be molded into the sidewall of the tire.

Patch kit

Fixing a flat patch kit

Patches seal small holes in innertubes. There are glueless versions and versions that require glue.

Tire lever

fix a flat tire levers

Tire levers come in many shapes and colors, but almost all of them include the same features – A shovel shaped end to scoop the tire bead off the rim, and a hooked end to secure the lever onto the wheel.

FIX A FLAT: Getting Started

The first step to fix a flat is to remove the wheel from your bike. Consult your bicycles owner’s manual for the proper way to remove the wheels.

Begin by removing all the remaining air from the tire. Depress the valve while squeezing the tire until all remaining air is out. Also try to push the bead of the tire into the rim well, doing this will make it easier to remove the tire from the rim.

Taking the Punctured Tube Out

Fixing a flat terminology

Tire, Rim, and Tire Lever Terminology

With the wheel in one hand and the tire lever in the other, try to position the shovel end of the tire lever under the bead of the tire. (see picture below)

fix a flat tire lever in action

Once the lever is positioned beneath the tires bead, push the hook side of the lever down (using the rim as the fulcrum) and lift the tires bead. Once you have lifted the bead with the tire lever, you should be able to push the lever around the perimeter of the rim, freeing one bead from within the rim. (See Video)


Some tire and rim combinations are too tight to allow this method. If you can’t make headway pushing the tire lever around the rim, use the hook side of the tire lever to capture a spoke. Use a second tire lever a few inches away from the first to remove the bead, the bead should be loose enough to remove easily at this time (see pictures below).

Remove the innertube and either patch it or take out a new one. Before installing a new innertube, run your fingers along the inside of the tire while inspecting an area a few inches in front of your fingers.(See Video)

You are looking for the object that caused the flat. You won’t always find something in the tire, either it fell out, or stayed in the road.

Installing a New Tube

When putting the innertube back in the tire, inflating it a little helps. Add enough air to give the tube shape, but not so much that it doesn’t fit into the tire


Start by putting the valve through the valve hole in the rim, then feed the rest of the tube into the tire.

Once the tube is in the tire, begin moving the tube into the rim well.

Begin at the valve, and feed the tire bead back into the rim well. It will be easy to get the bead moved over the edge of the rim initially, but will get progressively more difficult as you get farther away from the valve. It is normal for the last few inches of bead to be the most difficult to seat, don’t get discouraged and don’t attempt to use a tire lever to put the bead back. Tire levers can pinch and puncture innertubes. Instead of a tire lever, use your thumbs and the heel of your palm to force the bead back onto the rim. (See Video)


Once the tire and new innertub are reinstalled begin airing the tire up. Once there is a small amount of pressure in the tire, check to see if it is seated properly. A quick spin usually tells you visually if everything is even. (See Video)

If you are sure the tire is seated evenly, bring the tire up to pressure completely. Tire pressures are usually marked on the sidewall of the tire if you aren’t sure of how much to put in. Put the wheel back into the bike, reengage the brake, and you are off.

How to Prepare for a Flat Bike Tire in Winter

iceman

by Jess Leong, HaveFunBiking.com

You’re all bundled up against the winter chill, and everything seems to be going well. Then suddenly something feels off. You look down and find you’re riding on a flat bike tire. It’s the last thing you want to deal with in the cold, but you always need to be prepared for it.

Why Are There Flats That Happen in Winter?

Flats happen for a variety of reasons. In general, there are three different types of flats. These are:

  • Punctures – Any time an object passes through the tread of the tire, it is considered a puncture. Usually the hole left in the tire is small enough where you can just replace the tube.
  • Slashes – This is when an object cuts the sidewall of the tire. Usually, if a tire is slashed it needs to be repaired or booted (a temporary patch on the tire itself) before a new inner tube can be installed.
  • Pinch flats (also known as a snake bite) – This happens when the tire hits a square edged object (curb, pothole, etc.) and the object “pinches” the inner tube between itself and the metal rim of the bicycle. This usually leaves two small holes in the inner tube (hence, snake bite)

No matter what season it is, these flats are common. A few reasons why flats happen to a large degree in winter:

  • Air pressure – Air pressure in your tire gets lower as the temperature drops. This means that a tire inflated at room temperature will have a much lower pressure when ridden near freezing. Lower pressures increase the possibility of pinch flats.
  • Hidden sharps – Running over sharp objects such as glass, nails, or metal that is hidden in the snow. Snow can buffer some of these objects from getting to your tires, but it can also hide these materials.
  • Tire flexibility – As the temperature drops, the rubber in tires typically become stiffer. A tire is built to deform over objects and absorb the impact. But when the rubber becomes stiff, the tire cannot deform as easily. This can make the tire easier to puncture.

Consider Other Tire Options for Winter

Many tire companies produce puncture resistant tires. Typically these tires will have a thicker rubber tread or use a belt under the tread designed to stop sharp objects. They also incorporate a reinforced sidewall to resist against slashes. Puncture resistance does come at a cost both financially and in the form of ride quality. Many riders will purchase these tires specifically for winter use and switch back to something lighter and better riding in the spring.

Another option is to use studded tires. Studded tires are usually built out to be puncture resistant as well as being the only option for traction on ice.

Know How to Change a Flat in Regular Conditions

First and foremost, you need to know how to change a bike flat. If you don’t know how to change a tire in the best of conditions, you probably won’t be able to do it out in the cold. Before taking the bike for a spin, take a few minutes to refresh your memory on how to change a flat if it ever happens to you.

Also, check out our article for six items to have along for your ride. These items are great to keep with you year-round.

Carry Gear to Change Your Flat Quickly

Working on your bike in the winter is a game of time – the longer it takes, the colder you get. With this in mind, pack tools and products that help you move quickly. A dedicated tire lever (rather than one that is part of a multitool or patch kit) offers a better grip and more leverage. A CO2 inflator will get you up to pressure and back riding in seconds while a pump could take minutes. Carrying a 4″ section of old tire with the beads cut off (a bead is the thick rubber portion of the tire that makes contact with the rim) can act as a quick tire boot in case you slash the tire. Most importantly, check the tire thoroughly for objects before putting the new tube in. Run your fingers on the inside of the tire, feeling for sharp objects, while visually inspecting the outside of the tire a few inches in front of your fingers.

Gloves with Good Movement, But Still Warm

This certainly sounds like a tall order! However, if you can, try to find good winter gloves that are able to keep your fingers nice and warm but also allows some dexterity. Numb fingers don’t help when changing a tire and can even hinder your ability to adequately fix your flat.

If all else fails, wear warm gloves, and if a flat occurs you can change your riding gloves for another pair that allows for more movement of your fingers.

Inspecting your Tires

Before heading out, check your bike’s tires. Inspect them carefully to ensure they are still properly inflated. Look to see if they have any nails, glass, or other debris that could puncture the tube. Check the condition of the tire by looking for cracks in the rubber, threads coming free of the sidewall, or tread that is worn.

Carry Good Walking Shoes

In case all else fails, make sure you have a good pair of walking shoes. Whether you’re already wearing them or they’re in your pack, it’s handy. Sometimes the only option you have is your own two feet. If you’re not too far away or you have to walk back to an area, good shoes are a must so you can walk the rest of the way!

Remember Your Phone

If something happens, you want to always have your phone handy. It’s cold out, and you never know when you might need to call for backup or to let a worried friend or family member know why you’re running late.


Sadly, flats are inevitable and can happen to anyone, anywhere. Even if you take all the right precautions and get puncture resistant tires, you can still find yourself sitting on the side of the road staring at a deflated tire.

Know how to repair a flat, and practice it at least twice. You will find the first time to be daunting, but the second to go quite quickly. Keep aware of your surroundings, know your route, and always be prepared.

Be safe, and have fun!


Jess Leong is a writer for HaveFunBiking.com.