Tag Archives: pedros tools

If you are looking for a gently used bike in the south Twin City Metro, you may be in luck if you are in town on Saturday, May 11th.

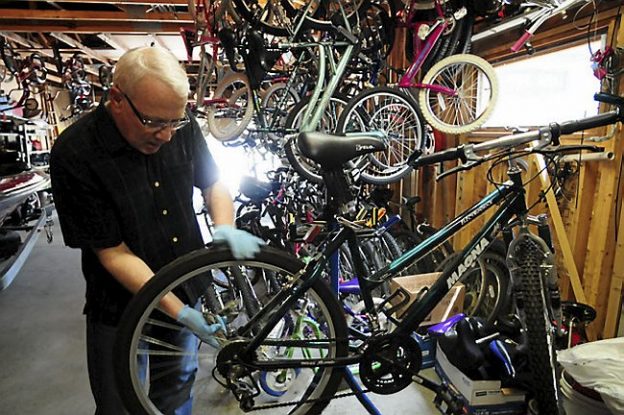
Bicycle maintenance will keep your bike in optimal condition

by John Brown

Like any other mechanical device, routine bicycle maintenance and cleaning will keep your bike in optimal condition as the season progresses. Additionally, routine bicycle maintenance will make your bike safer to ride when you need it. Where do you start? What do you use? Well, here are a few tips to put you on the right track!

Tip 1: For optimal bicycle maintenance, stay away from the hose

Bike running smooth hose and bucket
Angry hose and happy bucket

Every moving part on your bicycle needs lubrication to stay in optimal condition. The pressure of water coming from a hose will force water into areas that need to be lubricated. The water will displace grease and leave your bicycle susceptible to corrosion and excess wear. Instead of a hose, fill a bucket with warm, soapy water (Dawn dish detergent works well) and use a large sponge to clean all the parts of your bicycle. Rinse all the soap and gunk off with fresh water, and let the bicycle air dry.

Tip 2: Focusing on the drivetrain

If you have a particularly dirty drivetrain* and want to get it clean, you will need the following:Bike running smooth supplies

• Degreaser
• A stiff-bristled brush
• Rubber gloves
• Protective eyewear


*(the gears, chain, and the little pulley wheels on your derailleur)

  • First: Start by applying a liberal amount of degreaser to the chain, gears, and derailleur pulleys. Also, pay close attention not to direct the degreaser toward the center of either gear set. Doing so will drive the degreaser into bearings that need to remain lubricated.
  • Second: Once well saturated, begin freeing up dirt and debris by scrubbing back and forth with the stiff-bristled brush.
  • Third: After you have broken up all the contaminants, rinse the drivetrain with a warm soap/water solution.

Tip 3: reapply lubricant

Most areas of a bicycle are protected from the elements with rubber seals. Those rubber seals do a good job of keeping lubricants where they are supposed to be. Furthermore, it also means that the only bicycle areas that can be lubricated without disassembly are the chain and cables.

Lubricating the chain

bicycle maintenance
Proper lubrication is essential to keep your bike in optimal condition.
  • First: To lube the chain, prop your bicycle up so you can freely backpedal. While backpedaling, coat the chain evenly with a lubricant like in the image above.
  • Second: Fold a rag around the chain between the lowest pully and the chainrings. Next, backpedal with your right hand while holding the rag in place with your left. You want to try and remove all the excess lubricant you can. When complete, the chain will feel almost dry to the touch, and that’s OK. Even though the outside of the chain seems under-lubricated, there is still ample lubricant between the chain’s links and within the rollers.

Lubricating the cables

If shifting of braking feels rough at the lever, you may need to lube the cables. Here’s how to do that:

  • First: Apply lubricant in small doses where the cable enters the housing (see below).
  • Second: Cycle the gears, or squeeze the brakes until capillary action draws the lube into the cable housing.

bicycle maintenance

Ensuring your bicycle is clean and properly lubricated is essential to make sure your bike is in optimal condition.

About John Brown, the author

As a lifelong cyclist and consummate tinkerer, John operates Browns Bicycle in Richfield, MN. It all started for him in grade school when the bike bug bit and that particular fever is still there. Now, and over the past thirty years, he has worked at every level in the bike industry. Started, like most, sweeping floors and learning anything he could about bikes. He eventually graduated as a service manager and then store manager.  Through the years, he has spent extensive time designing and sourcing bicycles and parts for some of the largest bike companies in the world. All the while focusing on helping as many people as possible enjoy the love of riding a bike. In that pursuit, he has taught classes (both scheduled and impromptu) on all things bikes. John also believes in helping every rider attain their optimal fit on the bike of their dreams. Please feel free to stop in any time and talk about bikes, fit, and parts, or share your latest ride. You can also see more of John’s tricks and tips on the Brown Bicycle Facebook Page.

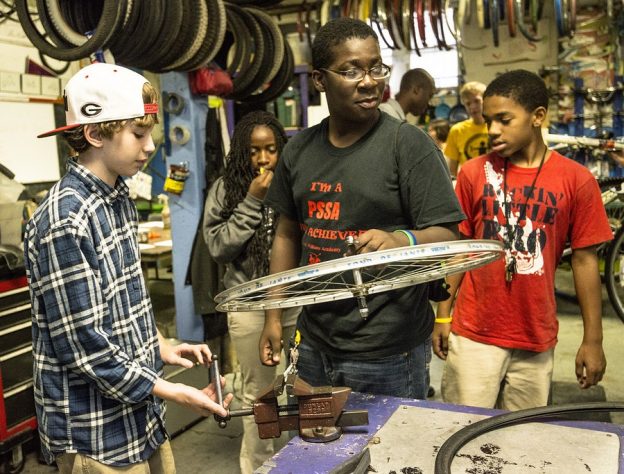
Round, straight and fast, wheel truing makes riding easier

by John Brown, HaveFunBiking.com

Wheel truing is a great way to take care of your bike while making it easier to ride. However, when you start adjusting your wheels, it’s important to know where to start. Please read on below for details on what makes your wheels work, and how to make them work better.

Wheel Truing and The Wheel Parts

Wheels are made up of four parts, the rim, the spokes, nipples, and the hub. The rim is the outside portion of a wheel that the tire mounts to. Nipples fit into the rim and thread onto the spokes and are the part of a wheel where you can adjust tension. Spokes are wire supports that stretch from the rim to the hub. Finally, the hub is where the wheel attaches to the bike, it houses bearings, supports the gears and in some cases a brake.

A wheel truing works by means of spoke tension. The tension on spokes is the force that suspends the hub (and by extension the bike and rider) inside the rim and tire. Spokes are attached to a centerline on the rim and one of two hub flanges that sit a few inches apart. Splitting the spokes between the left and right hub flanges triangulates the wheel’s tension and gives the wheel rotational and lateral stiffness. Splitting spokes between left and right flanges also allows rims to be “pulled” left or right by spoke tension to straighten a wheel.

Tools for Wheel Truing

Truing a wheel requires one special tool – a spoke wrench. Spoke wrenches are sized differently depending on the size of spoke nipple you have. When buying a spoke wrench, measure the nipple (standard square nipple sizes include 3.23mm/3.3mmm/3.45mm/3.96mm) or buy a multi-sized spoke wrench. Additionally, a truing stand is helpful (It’s a jig that holds the wheel in place and offers a gauge to help straighten the wheel) but not required.

Rim Material

Rims can be made from Wood, Steel, Aluminum, and Carbon fiber. Each material works differently and has its own pros and cons. Most likely, your rim is aluminum, which is a good thing. Aluminum is the easiest and most forgiving material to true.

Rim Condition

Truing a wheel is possible if the rim is in repairable shape. Things like large dents, cracks, excessive wear, and large bends make it impossible to straighten the wheel properly. By contrast, Small dings or warps of the wheel can easily be sorted out.

The Rim on the left has a small dent that could be repaired, while the rim on the right is beyond repair

Spoke Condition

Spokes are almost always made of stainless or high tensile steel. Because spokes are made of steel, they are incredibly durable and small bends or scratches aren’t a huge concern. In contrast, if you see large gouges or drastic bends, it’s best to replace that spoke (something I recommend you have a local bike shop do). Additionally, if there is excessive corrosion, the spokes may be too weak to support the rider. Also, be cognizant about uneven spoke tension. For example, if one side of the wheel has a high tension while the other side is loose, the wheel will be very difficult to true.

Nipple condition

Spoke nipples are made of either chrome plated brass or aluminum. Corrosion is one of the main concerns with spoke nipples. If a nipple is highly corroded, it might be difficult to turn, and eliminate the option of adjusting spoke tension. Before wheel truing bike, drop a small amount of oil where the spoke meets the nipple. Letting that oil soak into the threads will make truing your wheel easier.

How to True a Wheel

-True

Start by finding where the wheel is out of true. This can be done in a truing stand, or more easily between the brakes on your bike. Spin the wheel slowly to see where it gets closer the brake pads. To move the rim away from a brake pad you need to tighten an opposite side spoke, or loosen a near side spoke (see image). Also, when looking down on the rim, you will be turning the nipple to the left to tighten a spoke and the right loosen it (opposite of lefty loosy). Start by working in ¼ turn increments, meaning, don’t turn any nipple more than ¼ turn at a time. Work around the wheel, starting at the valve, and go around repeatedly until the wheel is straight.

Truing your wheels

To move the rim to the left, tighten the right side spokes and loosen the left side spokes

-Round

While you are working to make a wheel straight, be aware of how round it is as well. For the hops and dips that appear on a rim you should work in pairs of spokes (1 right, 1 left). Tightening spokes to eliminate hops, and loosen them to relieve dips.

by tightening a pair of spokes you can “pull” a hop out of a rim (left) and by loosening them you can correct for some dents (right)

Good Enough is Good Enough

Once a wheel becomes knocked out of true it is no longer perfect. Therefore, it may not be possible to bring it all the way back to being perfectly again. Once spokes become very tight or very loose, that’s an indication you have reached the end of a wheel’s adjustment range. Until you are very comfortable truing a wheel, work slowly and deliberately. By making small changes, you are more likely to catch any small errors before they become large problems. Take your time and have fun with it.