Tag Archives: #ridemybicycle

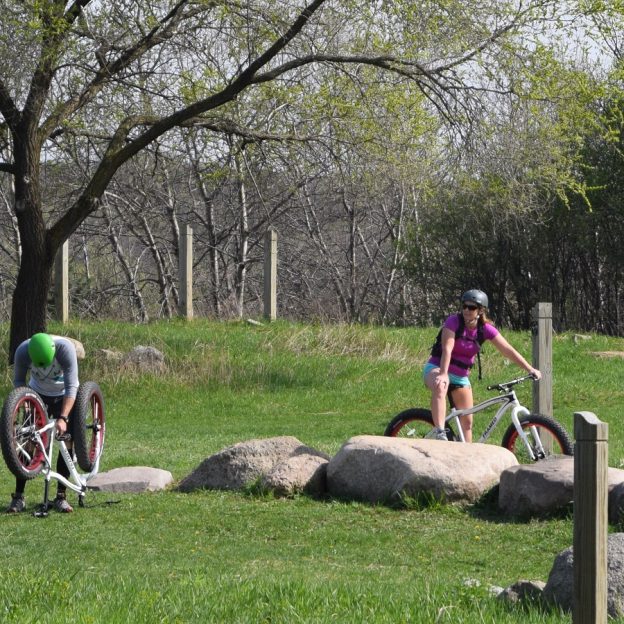
You don’t need to be a mountain biker to have a bike crash, after all, accidents happen. Be sure to take a few moments post-crash to inspect your bike.

Bike Crash: What to Look for and Inspect After the Unexpected

by John Brown, HaveFunBiking

I love the feeling of riding bikes. I don’t know if it’s the freedom, the movement, or the ability it gives me to clear my head, but I can’t imagine enjoying any other sport more. As a mountain biker, that tranquil feeling is sometimes interrupted by an unexpected bike crash. While crashing my bike isn’t something I enjoy, I realize that as I try to push my boundaries, a bike crash is a real possibility. You don’t need to be a mountain biker to have a bike crash, after all, accidents happen. However, if you find yourself spontaneously dismounted from your bike, be sure to take a few moments post crash to inspect your bike.

Body, Mind, and Helmet Inspection After a Bike Crash

Nothing on your bike is more important than you. It’s tempting to jump right up after a bike crash, but take a few moments to assess yourself. Make sure your joints (particularly knees and wrists) feel and function okay. Follow that up by looking for any cuts that might need attention. Finally, remove your helmet and check to see if there are signs of impact. If there are, seek medical attention.

Wheels

After you have deemed yourself okay, pick up your bike and spin each wheel independently. Look for any wobbles or dents in the rim. Also, look to see if the tire has come unseated from the rim. Sometimes you may not be able to see a slight wobble in the rim, but you can hear the rim hit the brake pad as it rotates if you listen closely. Slight wobbles can be fixed later (as long as the brake pads aren’t hitting the tire) but larger ones will leave you calling for a ride home. If you have AAA for your car, they now offer a bike pickup service as well.

Bars and Seat

Once you have checked the wheels, make sure that the bars and seat on your bike are still straight. Look down over your handlebars and make sure they are in line with the front wheel and level. Next, look down the length of your saddle and make sure it is in line with your bike and not bent down to one side or another. If you see any bending in the seat or handlebars, it’s best to take the bike into your shop and have those parts replaced. You may see some scuffing on the side of your saddle or the end of your handlebar grips. That scuffing is a good indication that your seat or bars made a hard contact with the ground and could need replacement.

Derailleurs

Before you ride away, look at your rear derailleur from the back of the bike. The top and bottom pulley should be in line with the cog above it. If it is bent inward, do not ride the bike. A bent derailleur will still hold the chain on the gears, but as you shift into a lower gear, it will get caught in your wheel. This scenario usually leads to a destroyed derailleur and can even result in a destroyed bike.


Frame

Look at the frame and inspect each tube carefully. You are looking for any dents (on metal bikes) or cracks (on metal and carbon frames). If you see damage to the frame, have it checked at your local shop before you continue to ride it.


Brakes

The last thing to check is the brakes. Make sure they operate properly by spinning the wheels and inspecting where the pad hits the rim. If the pads hit the tire, adjust the brake before riding away. A brake pad can make quick work of a tire, leaving you in a far worse situation.

Follow up

For the next few rides, be sure to pay close attention to how you feel and how the bike feels. I have had injuries appear days after a crash. Similarly, my bike has sustained damage that I missed upon my initial inspection. Listen for strange noises coming from the bike, or any change to the way the bike handles.

Road Bike Hacks: Descending with Confidence and Skill on Your Road Bike

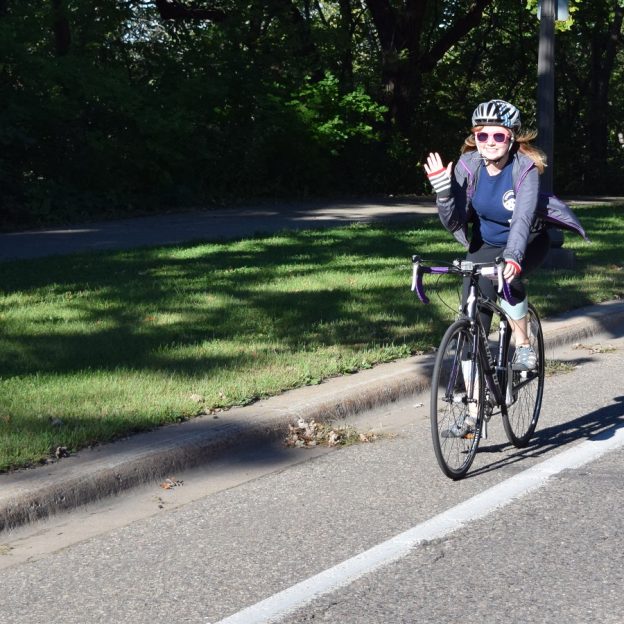
What goes up must come down. Descending on your road bike can be fun and safe if you learn some basic skills.

Weight down

If you have ever watched a motorcycle race, you will have seen those riders get off the side of the bike and touch the ground during turns. The purpose of that position is to get their center of gravity as low as possible. I don’t recommend matching that position on your road bike, but we can take some lessons from them. First thing, the lower your weight, the more stable you will be. Try lowering one foot to the bottom of the pedal stroke while descending in a straight line. When turning, drop your outside foot to the bottom of the pedal stroke and lean your hips toward the inside of the turn.

Hands in drops

Most riders use their drops about 10% of the time. It should be a position you can be in comfortably, if not, be sure to have your fit checked. Being in the drops while descending does two very important things. First, it lowers your upper body weight. Second, it gives you a greater mechanical advantage on your brake levers. Be careful with this new found braking power. Get comfortable with the different brake feel on gradual grades before tackling steep roads with speed.

Brake power

As you descend you are putting more weight on your front tire than rear tire. Additionally, as you apply the brakes, even more weight gets distributed onto the front wheel. With your weight shifting forward, you will notice that a rear wheel is far more likely to skid and break free while going downhill than on flat ground. The best thing to do while braking downhill, is to use the front brake to stop and slow the bike and the rear brake to control speed. New riders get taught that the best way to stop is to use both brakes evenly and that if we use too much front brake we are prone to crash “over the bars”. While going “over the bars” is a real concern it can be combated with a little practice. Simply put, as you begin to stop, brace yourself with your arms and get your weight low.

Look ahead

The world comes at you fast when heading downhill. For this reason, focus farther down the road than you would on flat ground. Keep eyes peeled for cars, pedestrians, painted road surfaces, gravel, or anything else that you will want to avoid. Also, look for the best approach for upcoming turns. When preparing for a turn, be cognizant of the exit to the turn as well as the entry. By planning how to enter, navigate, and exit a turn safely and efficiently, you will stay in control.

Trust your tires

Tires are literally where the rubber hits the road. Even though your tires only make about 3 square inches of contact with the road, they can do a lot to keep you planted. You can do a simple test to build confidence in the traction your tires give you. Try to find a place where the road surface is banked and ride along it. Under highway overpasses often have banked concrete surfaces with a sidewalk separating them and the road. Ride along that bank slowly and see how well the tires hold. You will find that the tires continue to hold fast even when the pitch becomes very steep.

Warning signs and speed wobbles

There are some normal things you want to avoid while going downhill. The most concerning things like sand, gravel, leaves, or debris could rob you of traction. Beyond outside influences, speed wobbles are an uncommon but frightening situation that some cyclist encounter. Speed wobbles are exactly what they sound like. As you get up to a certain speed, your bike will begin to wobble. There are many causes for speed wobbles, but only two things you can do when you encounter them. You can go faster (not recommended) or slow down carefully. Slowing out of a speed wobble is a matter of riding straight, and slowing under control.

Ride within your abilities

More important than the skills to ride downhill is the mentality. Riding at speeds you are comfortable with will keep you mentally, and by extension, physically calm. Calm riders make better and safer decisions. Be sure to take unknown descents with caution and build up to speed after you try it a few times. Overall, remember that it becomes harder to control your bike at higher speeds, so take it slow to start.

Mountain Bike Hacks: Tips and Tricks to Get You Riding Rocks Fast

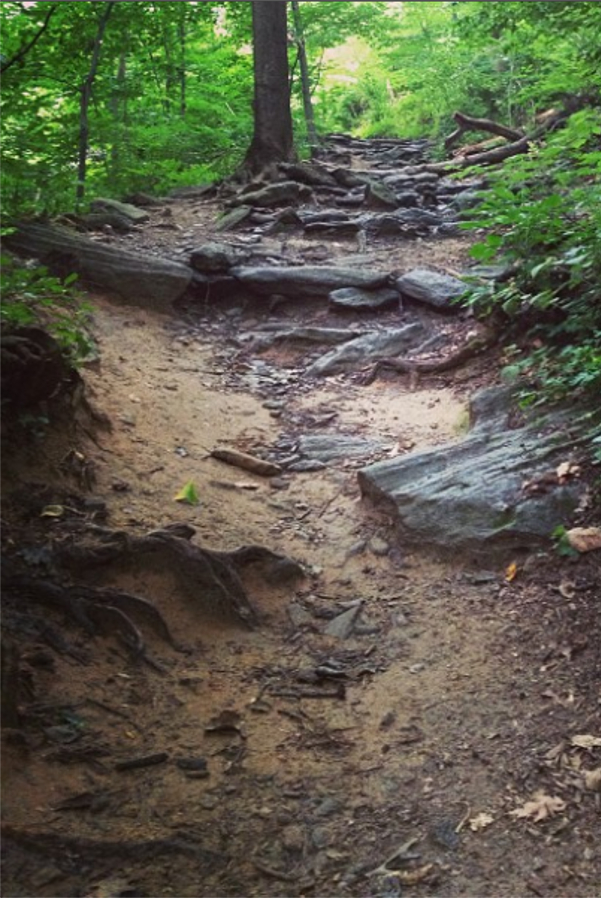
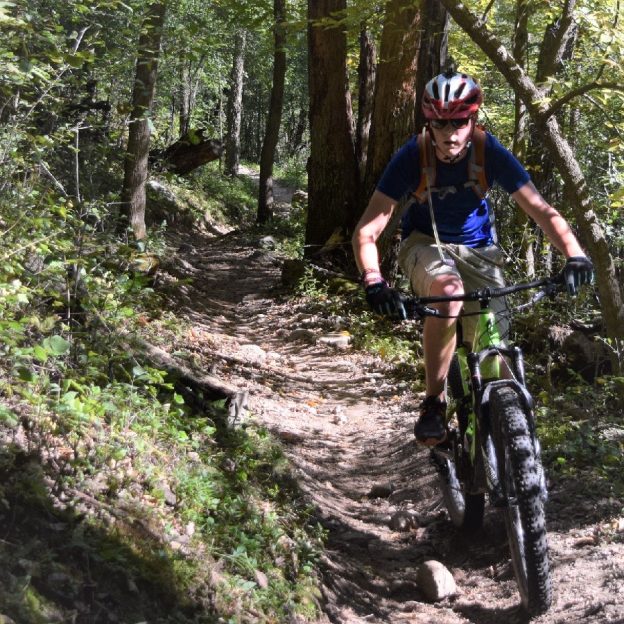
One of the most intimidating situations in mountain biking is riding rocks. Places like the east coast have football field long gardens of granite that appear impossible to traverse by bike. Although they might appear impossible, just a few tips and some regular practice will have you zipping through rock gardens as if they were paved.

Look ahead

While picking your way through rock gardens, always look ahead. By “look ahead” I mean focus on points down the trail ahead rather than the rocks below your front wheel. By focusing ahead, you will naturally keep moving forward rather than getting hung up. Looking ahead also helps you prepare for what’s coming next.

Sections

Another great benefit from looking ahead, is that it allows you to plan how to attack the rocks in sections. By breaking difficult sections into manageable pieces, you can recognize a difficult rock 20 ft down the trail and choose a line that positions you for the best approach. The best way to plan a section out is to look at the approach, the obstacle, and the exit as a single section. In the approach, find the smoothest lead up to the difficult obstacle. Also, think about how to traverse the obstacle in advance and be aware of what the exit looks like. By planning the exit, you can maintain momentum after the obstacle and quickly attack the next section.

Keep it loose

As your bike bounces off and over rocks, it’s easy to lose your balance. The best way to maintain your position is to be as loose on the bike as possible. You do this by riding with your arms and knees bent and your rear off the saddle. This can feel very unnatural at first to pedal with bent knees, but it helps absorb the shock from rocks as you pass over them.

Over not under

It’s better to go over rocks than down in between them. The reason is, you can navigate down and off a rock with ease. By contrast, navigating up and out of between rocks takes a lot more effort and force. Speed also helps you stay on top of the rocks. With a little speed, your tires will ski across the tops of rocks rather than dip down into them.

Gearing and pedal strike

Life through a rock garden would be easier if you didn’t need to pedal. Pedaling moves your weight around at the very time when you are trying to maintain your balance. To help maintain your balance while pedaling pick your gear carefully. The right gear will give you enough torque to get over rocks, while still being difficult enough to push to offer resistance and aid in balance. If the bike seems to jerk forward with very little effort, you should shift into a more difficult gear. By contrast, if you can hardly get any momentum going because the pedals are so hard to push, try dropping down a few gears. Additionally, as you pedal, pay close attention to where rocks are and where your pedals are going. Banging your pedal off a rock is a quick way to lose balance. If you need to pedal, but are in fear of hitting a rock, consider pedaling only 1/4 turn, backpedaling, then pedaling again.

Little bits at a time

You shouldn’t expect to be able to clean every rocky section on your first attempt. Even highly experienced riders still have trouble on new sections. Above all else, ride within your abilities, trying new sections a bit at a time.


For many, the fun of mountain biking is going down hill. So how do you descend with speed and confidence? Find out here!

Mountain Bike Hacks: How to Descend with Speed and Confidence

For many, the fun of mountain biking is going down hill. So how do you descend with speed and confidence? You will find it is as easy as controlling your weight, position and growing skills.

Weight Distribution

Weight distribution is the most important thing to focus on when descending. The inaccurate explanation of this is to “lean back” when heading downhill. In reality, by “leaning back”, you extend your arms completely and “hanging” on the handlebar. As you descend, if your arms are extended completely and the front end needs to drop, you will get pulled forward and potentially pitched over the bar.

For many, the fun of mountain biking is going down hill. So how do you descend with speed and confidence?

For many, the fun of mountain biking is going down hill. So how do you descend with speed and confidence?

An easy trick to controlling your weight is to consider how much pressure is on your pedals. Rather than keeping even weigh distribution between your bars and pedals, concentrate most of your weight on the pedals. As you initially get used to this concept, I find it useful to imagine what would happen if a genie magically came by and made your bike disappear mid ride and you were left to land on the ground. Would you land on your feet or your hands?

Once you get your weight distributed onto your pedals, you can easily move your body forward and back over the bike as the situation requires. While moving your weight around, you will find it is easier to do if you first get your weight into as low a position as possible.


Position

While most bikes have suspension, your arms and legs offer better suspension than any shock. By bending your knees and elbows It is easy to get into a low position and absorb trail shock. Additionally, beyond well bent joints, concentrate on looking ahead rather than down. If you look down, you lose vision of what is coming down the trail and you bend your back into a poor riding position (see image). By contrast, looking forward will naturally put your chest out and hips down, and grant you more time to see obstacles and correct. Finally, having a comfortable bend in your arms and legs, will allow you to be loose on the bike. Loose means you can let the bike move freely beneath you without affecting your position. Other than being low, balanced, and loose, you need to practice a few things to build your skills.


Skills

By bending your knees and elbows It is easy to get into a low position and absorb trail shock, while descending.

By bending your knees and elbows It is easy to get into a low position and absorb trail shock, while descending.

The number one skill is to ride in straight lines. While descending, you have more speed and less traction,therefore, trying to make hard or quick turns becomes increasingly difficult. When entering a descent, look ahead and setup as straight a path as possible, going over obstacles rather than around them. When you do plan to turn, try to control your speed before the turn and lay off the brake while making the turn. To do this, find areas that are smooth to apply the brakes and try to avoid skidding. Remember that if your wheels are skidding, you have lost traction and the ability to stop under control. Moreover, if your wheels are skidding, they will continue to skid even if the ground becomes smooth. An easy trick to help you brake comfortably, is to place your brake levers in an easily accessible place.

Bike setup

One trick that helps with position, braking and weight disbursement is a higher lever position. A common incorrect brake lever position is based on a normal seated riding position rather than the descending position. The levers should be set so that you can reach out and access them easily with your weight low and elbows bent. This will look higher than what you are used to (see image). The reason this is helpful is best explained by what happens if the levers are positioned incorrectly (low). If the levers are low, you will naturally roll your wrists over the bar when reaching for the brake. This lifts your weigh, locks your arms, and positions you too far forward.

Another way to get your weight low, is by installing a dropper post. Dropper posts allow the rider to remotely lower their saddle height. A lower saddle height lets you get your weight lower, easier. Once you need your saddle up again, just hit a button and its back in place.

Ride within your skills

I don’t encourage you to find the steepest, rockiest pitch to practice these skills on. When practicing these new skills, use descents of trail that you are comfortable with. The descents that you are already doing with relative ease are the places to practice new skills. Once you become comfortable with weight and position, try some new places and slowly work your way up to difficult terrain.

Learn How to Care for Your Bike Tires for a Comfortable and Safe Ride

Learn How to Care for Your Bike Tires for a Comfortable and Safe Ride

Tires are often overlooked, but wildly important in the safety and security of your next bike ride. Learning how to inflate your bike tires properly, review their condition, and fix flat tires is something every rider should know.

How do I use my pump?

The first thing about tire care is proper air pressure. Having too much air will result in a rough ride, while too little leaves you susceptible to pinch flats and poor control. The best way to inflate your tires is with a bike pump. To use a bike pump, it’s important to understand how the bicycle tire valves work, and what pump options exist.

-Valves?

Bike pumps are great because they typically work on both type of valves. If you aren’t aware, there are two commonly used valves. The American (or Schrader) valve is the most common. It’s the same valve used on car tires. It has a spring-loaded valve, that self-seals. The other common valve is a French (or Presta) valve. A Presta valve is narrower than an American valve and uses the pressure inside the tube to seal itself. It also has a lock barrel on the end of the valve to secure it shut. With the American valve, inflation is as easy as taking off the valve cap, attaching the pump and inflating. In Contrast, the French valve adds a step. First remove the valve cap, loosen the lock nut, then attach the pump and inflate.

-Hand Pump

The most economical and portable type of bike pump is a hand pump. Hand pumps vary in size from just a few inches long to almost two feet. They won’t fill a tire to pressure quickly, but for emergency repairs, they do a great job.

-floor pump

Floor pumps are by far the best option to inflate your bike tires. They are usually around 3 feet tall, work on both valves, and have a gauge that displays the tire’s pressure. While not portable, they are the quickest way to fill a tire.

-co2

Inflators use small cartridges usually filled with CO2 gas to quickly bring your tires up to pressure. They are great for emergency repairs, but at $2-3 per cartridge, they are too expensive for everyday use.

Tire condition

Before you inflate your tires, review their condition. There are a major concerns to be aware of like dry rot, tread wear, and sidewall wear.

-Dry rot

All tires are susceptible to dry rot. Dry rot is when rubber hardens, and cracks. It is caused by exposure to UV rays, O-Zone and Oxygen. As the bike tires age, they lose elasticity, durability, and traction. Typical signs that a tire is dry rotted is discoloration, meaning a normally black tire will appear grey. Additionally, you will notice small cracking on the tread to begin, and large cracking at later stages.

-Sidewall

Bike tires are built out of rubber impregnated fabrics. The rubber gives the tire durability, and the fabric allows the tire to conform over objects. Pay close attention to the sides of your tire for damage or “threading”. Damage would look like cuts, or punctures, while “threading” is when you see the rubber and thread separating, resulting in loose threads coming off the side of the tire.

-tread wear

The tire’s life is over when no more tread is left. On road tires, you can frequently see a difference in color once you wear through the tread. Mountain tires are a bit more difficult to call. For off road use, a tire stops functioning well once the tread wears down. This doesn’t meant he tire needs to be replaced for threat of flats, but t will stop functioning properly where traction is concerned.

What pressure should I run?

Tire pressure is usually called out on the sidewall of the tires somewhere. What you will see is a pressure range like 50-70psi. Follow those recommendations for best wear and ride quality.

Biking isn't for everyone, but being out there and being active is awesome. So whatever you do, you're being active and promoting a healthy lifestyle!

Bike Pic March 15, Being Active Is What Keeps Us Healthy and Having Fun!

Biking isn’t for everyone, but being out there and being active is awesome. So whether you bike, hike, ski, board, skate, or whatever else there is out there, at least you’re being active and promoting a healthy lifestyle to enjoy life to the fullest!

View the new Minnesota Bike/Hike Guide and remember to register for the Root River Bluff & Valley Bicycle Tour and all the other fun rides coming up.

Thanks for viewing Today’s Being Active is what Keeps us Healthy Pic

Now rolling into our 10th year as a bike tourism media, our goal is to continue to encourage more people to bike and have fun. While highlighting all the unforgettable places for you to ride. As we continue to showcase more place to have fun we hope the photos we shoot are worth a grin. As you scroll through the information and stories we have posted, enjoy.

Do you have a fun bicycle related photo of yourself or someone you may know that we should post? If so, please send your picture(s) to: [email protected]. Include a brief caption (for each), of who is in the photo (if you know?) and where the picture was taken. Photo(s) should be a minimum of 1,000 pixels wide or larger to be considered. If we do use your photo, you will receive photo credit and acknowledgment on Facebook and Instagram.

As we continues to encourage more people to bike, please view our Destination section at HaveFunBiking.com for your next bike adventure – Also, check out the MN Bike Guide, now mobile friendly, as we enter into our 8th year of producing the guide.

So bookmark HaveFunBiking.com and find your next adventure. Please share all our picks with your friends and don’t forget to smile. We may be around the next corner with one of our camera’s ready to document your next move while you are riding and having fun. We may capture you in one of our next Pic of the Day posts.

Have a great day!

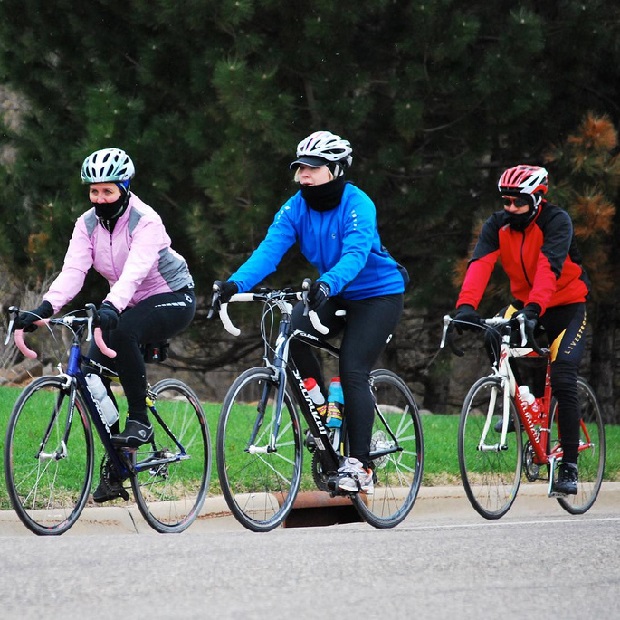
Winter weather is back and now we're all itching for that warm weather but based on forecasts it might not be for awhile. So make sure to dress appropriately if you're gonna head out for a ride. Also, make sure you never forget your helmet. Safety first!

Bike Pic March 10, Winter Weather Is Back, Be Sure to Dress For It

Winter weather is back and now we’re all itching for that warm weather but based on forecasts it might not be for another week. So make sure to dress appropriately if you’re gonna head out for a ride. Also, make sure you never forget your helmet.  Safety first!

View the new Minnesota Bike/Hike Guide and remember to register for the Root River Bluff & Valley Bicycle Tour and all the other fun rides coming up.

Thanks for viewing Today’s Winter Weather is Back Pic

Now rolling into our 10th year as a bike tourism media, our goal is to continue to encourage more people to bike and have fun. While highlighting all the unforgettable places for you to ride. As we continue to showcase more place to have fun we hope the photos we shoot are worth a grin. As you scroll through the information and stories we have posted, enjoy.

Do you have a fun bicycle related photo of yourself or someone you may know that we should post? If so, please send your picture(s) to: [email protected]. Include a brief caption (for each), of who is in the photo (if you know?) and where the picture was taken. Photo(s) should be a minimum of 1,000 pixels wide or larger to be considered. If we do use your photo, you will receive photo credit and acknowledgment on Facebook and Instagram.

As we continues to encourage more people to bike, please view our Destination section at HaveFunBiking.com for your next bike adventure – Also, check out the MN Bike Guide, now mobile friendly, as we enter into our 8th year of producing the guide.

So bookmark HaveFunBiking.com and find your next adventure. Please share all our picks with your friends and don’t forget to smile. We may be around the next corner with one of our camera’s ready to document your next move while you are riding and having fun. We may capture you in one of our next Pic of the Day posts.

Have a great day!

daylight savings time is ending this Sunday! So that means it's time to spring forward! We're looking forward to longer days! Are you?

Bike Pic March 9, Daylight Savings Time Begins, Bring On More Daylight

It’s been a windy March the last couple of days and we hope none of your gear has blown away, that said, daylight savings time begins this Sunday at 2.a.m. So that means it’s time to spring forward and enjoy longer days!

View the new Minnesota Bike/Hike Guide and remember to register for the Root River Bluff & Valley Bicycle Tour and all the other fun rides coming up.

Thanks for viewing Today’s Daylight Savings Pic

Now rolling into our 10th year as a bike tourism media, our goal is to continue to encourage more people to bike and have fun. While highlighting all the unforgettable places for you to ride. As we continue to showcase more place to have fun we hope the photos we shoot are worth a grin. As you scroll through the information and stories we have posted, enjoy.

Do you have a fun bicycle related photo of yourself or someone you may know that we should post? If so, please send your picture(s) to: [email protected]. Include a brief caption (for each), of who is in the photo (if you know?) and where the picture was taken. Photo(s) should be a minimum of 1,000 pixels wide or larger to be considered. If we do use your photo, you will receive photo credit and acknowledgment on Facebook and Instagram.

As we continues to encourage more people to bike, please view our Destination section at HaveFunBiking.com for your next bike adventure – Also, check out the MN Bike Guide, now mobile friendly, as we enter into our 8th year of producing the guide.

So bookmark HaveFunBiking.com and find your next adventure. Please share all our picks with your friends and don’t forget to smile. We may be around the next corner with one of our camera’s ready to document your next move while you are riding and having fun. We may capture you in one of our next Pic of the Day posts.

Have a great day!

Happy Tuesday! Mother nature is at it again everyone! With the line of storms that moved through yesterday and now the cool weather.

Bike Pic March 7, Mother Nature Is At It Again With Another Tease

Happy Tuesday! Mother nature is at it again everyone! With the line of storms that moved through yesterday and now the cool weather we’re experiencing today, we’re not quite sure what the rest of the month will bring. We hope that you have enjoyed the nice weather the past few days because it sounds like we may be in for a cold tone. So bundle up and have fun on your next ride or hiking the trail.

View the new Minnesota Bike/Hike Guide and remember to register for the Root River Bluff & Valley Bicycle Tour and all the other fun rides coming up.

Thanks for viewing Mother Nature is at it Again Pic

Now rolling into our 10th year as a bike tourism media, our goal is to continue to encourage more people to bike and have fun. While highlighting all the unforgettable places for you to ride. As we continue to showcase more place to have fun we hope the photos we shoot are worth a grin. As you scroll through the information and stories we have posted, enjoy.

Do you have a fun bicycle related photo of yourself or someone you may know that we should post? If so, please send your picture(s) to: [email protected]. Include a brief caption (for each), of who is in the photo (if you know?) and where the picture was taken. Photo(s) should be a minimum of 1,000 pixels wide or larger to be considered. If we do use your photo, you will receive photo credit and acknowledgment on Facebook and Instagram.

As we continues to encourage more people to bike, please view our Destination section at HaveFunBiking.com for your next bike adventure – Also, check out the MN Bike Guide, now mobile friendly, as we enter into our 8th year of producing the guide.

So bookmark HaveFunBiking.com and find your next adventure. Please share all our picks with your friends and don’t forget to smile. We may be around the next corner with one of our camera’s ready to document your next move while you are riding and having fun. We may capture you in one of our next Pic of the Day posts.

Have a great day!

With the warm weather out there, make sure when driving that you pay attention to cyclists. So be alert, share the road, and enjoy the nice weather!

Bike Pic March 6, Pay Attention To Cyclists and Cars, Whats Wrong With This Photo?

With the warm weather becoming more frequent as the days become longer, make sure either when driving your bike or car to pay attention and be alert. In this ‘pic of the day’ whats wrong with the subjects in this image?

The group of cyclists are all wearing helmets and some are properly signaling for a left-hand turn that they are all preparing to make. The problem is the majority of the cyclists are over on the right shoulder? They are not following, two-a-breast, the lead biker who is over to the far left preparing to make a safe turn – using good driving practice procedures. If you were driving a car and approached this group of bicyclist from behind would you be a little confused to their intentions?

Please, Share the Road, drive your bike as you would your car and enjoy the nice weather!

View the new Minnesota Bike/Hike Guide and remember to register for the Root River Bluff & Valley Bicycle Tour and all the other fun rides coming up.

Thanks for viewing Today’s Pay Attention to Cyclists Pic

Now rolling into our 10th year as a bike tourism media, our goal is to continue to encourage more people to bike and have fun. While highlighting all the unforgettable places for you to ride. As we continue to showcase more place to have fun we hope the photos we shoot are worth a grin. As you scroll through the information and stories we have posted, enjoy.

Do you have a fun bicycle related photo of yourself or someone you may know that we should post? If so, please send your picture(s) to: [email protected]. Include a brief caption (for each), of who is in the photo (if you know?) and where the picture was taken. Photo(s) should be a minimum of 1,000 pixels wide or larger to be considered. If we do use your photo, you will receive photo credit and acknowledgment on Facebook and Instagram.

As we continues to encourage more people to bike, please view our Destination section at HaveFunBiking.com for your next bike adventure – Also, check out the MN Bike Guide, now mobile friendly, as we enter into our 8th year of producing the guide.

So bookmark HaveFunBiking.com and find your next adventure. Please share all our picks with your friends and don’t forget to smile. We may be around the next corner with one of our camera’s ready to document your next move while you are riding and having fun. We may capture you in one of our next Pic of the Day posts.

Have a great day!