For many, the fun of mountain biking is going down hill. So how do you descend with speed and confidence? You will find it is as easy as controlling your weight, position and growing skills.
Weight Distribution
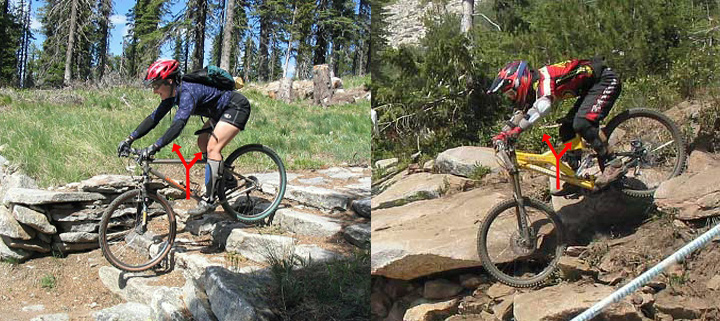
Weight distribution is the most important thing to focus on when descending. The inaccurate explanation of this is to “lean back” when heading downhill. In reality, by “leaning back”, you extend your arms completely and “hanging” on the handlebar. As you descend, if your arms are extended completely and the front end needs to drop, you will get pulled forward and potentially pitched over the bar.

For many, the fun of mountain biking is going down hill. So how do you descend with speed and confidence?
An easy trick to controlling your weight is to consider how much pressure is on your pedals. Rather than keeping even weigh distribution between your bars and pedals, concentrate most of your weight on the pedals. As you initially get used to this concept, I find it useful to imagine what would happen if a genie magically came by and made your bike disappear mid ride and you were left to land on the ground. Would you land on your feet or your hands?
Once you get your weight distributed onto your pedals, you can easily move your body forward and back over the bike as the situation requires. While moving your weight around, you will find it is easier to do if you first get your weight into as low a position as possible.
Position
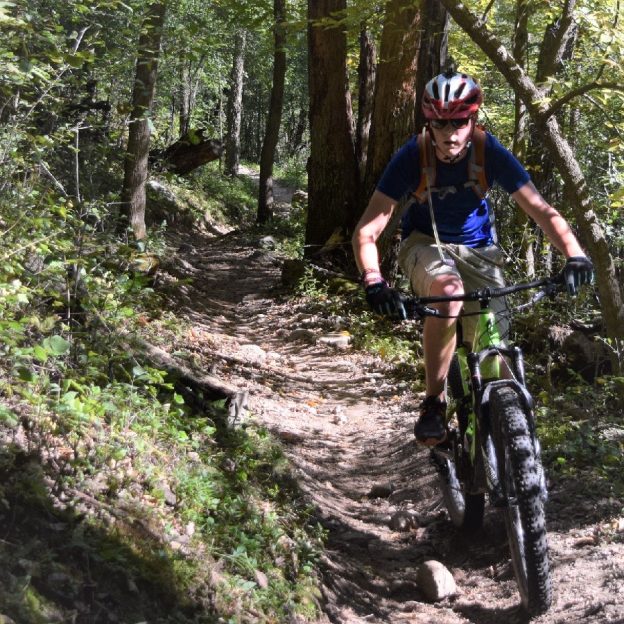
While most bikes have suspension, your arms and legs offer better suspension than any shock. By bending your knees and elbows It is easy to get into a low position and absorb trail shock. Additionally, beyond well bent joints, concentrate on looking ahead rather than down. If you look down, you lose vision of what is coming down the trail and you bend your back into a poor riding position (see image). By contrast, looking forward will naturally put your chest out and hips down, and grant you more time to see obstacles and correct. Finally, having a comfortable bend in your arms and legs, will allow you to be loose on the bike. Loose means you can let the bike move freely beneath you without affecting your position. Other than being low, balanced, and loose, you need to practice a few things to build your skills.
Skills

By bending your knees and elbows It is easy to get into a low position and absorb trail shock, while descending.
The number one skill is to ride in straight lines. While descending, you have more speed and less traction,therefore, trying to make hard or quick turns becomes increasingly difficult. When entering a descent, look ahead and setup as straight a path as possible, going over obstacles rather than around them. When you do plan to turn, try to control your speed before the turn and lay off the brake while making the turn. To do this, find areas that are smooth to apply the brakes and try to avoid skidding. Remember that if your wheels are skidding, you have lost traction and the ability to stop under control. Moreover, if your wheels are skidding, they will continue to skid even if the ground becomes smooth. An easy trick to help you brake comfortably, is to place your brake levers in an easily accessible place.
Bike setup
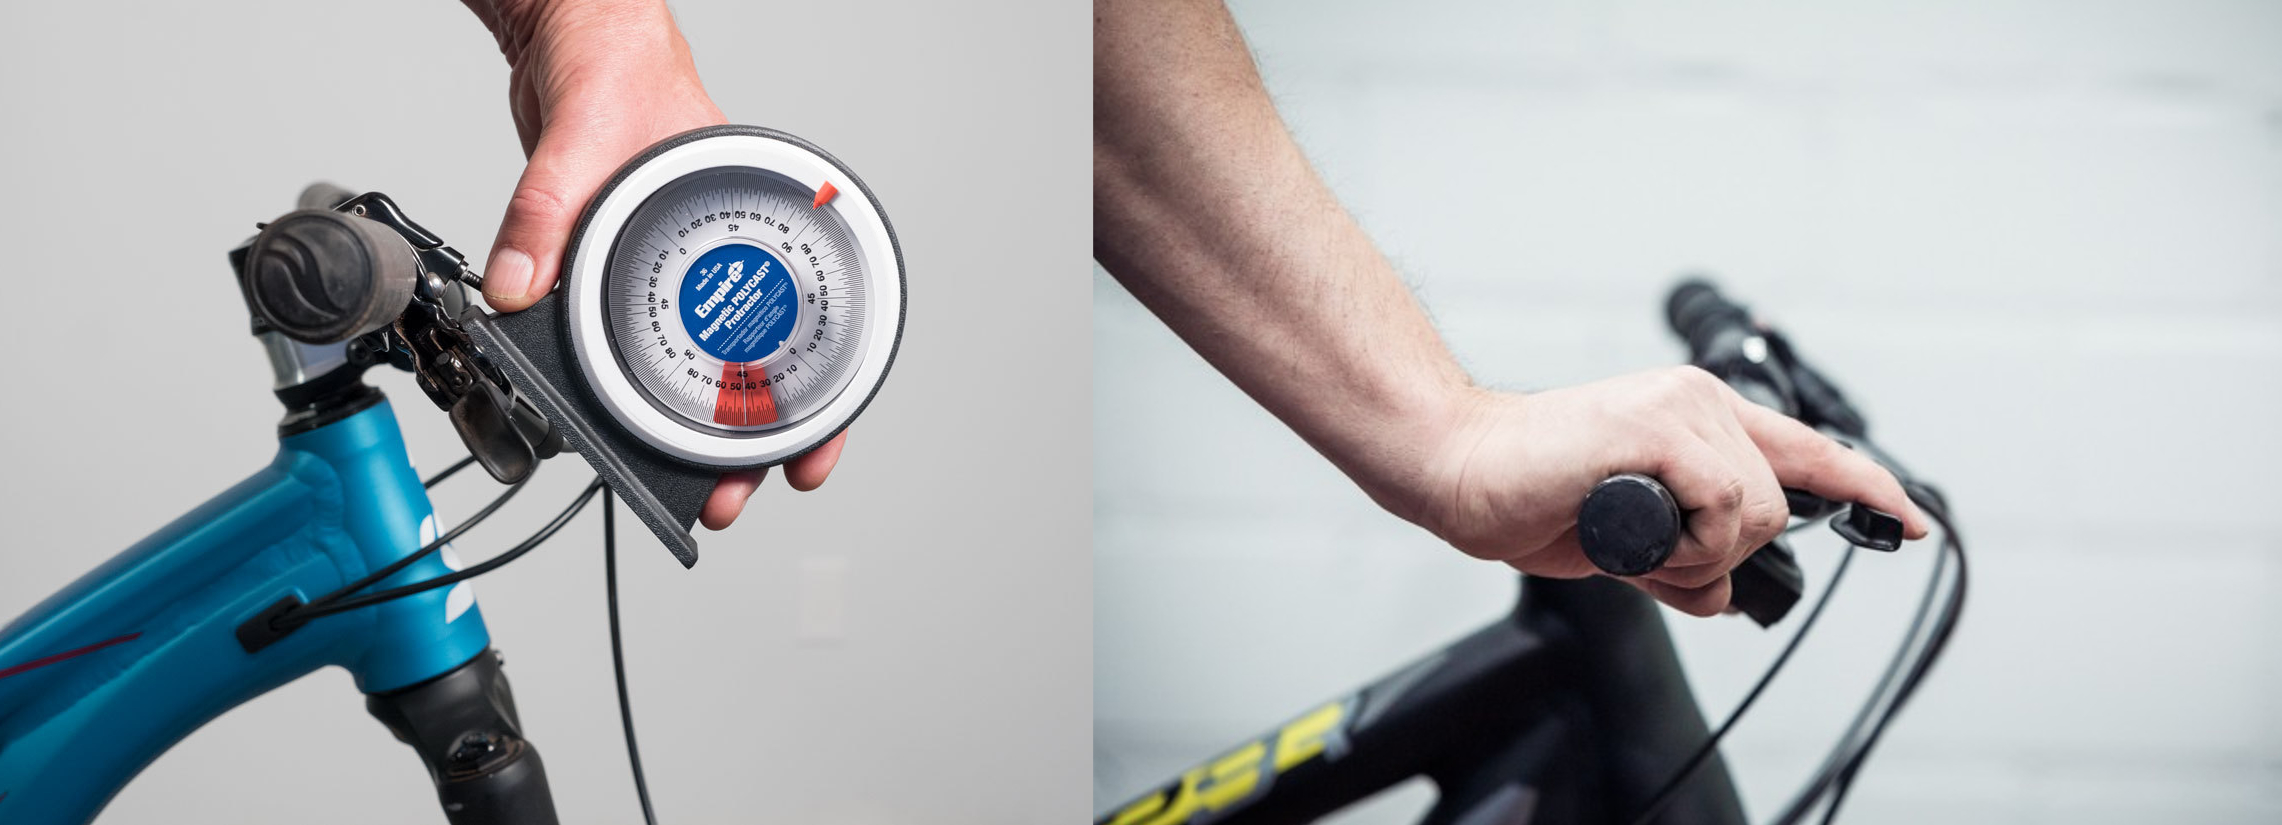
One trick that helps with position, braking and weight disbursement is a higher lever position. A common incorrect brake lever position is based on a normal seated riding position rather than the descending position. The levers should be set so that you can reach out and access them easily with your weight low and elbows bent. This will look higher than what you are used to (see image). The reason this is helpful is best explained by what happens if the levers are positioned incorrectly (low). If the levers are low, you will naturally roll your wrists over the bar when reaching for the brake. This lifts your weigh, locks your arms, and positions you too far forward.
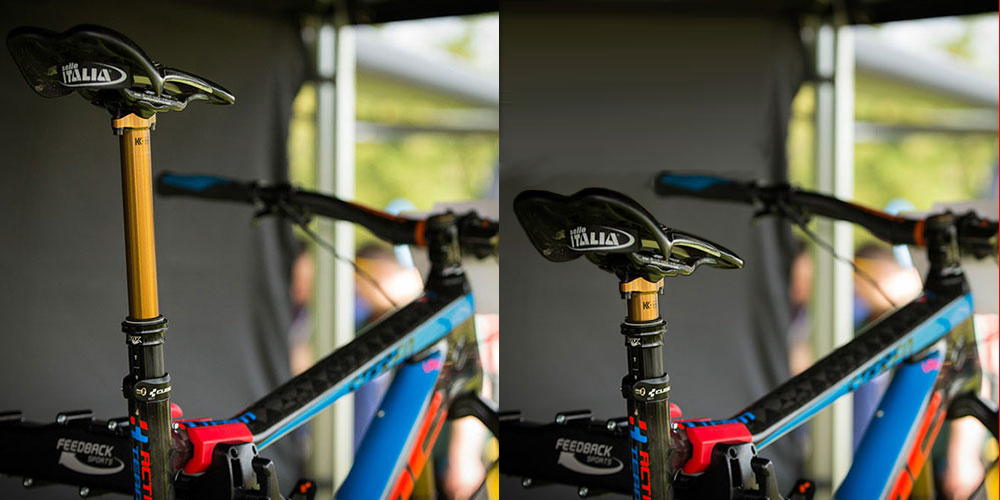
Another way to get your weight low, is by installing a dropper post. Dropper posts allow the rider to remotely lower their saddle height. A lower saddle height lets you get your weight lower, easier. Once you need your saddle up again, just hit a button and its back in place.
Ride within your skills
I don’t encourage you to find the steepest, rockiest pitch to practice these skills on. When practicing these new skills, use descents of trail that you are comfortable with. The descents that you are already doing with relative ease are the places to practice new skills. Once you become comfortable with weight and position, try some new places and slowly work your way up to difficult terrain.


