Tag Archives: mountain bike

The Patrol 672 mountain bike was well worth the ride

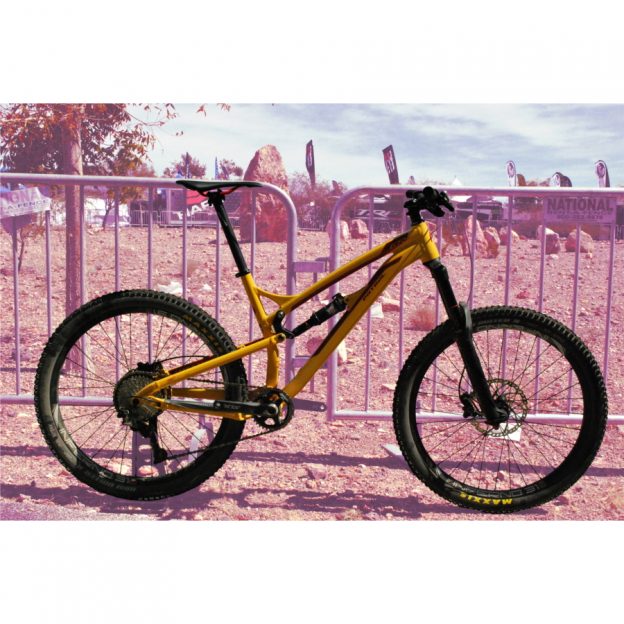
Testing mountain bikes at Interbike’s Dirt Demo: Review Patrol 672

by John Brown, HaveFunBiking,com

I have to admit it, Interbike was more fun before the internet. The reason for this is that you would walk isle after isle and see all the new, awesome products. In the age of digital media it becomes a lot harder to find something new and even harder still to find something new and awesome. Well, I’m happy to report that I did find a diamond in the rough (more specifically desert) while I was out there. That diamond was Patrol bicycles, specifically the Patrol 672.

The Patrol 672 bike

The Patrol 672 is a 160mm travel mountain bike, equipped with 27.5” wheels. In the landscape of today’s bike market, it is relatively normal. It uses the tried and true Horst link suspension design and an all aluminum frame. Throughout the build kit you will find Rockshox and Shimano parts. What all this means is that Patrol hasn’t cut any corners. Overall the bike felt light and roomy in the cockpit with the suspension easily adjusted through air pressure.

Patrol 672

The Patrol 672 I rode in Bootleg Canyon

The Patrol ride

By the sound of the spec and design this bike should be unremarkable. That couldn’t be further from the truth. This bike just begged to gobble up rocks and loose sandy turns. While the top tube (and by extension wheelbase) isn’t as long as some other bicycles on the market, it was still sure footed and stable when things got hairy. I think that shorter overall wheelbase is what lends to this bikes snappy handling and playful demeanor. With any long travel bike like the 672, climbing is almost an afterthought, so I really didn’t expect much. Fast forward to the first loose climb and I was taken aback by this little goat. With the suspension set into its “full open” position (meaning that the suspension moves freely and is not stiffened to make for more efficient pedaling) there was some slight pedal bob under hard effort, but nothing that would be considered inefficient. With the suspension set to its climb mode, the bike shot up hill. My feeling is that for loose climbs, this bike works best in full open, but for extended smoother climbs, the climb mode eliminates any loss of effort.

Patrol 672

The Rocky and loose trails of Bootleg Canyon, served as a perfect test track for the Patrol 672

The Patrol 672 components

For this category of bike, short stems, wide bars, and single chain rings have become the standard. The 672 checks all these boxes with some really nice house brand aluminum bars and stem. For the drivetrain, they use a Shimano SLX group which will perform flawlessly for a long time.

Value

At $2,900 the Patrol 672 is really reasonable by comparison. If this were a bike from a larger name, you could expect it to cost well over $3,000 dollars. Now, why do you ask does this bike justify what seems like a hefty $2,900 price tag? Let’s start with the frame. Patrol uses sealed ball bearings and oversized hardware throughout all of it’s suspension. These features lead to better performing suspension that will continue functioning smoothly for seasons to come. Additionally, the 672 uses carefully manipulated tube shapes, created through a process called hydroforming, that allows the bike to be stiff, durable, and exceedingly light. Finally, Patrol has equipped this bike with parts that are as durable as the are functional, This ensures a lifetime of happy riding (even if you crash a few times along the way).

Why is it a diamond in the Rough?

Simply put, this brand is considered rough only because of their distribution. Take a look at their website and you will see Patrol offers bicycles across all categories, and at affordable prices. The bikes themselves are as polished as anything you will see coming out of a major brand. The only difficulty is you probably won’t see them at your local bike shop. But, I have a feeling as more people discover this diamond, it will become more available. In the meantime, if your interest is piqued, contact them directly and they can help you out.

I was amazed at how well the B17’s operated. Even when thrown down rocky chutes or around jagged turns this bike soaked up anything I threw at it.

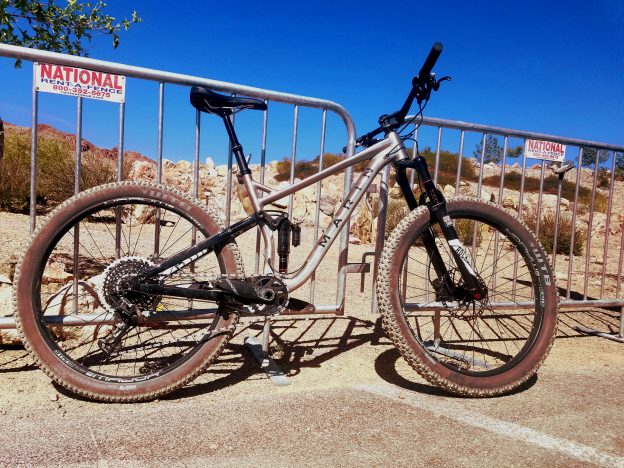
Dirt Demo Reviews: Thoughts and Feelings on the Marin B17

By John Brown, HaveFunBiking

Interbike’s Dirt Demo is always good for a few things, red dust, high winds, and some really expensive bikes just waiting to be ridden – and wow, was I impressed with the Marin B17. Typically the brands at Dirt Demo bring their biggest and best bikes in an effort to wow the throngs of bike shop staff members visiting. Happily, this year many brands brought their price point bikes and I have to say they were all awesome. OK, OK, I realize that calling them all awesome isn’t the type of hard hitting journalism that makes for a serious review. But, with that said, I honestly have to share just how much bike you get for a reasonable amount of money.

Bootleg Canyon

Dirt Demo is held about thirty miles east of Las Vegas in a place called Bootleg Canyon. This high plateau offers a great stage for dozens of brands to create a tent village from which to show their product. Bootleg also has paved bike paths, winding roads and miles of offroad trails. For these reviews, I used their trails, and small pumptrack. The trails are predominantly sand, rock and what riders call “kitty litter. While sand and rock is self explanatory, “kitty litter” needs some explanation. Basically “kitty litter” is loose rock, typically smaller than gravel, which is deposited over a firm surface. While sand will slow you down, and rock will make for fun obstacles, kitty litter requires a bike to have excellent traction, and handling to navigate it well.

Out in Bootleg Canyon there is plenty of room to test out the latest bikes manufactures are showcasing.

Out in Bootleg Canyon there is plenty of room to test out the latest bikes manufactures are showcasing.

Marin B17

This pump track was fun and a good way to see how the Marin B17 handled

The Marin B17

The first bike I tried was the Marin B17. The B17 is one of the new crop of aluminum full suspension bikes using 27.5+ (27.5 x 3”) tires. It boasts 130mm of travel up front and 120mm in the rear and a 1×11 speed drivetrain.

Marin B17

The Marin B17 I rode

Thankfully, the B17 uses an air shocks which made it easy for the the Marin mechanics to quickly adjust the suspension to my riding weight. When testing out any bicycle, it is important to try to isolate problems, adjust, and see if you can get the bike to ride its best. Initially, I felt the suspension offering good control but the bike seemed a bit harsh. Rather than adjusting suspension though, I lowered the tire pressure. For the B17, the harshness came from the tire’s air pressure being too high. Happily, once I lowered it, the bike absolutely lit up.

I was amazed how well the bike handled! To start, it had a near telepathic handling character. Simply think about changing direction and the bike did it. Following that, I was amazed at how well the B17’s suspension operated. Even when thrown down rocky chutes, or off camber, jagged turns, the B17’s suspension soaked up anything I threw at it. Even more, when it was time to turn the bike uphill, the suspension resisted bobbing and transferred my pedaling effort to the rear wheel while still allowing the rear wheel to find traction.

Keeping things Consistent

I tested the B17 3 (Marin’s Top end model at $3699.99). While $3700 dollars isn’t exactly wallet friendly, Marin also produces a B17 1 AT $2099.99. That makes the B17 1 an excellent deal for such a full functioned bike. however, you may be concerned that the ride quality of B17 I rode was associated with the high end suspension parts and not the frame design. I ran both the fork and rear shock in their full “open” position. I did this to see if the frame design or shock function is responsible for the ride quality. If the function of the high end shocks were responsible the bike would behave differently in “full open”. Happily I can say that with the suspension setup in “full open” that the B17 happily climbed and descended with control and confidence.

More to come

Stay tuned for my Review of the Marin Wolf Ridge, Hawk Hill, and Haro Shift. As for right now, I am off to Dirt Demo to bring you more great product reviews. Feel free to comment below if there is anything you want to see in more detail.

In the U.S. bike markets it all happens at Interbike.

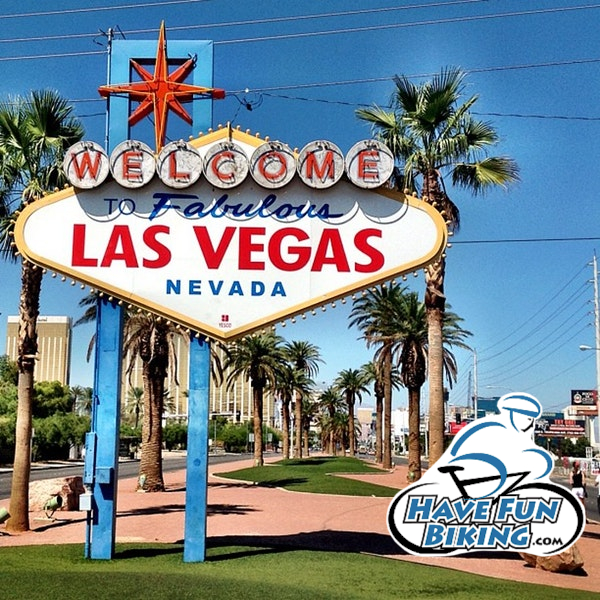
HaveFunBiking will share many new bike products from Interbike

by John Brown, Havefunbiking.com

Show season is at hand in the cycling industry and HaveFunBiking.com will be on the show floor. We are excited to try the newest product and deliver to our readers the most curated list of new products over the next couple months. On Monday September 18th , before dawn, we embark to Las Vegas to try countless bikes at Interbike’s Dirt Demo. Following that, on Wednesday the 20th, the doors open to the last Interbike in sin city. Stay tuned to our Blog to see all the newest products and news from the show floor at HaveFunBiking.

Interbike

Interbikes’s Dirt Demo is a great way to try new product.

HaveFunBiking goes to Interbike in Las Vegas

Don’t worry, the fun doesn’t stop when we leave Vegas. Following the show we will be reviewing product we will see over the course of next week, so stay tuned.

Here the manufactures of Tern Bicycles is showing and demonstrating the latest line of folding bikes out at the Iterbike's Canyon Demo location.

Here the manufactures from Tern Bicycles is showing and demonstrating the latest from their line of folding bikes out at the Interbike’s Canyon Demo location.


Here a bike shop representative takes a fat bike out for a test ride so she can share the highlights with her customers.

Here a bike shop representative takes a fat bike out for a test ride so she can share the highlights with her customers.


On Wednesdays Interbike official begins with several thousand exhibitors showing off their latest products in bike wear and fad.


Interbike

Miles of product at Interbike 2017!

Here the manufactures of Alter Bicycles is showing and demonstrating the latest line of there line of bikes at Interbike.

Here the manufactures of Alter Bicycles is showing and demonstrating the latest line from their their line of bikes at Interbike.


Here a manufacture is showing and demonstrating a colorful line of helmet mirrors at Interbike

This manufactures rep is demonstrating their colorful line of helmet mirrors at Interbike

Feel free to let us know what new products you want to hear about and what topics you need more info on.

Here in this bike pic a member of MORC (Minnesota Off Road Cyclists) checks out a mountain bike trail in Lebanon Hills Regional Park. With an alliance created between Dakota County Parks and MORC, eighteen years ago, members of the Off Road organization have been volunteering their time each year to build and maintain the popular trails in the park.

Tubeless tires on bicycles: The basics of this exciting new technology

by John Brown, HaveFunBiking.com

In the spring of 1999 the french rim maker MAVIC launched the first viable bicycle tubeless system. By working closely with their french neighbor, the tire maker Hutchinson, they engineered a simple system that could give riders the benefits of larger air volume, greater traction, lighter weight and greater durability that tubeless systems offer. Since 1999, tubeless has evolved to be lighter, more serviceable, and lighter.

Now, with more bicycles coming from the manufacturer with these tires as standard equipment, please read on to see how the current family of tubeless systems can benefit you.

What are tubeless tires

Tubeless tires are exactly what they sound like, tires that use no innertubes. Specifically, these tire and rim systems use the air pressure, combined with a sealant, to keep your tires seated and inflated on the rim.

Why tubeless

There are a few reasons as to why tubeless tires have become popular. In essence, they are less prone to flats, they ride more comfortably, they are lighter and they offer better traction.

Less flats

Tubeless tires protect against the most common type of flat tire, a pinch flat. How a pinch flat works is the tire is compressed between a solid object and the rim. When compressed the rim and object work like scisors and cut a hole in the innertube. Considering tubeless tires have no innertube, they cannot pinchflat. This isn’t to say you cannot cut the tire in the same circumstance, but that is far less likely.

Tubeless Tires

The innertube on the left (blue) is susceptible to pinchflats, while the tubeless setup on the right is immune.

Less weight

Innertubes are relatively heavy. The pair can easily weigh a pound. While a pound may not sound like a lt of weight, we need to consider were that weight is. Tires, tubes, and rims have a profound effect on the feel of a bike. Heavy rims, tubes or tires can make the bike feel very heavy (even if it’s overall weight is low). The reason for this is that when you pedal, the weight you are constantly accelerating, only to have it decelerate and need to be accelerated again is rotating weight (ie. Rim, tire, tube). Reducing the rotating weight will decrease the mass you need to constantly accelerate, and lead to a lighter riding bicycle.

More comfot

By doing away with the innertube, you automatically increase the air volume of the tire. This increased air volume allows for a greater degree of flex in the tire when you ride over objects. Increaseing that flex allows the bike to more comfortably float across road and trail.


More traction

Tires and tubes don’t actually play well together. A tire is built with high thread count fabrics that are designed to conform over objects, but not collapse under the efforts of turning and pedaling. That delicate balancing act is made more difficult when you introduce an innertube. An inflated innertube will press against the inner surface of the tire an hinder it from conforming over objects. This is because that pressure creates friction between the tire attempting to conform, and the tube exerting force on it. This, if you eliminate the tube, the tire is free to do what it was intended to do

Tubeless Tires

Air Pressure (Green) forces the tube into the tire causing friction (Red)

Types of tubeless tires

There are two primary tubless systems. Tubeless, and Tubeless-ready. A true tubeless system (like the tires on most automobiles) requires no sealant to inflate the tire. The tire is built with a airtight material grafted to the inner surface. Tubeless-ready tires require you to use a sealant because they have no airtight material applied. Overall, the tubeless-ready tires has become more popular because they ride better, are lighter and less expensive. For all those benefits, the trade off is that a sticky solution must be installed into the tire to seal it.

What you need to go Tubeless

There are four primary items you need to go tubeless. They are a tubeless compatible rim, rim tape and valve, a tubeless-ready tire, and sealant. In many cases new bikes are coming stock with tubeless compatible rims (the largest expense) so check with your shop to see if you are already half way there.

What happens if you get a flat with a tubeless  tire

In the rare instance where you do get a flat tire, you can simply remove  the tubeless valve core, and install an innertube. There is a bit of added mess with the sealant, but otherwise changing a flat is simple.


Disc brakes are more powerful, consistent, and durable than a standard brake. read on to learn the tips and tricks of removing disc wheels.

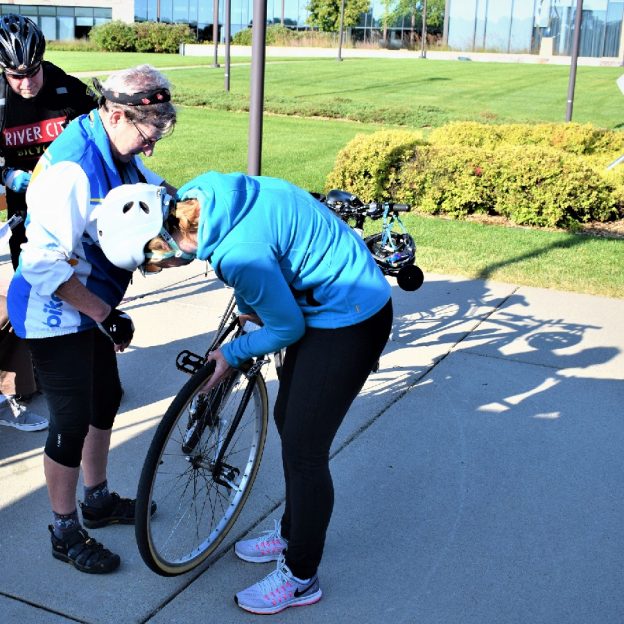
Don’t be Afraid of Removing Wheels with Disc Brakes

by John Brown, HaveFunBiking.com

Disc brakes are taking over the cycling world. It is becoming more difficult to find a new bike without them and that’s for some good reasons. Disc brakes are more powerful, more consistent and more durable than a standard brake. With any new product there are new things you need to learn and here are a few tips we would like to share.

The wheel with disc brakes is the same as with rim brake

Just because your new bike has disc brakes, doesn’t mean that everything is new. In fact, the skills you learned to take the wheel off your old bike with rim (pad) brakes are still completely relevant. Specifically, if you know how to operate a quick release, you can take the wheel off a bike with disc brakes. Consequently, with a disc, there is actually less to worry about than with a standard rim brake. However, if you don’t know how a quick release or thru axle works, read below.

How does a Quick Release work

A quick release allows you to remove your wheel without tools. Moreover, the quick release is installed through the center of your wheel allowing you to clamp the wheel into the bike. Basically, a quick release is a very long bolt with a cam lever on the end. It’s the cam lever that gives the quick release its powerful clamping force. To remove your wheel, simply flip the lever open, and remove the wheel. If it’s a front wheel, you will also need to unthread the quick release nut on the opposite side from the lever.

Disc brake

Flipping the lever open widens the quick release. This action is what gives a quick release it’s clamping force.

Disc Brake

Quick release levers are marked “open” and “closed” on the lever. Be sure to always close the lever when tightening the quick release lever in place. If the wheel is tight, and you can read “open” the quick release lever is not installed properly.

How does a Thru Axle work

Thru axles work similarly to quick release levers. The main difference is that a thru axle needs to be threaded out of the frame and removed completely for the wheel to come out. Consult your bike manufactures manual for the details on how to remove your thru axle.

disc brake

Thru Axles slide through both frame and wheel and thread into place.

So what is difference between mechanical or hydraulic disc brakes?

When it comes to removing a wheel, the main difference is knowing if your disc brakes on your new bike are mechanical or hydraulic disc brakes. The differences come with the way that lever force is transferred to the caliper or pad around the brake disc rotor. At one end there is a cable that operates the brake system, sometimes referred to as mechanical disc brakes. In contrast hydraulic disc brakes use a sealed, fluid filled system as the means apply pressure. In the case of the mechanical disc brake you don’t need to worry about anything. You can open the quick release and remove the wheel with no other issues. For hydraulic disc brakes, you only need to take care not to squeeze the brake lever if the wheel is not in place in the bikes caliper.

You shouldn’t squeeze the lever without a disc rotor in place. This is because of hydraulic disc’s auto adjusting pad (caliper) wear valve. If you make the mistake of squeezing the lever without a disc rotor in place. The valve adjusts as if you just wore through 3mm of pad material (the thickness of a rotor). If this happens, don’t worry, just get a flat piece of clean, oil free, metal to pry the pads back apart again. Even if you spread those pads too far out, once the rotor is back in, a few squeezes of the lever will get the brake adjusted properly again.

Putting the Wheel back In

When replacing the wheel on a disc bike, there is one new detail to take into consideration. Generally speaking, the wheel fits into the bike normally. Just verify that the rotor is inserted into the caliper (pad) properly. For instance, if the rotor isn’t centered into the caliper, it will rub. Therefore, verify that the wheel is centered in the bike straight.


With all the great things about fall bike riding there are some dangers as well. Read on to learn how to enjoy the fall riding season safely.

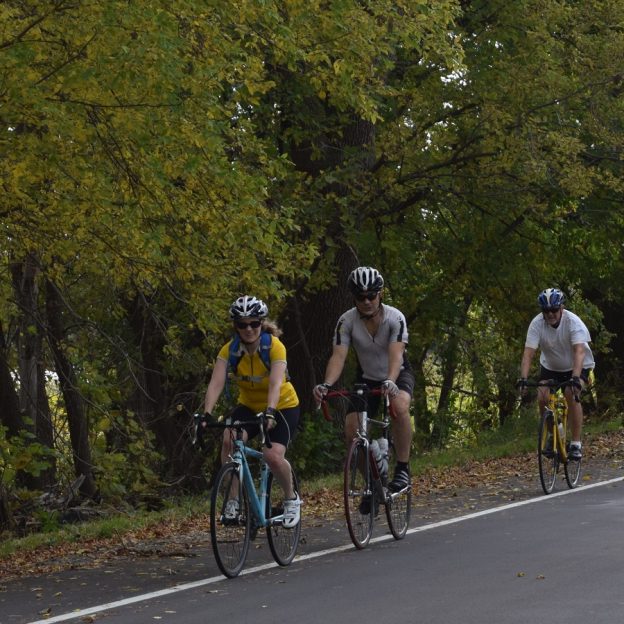
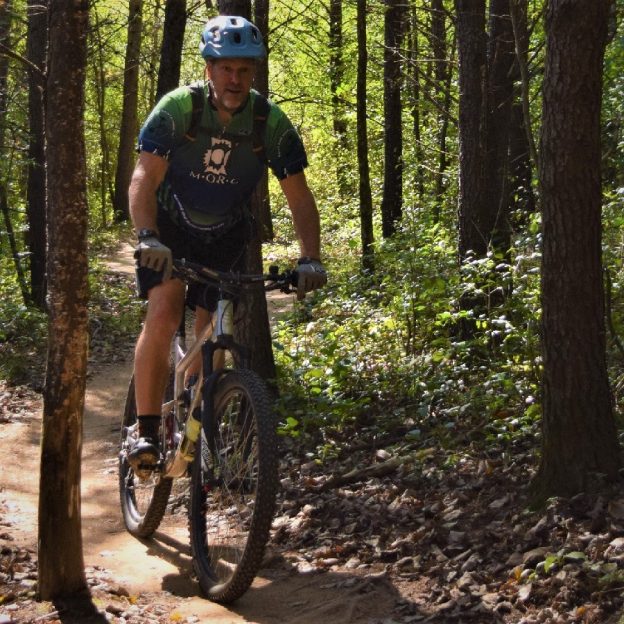
Finding fun and fitness in fall bike riding through the colorful foliage

by John Brown, HaveFunBiking.com

Now that the kids have gone back to school, the days are getting shorter and temperatures begin to drop it is the best time of year to ride your bike. From a trail perspective, the dirt becomes softer as the fall rolls in because of lower temperatures and increased rainfall. Additionally, riding off road in the fall is a beautiful way to enjoy the change in foliage. That doesn’t mean you can’t enjoy the leaves changing if you choose to ride on the path or road. In fact, great fall rides often have specific vista points built into the ride. With all the great things about riding through the fall there are some dangers as well. Read on to learn how to enjoy the fall riding season safely.

Fall bike riding road hazards

Those beautiful fall colors are enjoyable, but also a sign of falls largest hazard. Falling leaves that mix with fall rains begin to break down and decompose on road surfaces. What is left behind is a slick slurry of organic matter perfectly suited to eliminate traction and cause a crash. As you ride in the fall, avoid riding too far off the edge of the road. Likewise, don’t ride too far into the middle of the road where leaves tend to accumulate.

Fall bike riding off road hazards

The same problems with traction and decomposing leaves exists off road, but it’s not as large an issue as on the road. Thanks to the soft dirt and rough surface, riders have a better chance of finding traction when the leaves get wet. What you should be on the lookout for is what you can’t see. Makes total sense, right?! Whenever you are on a trail that has fallen leaves, objects can hide in those leaf piles.

Being seen while fall bike riding

As the days get shorter, you need to be concerned with being seen in low light situations, that’s where proper lighting comes in. Lights, no matter your level of bike riding skill, are essential to make sure you have the safest ride possible. Plus, most states require bike lights to ride on a roadway (here is Minnesota’s law). The two types of lights on the market are lights that allow you to see, and lights that allow others to see you.

Seeing the trail

A great side effect to the shortened days is going for night rides with your mountain bike. Night riding was first born out of the necessity of riding, but has quickly become a fun part of the sport in and of itself. With this in mind, get yourself a high output light, strap it to your bike and head into the woods. In the long run you will see that riding at night changes how you see your local trails, and makes then new and fun.

Dressing the part for fall bike riding

Universally across on or off-road riders, the fall brings colder temperatures. To combat these temps you want to dress accordingly. Early fall rides force us to break out the arm and knee warmers, with long sleeve jerseys marching quickly behind. When dressing for colder weather, be sure to not overdress. Being too insulated will cause you to sweat past your cycling clothings ability to move moisture. At that point, you get wet, and cold, which defeats the purpose of wearing more clothing.

Lights are essential to make sure you have the safest ride possible. Here in this photo Brian Will, from Iowa's Cedar Valley Cycling Club lead a safe ride using trails and roads near sunset.

Falls unique events

Many charity rides are scheduled through the fall because of its great weather, and ambient beauty. One event type that is completely exclusive to fall is the sport of Cyclocross. What is Cyclocross you ask? Well, the best way to describe it is it’s just fun. A Cyclocross race is a timed (30,45,60 minutes) event that covers a one-mile course including, road, off road, grass, and sand sections with manmade and natural barriers. The best part of Cyclocross is that spectators can enjoy the action easily. Additionally, Cyclocross races are very family friendly and usually include things like food trucks, kids bike rodeos, and beer tastings.

How ever you decide to spend you fall, try and spend it outside on your bike. The Fall is a great time to get back on the bike, steal a few more hours in the saddle, or enjoy natures last show before the winters long sleep.

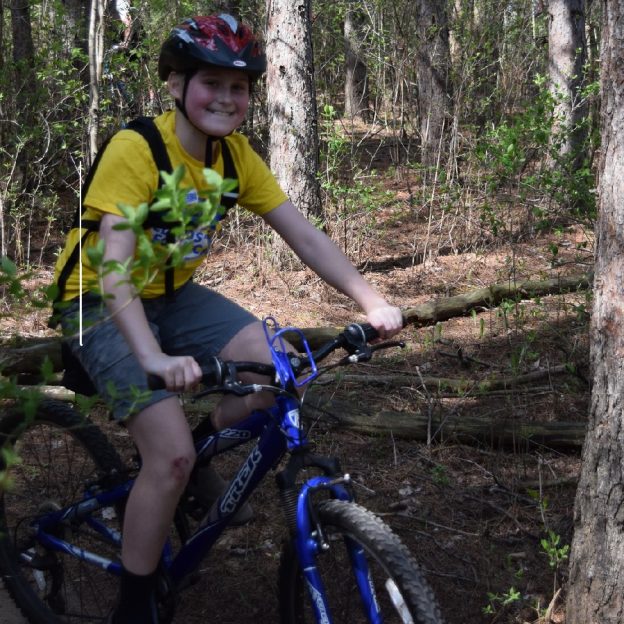
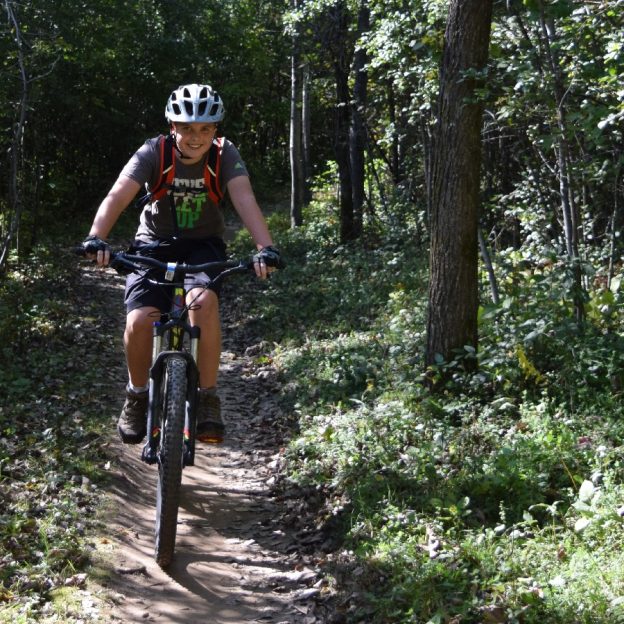
Bike Pic Sept 9, schools out for the week for this mountain biker

With the first week of school out of the way this young mountain biker is enjoying riding the trail. With temps in the mid-70’s we hope get an ride!

What better way to continue your summer fun and your #NextBikeAdventure. View all the great ideas and bike destinations in the latest Minnesota Bike/Hike Guide. Then plan your next outing with family and friends in one of Minnesota’s HaveFunBiking Destinations.

Thanks for viewing our ‘Mountain Biker’ pic of the day  

We are now rolling into our 10th year as a bike tourism media. As we pedal forward our goal is to continue to encourage more people to bike and have fun while we highlight all the unforgettable places for you to ride. As we continue to showcase more places to have fun, we hope the photos we shoot are worth a grin. Enjoy the information and stories we have posted as you scroll through.

Do you have a fun bicycle related photo of yourself or someone you may know that we should post? If so, please send your picture(s) to: [email protected]. Include a brief caption (for each) of who is in the photo (if you know) and where the picture was taken. Photo(s) should be a minimum of 1,000 pixels wide or larger to be considered. If we use your photo, you will receive photo credit and acknowledgment on Facebook and Instagram.

As we continue to encourage more people to bike, please view our Destination section at HaveFunBiking.com for your #NextBikeAdventure – Also, check out the MN Bike Guide, now mobile friendly, as we enter into our 8th year of producing this hand information booklet full of maps.

Remember, bookmark HaveFunBiking.com on your cell phone and find your next adventure at your fingertips! Please share our pics with your friends and don’t forget to smile. We may be around the corner with one of our cameras ready to document your next cameo apperance while you are riding and having fun. You could be in one of our next Pic’s of the Day.

Have a great day!

Another mountain biker having fun in Lebanon Hills Park.

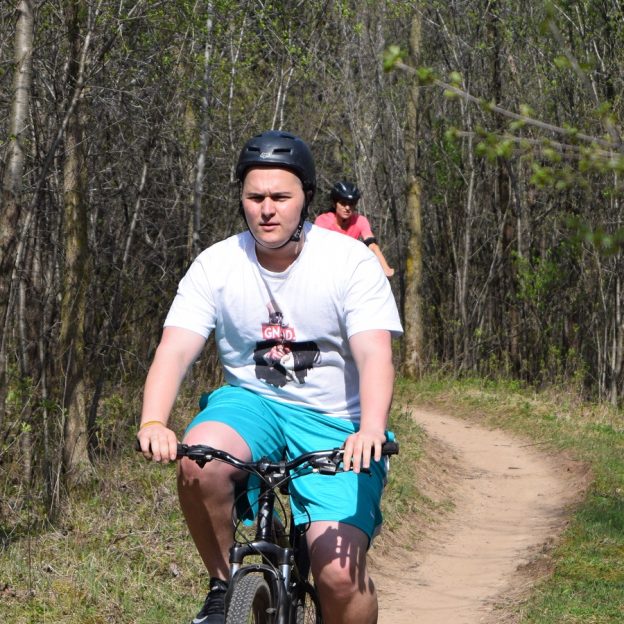
Bike Pic Aug 22, another mountain biker having fun in Lebanon Hills Park

Another mountain biker having fun in Lebanon Hills Park. Check MORC trail conditions to see which trail systems may be closed after another day of rain yesterday.

What better way to continue your summer fun and your #NextBikeAdventure. View all the fun ideas and bike destinations in the latest Minnesota Bike/Hike Guide. Then plan your next outing with family and friends in one of Minnesota’s HaveFunBiking Destinations.

Thanks for Viewing Our ‘Mountain Biker’ Pic of the Day  

We are now rolling into our 10th year as a bike tourism media. As we pedal forward our goal is to continue to encourage more people to bike and have fun while we highlight all the unforgettable places for you to ride. As we continue to showcase more places to have fun, we hope the photos we shoot are worth a grin. Enjoy the information and stories we have posted as you scroll through.

Do you have a fun bicycle related photo of yourself or someone you may know that we should post? If so, please send your picture(s) to: [email protected]. Include a brief caption (for each) of who is in the photo (if you know) and where the picture was taken. Photo(s) should be a minimum of 1,000 pixels wide or larger to be considered. If we use your photo, you will receive photo credit and acknowledgment on Facebook and Instagram.

As we continue to encourage more people to bike, please view our Destination section at HaveFunBiking.com for your #NextBikeAdventure – Also, check out the MN Bike Guide, now mobile friendly, as we enter into our 8th year of producing this hand information booklet full of maps.

Remember, bookmark HaveFunBiking.com on your cell phone and find your next adventure at your fingertips! Please share our pics with your friends and don’t forget to smile. We may be around the corner with one of our cameras ready to document your next cameo apperance while you are riding and having fun. You could be in one of our next Pic’s of the Day.

Have a great day!

The trails of Lebanon Hills offer some of the most enjoyable mountain biking in the Twin Cities Area.

Enjoy fun and nature on Lebanon Hills fantastic mountain bike trails

by John Brown, HaveFunBiking.com

The newly expanded trailhead of Lebanon Hills acts as a gateway to some of the most enjoyable trails in the Twin Cities Area. With nearly 12 miles of one way singletrack trails, Lebanon Hills has become one of the go-to trails in Minnesota. The trails feature riding for all skill levels combined with world-class facilities to enhance your riding experience. All the bike trails are built and maintained by the Minnesota Off-Road Cyclists (MORC).

Where Lebanon Hills is

Another happy mountain biker riding through the forests of Lebanon Hills Park.

Another happy mountain biker riding through the forests of Lebanon Hills Park.

The Lebanon Hills Mountain Bike trails (Leb to the locals) are located in Eagan Minnesota off Johnny Cake Ridge Road. The newly expanded trailhead boasts ample parking, clean bathrooms, public grills and picnic areas as well as a skills course appropriate for all ability levels. Leb is a part of the larger Lebanon Hills Regional Park system that includes two swimming lakes, nearly a dozen hiking areas, three camping areas and close proximity to the Minnesota Zoo.

What to expect in Lebanon Hills

The first thing you will notice about riding in Leb is the amazing condition of the trails. Thank the Minnesota Off Road Cyclist organization (MORC) for the smooth berms, clear trails and exciting features. Ride into the first trail and enjoy the sweet smell of pine trees while you wind through a healthy forest. First, you are given the choice of staying on the beginner trails or hanging a hard right onto the intermediate loop. Staying on the beginner trails will lead you to five 8’ tall berms that are a total blast to ride. From those berms you can branch off into another intermediate loop or head into a skills section that including a berm, roller, and jump line.

Another fun run through an open meadow.

Another fun run through an open meadow in Lebanon.

If you choose that first right onto the intermediate loop, you are rewarded with twisty sections, a rock drop, and high speed downhill sections. That intermediate section brings you out to the far end of the park. Once out there, you can enter into the truly advance loops built on rock gardens, step climbs and steep descents. The trails on the far side of the park meet at one point, perfect for a quick break between loops.

Here on the advanced trail in Lebanon Hills you will find some obstacles to challenge you.

Here on the advanced trail in Lebanon Hills you will find some obstacles to challenge you.


Best part of the trails

Leb gives its riders amazing trails as well as awesome views. The best part of Leb is how well it integrates into nature. Even though the trails of Leb are well trafficked, Places like the “lake loop” give the impression of sanctuary for hundreds of riders a weekend. Because all the trails are directional, there is a great feeling of isolation even though other riders may be just a few hundred feet away. Overall, Lebanon hills is a great way to enjoy the beauties of nature in the Twin Cities area.

Here is a place for all ages to build on their skill levels.

Here in Lebanon Hills is a place for all ages to build on their skill levels.

How to help

If you ride and enjoy the trails at Leb, consider volunteering for trail maintenance. The Minnesota Off Road Cycling organization (MORC) schedule trail work sessions on Tuesdays through the summer. The group meets in the parking lot at 6 O’clock and welcomes anyone interested in helping. Wear long pants, boots, and work gloves because you will be doing hard labor. You will find that the hard labor is enjoyable because you are giving back to fellow riders.

Best seasons to ride

Those with fatty's are finding Lebanon Hills the perfect trail system year round.

Those with fatty’s are finding Lebanon Hills the perfect trail system year round.

If you love the trails at Leb during the summer, rejoice, they are open through the winter as well. Not only are the trails open when the snow falls, but well traveled. Because of that traffic, the trails stay clear and ride-able right up until the spring thaw. With that said, once the thaw begins, the trails are usually closed for about six weeks while things dry out. A quick check on MORC’s trail conditions website will let you know when the trails are open.


Tips and Tricks to Adjust Your Bike’s Rear Derailleur

by John Brown, HaveFunBiking.com

It goes by many names, the rear derailleur. It is also known as the “s,” the “hangdown,” or the mech. Here in the U.S. we refer to it as the rear derailleur. The device that moves your bike’s chain from gear to gear letting you traverse hills with ease. Even though derailleurs are sturdy and relatively maintenance free, they do require attention occasionally. Look below for the step by step instructions on how to adjust your bike’s rear derailleur.

 Rear Derailleur Terminology

Twist shifter – A shifting device that rotates around the handlebar like the throttle of a motorcycle.

Trigger shifter – A Shifter that activates by pushing or pulling a set of paddles with your thumb and index finger.

STI shifters – Technical this stands for Shimano Total Integration and speaks directly about one brands type of road bike shifter, but it has become the generic term for any drop bar shifter/brake lever combo.

Thumb shifter – A shifter that can be mounted in many places like; the stem, bar end, brake lever, or top of the bar. These shifters are the most rudimentary type of shifter, and operate by simply actuating a lever with your thumb.

Derailleur parts

(A) Jockey Wheels- two small wheels on the derailleur on which the chain run. They are mounted onto the derailleur cage

Limit screws- The limit screws control the area of motion a derailleur has. On most derailleurs there are three limit screws: the upper limit, Lower limit, and B-limit. The upper limit screw sets the maximum distance the derailleur can shift in high gears. The lower limit screw sets the maximum distance the derailleur can shift in the lower gears. The B-limit screw sets the distance the upper jockey wheel sits from the cogs.

(B) Barrell adjuster – This is an adjustment device on the back of most derailleurs. It is the area where the derailleur cable enters the derailleur and can increase or decrease the cable tension by threading it in and out.

(C) Pinch bolt – The pinch bolt is where the derailleur cable gest secured.

(F) Derailleur hanger – The portion of the bike frame where the rear derailleur is mounted.

Rear Derailleur

Not defined above is the Upper Knuckle (E), and lower knuckle (D)

Is everything straight?

The cogs your rear derailleur shifts across can have as little as 2.14 millemeters of spacing between them. Considering the spacing is so narrow, look to see that everything is aligned properly before you start adjusting your rear derailleur in vain. Look first at the derailleur itself from behind. You should be able to see if the derailleur itself is aligned properly. A tell-tale sign of damage is when the two Jockey wheels don’t line up with the cogs or each other (see picture).

Next assure that the derailleur hanger is aligned properly. This is easily seen when the derailleur appears straight, but not in line with the cogs. Consequently, if either the derailleur or derailleur hanger are bent, it’s best to take it into your local shop for a remedy.

Step 2, A man has got to know his limitations

Before attempting to adjust the derailleur properly, set its usable range. First, loosen the pinch bolt and let the derailleur run on the smallest cog. Next, pedal forward while visually and audibly inspecting how the chain runs on the smallest cog. The chain should run smoothly without any clicking, or skipping noises. If it runs smoothly, don’t worry about the upper limit. when you do experience skipping or noise, look closely at how the chain runs on the cog (looking from behind is easiest). If the chain isn’t coming directly off the upper jockey wheel and going straight onto the small cog you need to adjust the upper limit. By threading the limit in or out you can adjust where the derailleur sits in relation to that smallest cog (note: the limit screws don’t need to get “tightened” down, they simply act as a stop for the derailleur).

Once the upper limit is set, pedal forward and push on the derailleur lower knuckle until it moves the chain into the largest cog. If the chain has issue getting into the largest cog, or jumps over that cog into the wheel spokes, you need to adjust the lower limit screw in a similar fashion to the upper limit screw.

Rear Derailleur Tension

With the limits set, you can now move on to tightening the cable and trying to shift. Make sure the shifter is in its lowest gear by shifting down while gently pulling on the shift cable. With the shifter in its lowest position, ensure all housing ends are settled into the frame properly then pull the cable taught through the derailleur.  With the cable taught, tighten the derailleur pinch bolt onto the cable. Trim any excess cable so that only about one inch of cable extends beyond the pinch bolt and crimp it off as not to fray.

While pedaling, shift one gear up. Ideally, the chain will easily move from the smallest cog up to the next cog. It should stay on the second cog and run quietly and smoothly. If it hesitates to get to the second cog, increase cable tension by rotating the barrel adjuster out. If you cannot increase tension enough with 3 or 4 turns of the barrel adjuster, thread it back in, loosen the cable pinch bolt, pull the cable taught, and tighten the pinch bolt again. Once you have the chain shifting up the cogs easily, check to see if it will smoothly move back down the cog stack by shifting from the largest cog down and inspecting. The only difference is in the adjustment. If the chain hesitates to move down the gears, turn the barrel adjuster in (relieving cable tension).

Rear Derailleur Trouble shooting

What happens if you can get the chain to move up the cogset well, but can’t get it to move back down the cogset easily. In some cases, the cable and housing can be corroded and causing drag. This drag won’t affect the shifting moving up the gear set, but it will stop the derailleur from returning. In tis case, you can clean and lube the cables and housing, or just replace the cable and housing all together.

Additionally, there may be a grinding/banging noise in only the largest cog. That noise is caused by the upper jockey wheel running on the largest cog. To remedy this, tighten the b-limit screw until the noise subsides.

Finally, a common problem is if you get skipping while pedaling up steep grades or under load. If your derailleur is adjusted properly, and you’re getting skipping, it may be related to a worn out drivetrain. As your chain ages, it stretches slightly. As the chain stretches, the front face of the gears will wear in unison with the chain stretching. Once the chain stretches beyond the point where it will mesh with the gears, you will experience skipping under load.

Working on your own bike is fun. Also, your appreciation for the technology and engineering that goes into what is considered a simple machine will grow with each turn of the wrench. Periodically, you will run into a problem you cannot solve. If that is the case, bring your bike to your local shop, talk honestly with the mechanic about what you tried and what you are trying to accomplish. As a result, you will find that most mechanics will be happy to teach you what you need to know.