Welcome. We're your premier source for fun places to explore by bicycle or on foot. Offering guides, maps and articles on road and trail riding for the novice to seasoned cyclist - helping you find your #NextBikeAdventure
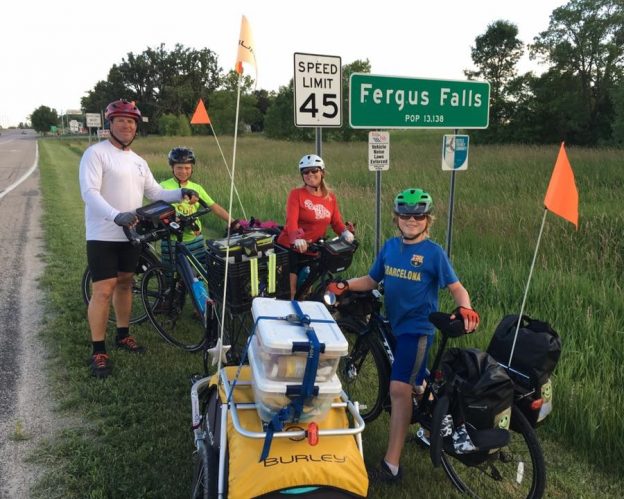
by Natalie Gille, Greater Minnesota BikeMN program Manager – photo Pedal Fergus Falls
With bike touring season is in full swing here in Minnesota the local bike advocates in Fergus Falls are always ready! Located on the Adventure Cycling Association Northern Tier route, an overnight stop here should not to be missed on your travels through our bicycle-friendly state.
When I reached out to the Pedal Fergus Falls crew on short notice it was the beginning of the 4th of July holiday weekend. Right away they responded and were busy welcoming a family of four (including two kids ages 10 and 12) who just arrived on their bikes. The Ziemer family was touring across the country from coast to coast by bike. On their arrival, Pedal Fergus Falls response was lightening fast. Within a few short hours the crew had lined up dinner, overnight accommodations and a warm welcome for their first night in Minnesota.
What’s really cool to hear is that two other touring cyclists groups where overnight guests in Fergus Falls as well. They pedaled in just before the Ziemer’s arrived. So a third host site was needed to accommodate them, which was promptly arranged by the local Fergus Falls crew.
Special thanks to Wayne Hurley and his family for providing dinner for the Ziemer’s. The Thorson Family for hosting them overnight. David Jensen and Paul Shol for hosting the other touring cyclists in town at the same time period. Also a wonderful warm thanks by the local bike advocate group in Fergus Falls.
I received the following message of gratitude from Jessica Ziemer as they continued biking across the rest of Minnesota. “What an amazing bike community Fergus Falls has here!” She said. “We were treated so wonderfully by the Fergus Falls community!”
Thank you for biking through Minnesota Ziemer Family. BikeMN wishes you safe travels on the rest of your journey to the east coast. You can learn more about the Ziemer bike tour in the Glendive Ranger Review and follow their story at www.journeybig.com.
To learn more about local bike advocates in Fergus Falls. A group who has sought out and received national recognition as a bronze level Bicycle Friendly Community, check out Pedal Fergus Falls on their Facebook page.
Also, keep your eyes peeled the Green Riders pedaling through Minnesota! They’ll be rolling in from the east and heading west from Minneapolis. Anyone who wants to stretch their legs is invited to ride with them on their way through the state, or even just through their town! Check out their website here to connect.
Lots of people are bicycling through and around Minnesota. Keep a lookout in the city and on country roads for bicyclists. Please stay focused on the road at all times and give all riders lots of room (and a wave hello)!
About BikeMN
The Bicycle Alliance of Minnesota is working to make Minnesota a place where bicycling is an easy, safe, and fun for everyone. The mission of BikeMN is to unite and strengthen bicycle advocacy, provide education, and work for a more bicycle friendly Minnesota. Visit www.bikemn.org to learn more about local advocacy around Minnesota.
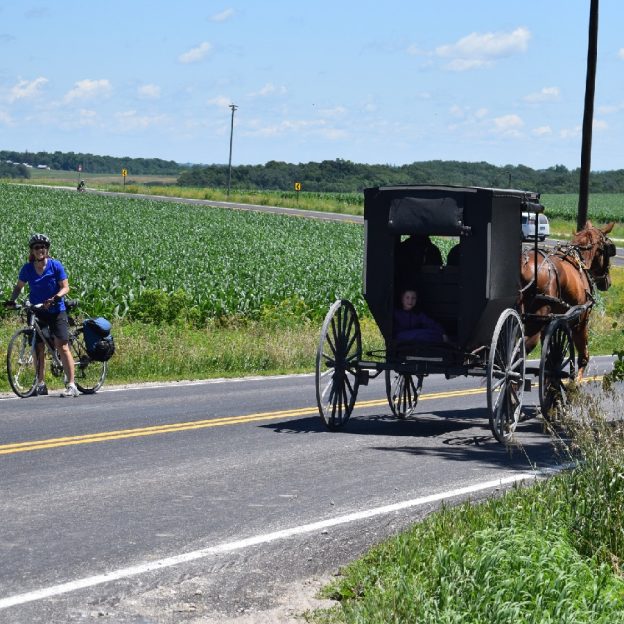
This fun biking experience, earlier this month, was captured in Southeast Minnesota while riders of the Root River Bluff & Valley Bike Tour enjoyed riding through Amish Country. Mark your calendar for next year’s ride July 13, 14 & 15, 2018 and watch for updates here at HaveFunBiking,com.
What better way to enjoy your Summer and your #NextBikeAdventure. View all the fun ideas and bike destinations in the latest Minnesota Bike/Hike Guide. Then plan your next outing with family and friends in one of Minnesota’s HaveFunBiking Destinations.
Thanks for Viewing Our ‘Fun Biking Amish Country’ Pic of the Day
We are now rolling into our 10th year as a bike tourism media. As we pedal forward our goal is to continue to encourage more people to bike and have fun while we highlight all the unforgettable places for you to ride. As we continue to showcase more places to have fun, we hope the photos we shoot are worth a grin. Enjoy the information and stories we have posted as you scroll through.
Do you have a fun bicycle related photo of yourself or someone you may know that we should post? If so, please send your picture(s) to: [email protected]. Include a brief caption (for each) of who is in the photo (if you know) and where the picture was taken. Photo(s) should be a minimum of 1,000 pixels wide or larger to be considered. If we use your photo, you will receive photo credit and acknowledgment on Facebook and Instagram.
As we continue to encourage more people to bike, please view our Destination section at HaveFunBiking.com for your #NextBikeAdventure – Also, check out the MN Bike Guide, now mobile friendly, as we enter into our 8th year of producing this hand information booklet full of maps.
Remember, bookmark HaveFunBiking.com on your cell phone and find your next adventure at your fingertips! Please share our pics with your friends and don’t forget to smile. We may be around the corner with one of our cameras ready to document your next cameo apperance while you are riding and having fun. You could be in one of our next Pic’s of the Day.
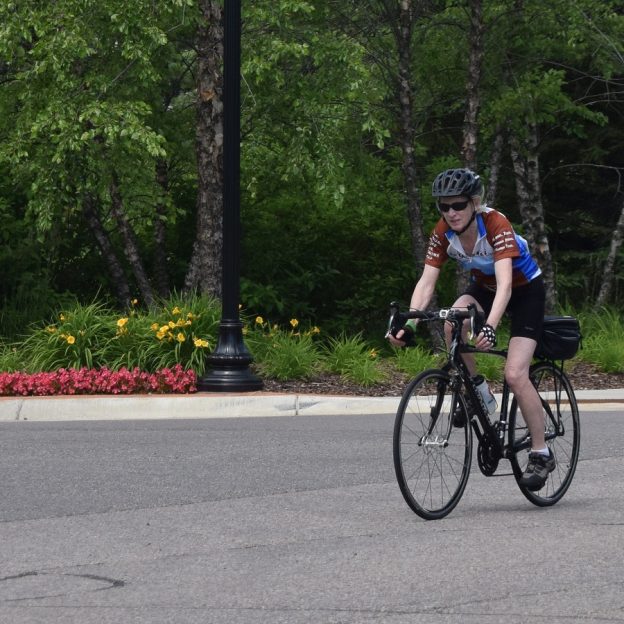
Most mountain bikes today are coming equipped with a suspension fork, many others are offering suspension for both the front and rear wheel. Additionally, the technology being employed in these suspension systems has become truly amazing. As good as suspension is, it does nothing unless setup correctly. Read on to learn how the right suspension setup can have you riding longer and in greater control.
Suspension Setup Terminology
To properly set up your suspension, it is first important to know what all the parts are called, and what they do. While shaped very different, suspension forks and rear shocks use the same terms and functions
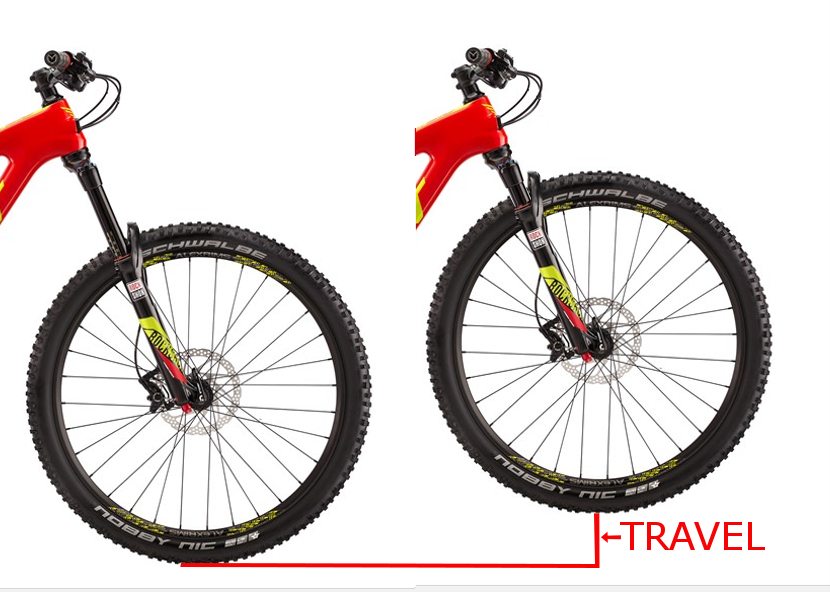
Travel
Suspension travel is simply the distance your wheel can move. On suspension forks, this is easily measured on the fork itself, while measuring rear wheel travel is far more difficult. ON the bright side, most manufacturers publish the amount of rear wheel travel a bike has.
Spring
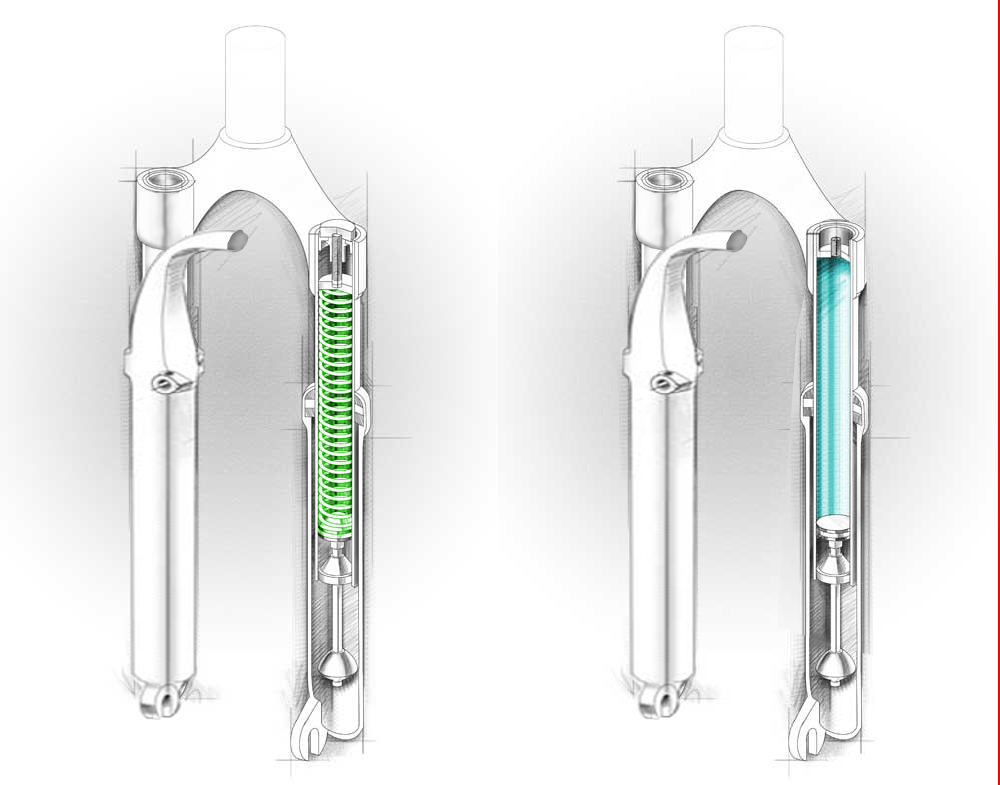
Suspension springs can be made of metal (coil spring) or air. Coil sprung suspension is great because it offers smooth motion from the initial movement to the end of its travel. Air springs are great because they are lighter than a coil, and have a wider range of adjustment (just add air to make the suspension stiffer, or remove it to make the suspension softer). The downsides of an air spring is that they suffer from a greater static friction (stiction) in the initial part of its movement than a coil spring. Additionally, to change pressure in an air spring, you need a specific shock pump.
These cutaway pictures show how a suspension fork works. Coil spring on the left (green) and air spring on the right (blue)
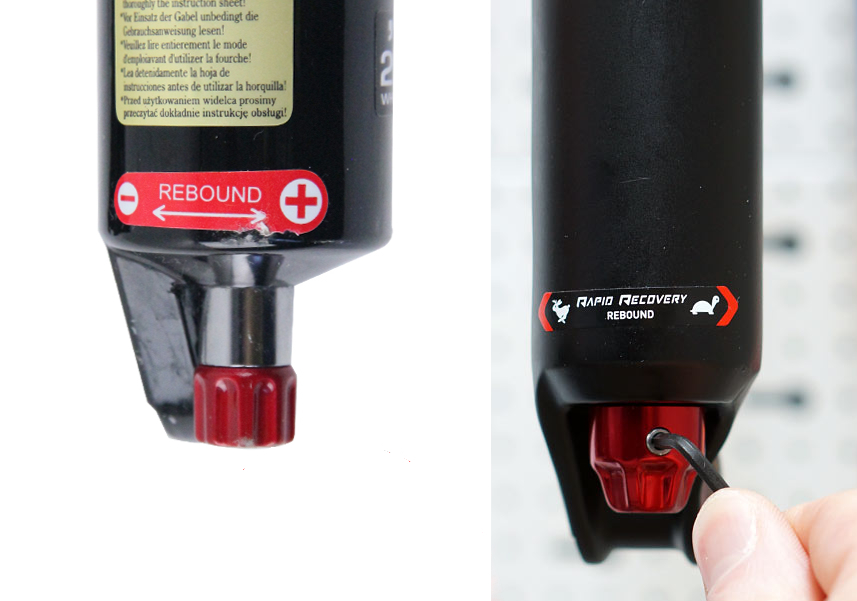
Damping
Damping is a way of controlling how fast the suspension can move. As an example, if a fork is un-damped, it would rebound as quickly as it was compressed, making your bike bounce around the trail like a pogo stick. A damper is the mechanical device inside the suspension that allows it to compress quickly when you hit an object, but return at a controllable rate. Damping comes in two common forms, Compression and Rebound. Compression damping controls how fast a suspension can be compressed and rebound damping controls how fast the suspension can return to full extension.
Preload
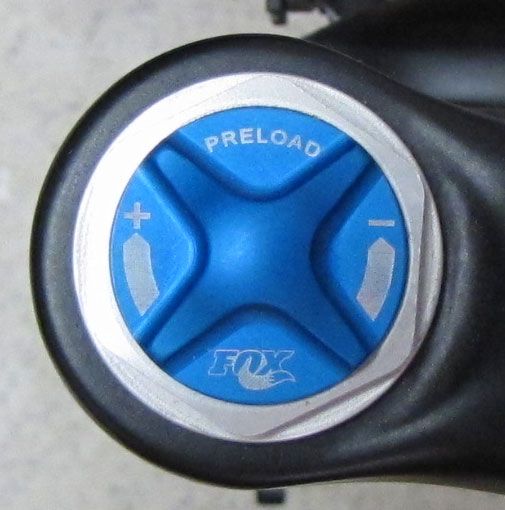
Preload is a set amount of compression force applied to the spring at its full extension. For instance, a coil spring might have some preload applied if a rider feels their suspension is too active. By applying some preload, you raise the force needed to begin the suspensions movement. In most cases, preload is handled by adjustment knobs on the top of a suspension fork.
Sag
Sag is the amount your suspension will compress when you are seated on your bike. Having some sag allows your wheels to track down into holes in the trail as well as compress if you hit an object. Overall, an optimal amount of sag is between 25-35% of the total travel.
Bottom out
Bottom out is when you compress suspension to its limit. Most suspension is designed with bumpers to protect metal parts from doing damage to one another during a bottom out.
Setting Sag
First, you will need something to mark your sag point. Most suspensions come with a rubber o-ring installed around the fork leg or rear shock. If they don’t have an o-ring, you can use a zip-tie that is loosely installed around the leg or rear shock.
Next, lean the bike up against a nearby wall and get on. Stand on the pedals with your hands on the bar and bounce up and down on the bike a few times. Now sit gently on your saddle with your weight forward (normal riding position).
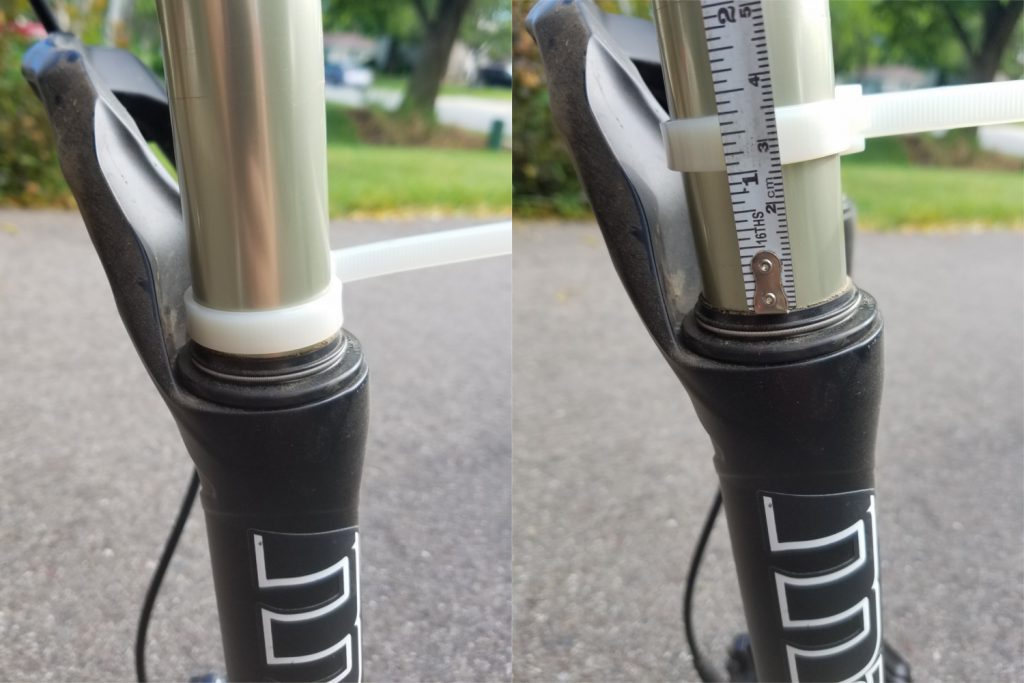
Now push the o-ring down on the suspension against the seal and get off your bike carefully. You should see is some space between the o-ring and suspension seal (see image). That space is your sag measurement. Like stated earlier between 25-35% of total travel is optimal, so suspension with 100mm of travel should have 25-35mm of sag. If you have too little sag, stiffen the spring, too much then soften it.
The zip tie is flush against the fork seal under the weight of the rider, but when the rider steps off, 25mm of sag can be measured (left)
Suspension Setup and Air Spring Adjustment
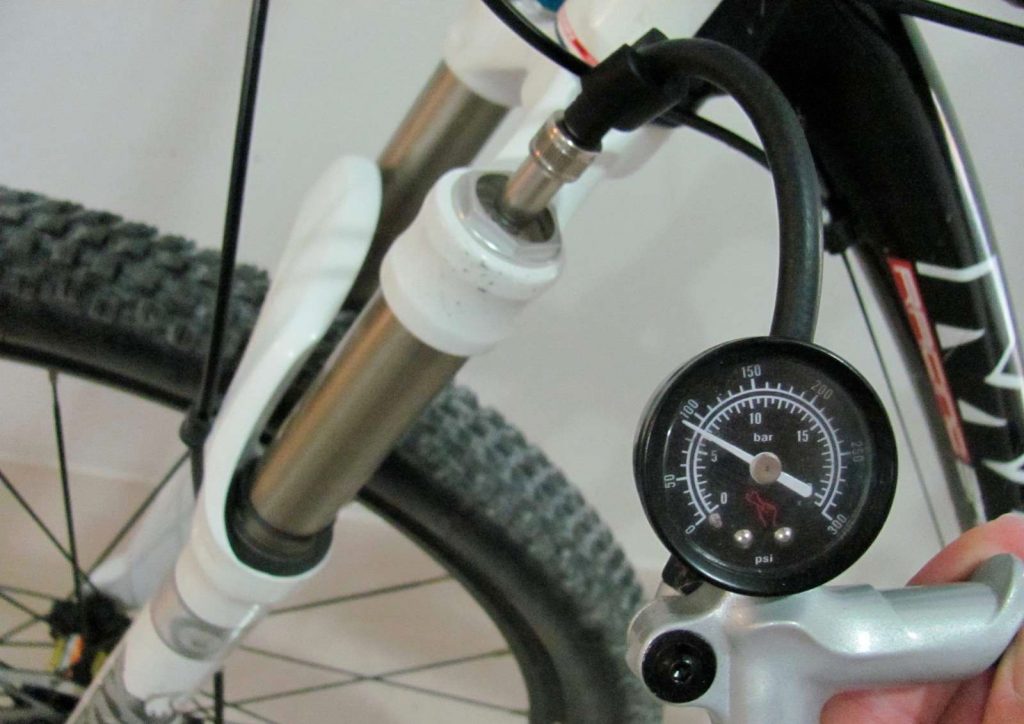
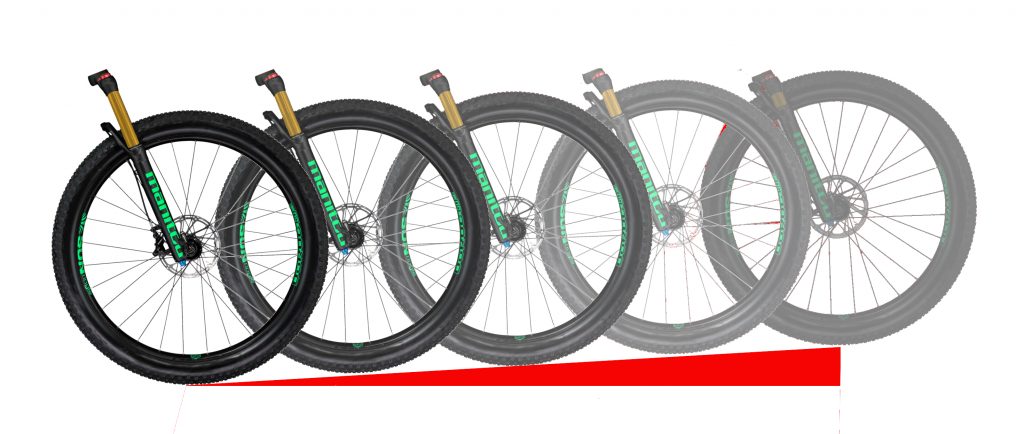
Most manufacturers have a recommended air pressure based on your riding weight (remember to account for the weight of your gear and pack!). Before checking your sag, start by pressurizing your suspension to those recommended settings. Once you have checked sag, either increase or decrease the air pressure to make your suspension stiffer or softer.
Coil spring.
To adjust the sag amount on a coil spring you have two options. First option is to replace the spring for stiffer or softer versions. Replacing the spring will be necessary if you can’t achieve the proper sag by adjusting the preload setting. To adjust preload, simply turn the knob on the top of the suspension fork to the right to stiffen the fork, or the left to make it softer.
Setting Damping
Most suspensions only offer the ability to adjust rebound damping easily. Compression damping can always be adjusted, but it typically requires some disassembly. To initially setup your rebound damping, first find the adjustment knob usually located on the bottom of the right fork leg. Turn the damping knob to full open (typically represented by a “–“ symbol or a picture of a rabbit). Now, stand over the bars; press down then pull up quickly. You should feel the suspension spring back up as quickly as you compressed it. Turn the damping knob closed a small bit and repeat your compression test. Continue to compress and add damping until you feel the suspension is not quite able to keep up with your hands as they pull up.
Suspension Setup On the Trail
With your suspension setup now at a good starting point, take the bike out on the trail to fine tune it. First thing you want to ensure is that you bottom out your suspension under normal riding conditions a few times per ride. Bottoming out the suspension is a clear indicator that you are using all of your travel. However, be sure you aren’t bottoming out all the time. I know I just told you it’s OK to bottom out the suspension, but if you are doing it more than 2-3 times a ride, chances are you need to stiffen your spring.
If by chance you haven’t slowed the fork’s damping down enough, you will feel as if the bike wants to bounce away through rough sections. An under-damped fork will almost feel like the front end of the bike is trying to get away from you. The solution to this problem is to increase the amount of rebound damping you have.
As you add damping, be concerned with not allowing the fork to “pack up”. When you set your damping, you determined the rate at which the suspension can return to full extension. If your terrain is particularly rough, it is possible to set the damping to rebound slower than you need. As an example, if you go through a rock garden, hitting an object every second that compresses you fork 10mm, you want the damping to allow the suspension to rebound at least 10mm per second. If your suspension can only rebound 7mm per second, you will quickly be riding at less than full travel. The key indicator of this is the fork will feel stiffer through the rough stuff, but soft again when the trail smooths out. If you experience this, speed up the damping slightly until the feeling goes away.
Continuing adjustments
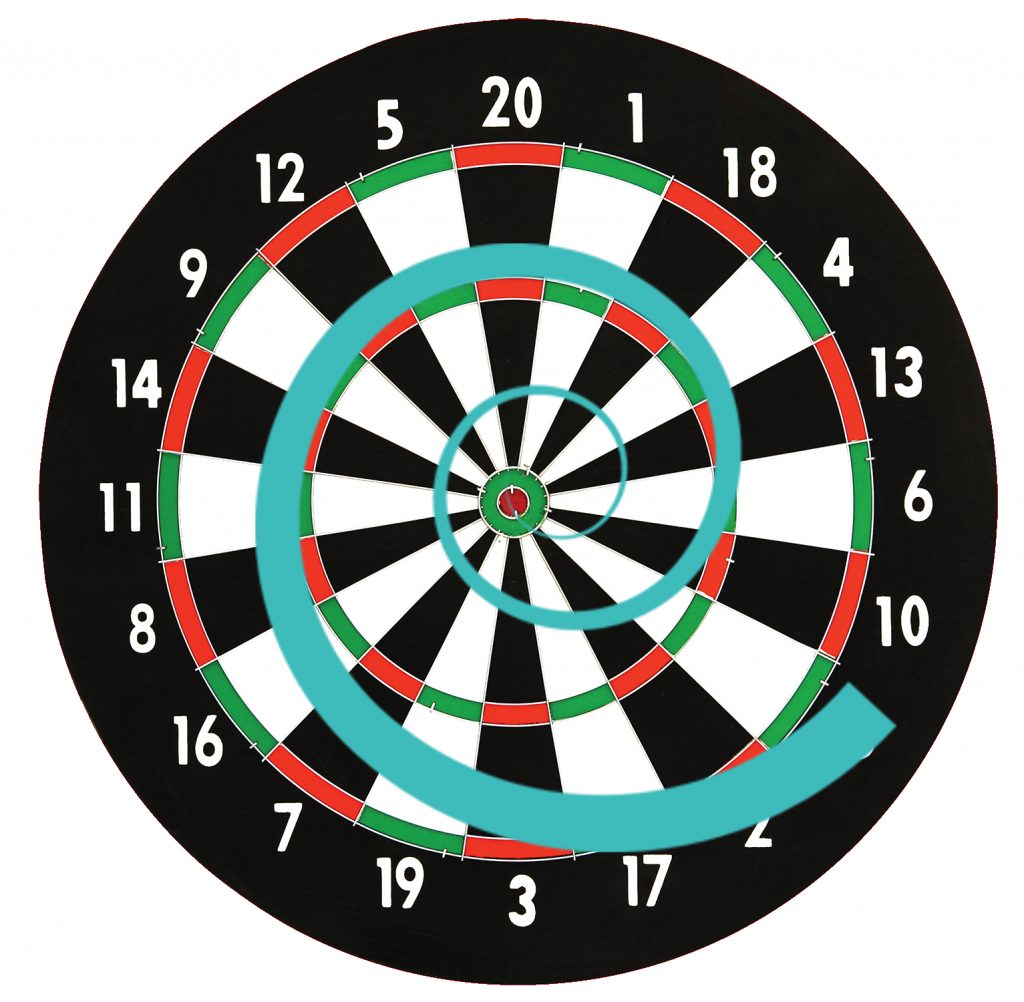
Over the first 6 months of owning your new suspension, never stop focusing on how it performs. As the forks wears in and begins to move more freely, the amount of damping you need may differ. Also, as you adjust your spring, it will slightly change the way your damping works. The best way I can describe suspension setup is as a dartboard. Rather than shooting for the bulls-eye in one shot, you are traveling down a spiral road getting closer to the bulls-eye with every new adjustment. With a little luck and focus, you will realize all the performance your suspension has to offer you.
Ham Lake is one of my favorite places to stay when visiting and biking in the Twin Cities Gateway Area. Getting around from here it is easy on my bike for summer fun and winter fat biking. It’s almost like there is a bike-friendly road wherever you go with wide paved shoulders That makes it easy to connect to the Gateway’s vast network of trails. It’s a great place to stay when you want to get out of the confines of your hotel room and explore. Only a few miles from all the other area attraction in the Twin Cities Gateway, Ham Lake offer several opportunities to check out when not exploring the trails and roads here.
Willow Tree Winery
Not only do Minnesotan’s brew their beer, but they also make their own wine. Here in Ham Lake, you can get a taste of the local wine at a small winery in the spacious farmland of Ham Lake. At Willow Tree Winery you’re free to roam almost anywhere you choose. You can walk among the small vineyard that you’ll be able to see from the road, and if the vines look a little bare that’s because all of the bottling is done in the early fall. There plenty of places to sit down and relax while you sip from the local creations. You can also step inside the small tasting room that has wine bottles stacked and lining the walls, a couple of tables, TVs, and a small counter where the owner usually sits. It’s not a bad place to enjoy before you start riding again.
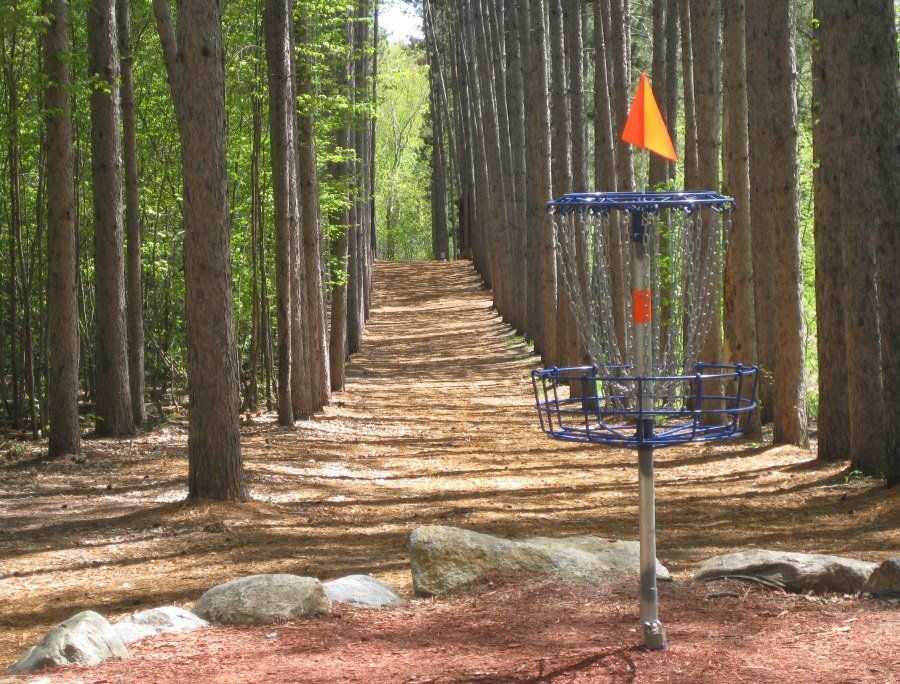
A few minutes away from Ham Lake is the Blue Ribbon Pines Disc Golf Course.
T-Box Bar & Grill
At some point, you’ll need fuel and T-Box Bar & Grill has plenty to satisfy your appetite. It’ got everything from wings and salmon to pizza and spaghetti. They even have a great wine and beer section to choose from as well as scotch, whiskey, and bourbon.
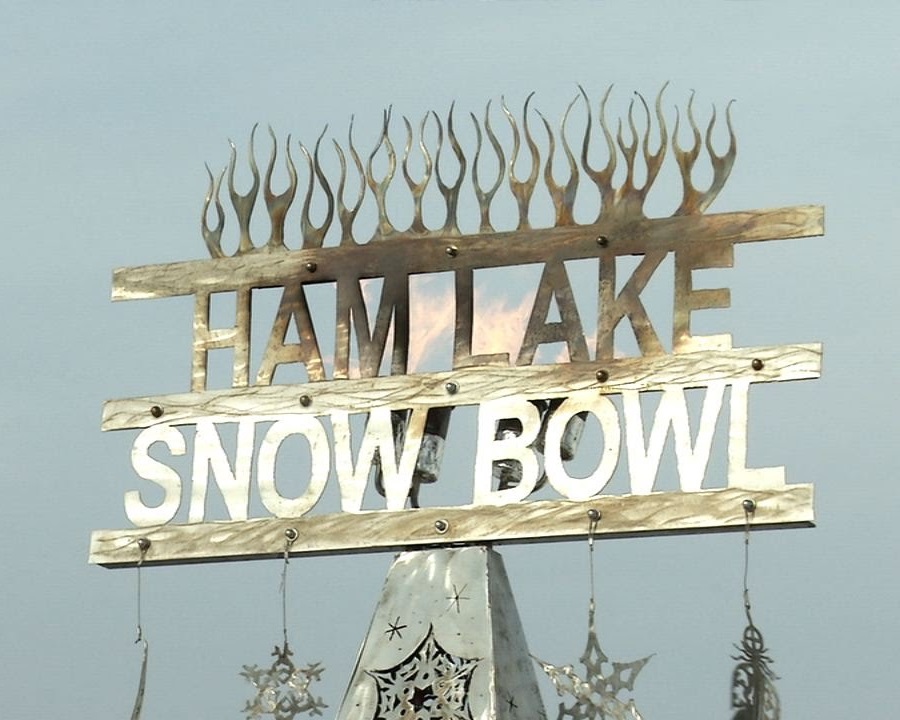
Ham Lake Snow Bowl
If you’re around in February, make sure to come by for the annual Ham Lake Snow Bowl on February 10th. It includes a scavenger hunt, ice fishing, local crafts and food, a sliding hill, and more.
Bring your fat bike, or rent one and come to the Annual Ham Lake Snow Bowl
So come and discover the amenities in Ham Lake for your #nextbikeadventure in the Twin Cities Gateway.
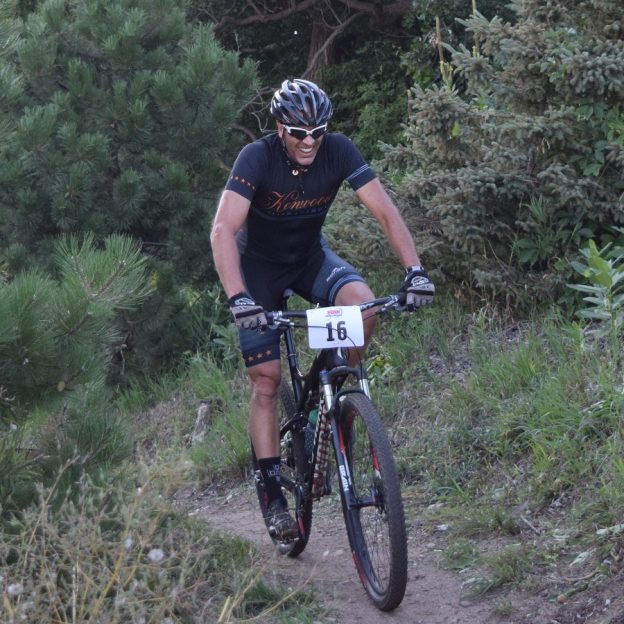
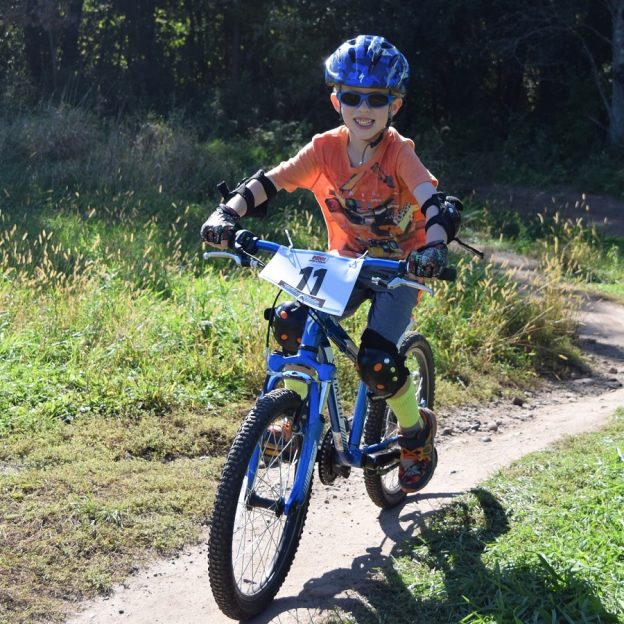
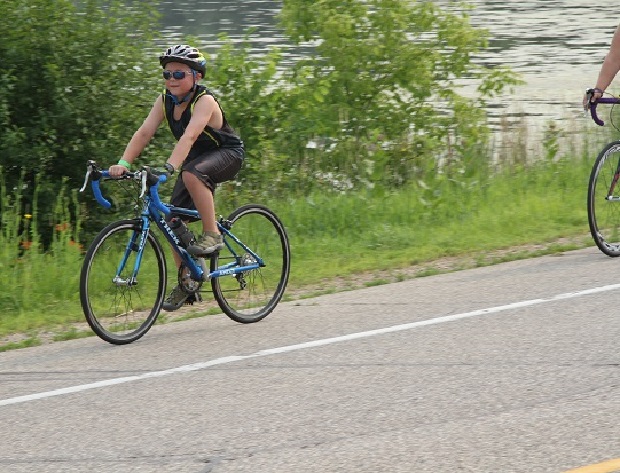
With sun glasses, sunscreen and other articles of protection, its a great day for trail riding fun, at any age. Photo captured in Lebanon Hills Park, near Lakeville, MN.
What better way to start your Summer and your #NextBikeAdventure. View all the fun ideas and bike destinations in the latest Minnesota Bike/Hike Guide. Then plan your next outing with family and friends in one of Minnesota’s HaveFunBiking Destinations.
Thanks for Viewing Our ‘Proper Protection Pic of the Day
We are now rolling into our 10th year as a bike tourism media. As we pedal forward our goal is to continue to encourage more people to bike and have fun while we highlight all the unforgettable places for you to ride. As we continue to showcase more places to have fun, we hope the photos we shoot are worth a grin. Enjoy the information and stories we have posted as you scroll through.
Do you have a fun bicycle related photo of yourself or someone you may know that we should post? If so, please send your picture(s) to: [email protected]. Include a brief caption (for each) of who is in the photo (if you know) and where the picture was taken. Photo(s) should be a minimum of 1,000 pixels wide or larger to be considered. If we use your photo, you will receive photo credit and acknowledgment on Facebook and Instagram.
As we continue to encourage more people to bike, please view our Destination section at HaveFunBiking.com for your #NextBikeAdventure – Also, check out the MN Bike Guide, now mobile friendly, as we enter into our 8th year of producing this hand information booklet full of maps.
Remember, bookmark HaveFunBiking.com on your cell phone and find your next adventure at your fingertips! Please share our pics with your friends and don’t forget to smile. We may be around the corner with one of our cameras ready to document your next cameo apperance while you are riding and having fun. You could be in one of our next Pic’s of the Day.
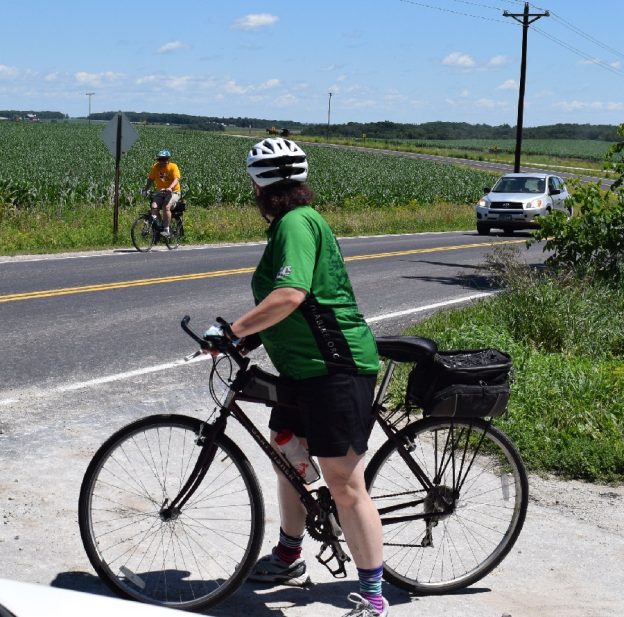
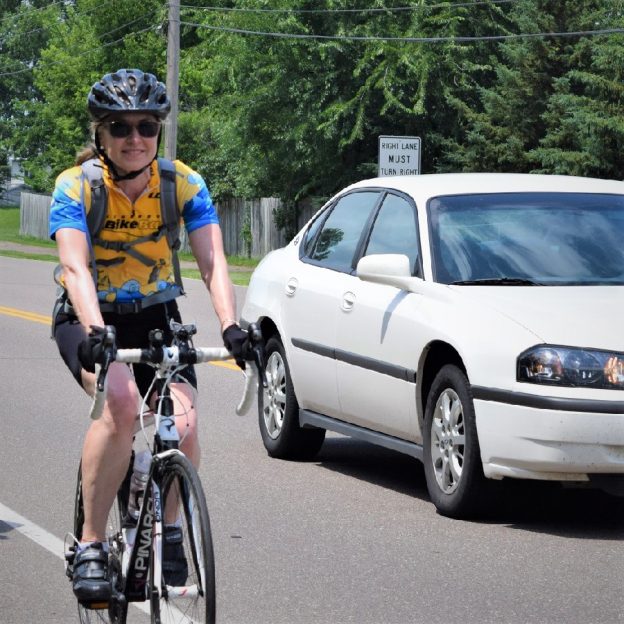
Now that Minnesota motorists have the option to pass a bicycle in a no passing zone, as of July 1, this cyclist is watching it happen in Southeast Minnesota. Your can find all the latest details here on the revised 3-feet passing rule for motorists.
Get into the zone and plan your next bike outing with family and friends at one of Minnesota’s HaveFunBiking Destinations. View all the fun ideas and bike destinations in the latest Minnesota Bike/Hike Guide.
Thanks for Viewing Our ‘Revised Passing Law’ Pic of the Day!
We are now rolling into our 10th year as a bike tourism media. As we pedal forward our goal is to continue to encourage more people to bike and have fun while we highlight all the unforgettable places for you to ride. As we continue to showcase more places to have fun, we hope the photos we shoot are worth a grin. Enjoy the information and stories we have posted as you scroll through.
Do you have a fun bicycle related photo of yourself or someone you may know that we should post? If so, please send your picture(s) to: [email protected]. Include a brief caption (for each) of who is in the photo (if you know) and where the picture was taken. Photo(s) should be a minimum of 1,000 pixels wide or larger to be considered. If we use your photo, you will receive photo credit and acknowledgment on Facebook and Instagram.
As we continue to encourage more people to bike, please view our Destination section at HaveFunBiking.com for your #NextBikeAdventure – Also, check out the MN Bike Guide, now mobile friendly, as we enter into our 8th year of producing this hand information booklet full of maps.
Remember, bookmark HaveFunBiking.com on your cell phone and find your next adventure at your fingertips! Please share our pics with your friends and don’t forget to smile. We may be around the corner with one of our cameras ready to document your next cameo apperance while you are riding and having fun. You could be in one of our next Pic’s of the Day.
Thanks BikeMN (Bicycle Alliance of Minnesota) for pushing the legislature to update the law making it easier for bicyclists and motorist to Share the Road. This new revision allows motorists the option to pass a bicycle and use a portion of a no passing zone to stay minimum of three away from cyclist. This makes it more comfortable for all, plus Minnesota becomes a more bike-friendly state.
Bicyclists Now Have An Added Layer Of Protection On MN Roads
When Governor Dayton signed the new transportation bill into effect it enacted a change to the law. This revision to the law was advocated by the Bicycle Alliance of Minnesota. It allows motorists the ability to pass a bicycle in a no passing zone, if safe to do so. Before this recent change in the law motorist had to allow a minimum of three feet when passing, only passing zones. They had to keep a distance of when passing a bike, staying on the right side of the double yellow line. In many cases this rule was an impossible feat for drivers to perform as many of the states roads are to narrow without using a passing lane. This new update to the law now makes it legal so an automobile can change lanes to pass a bicycle even in a no passing zone when safe to do so.
A Win-Win For Motorists and Cyclists
“This change, proven successful in nine other states, is a win-win. We’ve made things both safer for bicyclists and more convenient for drivers,” said BikeMN volunteer lobbyist Joe Olson while thanking legislators for helping to make this happen.
“This revision to the law is a convenience for motorists because it legalizes a current practice of reasonable driving, especially on the many flat and straight low-speed roads in our communities,” says Dorian Grilley, BikeMN’s executive director. “Many people see the double yellow line and they think ‘Oh, I can squeeze by that bicycle in the 12-foot lane ahead,” Grilley said. “Now we hope drivers will allow bicyclists a little more space without fear of getting a ticket.”
BikeMN encourages bicyclists to ride where they are visible and have room to maneuver. The law states bicyclists should ride as far to the right as practicable, which does not mean as far to the right as possible. Bicyclists should ride away from the curb in the right wheel track of vehicles and at least a minimum of 24 inches away from the road edge. A motor vehicle should either wait to pass or change lanes to overtake the bicyclist. This law change expands opportunities for safe automobile passing while improving the flow of overall road traffic.
Details To The Changes
The change can be found on Line 62.4 of the transportation bill, House File 3. It states: Minnesota Statutes 2016, section 169.18, subdivision 5 (Subd. 7.Laned high (c)), is amended to read: a motor vehicle may be driven to the left side of the roadway (in a noway (c passing zone) to safely overtake a bicycle under the following circumstances:
(1) the bicycle is proceeding in the same direction as the motor vehicle
(2) the driver of the motor vehicle either (i) provides a safe clearance distance, in no case less than the greater of three feet or one-half the width of the motor vehicle, or (ii) completely enters the left lane of the highway
(3) the operator of the bicycle is not (i) making a left turn, or (ii) signaling that the bicycle operator intends to make a left turn and
(4) the driver of the motor vehicle complies with all other applicable requirements under this section.
Now that it’s legal to pass a cyclist in a double yellow, as of July 1st, advocates around the state hope drivers will be more willing to make a wide pass around cyclists.
The new law is intended to reinforce the rule that you must give at least 3 feet to pass a cyclist on the road.
Alisa Reckinger, who bikes frequently around Minneapolis, wasn’t aware of the new law until now and hopes it makes her trips a little safer. “I think a lot of it comes down to common sense a little bit,” she said. “I think sometimes drivers don’t realize how close they are, but I think giving a little more space makes everyone feel a little safer out there.”
About BikeMN
The Bicycle Alliance of Minnesota is working to make Minnesota a place where bicycling is an easy, safe, and fun for everyone. The mission of BikeMN is to unite and strengthen bicycle advocacy, provide education, and work for a more bicycle friendly Minnesota. Visit www.bikemn.org to learn more about local advocacy around Minnesota.
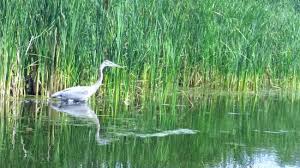
When you’re in Lino Lakes it can feel like you’re smack dab in the middle of northern Minnesota. You’re pedaling down wide open roads that take you by lakes, farmland and scenery that can meet you with the horizon. Where roads with no shoulder offer trails or sidewalks that parallel the street to connect you to the vast Twin Cities Gateway trail system for your #nextbikeadventure. Enjoy the many options, including the Blue Heron Celebration in August, when visiting Lino Lakes:
Riding around Lino Lakes which has the second largest Blue Heron rookery in the state.
Rice Creek Chain of Lakes Park Reserve
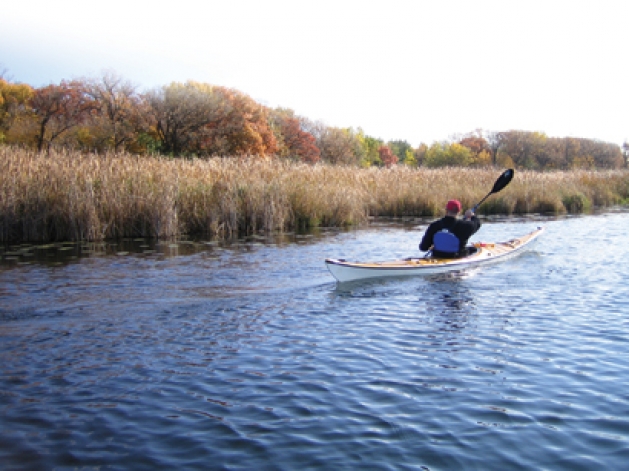
Easy to get to by bike from your hotel, an entire day here won’t be enough. The Park Reserve here offers seven lakes to make for an outdoor enthusiast feel like they are in heaven. Riding or hiking the trails around these lakes, amongst the prairies landscapes offers plenty of opportunities to get you in touch with natural. When not riding, you can also rent a canoe or kayak to paddle through the chain of lakes.
Wargo Nature Center
On your venture in Lino Lakes your first stop could be the Wargo Nature Center, which has plenty of programs for kids throughout the summer. After you ride down the scenic driveway, park your bike at the fish-shaped bike rack, next to the parking lot. Inside the visitors center take a look at the mapped hiking and biking routes. You can also rent a canoe here or view all the local critters that have been preserved and on display on the walls and shelves.
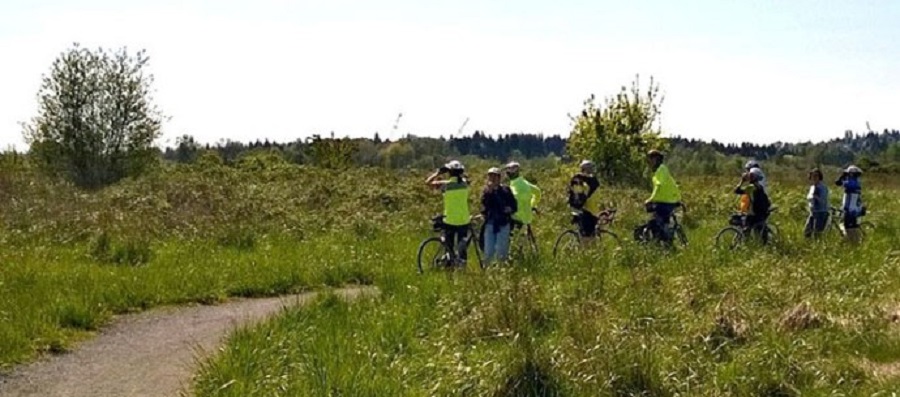
Another birding hotspot is in some of the open meadows that paved bike paths pass through the park.
Walk outside and you’ll see three entry ways to connecting trails that are mostly natural surface. The trails are very well maintained and wide enough to walk two abreast and pass others walking by. As you hike along you will be surrounded by the sounds and sights of nature. Along the trails you will see many kinds of trees and plants with plenty of birds chirping. You may even be lucky enough to see a little red fox ahead of you crossing the walkway.
There are also plenty of hand-drawn signs throughout the area that tell you more about the area and Minnesota’s natural history dating back to before the Ice Age. You can even step up and look out into wetlands at a couple dock stations along the shoreline. If you want to explore the wetlands more, you can check out a canoe or kayak back at the visitors center.
Blue Heron Rookery
Egrets and blue heron are also a common to see as you paddle along.
A highlight to visiting this area of the Twin Cities Gateway is the Blue Heron Rookery. It’s the second largest heron rookery in the state, however it isn’t the exactly easiest to get to or see. You can catch glimpses of the island if you drive by some of the lake houses on the other side of the lake, or you use a canoe or kayak to get close to it. There is a no wake zone by the island, but you should be able to get a nice view of the island using field glasses or a zoom lens on your camera. For more information on the Peltier Island heron colony, visit the Facebook page.
Relax on the Beach, Swim, Bike, and More
You can also visit the main beach on Centerville Lake and go for a swim or just relax and let those rays give you a nice tan. There is also a little playground for kids, a beach volleyball area, and picnic tables here. You will also find plenty of paved trails leading in and out of here to help you get around the area, and one of them even leads to Chonomax Golf Course. The different lakes also have various public access points for fishing and boat launches.
HammerHeart Brewery
Stopping at the HammerHeart Brewery in Lino Lakes is always refreshing after a ride.
Whether you’re looking for a mid-day break or want to relax after a long day of exploring, there is nothing better than an ice cold beer at the Brewery here. Even better, the brews here are locally crafted and inspired by Norse and Celtic history, love, old world traditions. If you’re lucky enough to stop by on a Saturday there’s a good chance you’ll be able to get food from one of the various food truck they bring in to compliment their selection of brews.
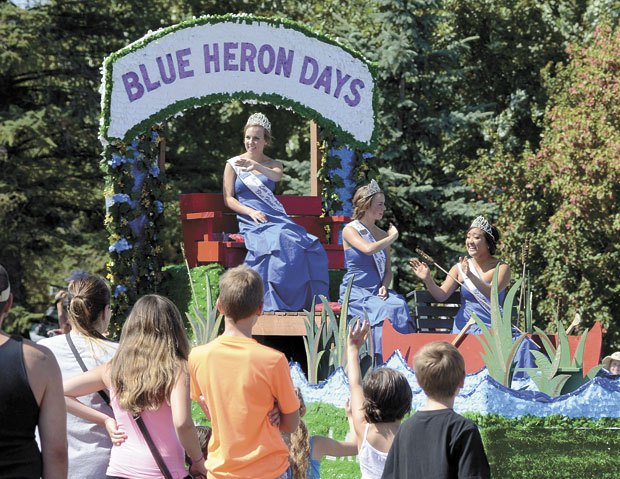
Lino Lakes’ Blue Heron Days
Remember the Blue Heron Rockery? Well, by the middle of August the nests are all empty out on the island. However, the city of Lino Lakes who adopted the blue heron for their city logo many years ago has an annual event to celebrate the bird and its habitat. Perfect for the whole family the annual celebration features a parade, carnival, movie night, petting zoo, and more. This years event is scheduled for August 18, 19 & 20. For more information visit the city’s website about Blue Heron Days.
The celebration and parade in Lino Lakes is fun for the whole family.
A part of Minnesota’s Twin Cities Gateway Community, Lino Lakes is located on the north side of Minneapolis and its easy to find your next bike adventure here.
Shift gears to the terrain you are riding can take you miles from home with ease. Over hills and through tough valleys, all thanks to the ability to know how to shift your gears. Learn the what, how, when and why of shifting your bike below.
Shift Gears and Its Terminology
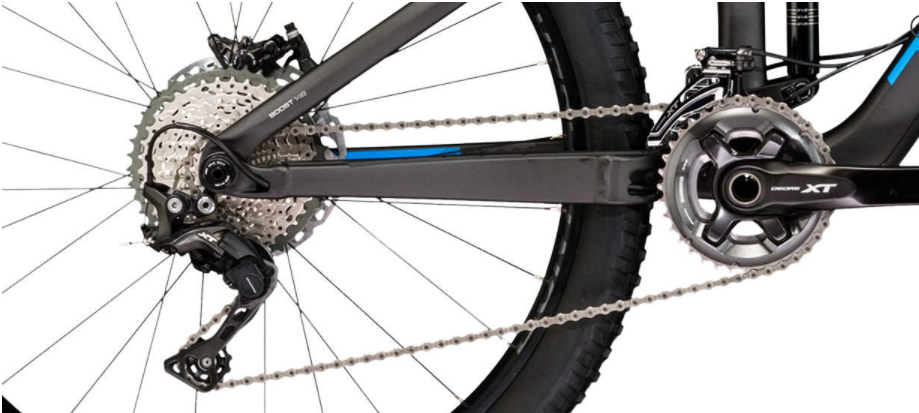
Before we jump into how to shift your bike most efficiently, lets cover the basic parts. Beyond the chain, there are many moving parts that make up the drivetrain on your bike, allowing you to shift gears.
-Cassette and freewheel
The gears attached to your rear wheel are called the cassette or freewheel. While they are mechanically different, for the act of shifting, they operate identically. These gears are built with teeth that sit higher, lower, or at an angle depending on where they are located. The different tooth profiles allow the chain to seamlessly shift from one gear to the next. These gears come in groups of 5 up to 12 depending on the shifting system you have. Overall, the smallest and largest gears are close in size regardless of the amount of gears.
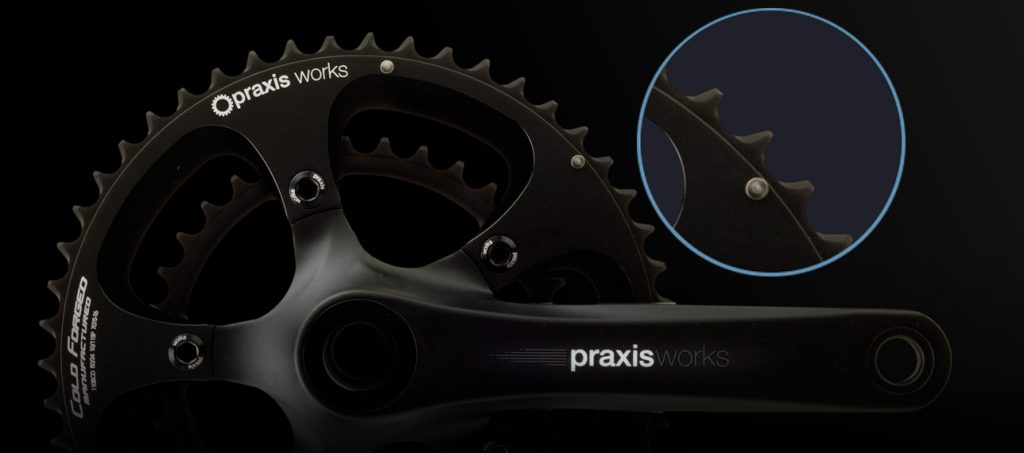
-Chainrings
The chainrings are the gears attached at the middle of the bike where your pedals are. Most bikes have between 1 and 3 chainrings. You will notice that the teeth on the chainrings have similar profiles to those on the cassette. So if you see a tooth that is smaller or oddly shaped, don’t immediately assume it’s damaged. Basic chainrings will be stamped out of steel while more expensive ones are machined out of aluminum. The machining makes these aluminum rings both lighter and shift better.
-Derailleurs
The derailleurs are the mechanisms that physically guide the chain from one gear to another. Most bikes will have two, a front and a rear. The front derailleur has a curved cage that sits just above the chainrings. When moved in and out, that cage guides the chain onto different gears. The rear derailleur has a parallelogram, and a spring loaded arm with two pulleys. When shifted, the rear derailleurs upper pulley guides the chain across the cassette and onto the appropriate gear.
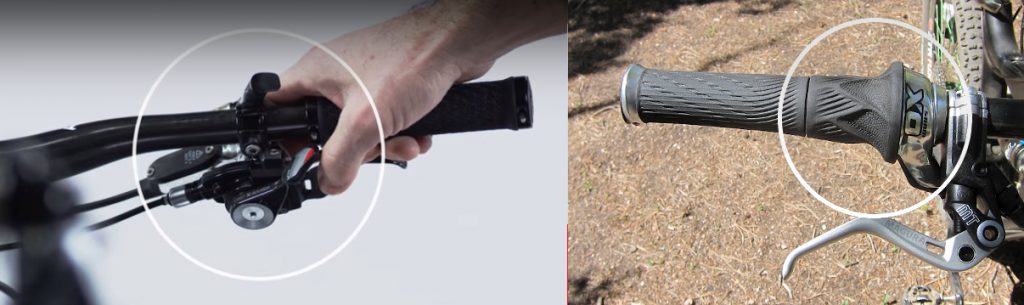
-Shifters
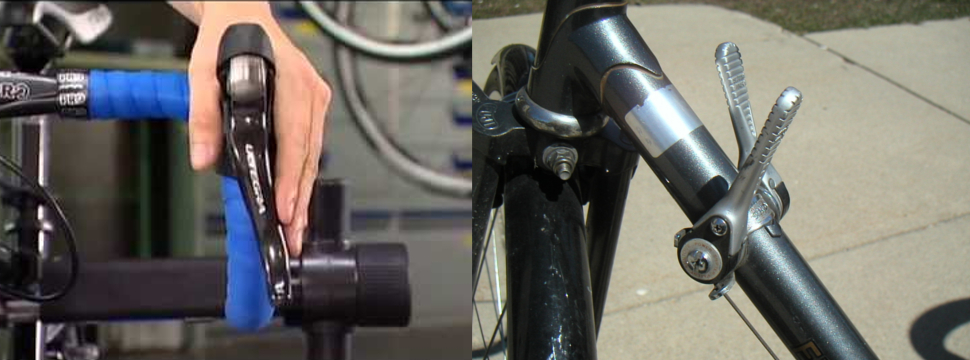
The shifters are designed to pull the cables that operate the derailleurs. Most bikes have them attached to the handlebar, but some older bikes will have them located on the downtube. The shifter on the right side of the bike controls the rear derailleur while the shifter on the left operate the front. For mountain bikes and hybrids there are really only two types, trigger and twist shifters. A trigger shifter uses thumb and trigger finger activated levers, while a twist shifter allows you to rotate a portion of the grip to shift gears. Road bikes usually have the shifter mounted onto the brake lever, but can also have paddle style shifters on the end of the bar or on the downtube.
Flat bar shifters come in two varieties, trigger (left) and twist (right)
Road bike shifters are usually attached to the brake levers (left) but on older bikes can be found on the downtube.
How To Shift Gears
Shifting your bike is easy to do and easy to do wrong. For all bikes that use derailleurs, remember one thing – Shift only when pedaling. The act of pedaling is what allows the chain to jump seamlessly from gear to gear. Also try not to shift both the front and rear derailleur simultaneously as it can lead to problems. To get comfortable shifting, pedal on a piece of flat ground and operate only the right (rear) shifter first. You will find that as you shift into higher numbers (assuming your shifter has a gear indicator) it will become more difficult to pedal but faster moving. Inversely, as you shift into lower numbers it will become easier to pedal but slower moving.
Once you feel very comfortable shifting the rear derailleur, shift into a middle gear and explore what the front derailleur does. You will notice that the incremental changes of the rear derailleur give way to large changes when shifting the front derailleur. Going across chainrings makes a huge difference in how easy or difficult it is to pedal. Once you have mastered the front and rear derailleurs, you are now ready to try shifting in other than flat conditions.
When to Shift Gears
The reason we shift gears is to give ourselves a mechanical advantage over the changing surroundings. With this mechanical advantage comes some idiosyncrasies. First thing is that the gears are designed to allow the chain to move easily from one to the other when shifted, but hold tight under the load of pedaling. What that means is that if you are pedaling with a great amount of effort (say up a hill), and try to shift, you are asking the drivetrain to both hold the chain in place and move freely. Sadly, it becomes difficult for a mechanical device to do both these things. To make sure you don’t run into any issues, always shift while you are pedaling with light load, or shift into the dear you will need just before you actually need it. As an example, shifting into a very low gear at the base of a hill is a better idea than taking a run at it and trying to shift down gears while your climbing under load.
Gear Ratios And How They Affect Your Ride
When we talk about gears, what it translates to is how many times the rear wheel rotates per pedal rotation. So if you are in a very low gear going up hill, you may pedal two complete pedal rotations in order to turn the rear wheel once. Inversely, if you are headed down a steep descent in a high gear, you will probably be spinning the rear wheel 3-4 times per pedal rotation. If you think about gears in these terms, it becomes easier to figure out where and when to shift.
Finding The Perfect Gear
The perfect gear is always changing (and you thought it would be easy). Even though it changes, it can most easily be described as the gear allowing you to pedal comfortably. We all have a natural pace (called cadence) we feel comfortable pedaling at, the goal in shifting I to allow you to continue to pedal at that pace even as the topography changes.
Putting It All Together
Now that you understand the “what, when, why, and how” of shifting, it’s time to practice on the open road. Pay close attention to what your most comfortable pedaling cadence is. Oftentimes people believe that they are comfortable pedaling really slowly in a difficult gear, but find after some experimentation, that they can pedal for longer if they shift into a slightly easier gear and pedal quicker. If you are riding off road, experiment with what gears give you the best traction on loose terrain. Many riders will default to their lowest gear at the first sign of loose conditions only to find that gear has too much torque, forcing their tire to break free and spin out. All in all, body types, muscle mass, conditions, and personal preferences make gearing choices different for everyone. But now that you know the details, you should feel comfortable finding the right ones for you.
Also check out our article on related tips to make your bike more comfortable and faster.
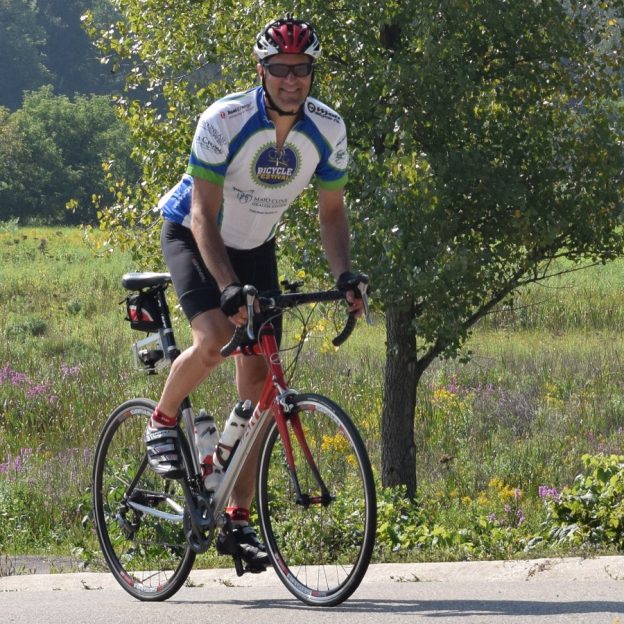
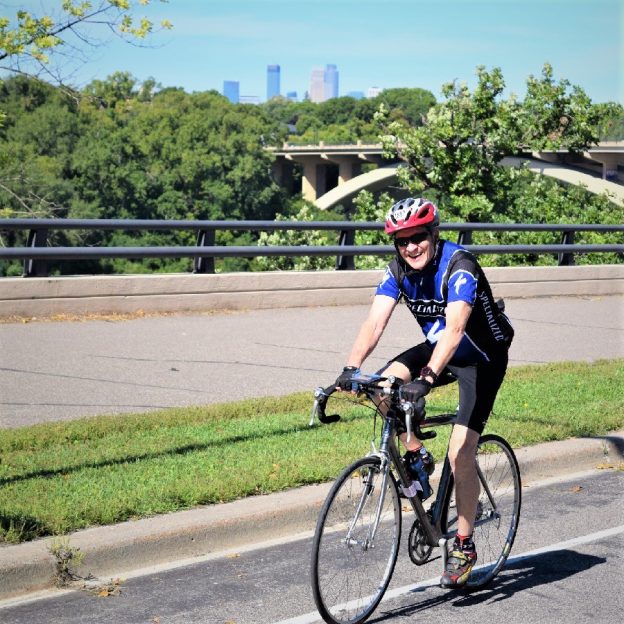
Another fun day to ride the Minnesota section of the Mississippi River Trail on this picture perfect Saturday. Here in this photo a cyclist round the scenic waterscape, with the Minneapolis downtown skyline in the background.
Get into the zone and plan your next bike outing with family and friends at one of Minnesota’s HaveFunBiking Destinations. View all the fun ideas and bike destinations in the latest Minnesota Bike/Hike Guide.
Thanks for Viewing Our ‘Mississippi River Trail’ Pic of the Day!
We are now rolling into our 10th year as a bike tourism media. As we pedal forward our goal is to continue to encourage more people to bike and have fun while we highlight all the unforgettable places for you to ride. As we continue to showcase more places to have fun, we hope the photos we shoot are worth a grin. Enjoy the information and stories we have posted as you scroll through.
Do you have a fun bicycle related photo of yourself or someone you may know that we should post? If so, please send your picture(s) to: [email protected]. Include a brief caption (for each) of who is in the photo (if you know) and where the picture was taken. Photo(s) should be a minimum of 1,000 pixels wide or larger to be considered. If we use your photo, you will receive photo credit and acknowledgment on Facebook and Instagram.
As we continue to encourage more people to bike, please view our Destination section at HaveFunBiking.com for your #NextBikeAdventure – Also, check out the MN Bike Guide, now mobile friendly, as we enter into our 8th year of producing this hand information booklet full of maps.
Remember, bookmark HaveFunBiking.com on your cell phone and find your next adventure at your fingertips! Please share our pics with your friends and don’t forget to smile. We may be around the corner with one of our cameras ready to document your next cameo apperance while you are riding and having fun. You could be in one of our next Pic’s of the Day.