

by John Brown, HaveFunBiking.com
Do you want to make your bike ride more fun? How about getting all you can out of your bike? What about making your bike more comfortable? Well, we have is some great news! We have compiled a list of simple bike tips to make your ride more fun, more efficient, and more comfortable.
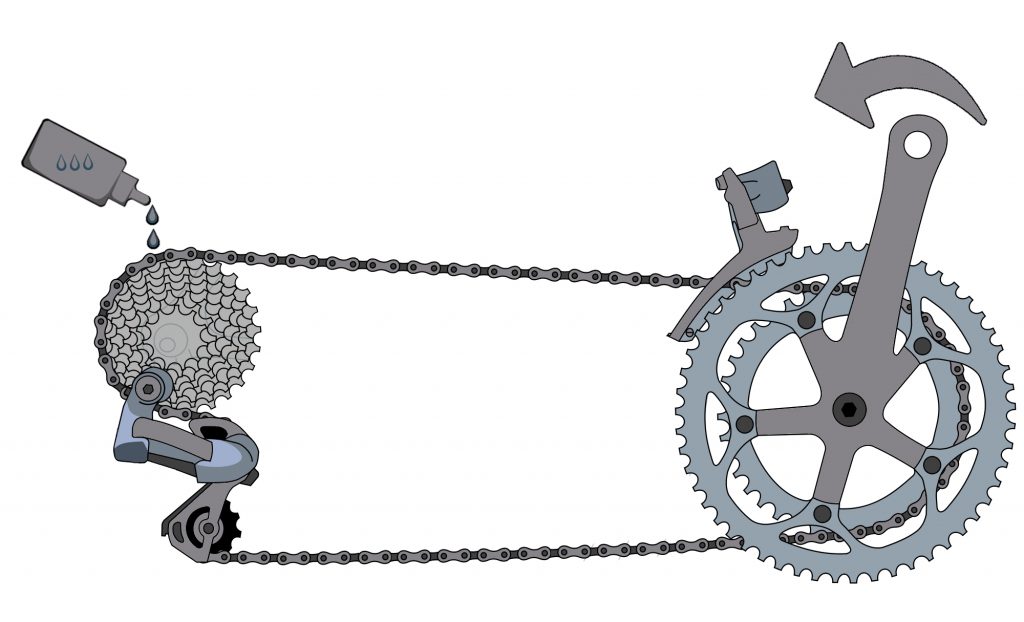
Lube your chain
If your chain isn’t running smoothly, neither are you. While a in-depth bike clean is great, simply keeping your chain lubricated is an easy way to ensure you bike runs well. Start by propping the bike up so you can rotate the cranks backward freely. Next, Backpedal the bike, while dripping lubricant onto each chain link. Once the chain is well saturated, give a few moments for the lubricant to penetrate the chain. Finally, wrap a rag around the chain, backpedal, and remove all the excess lubricant. Done!
Bike Tips to Find the Perfect Tire Pressure
First, fill the tires to the recommended maximum pressure as listed on the sidewall. Next, take the bike for a quick spin around the block for feel. From there, let about 5psi out of each tire (a digital pressure gauge works great) and ride it again. Continue lowering the pressure in 5psi increments until you can no longer feel the small imperfections in the road vibrate through the bike. Use these pressures as you starting point. Finally, over the next few rides, adjust pressure by 2-3 psi in search of the absolute perfect pressure. The goal is for a pressure that allows the tire to easily deforms over objects, offer ample traction, and resist compressing too far under hard braking and turning. As an example, I recently determined my mountain bike’s perfect pressure to be 28psi for my front and 32psi in the rear.
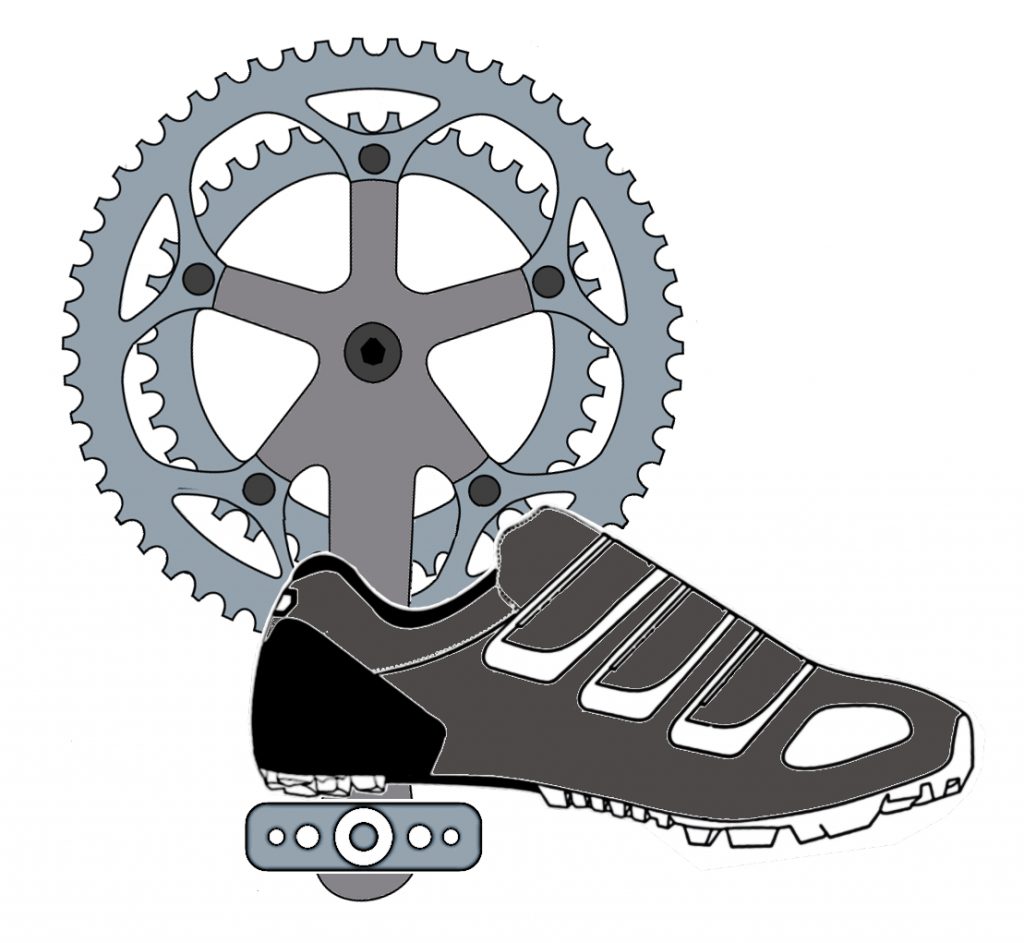
Saddle fit
Checking your saddle height is also a quick way to get more comfort and efficiency. While a complete bike fit does the most benefit, checking saddle height goes a long way to help with back pain and other discomforts. To set saddle height, sit on your bike and place your heel on your pedal. Then rotate the pedals backward. At the bottom of the pedal stroke your goal is to have your leg completely extended while keeping your hips level. If at the bottom of the pedal stroke you aren’t getting complete extension, raise your saddle. However, if you’re tilting your hips at the bottom of the pedal stroke, lower the saddle. Once you begin pedaling naturally (with the ball of your foot on your pedal, rather than your heel), you will have the proper amount of bend to your knee.
Mountain bike tips
To get your Mountain bike working it’s best try a few of these bike tips.
Cut your bars
Bicycle companies usually install all the same width bars on their mass-produced bicycles. That means that all but the largest size riders usually ride with bars that are too wide. For many riders, uncomfortable bar width is something they just get used to. But before you get used to it, realize that there are serious ramifications on using a bar that’s too wide. First, riding a bar that’s too wide spreads your arms out forcing you to use your support muscles inefficiently. Second, as you spread your arms, your back will naturally pitch forward (potentially leading to discomfort). Finally, wider bars are more prone to accidentally clipping trees or signs, causing a crash.
To cut your bars, first remove the grips (Spray a little hairspray under the grip and they will slide right off), Then measure and mark the amount of bar you intend to remove. Considering you can’t uncut your bars, only take 1-2 cm off at a time, then ride for a few weeks to verify before cutting again. You can cut the bars with a pipe cutter or hacksaw, but remember to smooth the sharp edge with sandpaper once finished.
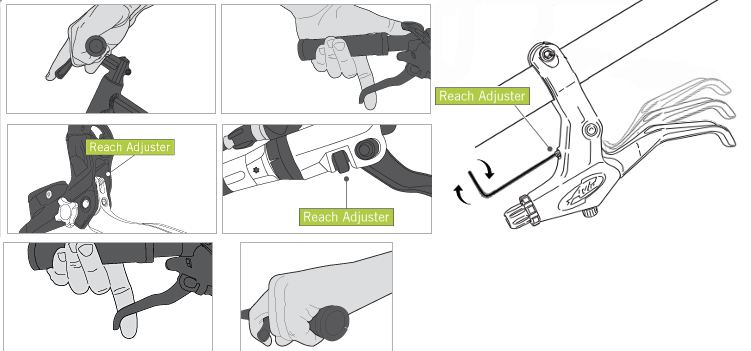
Brake reach
Stopping the bike confidently leads to control and comfort, so make sure you adjust your brakes levers to match the size of your hands. Most brake levers have a reach adjustment built into them. By loosening or tightening the reach adjustment bolt you can bring the brake lever closer to the bar, or move it further away. I like to setup a brake so that the rider can easily reach the lever without changing their hand position on the grip. Additionally, I try to make sure the levers can’t hit the bar, or other fingers when they are squeezed.
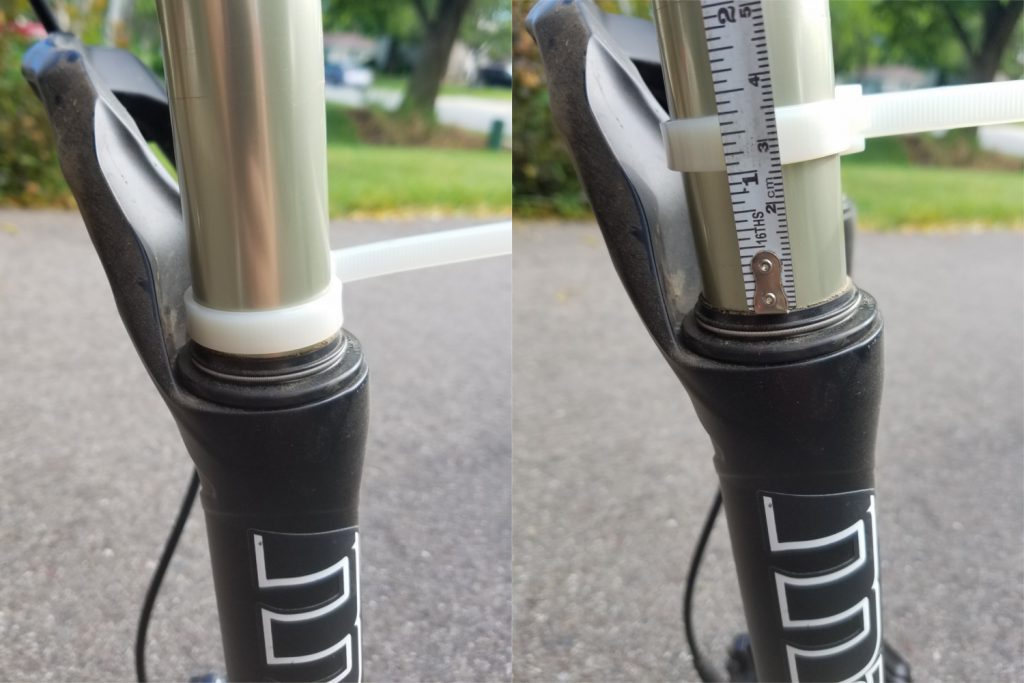
Check your sag
A mountain bike with a suspension fork will work better once that fork is adjusted for the weight of the rider. The first step in adjusting the suspension is to set the “sag”. “Sag” is the amount your suspension compresses when you put your weight on the bike. Most suspension calls for about 25% sag, meaning, when you sit on the bike, the suspension compresses ¼ of its travel.
To set sag, first snug a zip tie around the upper leg of your suspension fork. Make sure it is snug enough to stay in place by itself, but not actually tight. Slide the zip tie all the way down until it is resting on the rubber seal of your fork. Next, find somewhere that allows you to put both feet on the pedals and balance without needing to pedal (I find a wall works well). Get on the bike, rock back and forth a few times to cycle the suspension, then sit still on the saddle in your standard riding position with both hands on the bar. Have a friend, move the zip tire so it sits on the seal once again and carefully get off the bike. You can now measure the distance from the seal, to the bottom of the zip tie and determine your sag. As an example, if a fork has 100 millimeters of travel, you want the distance between the zip tie and seal to be 25 millimeters. If you would want to adjust your suspension, see your forks owner’s manual for details.
Road Bike tips
Not to forget the road bike out there. Here are a few bike tips for the drop bars.
Re-tape your bars
On your road bike, bar tape does a big job. If installed correctly and replaced frequently, it can quiet loads of road buzz that would otherwise be transferred into your hands. Many times, riders ignore their tape because it appears OK. While your tape may look OK, the real test is to see how compliant it is. Use the tip of your finger and press firmly into the tape where your hands typically rest (usually, this is just behind the hoods). Follow up by then pressing an area of the bar that never sees wear. Compare the two to see just how compressed your tape has become, replace if needed.
Adjust your hoods
While you are replacing your tape, it’s a good Idea to review the location of your brake hoods. Verify, that when seated on your bike with your hands on the hood, your wrist is straight. If your hands bend upward or down, you are putting excess strain on your shoulders, arms and hands. That strain can lead to fatigue or pain.

Overall, a great fitting and functioning bicycle will allow you to ride longer, faster, and in more comfort. If you have additional questions about customizing your bicycle the professionals at your local bike shop can be a great resource.