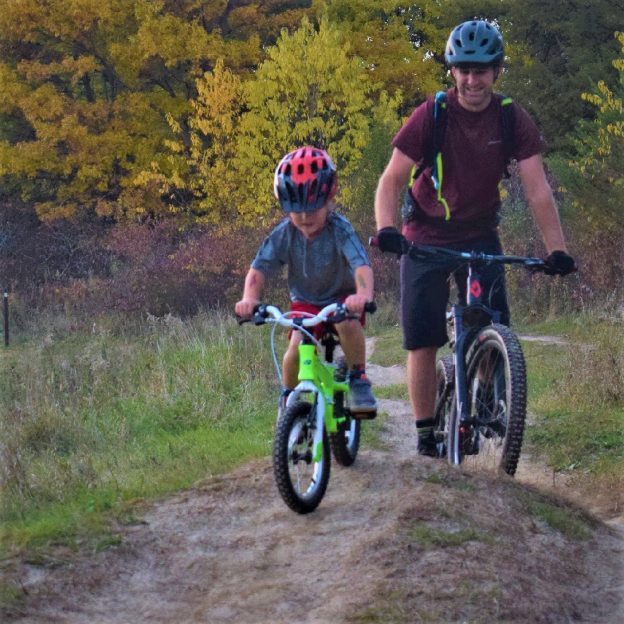
Tag Archives: bike life

Kid’s bikes are the gateway to lifetime of fun. What’s best for your rider?

by John Brown, HaveFunBiking.com

When it is time to get your child on the bike for the first time, or upgrade to a bigger size, knowing the differences between kid’s bikes will make the job easier. Read below for more details.

BMX

In the early 1970’s kids began racing their bicycles on the dirt tracks of southern California. This racing led to the national explosion of the BMX bike. Over the last few years the “Bikelife” movement has given BMX a renewed interest around the world and ushered many different frame and wheel sizes into the category of BMX. These bikes all share the similarities of one rear brake, single speed, high bars, and low saddle even though the wheel sizes are different.

MTB

The Mountain Bike boom of the 90’s spread across the globe and included options for every size of rider. Today, kid’s mountain bikes live in two categories; “Off road” and On road”. The “Off road” mountain bikes have lower gearing to traverse loose trails, suspension designed for control, and lightweight components. “On road” mountain bikes are built to be ridden around the neighborhood rather than off road. They have higher gearing for smooth paths, suspension designed for ascetics rather than function and they typically weight a lot more than the “Off road” versions. Both come in 20”, 24” and 26” wheel sizes.

Balance

Balance bikes are sweeping the world as the best way to teach children to ride bikes. What is a balance bike and how does it work? These bikes look a lot like a normal bike with two wheels, frame, seat and handlebars. What you won’t see on a balance bike is a crank, chain and pedals. Balance bikes are designed to teach kids the most difficult portion of riding, balance, before incorporating pedals.

Road

This category is a bit newer to kid’s bikes, but has existed in cycling for over 100 years. More recently, parents who enjoy riding their road bikes wanted to share that experience with their young kids. Thanks to a few perceptive companies, kid’s road bikes came to the market with great acceptance. To find the size that fits your child best, try different brands to find something that fits your child well.

Sizes

Most kid’s bikes are sized by wheels size. As an example, a child from 32”-42” tall would ride a 16” wheeled kids bike. That does not mean that all 16” wheeled kids bikes are the same size. Where they differ is the overall height of the frame, and the distance from the seat to the handlebars. When getting a new bike, try a few brands to see which frame fits best.

Brakes

Smaller kid’s bikes (>16” wheels) usually use a pedal brake. Therefore, to have the child stop, they pedal backward. Once you grow into kid’s bikes with 20” wheels most manufactures use a hand brake and a pedal brake so that kids can get comfortable with hand brakes. At 24” wheels and above, bikes are almost exclusively built with hand brakes only.

Materials

Thanks to the increase in aluminum production and costs for the material coming down, many kids bikes are now made out of aluminum. This is great news for kids of the world because aluminum frames are lighter than steel. Steel frames are not always a detriment to kids bike though. In the case of BMX bikes, Steel’s durability and strength end up being a huge benefit for riders doing more aggressive moves.

Attributes

-weight

Kids bikes typically weigh a lot in relation to the child. But that is not to say these bikes are heavy. As an example, a 25-pound bike is proportionally heavier to a child who weighs 40 pounds than to a 150-pound adult. Getting your child the lightest bicycle available, will go a long way to make it easier for them to ride.

-durability

Durability is a difficult metric to qualify when buying a bike for a child. Something that will be durable enough for path riding, might not hold up to the rigors of off road use. Durable things to look for are metals rather than plastics in the braking and shifting components, and aluminum rims rather than steel. Beyond everything else, take into consideration the child who will be riding the bike when determining how durable it needs to be. Some kids are gentle on their equipment while others are far more kinetic.

-gears

Gears are great for neighborhoods that have hills or for riding off road. Multiple gears give kids a mechanical advantage to ride steep grades or high speeds with relative ease. On the other hand, if your typical riding locations are completely flat and paved, gears will probably just add undue complexity to your child’s bike.

How to buy

Now that you know all about what makes a kid’s bike, let’s talk about how to buy one. I cannot recommend your local bike shop highly enough. A child’s enjoyment of riding a bike is hugely effected by the quality of the bike, fit of the bike, and function of the bike. For those reasons, no entity does a better job of getting your kid on the right bike than the local bike shop. It is not a secret that there are less expensive places to buy a bike than a bike shop. Even though others may sell bikes for less money they are not the same product in fit, function, or service.

Additional materials

When going to get your child a new bike, remember to look for a few other products as well. First and foremost is a Helmet. Helmets have limited lifespans and should be replaced frequently. Also consider the things that will go on your kid’s new bike like a bell or bottle. Round out the purchase with gloves or a jersey and your kid will be looking forward to mile after mile of great riding.

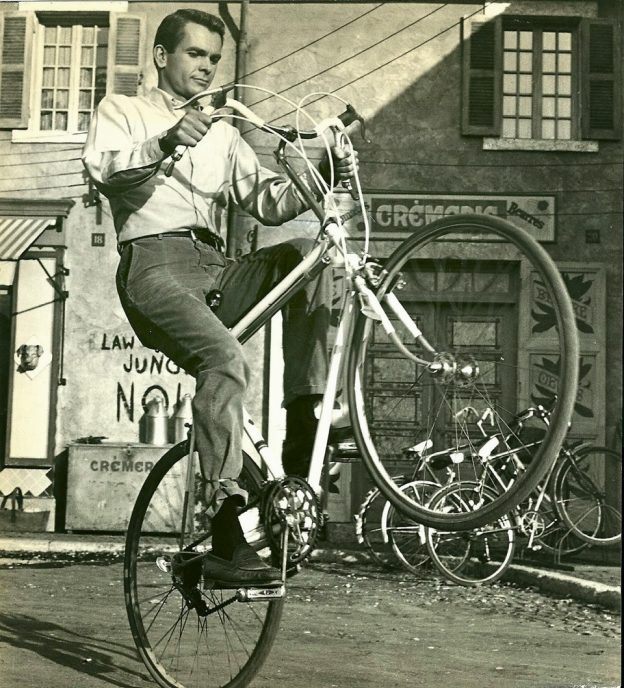
Be the coolest biker on your block when you learn how to wheelie

by John Brown, HaveFunBiking.com

Very few bicycle moves are as cool as the wheelie. When I was younger only a few of my friends could Wheelie and as I got older that number decreased. Beyond the “cool factor” wheelies can also help you get up and over objects on the trail with a bunny hop. Ultimately, the ability to control the bicycles balance side to side as well as front to back, while riding on one wheel, will make you a better rider all around. Here is the low down on teaching yourself how to do a wheelie. Please wear helmet!

Find the right place

The right practice location is key at first, but becomes unnecessary once you begin to get accustomed to the wheelie. To start, I find somewhere that is very slightly uphill, easily ride-able, but also soft is ideal. The types of places that come to mind are golf courses, turf fields, dirt trails, and bike paths. The gradual uphill gives you a little effort to help get the front wheel up, and the soft surface makes it nicer if you accidentally dismount.

If life were a mountain bike trail and Wheelie Wednesday helped smooth out your day-to-day ride or aided you in dropping into your sweet spot,

The steps

Starting out- Start in a medium gear on a slight incline. Begin pedaling normally and until you are moving at a walking pace. Then lower your upper body slightly, bend your elbows, and put your dominant leg into the 11 o’clock position.

Getting it up- Here is the moment of truth. Pedal forward forcefully while pulling up on the bars. Once the front wheel begins to lift, move your upper body back (locking out your arms) and attempt to have the front wheel stay up.

Keeping it up- When the front wheel is up, there are a few directions you need to handle all at once. You need to pedal in an effort to keep the front wheel up, feather the rear brake in order to stop your weight from moving too far back, as well as try to maintain your position left and right.

Balance- To keep balance front to back, continually feather the rear brake as you pedal. If you are balancing properly, pedaling will start to move your weight too far back, so you will be tapping your rear brake on nearly each pedal stroke too move your weight back forward.

how to wheelie

get your front wheel up by pedaling and moving your weight back. Then use the rear brake and pedaling forces to control your position.

To control the side to side movement, use a combination of your knees and handlebars. As an example, if you feel the bike drifting off to the right, turn the bars to the left while also sticking your left knee out. Keep in mind, it is very important to try and control balance issues early, as the bike gets farther and farther toward any direction, it becomes increasingly more difficult to correct.

How to Wheelie

King of Wheelies, Perry Kramer showing how to hang a knee out.

Practice

I would love to say that reading the steps above will have you rockin’ wheelies in no time, bit the truth is it takes a lot of practice. Picture this: All at the same time you will be pedaling, braking, leaning, turning, and balancing in precise amounts. Getting proficient is not going to happen overnight.

Success

You will find that the new talent of Wheeling leads into new challenges, as well as better control. Additionally, as you become good at wheelies, you will find it Is easier to get up and over obstacles. Whatever the outcome, you will be satisfied in yourself that you have practiced, and achieved a new skill.