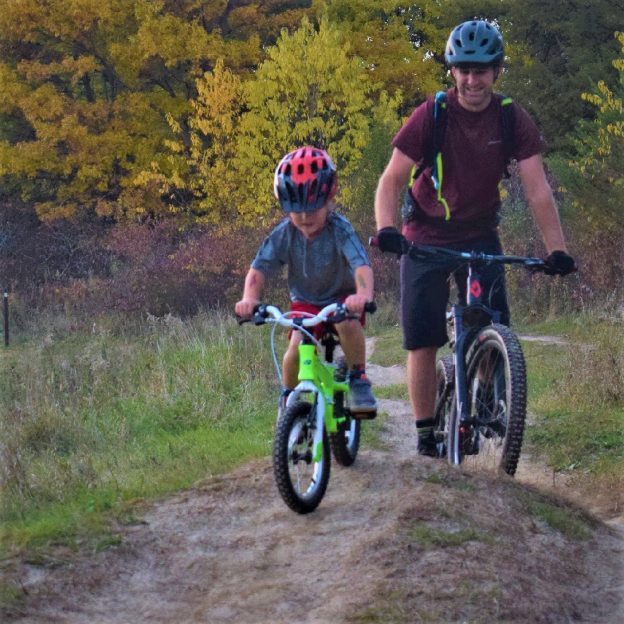
Tag Archives: Kids safety

Summer fun for you and the kids is two wheels away. Here are the best ways to keep your kid's bike working well and operating safely.

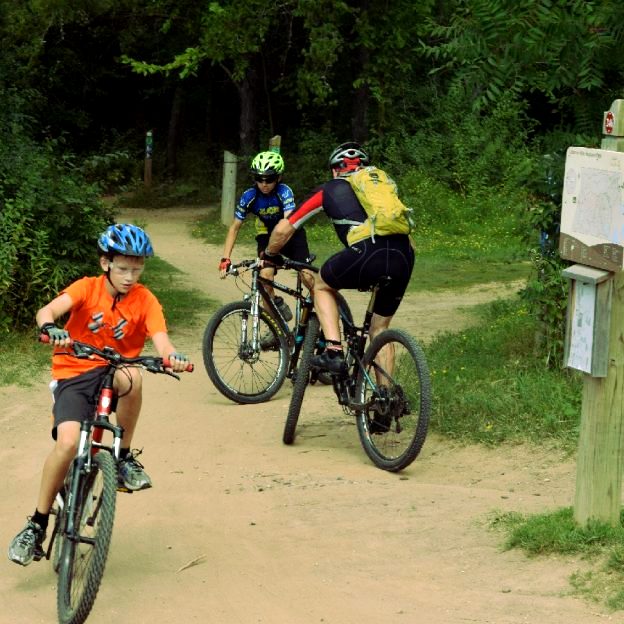
Tips and tricks for keeping your kid’s bike running smooth and safe

by John Brown

Summer fun for you and the kids is two wheels away. It is a time to bond and explore a new area of the neighborhood and maybe share some life lessons? Sadly, that fun can come to a premature end if the bike breaks down, or worse, you crash. Here are the best ways to keep your kid’s bike working well and operating safely.

How much air should you put in kid’s bike tires

Nothing will spoil a fun ride faster than a flat tire, and most flats are due to low tire pressure. Take a few minutes before your kids ride to help them check the tire pressure. If your kids don’t know how to use your pump, checking pressure is a great way to teach them. When considering a pump, remember you kid’ bike tires work best around 35psi so make sure your pump can easily hit that pressure.

Adjusting your kid’s bike brakes

The biggest key to control in braking. Adjusting brakes for children is a little different than for adults. Due to children’s small and relatively weak hands, it is important to focus on the brake lever position before adjusting the brake. Ensure the lever is as close to the bar as possible (see image) and the spring tension on the brakes are as low as possible. You have it right if your kids can easily reach and squeeze the brake levers.

Lubing their chain

A dry chain will wear faster than one that is properly lubricated. Additionally, a dry and worn chain can break under stress. To avoid excess wear, be sure to lube the chain periodically in dry conditions and immediately after wet rides.

Inspect your kid’s bike for bent or broken parts

Every year, bike makers change bike designs to make them indestructible for kids. The following year, kids find new and interesting ways to destroy those bikes. Pay close attention to your kid’s bike for bent or broken parts. The most common parts that get bent are rear wheels, seats, handlebars, and rear derailleurs. The parts that most frequently get broken are brake levers, shifters, pedals, and reflectors (reflectors leave sharp sections of plastic behind). If anything is bent or broken, replace it immediately.

Also, inspect tires for wear

Tires are more susceptible to flats when worn. The normal wear indicator for a tire is when the tread goes bald. Beyond tread wear, there are a host of other indicators. Look for cracks in the tread or sidewall, threads coming loose, or bubbles in the tire. Worn tires should be replaced immediately.

Are the handlebar grips tight?

As rubber wears and ages, it becomes harder and less elastic. For grips, the softness and elasticity are what keeps the grips in place. Put your hands around the grip and twist hard. If the grip can rotate or move, get them replaced. Also, when a bike gets dropped on the ground the end of the grip can get torn. Once torn, that grip will leave the sharp end of the bar exposed with the potential to cut small riders in the event of a crash.

Is the seat adjusted and tight?

When riding, a stable seat allows your child to control the bike with their hips. If that saddle is loose, it can be difficult to control the bike. Check the saddle by grabbing it firmly, flexing up and down, and twisting. Be sure to tighten it if there is any movement.

How to bike fit your kid’s bike

Kids grow so quickly that it’s important to constantly check their fit in the bike.  Be sure they can easily pedal without their knees going to high. Also, ensure that they aren’t reaching too low for the bars.

Proper helmet fit

The final bit of safety for riding is probably the most important. A helmet needs to fit properly to work well. If the straps are too tight or the shell is too small, it will be painful to wear and your child will try not to wear it. Additionally, always check for dents or cracks in helmets. It is possible to break a helmet without crashing on it. Most helmets are relatively inexpensive, so making sure they are comfortable enough for your kids to want to wear them is a small investment to keep them safe.

Family rides are the perfect time to teach your kids about riding safely.

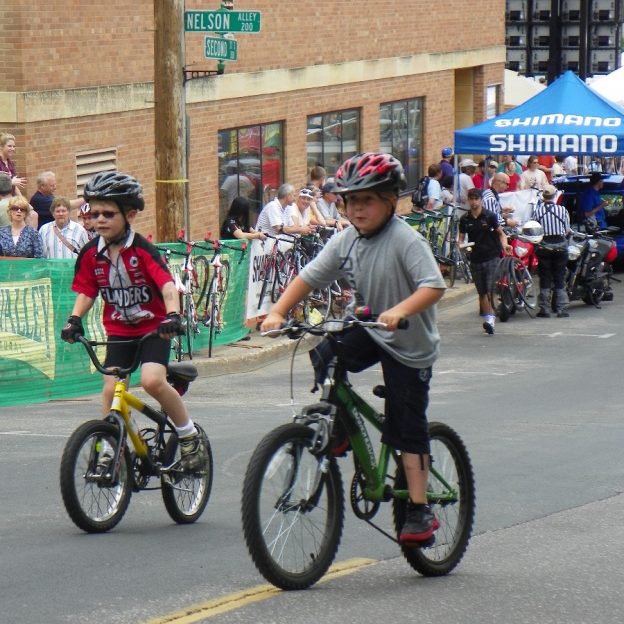
Demonstrating safe riding practices teaches kids valuable skills for life

by John Brown, HaveFunBiking.com

The summer months ahead will play host to countless hours of family riding fun. During these bicycle outings its the perfect time to teach your kids about riding safely. All things considered, there are just a few topics to teach. Please read below for the details.

Safe riding starts with a helmet

First and foremost, a well-fitting helmet cuts down the risk of serious injury by half. As a result, helmets are the single most important piece of cycling gear for kids, and sadly one that is not used by many riders under 14. As an example, a well-fitting helmet will be snug on the rider’s head. Additionally, the strap toggles are located about ½ inch below the ear lobe and the chin strap is tight enough to hold the helmet on your head, but not so tight it chokes you. Furthermore, be sure to consult the manufacturers recommendations for when to replace your helmet. Important to realize, is that helmets lose effectiveness over time, so review it’s production date.

Helmet fit

Be sure that your child is comfortable on their bicycle and it is sized properly. Bikes that are too small or too large are difficult for children to control. As an example, good fit is when your child can stand over the bike with 2-3 inches of clearance between the top tube of the bike and them. Also, the kid can easily sit on the bike and pedal without their knees raising so high it impedes their ability to ride. Additionally, a child should also be able to hold the bars without stretching so far they cannot confidently handle the bicycle. If you have concerns about the fit, visit your local bike shop to have the bike adjusted.

Bike function and riding safely

Verify that the brakes work, tires are inflated and controls are tight. Be sure that your child can squeeze the brake levers easily and stop the bike. If they struggle to squeeze the brakes, have the bike serviced at your local shop. Additionally, keeping proper air pressure in the tires will limit flat tires and aid in control.

Visibility and Riding Safely

Kids bikes are required to be sold with reflectors on the bars, seatpost, wheels, and pedals. Those reflectors should be considered the most basic level of visibility. Add to that visibility, by having your kids wear brightly colored clothes, installing lights and a flag on the bike. With young kids try to avoid riding at night or at twilight.

Riding skills

If your kids are better riders, they will be safer. Teaching basic skills can be fun and easy. Find a flat section of low grass (like a high school football field) and have them practice riding with one hand off the bar. Use the Board Trick to learn how to handle riding over obstacles. Another great way to learn riding skills is to enter into bicycle rodeos (many local shops put these on).

Learning to signal

When riding a bicycle on the road, you are required to follow posted traffic laws as well as signal your directions. Teach your kids the basics of signaling turns and navigating on roads.

Sidewalk and Bike Path Courtesy

Riding to the right is the most basic rule of riding on sidewalks and bikepaths. What is more important than that rule is the courtesy of riding around others. If you are trying to pass a rider you should verbally signal where you are passing. A quick “on your right” is all it takes, wait for the rider ahead to move over and allow you to pass safety. When being passed, be sure to yield the path by moving over and allowing the overtaking rider to pass safely. If you are stopping on a bikepath look for a wider section of trail or a clearing. Make sure that all members of your group are off the side of the trail and leaving ample area for others to ride past. Being courteous is the best way to make sure everyone has fun.

Ride with them

Kids learn a lot from the example set by their parents. Ride with your kids, show them the right things to do with your actions and teach them the right things to do with your words. Make safe riding part of the fun.

Keep senses clean

It’s tempting for kids to try and bring a phone or iPod on a ride with them. They may want to be able to check their texts, listen to music or just have their digital device with them. Those distractions are a detriment to your child’s safety. Keep your digital toys in a backpack or better yet at home and focus on the world around you.


Kid’s bikes are the gateway to lifetime of fun. What’s best for your rider?

by John Brown, HaveFunBiking.com

When it is time to get your child on the bike for the first time, or upgrade to a bigger size, knowing the differences between kid’s bikes will make the job easier. Read below for more details.

BMX

In the early 1970’s kids began racing their bicycles on the dirt tracks of southern California. This racing led to the national explosion of the BMX bike. Over the last few years the “Bikelife” movement has given BMX a renewed interest around the world and ushered many different frame and wheel sizes into the category of BMX. These bikes all share the similarities of one rear brake, single speed, high bars, and low saddle even though the wheel sizes are different.

MTB

The Mountain Bike boom of the 90’s spread across the globe and included options for every size of rider. Today, kid’s mountain bikes live in two categories; “Off road” and On road”. The “Off road” mountain bikes have lower gearing to traverse loose trails, suspension designed for control, and lightweight components. “On road” mountain bikes are built to be ridden around the neighborhood rather than off road. They have higher gearing for smooth paths, suspension designed for ascetics rather than function and they typically weight a lot more than the “Off road” versions. Both come in 20”, 24” and 26” wheel sizes.

Balance

Balance bikes are sweeping the world as the best way to teach children to ride bikes. What is a balance bike and how does it work? These bikes look a lot like a normal bike with two wheels, frame, seat and handlebars. What you won’t see on a balance bike is a crank, chain and pedals. Balance bikes are designed to teach kids the most difficult portion of riding, balance, before incorporating pedals.

Road

This category is a bit newer to kid’s bikes, but has existed in cycling for over 100 years. More recently, parents who enjoy riding their road bikes wanted to share that experience with their young kids. Thanks to a few perceptive companies, kid’s road bikes came to the market with great acceptance. To find the size that fits your child best, try different brands to find something that fits your child well.

Sizes

Most kid’s bikes are sized by wheels size. As an example, a child from 32”-42” tall would ride a 16” wheeled kids bike. That does not mean that all 16” wheeled kids bikes are the same size. Where they differ is the overall height of the frame, and the distance from the seat to the handlebars. When getting a new bike, try a few brands to see which frame fits best.

Brakes

Smaller kid’s bikes (>16” wheels) usually use a pedal brake. Therefore, to have the child stop, they pedal backward. Once you grow into kid’s bikes with 20” wheels most manufactures use a hand brake and a pedal brake so that kids can get comfortable with hand brakes. At 24” wheels and above, bikes are almost exclusively built with hand brakes only.

Materials

Thanks to the increase in aluminum production and costs for the material coming down, many kids bikes are now made out of aluminum. This is great news for kids of the world because aluminum frames are lighter than steel. Steel frames are not always a detriment to kids bike though. In the case of BMX bikes, Steel’s durability and strength end up being a huge benefit for riders doing more aggressive moves.

Attributes

-weight

Kids bikes typically weigh a lot in relation to the child. But that is not to say these bikes are heavy. As an example, a 25-pound bike is proportionally heavier to a child who weighs 40 pounds than to a 150-pound adult. Getting your child the lightest bicycle available, will go a long way to make it easier for them to ride.

-durability

Durability is a difficult metric to qualify when buying a bike for a child. Something that will be durable enough for path riding, might not hold up to the rigors of off road use. Durable things to look for are metals rather than plastics in the braking and shifting components, and aluminum rims rather than steel. Beyond everything else, take into consideration the child who will be riding the bike when determining how durable it needs to be. Some kids are gentle on their equipment while others are far more kinetic.

-gears

Gears are great for neighborhoods that have hills or for riding off road. Multiple gears give kids a mechanical advantage to ride steep grades or high speeds with relative ease. On the other hand, if your typical riding locations are completely flat and paved, gears will probably just add undue complexity to your child’s bike.

How to buy

Now that you know all about what makes a kid’s bike, let’s talk about how to buy one. I cannot recommend your local bike shop highly enough. A child’s enjoyment of riding a bike is hugely effected by the quality of the bike, fit of the bike, and function of the bike. For those reasons, no entity does a better job of getting your kid on the right bike than the local bike shop. It is not a secret that there are less expensive places to buy a bike than a bike shop. Even though others may sell bikes for less money they are not the same product in fit, function, or service.

Additional materials

When going to get your child a new bike, remember to look for a few other products as well. First and foremost is a Helmet. Helmets have limited lifespans and should be replaced frequently. Also consider the things that will go on your kid’s new bike like a bell or bottle. Round out the purchase with gloves or a jersey and your kid will be looking forward to mile after mile of great riding.