Tag Archives: cross bikes

If you are looking for a gently used bike in the south Twin City Metro, you may be in luck if you are in town on Saturday, May 11th.

Need a Bike? Rick’s used bike sale benefits kids youth program

Are you looking for a gently used bike? If you are and you are in the south Twin City Metro on Saturday, June 18th, you may be in luck. For the fourteenth year, Rick’s annual used bike sale benefits a kid’s youth program and you can find a deal on a used bike. This year Rick Anderson has over 500 bicycles primed and ready for that #NextBikeAdventure.

Rick Anderson working in his garage so a wide assortment of gently used bikes are ready for the sale

Rick’s used bike sale details

The public bike sale will be held  June 18, from 9 a.m. to 1 p.m. at Superior Service Center, 14580 Glenda Drive, Apple Valley, MN  (Just off Cedar Ave, near the Red
Line’s 147th Street bus stop.)

There are models for all ages and skill levels, including some top-quality cycles from Trek,
Specialized, Cannondale, Schwinn, Raleigh, Giant, and Fuji. There will be road bikes, mountain
bikes, cross bikes, city bikes, cruisers, hybrids, BMX, vintage, classics, and even a recumbent tandem. With many bikes for sale, they will range in price from $50 to $500 dollars.  Much more
information and a map of the sale are at www.ricksbikesale.com.

Used Bike Sale Benefits Youth Program

The bikes generally sell fast. Anderson recommends arriving promptly at 9 a.m. Monetary
donations to Kids ‘n Kinship and DARTS will be accepted on-site. For additional information about the Kids ‘n Kinship mentoring program, visit
www.Kidsnkinship.org.

For additional information about DARTS, visit https://www.darts1.org/

The Dakota County Kids ‘n Kinship is a private non-profit organization that matches children who have a need for an additional supportive relationship with carefully screened adult volunteers. Once a match is made, volunteers spend 1-4 hours per week with the child. Typical activities might include picnicking, attending sporting events, sharing interests, or going to the movies.

If you are looking for a gently used bike in the south Twin City Metro, you may be in luck if you are in town on Saturday, May 11th.

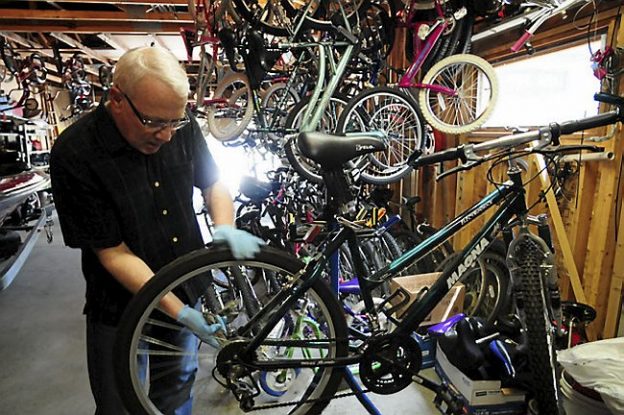
Apple Valley used bike sale benefits Kids ‘n Kinship Youth Program

Are you looking for a gently used bike? If you are and you are in the south Twin City Metro on Saturday May 12th, you may be in luck. For his tenth annual used bike sale, that benefits a kid’s you program, Rick Anderson has over 400 bicycles primed and ready for that #NextBikeAdventure.

Rick Anderson with a wide assortment of gently used bikes ready for the sale in Apple Valley, this Saturday.

Bike sale details

The public bike sale will be held Saturday May 12, from 9:00 a.m. to 1:00 p.m. at
Goodyear Superior Service Center, at 14580 Glenda Drive, Apple Valley, MN (Located at the Red
Line’s 147th Street bus stop.)

There are models for all ages and skill levels, including some top-quality cycles from Trek,
Specialized, Cannondale, Schwinn, Raleigh, Giant, and Fuji. There will be road bikes, mountain
bikes, cross bikes, city bikes, cruisers, hybrids, BMX, vintage, classics and even a recumbent tandem. With 400 bikes for sale, they will range in price from $30 to $500 dollars.  Much more
information and a map to the sale are at www.ricksbikesale.com.

Used Bike Sale Benefits Youth Program

The bikes generally sell fast. Anderson recommends arriving promptly at 9 a.m.. Monetary
donations to Kids ‘n Kinship and DARTS will be accepted on site. Anyone who purchases a bike
can register to win one of two $25 gift certificates for Famous Dave’s BBQ restaurant in Apple
Valley.

For additional information about the Kids ‘n Kinship mentoring program, visit
www.Kidsnkinship.org . For additional information about DARTS, visit https://www.darts1.org/

For More information see .

The Dakota County Kids ‘n Kinship is a private non-profit organization that matches children who have a need for an additional supportive relationship with carefully screened adult volunteers. Once a match is made, volunteers spend 1-4 hours per week with the child. Typical activities might include picnicking, attending sporting events, sharing interests or going to the movies.

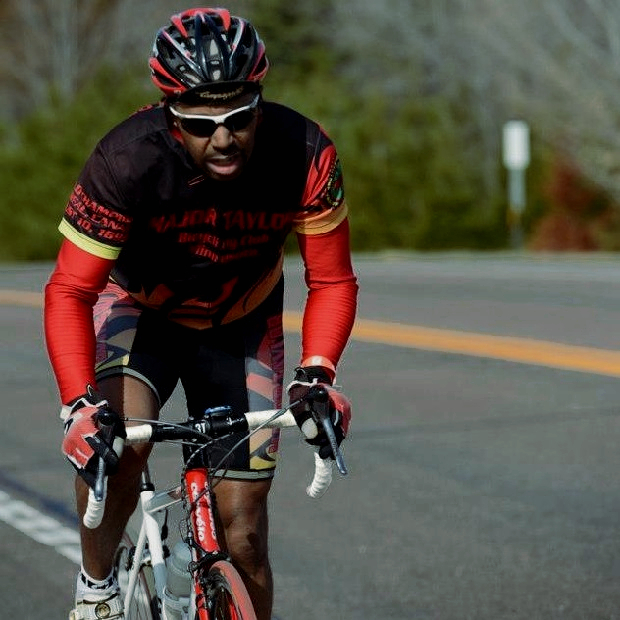
Learn How To Install Bar Tape For Your Most Comfortable Ride Yet

by John Brown, HaveFunBiking.com

Riding and maintaining your road bike can be easy with some basic maintenance and by practicing the right skills. Plus, while you ride your bike, you should do everything you can to feel comfortable. That includes the right fit, the right clothes, and above all else, the right touch points. Touch points on a bike are anywhere your body touches the bike (specifically hands, feet, and saddle). The easiest touch point to freshen up on your road bike is the bar tape. Read below for a step by step instruction on installing bar tape.

How to Start Installing New Bar Tape

The first choice you have when wrapping your bars is, will you wrap from inside out, or outside in?  Either choice is fine as long as you start from the bottom of the bar rather than the top. Wrapping from the top down, will position the edge of the bar tape so it easily unravels with normal use.

Bar Tape

The bars on the left are being taped from inside to outside, while the ones on the right are going outside to inside.

To begin. position the end of the bar tape about 50% off the end of the bar. While holding the end of the tape tightly, begin stretching the tape and winding it around the bar. When winding it, make sure that each section of tape, covers 25% of the previous wrap. It is important to stretch the tape. While most bar tapes have an adhesive backing to help hold itself in place, stretched tape will constrict around the bar as you wrap it, and stay in place better.

From left to right you can see how to start, how to wrap the tape, and the hood clamp detail

Wrapping levers

While winding the tape up the bar, the only real difficulty is the brake hoods. First thing you want to do is flip the back of the brake hood forward, exposing the hood clamp band and a portion of the hood body.

The soft rubber hoods flip forward to tape bars, or replace cables

The most common ways to wrap around the hood are either, maintain the standard, spiral, winding pattern, or wrap the lever in a figure 8 pattern. For a standard wrap, first place a small piece of bar tape to cover the clamp band, then continue wrapping up the bar. For the figure 8 pattern, start winding as normal, once the tape gets over the hood, wrap the tape back down the side of the hood winding it around the bottom of the hood and crossing the tape in a figure 8 pattern across the back of the hood strap. You have done it correctly if no bar is showing once you flip the brake hoods back into place.

On the left, the tape is being wrapped in a helical fashion while the bar on the right is using a figure 8 pattern

Finishing Your Bar Tape

Once you have taped up the bar, past the hood, and are about 2” from the stem clamp, it is time to finish the tape. Most bar tapes come with vinyl finishing tape to hold the tape in place. Whereas bar tape is quite flexible finishing tape is a lot more ridged. When cutting the bar tape, cut it on an angle so that when wrapped, it leaves a sharp flat edge. Before using the finishing tape, I find it helpful to use a vinyl electrical tape to secure the bar tape, then wrap the supplied finishing tape on top in the opposite direction. When you have finished taping, go back to the open end of the bar, tuck any spare tape into it, and tap the bar plug into place.

An easy sign of a good tape job is a clean finish and bar plugs that face upright. It’s O.K. to sweat the small stuff!

Tips and Tricks

Before you begin taping the bar, be sure to have scissors, electrical tape, a small section of bar tape, and the bar plug within reach. There is nothing more annoying than getting to the top of the bar and having to let it go (unraveling the bar) and go get scissors or tape. If you want a little more cush, take some spare bar tape and run it length wise along the top of the bar all the way to the hood and wrap over it. This method gives you added padding without increasing the bar diameter too much. If you want to change the profile of the bar you can use some spare brake housing under the tape to give the bar more of a wing profile. Simply secure it in place with liberal amounts of electrical tape.

Simple things like additional tape (above) and a section of spare brake housing (below) can customize your bar shape

Hopefully by following the above instructions your new bar tape will go on quickly and neatly. However, if you don’t have the time or feel uncomfortable visit your favorite bike shop and they can get the feel your looking for.