Tag Archives: comfortable riding

Riding a bicycle is one of the most enjoyable hobbies available. When you have your bike fit to your body it becomes even more enjoyable. Don’t let little nagging annoyances take away from your great ride.

Be more comfortable and have more fun when you follow these bike fit tips!

John Brown, HaveFunBiking

Riding a bicycle is one of the most enjoyable hobbies available. When you have your bike fit to your body it becomes even more enjoyable. Don’t let little nagging annoyances take away from your great ride. Read on to learn the causes and fixes to cycling’s most basic discomforts.

Before you ride, visit your local bicycle shop for a bike fit

A proper bike fit can alleviate most common discomforts. To set up your bicycle, I encourage you to find a friend to help look at you on your bicycle and adjust your bike fit. If no one is available, use your phone and take video of you sitting and riding your bicycle.

Bike Fit explained

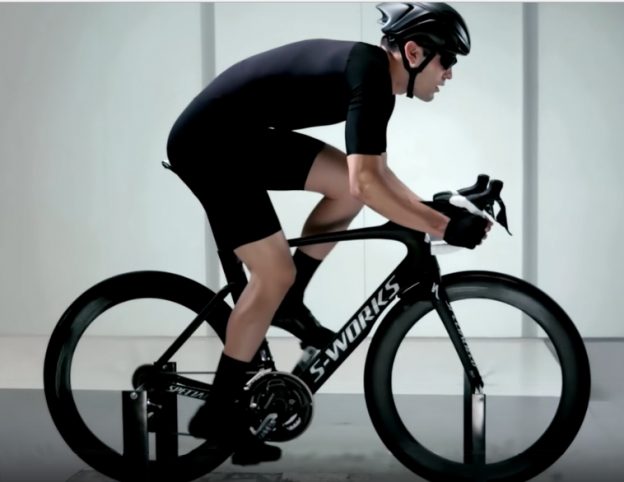
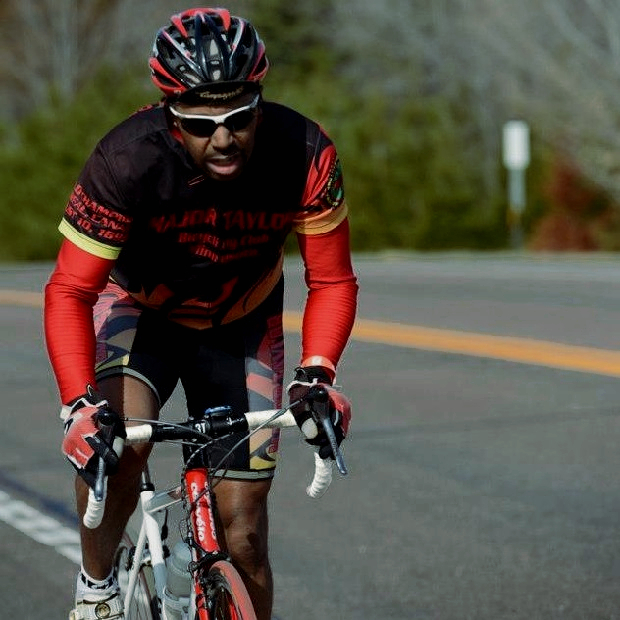
The left rider’s position is safe and comfortable while the rider on the right is in for some sore days

Saddle Height

Look at the two riders above. The rider on the right is in for some sore days. The excessive amount of bend to his legs is making his knee support all his pedaling forces at a very acute angle, which puts excess strain on the joint when pedaling. His low saddle overworks his quadriceps and doesn’t engage his gluteal or calf muscles. The rider on the left is bending his leg at a wider angle which results in proper leg extension while pedaling, and incorporates all his muscles (helps with efficiency).

To set saddle height: Sit on your bike, place your heel on your pedal. Next, rotate the pedals backward (see below). You want your leg completely extended while keeping your hips level (at the bottom of the pedal stroke your leg should be just barely locked out with your heel touching the pedal). If you find you aren’t getting complete extension raise your saddle, but lower it if you’re tilting your hip to reach the bottom of the pedal stroke. Once you begin pedaling naturally (with the ball of your foot on your pedal, rather than your heel), you will have the proper amount of bend to your knee.

Don’t Lean Too Much

The rider on the right above is leaning over drastically, which means his upper body weight is supported only by his lower back and arms. This position will results in a sore back, shoulder, arms, and painful hands. His head is positioned so low he must crane his neck up aggressively just to see. This will also result in a sore neck.

The rider on the left has more support. By sitting a bit more upright he is using his bone structure to support his upper body. Adjust your handlebar so that your back is at an angle over 45-degrees from the ground. Your arms should extend at a 90-degree angle from his back with a very small bend to the elbow. Adjust your grips and controls to be in place when you reach out to take the bar. If you need to turn your wrist up or down to shift or brake you should re-adjust the controls.

Look Around

The rider on the left also has a very comfortable position for his head. He can see around and in front naturally without needing to stretch.

Once you have a comfortable setup, you should experience hours upon hours of painless riding. If discomfort continues after looking at charts on the web, then consult with your local bike shop. They are trained in advanced personal fitting techniques and can offer insights into potential causes of discomfort.

If you enjoy our content and want access to exclusive content fr our members only, please sign up for our free, weekly, E-Magazine

Learn How To Install Bar Tape For Your Most Comfortable Ride Yet

by John Brown, HaveFunBiking.com

Riding and maintaining your road bike can be easy with some basic maintenance and by practicing the right skills. Plus, while you ride your bike, you should do everything you can to feel comfortable. That includes the right fit, the right clothes, and above all else, the right touch points. Touch points on a bike are anywhere your body touches the bike (specifically hands, feet, and saddle). The easiest touch point to freshen up on your road bike is the bar tape. Read below for a step by step instruction on installing bar tape.

How to Start Installing New Bar Tape

The first choice you have when wrapping your bars is, will you wrap from inside out, or outside in?  Either choice is fine as long as you start from the bottom of the bar rather than the top. Wrapping from the top down, will position the edge of the bar tape so it easily unravels with normal use.

Bar Tape

The bars on the left are being taped from inside to outside, while the ones on the right are going outside to inside.

To begin. position the end of the bar tape about 50% off the end of the bar. While holding the end of the tape tightly, begin stretching the tape and winding it around the bar. When winding it, make sure that each section of tape, covers 25% of the previous wrap. It is important to stretch the tape. While most bar tapes have an adhesive backing to help hold itself in place, stretched tape will constrict around the bar as you wrap it, and stay in place better.

From left to right you can see how to start, how to wrap the tape, and the hood clamp detail

Wrapping levers

While winding the tape up the bar, the only real difficulty is the brake hoods. First thing you want to do is flip the back of the brake hood forward, exposing the hood clamp band and a portion of the hood body.

The soft rubber hoods flip forward to tape bars, or replace cables

The most common ways to wrap around the hood are either, maintain the standard, spiral, winding pattern, or wrap the lever in a figure 8 pattern. For a standard wrap, first place a small piece of bar tape to cover the clamp band, then continue wrapping up the bar. For the figure 8 pattern, start winding as normal, once the tape gets over the hood, wrap the tape back down the side of the hood winding it around the bottom of the hood and crossing the tape in a figure 8 pattern across the back of the hood strap. You have done it correctly if no bar is showing once you flip the brake hoods back into place.

On the left, the tape is being wrapped in a helical fashion while the bar on the right is using a figure 8 pattern

Finishing Your Bar Tape

Once you have taped up the bar, past the hood, and are about 2” from the stem clamp, it is time to finish the tape. Most bar tapes come with vinyl finishing tape to hold the tape in place. Whereas bar tape is quite flexible finishing tape is a lot more ridged. When cutting the bar tape, cut it on an angle so that when wrapped, it leaves a sharp flat edge. Before using the finishing tape, I find it helpful to use a vinyl electrical tape to secure the bar tape, then wrap the supplied finishing tape on top in the opposite direction. When you have finished taping, go back to the open end of the bar, tuck any spare tape into it, and tap the bar plug into place.

An easy sign of a good tape job is a clean finish and bar plugs that face upright. It’s O.K. to sweat the small stuff!

Tips and Tricks

Before you begin taping the bar, be sure to have scissors, electrical tape, a small section of bar tape, and the bar plug within reach. There is nothing more annoying than getting to the top of the bar and having to let it go (unraveling the bar) and go get scissors or tape. If you want a little more cush, take some spare bar tape and run it length wise along the top of the bar all the way to the hood and wrap over it. This method gives you added padding without increasing the bar diameter too much. If you want to change the profile of the bar you can use some spare brake housing under the tape to give the bar more of a wing profile. Simply secure it in place with liberal amounts of electrical tape.

Simple things like additional tape (above) and a section of spare brake housing (below) can customize your bar shape

Hopefully by following the above instructions your new bar tape will go on quickly and neatly. However, if you don’t have the time or feel uncomfortable visit your favorite bike shop and they can get the feel your looking for.