Welcome. We're your premier source for fun places to explore by bicycle or on foot. Offering guides, maps and articles on road and trail riding for the novice to seasoned cyclist - helping you find your #NextBikeAdventure
from Barry H. Oberholzer Jr.
We have all heard it before: Use protection…wear sunscreen!
In the late 1990s, Baz Luhrmann released a song called “Everybody’s free to wear sunscreen…” If you have never heard it or can’t recall the song – EnjoyI
We all get caught up in preparing for all those fun summer outings. We check our equipment, focus on nutrition, work out, and stay hydrated. However, after my last couple of triathlons, I realized I had forgotten one of the most important things. You need to apply sunscreen, something I didn’t do at my last couple of outdoor events.
Reapply sunscreen throughout the day for added protection.
Whether you participate in a race or tour the countryside, you will spend most of your day in the sun. Suppose you remembered to start the day off with sunscreen applied. In that case, as you head into the second part of the day’s adventure, the lotion has started to disappear from rubbing, sweating, or maybe from a swim incorporated into your day’s activities. This is where you should take the time to reapply. Believe me, 30- seconds is all it takes to ensure you are covered. And it will protect you from the worst UV rays on the second leg of your day’s activities.
I learned this the hard way. I always knew you should apply sunscreen thoroughly before any outing or race, but I didn’t think about it while participating in my last Triathlon. The time I spent in direct sunlight over the course of the day, added to the change from a wet suit to a tri-suit, took a toll on my skin. Not reapplying lotion—I got burned.
As I mentioned, we focus intensely on our nutrition and how we will fuel, hydrate, and keep our bodies going. Still, we sometimes forget that our biggest organ is exposed to direct sunlight for many hours. That is why one of the newest additions to my transition bag is SPF 50+ water/sweatproof lotion. It is just as important as that banana/GU Gel and a bottle of water.
So if I could give you advice from one newbie to another newbie, wear sunscreen!
Whatever your riding style, downhill, cross-country, or a leisurely ride after work, you’ll find plenty of mountain biking trails to choose from. Minnesota offers many off-road trails to shred. No matter your skill level, you will find plenty of glaciated ridges: lush forests, and open prairies to explore. Plan your next outdoor adventures with our list of mountain bike trails in Minnesota. You will find many fun opportunities year-round, as many of these trails are open for fat biking throughout winter. Thanks to the Minnesota Off-Road Cyclist (MORC) and several other community organizations who maintain these trails.
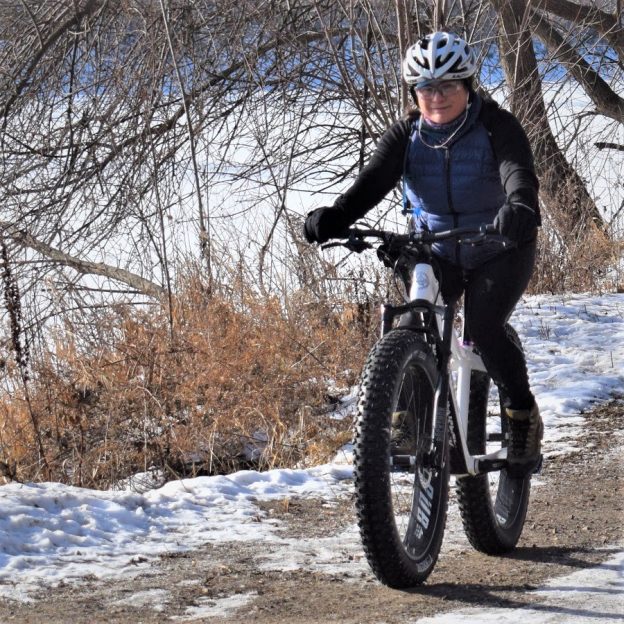
Fat bike fun on Minnesota’s Mountain Bike Trails
From lift-served downhill and legendary red dirt trails of the North to the open-air feel of the prairies further south, you’ll find outstanding mountain bike trails across Minnesota.
Minnesota mountain bike trails in the North
You will find many trail options when visiting Northern Minnesota.
In Northern Minnesota’s vast forests, find an extensive network of rugged singletrack and easy-to-moderate mountain bike trails to enjoy. Explore the following list, with many state, regional, and city parks that maintain off-road trails to provide riders at every skill level with a fun experience. Whether seeking a serene roll or a challenging thrill, Minnesota has no shortage of mountain bike trails to explore. For that next Northern Minnesota adventure you want to plan, click here for over 25 trail systems to shred.
Minnesota’s Central Region
Enjoy the mix of prairie and forested trails regardless of your skill level.
In Minnesota’s heartland, find an extensive network of rugged singletrack and easy-to-moderate mountain bike trails to enjoy. Explore the following list, with many state, regional, and city parks that maintain off-road trails to provide riders at every skill level with a fun experience. Whether seeking a serene roll or a challenging thrill, Minnesota has no shortage of mountain bike trails to explore. For that next Central Minnesota adventure you want to plan, click here for over 15 trail systems to shred.
Minnesota’s Twin Cities Metro Area
The TC Trails here are perfect for the beginner and the serious rider.
In the Twin Cities, mountain bikers will find trails to enjoy year-round. No matter your skill level, you will find the singletracks trails flowing in the summer. Then in the winter months, they are groomed for fat biking. Explore the following list, with many regional and city parks that maintain off-road trails to provide riders at every skill level with a fun experience. Whether seeking a serene roll or a challenging thrill, Minneapolis-St has no shortage of mountain bike trails. Paul Area. For the next mountain bike adventure you want to plan in the Twin Cities Metro, click here for over 15 trail systems to shred.
Minnesota’s South
Southern Minnesota awaits your arrival from the driftless area to the open prairies.
In Southern Minnesota’s open prairies, meandering rivers, and stunning bluffs, find an extensive network of rugged singletrack and easy-to-moderate mountain bike trails to enjoy. Explore the following list, with many state, regional, and city parks that maintain off-road trails to provide riders at every skill level with a fun experience. Whether seeking a serene roll or a challenging thrill, Minnesota has no shortage of mountain bike trails to explore. For the next mountain bike adventure you want to plan in the Twin Cities Metro, click here for over 15 trail systems to shred.
I have used a commuter bike almost exclusively for the past twenty years. In that time, I have seen many people put off commuting by bicycle because they felt they didn’t have the right bike. While the right gear is important, many don’t realize that the right equipment is closer than they think. Take a look at how I would build the perfect bike for commuting. It may surprise you how close it might be to that bike hanging in your garage.
The ultimate commuter bike
For the sake of this article, we will start with a bike similar to what many people already have in storage. Take the Marin Farifax SC1, an aluminum hybrid with V-brakes, 24 speeds, and a flat handlebar. This bike is comfortable and efficient for most riders and durable enough for the rigors of daily riding. Additionally, the tires can use a puncture-resistant layer to fight flats.
The Fairfax SC1 is similar to bikes you will find in garages everywhere.
The bare minimum to be a commuter bike
As with most road bikes, the Fairfax SC1 is pretty much commuter-ready out of the box. If I were to add one thing, it would be lights. Being visible as a commuter is job #1. While commuting, you typically share time and space with cars, so it is important to let them know where you are. I like to use a good tail light and a strong headlamp. The tail light is kept on blink mode while the headlamp shines bright and steady. This way, vehicles approaching from behind can see me easily, and the light from my headlamp allows others to see me and me to see them.
I would also recommend the basic tools necessary to fix a flat tire. That includes a spare tube, pump, tire levers, patches, and a 1-$ bill. If you have never changed a flat before, practice once or twice at home before heading off on your first trip.
Being visible is a must
Next best thing
If I were to make another suggestion, it would be for a rear rack with bags, or a good backpack. While both options are designed to carry your stuff, they do their jobs slightly differently. A rack and bag combo works well to keep the weight of your gear on the bike and off your back. This option is far more comfortable than a backpack but can be more jarring to your gear (a real concern if you lug a laptop). The backpack is not as comfortable, but is better for your gear, and easier to use if you have more than one bike. For either option I look for something waterproof. Eventually, you will get caught in the rain, and keeping your gear dry is essential.
A rack and this bag make carrying your gear easier.
On the subject of Dry
While not a necessity, fenders are a welcome addition to any commuter bike. I prefer the permanent, bolt-on style fender. They keep you dryer and stay in place better than the clip-on variety. The fender does an amazing job of keeping you dry when the road surface is wet.
Fenders round out the commuter bike build.
The ultimate commuter bike
Okay, I know “The Ultimate” gets thrown around a lot, and it’s probably a better headline to grace the cover of Cosmo than HaveFunBiking. So, this is an overview of myultimate commuter. As a base, I will start with the Marin Fairfax SC6 DLX or a similar-style and model bike that fits better. If you don’t have a bicycle in storage for your optimum build, look around to see what is available in your market. With new or used bicycles, and e-bikes, always test ride to see what you like best.
Marin’s Fairfax SC6 DLX is a fully loaded commuter.
Why I like the Fairfax SC6 DLX it uses a generator front hub, Internally geared rear hub, belt drive, full fender set, hydraulic disc brakes, and a full carbon fork. The things I would change to make it even better is to use lighter rims (light weight wheels make a bike ride easier), and a Carbon handlebar to quiet some of the road noise. Other than that, I would probably lose the rear rack (as I prefer a backpack) and install some egg-beater clipless pedals
Everything else
Beyond the bike, there are lots of other topics that arise when you start commuting by bike. Like, what to wear, how to care for my bike, rain riding, etc. Rather than focusing on those concerns, I encourage you to think about how you will enjoy your increased fitness, what you will feel like when you lose those extra few pounds, and what amazing things you will create after you kickstart your mind aboard two wheels.
About John Brown, the author
As a lifelong cyclist and consummate tinkerer, John operates Browns Bicycle in Richfield, MN. It all started for him in grade school when the bike bug bit, and that particular fever was still there. Now, and over the past thirty years, he has worked at every level in the bike industry. Starting, like most, sweeping floors and learning anything he could about bikes. He eventually graduated as a service manager and then as a store manager. Through the years, he has spent extensive time designing and sourcing bicycles and parts for some of the largest bike companies in the world. All the while focusing on helping as many people as possible enjoy the love of riding a bike. In that pursuit, he has taught classes (both scheduled and impromptu) on all things bikes. John also believes in helping every rider attain their optimal fit on the bike of their dreams. Please feel free to stop in any time and talk about bikes, fit, parts, or just share your latest ride. You can also see more of John’s tricks and tips on the Brown Bicycle Facebook Page.
Join old and new friends on the Mesabi Trail Tour for the most fun you can have on two wheels. The 2024 Great River Energy Mesabi Trail Tour returns on August 10th with five fun distances for your next bike adventure. Choose from 5 different routes – 12, 26, 46, 58, or 70 miles. All routes travel out and back on Mesabi Trail from one start/finish location in Buhl Park, Buhl, MN.
All routes travel out and back on the Mesabi Trail from Buhl Park in Buhl, which is located on Highway 169 between Hibbing and Virginia.
Mesabi Trail rolling over an ore train crossing.
While you pedal (fully supported) along one of Minnesota’s premiere paved bicycle trails, you will encounter historic & scenic points of interest, food & music at rest stops, and a finish line celebration complete with a picnic lunch and more music!
Cost of riding the Mesabi Trail Tour in 2022
The cost of riding this year’s event (cost per weekend ride) is $45 for riders 17 years and older. The ride is still free for kids 16 and under, with a parent or guardian riding along.
The scenery is stunning along the Mesabi Trail.
Stretching from the Mississippi to the Boundary Waters, with over 150 miles of paved trail, the Mesabi Trail is like no other in the country. Cutting through the forests of northeast Minnesota, your adventure will take you past lakes, creeks, and ponds, by vast red pits of old iron ore mines now filled with emerald green water. You are sure to be greeted by native wildlife during your travels. Passing through 28 communities, visit local attractions, learn about the local mining and logging legacies, and enjoy the local cuisine, like sarma, a pasty, or some potica.
Mesabi Trail Tour riders enjoy the scenery at O’Brian Reservoir.
Your riding experience on the Mesabi Trail in spring, summer, or fall will create great memories.
Camping and lodging along the Mesabi Trail
Camping will be available at Buhl Park, with a $10 charge for a tent/camper site. There are no water or electrical hookups at this park. There will be portable toilets and a hand wash station. Please keep your trash and dispose of it correctly. Please leave your site as you found it. The money collected will go towards the Buhl Youth Recreation Program.
Electric bicycles are becoming increasingly common in most countries worldwide, and here are some tips to extend the lithium battery life.
Tips for charging your new Lithium Battery
With more and more people choosing to take to two wheels, these bikes offer the perfect opportunity to enhance fitness while playing an important role in helping to reduce the carbon emissions generated by other forms of transport. These bikes are helping to persuade many non-cyclists to start pedaling. However, it is essential to understand that purchasing a new e-Bike or tool with a lithium battery is just the first step.
Extend the life of your Lithium battery
Once you have bought your e-bike or light, it is crucial that you take the necessary steps to ensure that it continues to run at its optimum level. Few aspects of an e-bike are more critical than its battery.
Enhanced technology has seen many electric bike manufacturers utilize the benefits of long-life lithium batteries. While these batteries offer a significant upgrade over their predecessors, specific guidelines are still essential to maximize the batteries’ lifespan and run time.
5 Lithium battery life tips
Below I have outlined several e-bike battery care tips that will help you along the way.
1. Owners Manual – Read and follow your bike’s accompanying manual and warning stickers. If you have any questions, call your bike dealer or the company directly and ask.
2. The Charger – Only use the charger supplied with your electric bike or light. Using a different charger can be very dangerous, possibly resulting in fire and/or explosion. So use the charger that came with the item you purchased.
3. Fully Charge – When you get a new e-battery, fully charge the battery per the instructions before you ride the bike.
4. Avoid Extreme Temperatures – Very hot or cold temperatures can negatively affect the battery’s performance and shorten its expected life. Avoid storing and charging your battery in a garage or shed that could be subject to really hot or cold temperatures. Instead, charge and store your battery in a moderate-temperature area. (Recommended storage temperatures are 32F – 77F. Avoid exposing the battery to extreme heat, 104F +, for long periods.
5. Storing a Lithium Battery – If you will not be riding your electric bike for an extended period, it is a good idea to store your lithium battery with a full charge. At the three-month point, check the state of charge and recharge to top it off if necessary.
Two more bonus tips!
6. Charging Location—When charging your bike or battery, do so in a dry location where a hot battery or charger (should there be a malfunction) will not cause a damaging fire.
7. Avoid Humidity—Store your bike, battery, and charger in a dry location. Water and humidity are unsuitable for electrical devices.
Do you want your bike to go faster, ride more effortlessly, and shift smoother after your annual bike shop check-up? Here are some bike tune-up tricks that you may want to keep handy.
Bike tune-up tricks to remember.
Improvements in these areas are often relatively easy to accomplish with just a few simple steps. Try out these four simple tune-up tasks below. They don’t require any special knowledge or tools, and you should see a long-lasting improvement in your bike performance and ease of riding:
1. Clean your chain and lubricate often
Light lubrication on your bike chain is the key; wipe off excess to prevent dirt build-up.
The chain and sprockets on your bike are key in transferring power from your legs to your wheels, making them go round and round. When the crank and gears collect dirt and grit and get gummy, not only does it slow you down, but they also wear out faster. Keeping your chain clean and lubricated is one of the best ways to keep your bike working well.
• How to clean your chain – quick and easy check out this video.
Tip: Use lightweight oil specially designed for bikes. Please avoid motor oil as it is too heavy and quickly attracts dirt and crud. Want a big greasy chainring mark on your leg? Using too much oil or the wrong kind is a guaranteed way to get one. Light lubrication is the key, and wipe off excess at the end.
2. Lubricate the moving parts of your derailleurs.
Keep the derailleur on your bike clean for smooth shifting.
Your bike has quite a few moving metal parts that are vulnerable to dirt and moisture. These parts should be lubricated regularly to keep your bike happy and in good working condition.
Pivot points on the brakes and derailleurs are good places to target because they are vulnerable to attracting dirt and grit due to their placement on your bike. You can spot many of these places by watching your bike in action and seeing where metal parts move against and around each other.
For instance, think about your brakes. Most road bikes are mounted on a bolt on the frame above the wheel. When you squeeze the lever, the brake pivots around this bolt as it contracts. These are places where you want to apply a couple of drops of oil.
3. Inspect your brake pads.
Check your brakes on your bike to see that the pads are clean and aligned correctly.
A quick check of your brake pads will often reveal potential problems that are easy to fix. You want to check:
• Are your brake pads adequately aligned? Brake pads are the little rubber things that clamp down on your rims to slow you when you squeeze the brake levers. Ensure they are hitting the rims evenly and aren’t rubbing the tire or missing your rim partially or entirely.
• Are the brake pads toed in? The bike brake pads should also be “toed in,” which means the leading edge of the pads should touch the bike rim first when you lightly apply the brakes. The pads squish a little, and you should get complete contact with the rim when you squeeze down hard—this helps prevent squeaking.
• Check for junk embedded in the brake pads. Inspect the surface of the brake pads where they meet the rims, and using a sharp, pointy instrument like a knife, pick out any bits of sand or metal that may have become embedded in the pad. Removing this grit prevents the pads from wearing and scratching your rims and helps them provide more even and consistent stopping power. Need more info? Check out this video.
4.Check the pressure on your tires.
Always check your bike tires’ air pressure.
Checking the tire pressure is one of the simplest things you can do for the best results. Surprisingly, most people overlook this both on their bikes and cars. Paying attention to keeping the proper level of air pressure in your tires accomplishes many things, including:
• Makes pedaling easier
• Protects your rims from damage
• Prolongs the life of your tires
• And it makes it much less likely that you will get a flat.
And, checking for proper air pressure in your tires before every ride is quick and easy to do.
Simply look for the recommended air pressure for your bike’s tires. It will be printed on the tire’s sidewall in both English and/or metric units. When you know what that number is, inflate the tire and check the air pressure as you pump to ensure that you’re on target. You’ll need a tire gauge, either built into your pump or a separate gauge, to measure the tires’ air pressure. Be sure to check the pressure frequently as you pump up the tire so that you do not overinflate your tire. See this video for more information.
Also, take a quick moment to check your tires for proper inflation before each ride and add more air if needed. It is not uncommon for tires to gradually lose air over several days, even without having a flat that needs to be replaced. Taking just this simple and easy step will prove valuable to you in the long run.
If you are still having problems, need to adjust the derailleurs, or need to get some new tires if the ones on your bike are several years old, visit your local bike shop. They will fix you up and share some more easy maintenance tips.
Now go out and have fun riding!
About John Brown, the author
As a lifelong cyclist and consummate tinkerer, John operates Browns Bicycle in Richfield, MN. It all started for him in grade school when the bike bug bit, and that particular fever was still there. Now, and over the past thirty years, he has worked at every level in the bike industry. Starting, like most, sweeping floors and learning anything he could about bikes. He eventually graduated as a service manager and then as a store manager. Through the years, he has spent extensive time designing and sourcing bicycles and parts for some of the largest bike companies in the world. All the while focusing on helping as many people as possible enjoy the love of riding a bike. In that pursuit, he has taught classes (both scheduled and impromptu) on all things bikes. John also believes in helping every rider attain their optimal fit on the bike of their dreams. Please feel free to stop in any time and talk about bikes, fit, parts, or just share your latest ride. You can also see more of John’s tricks and tips on the Brown Bicycle Facebook Page.
Over the past quarter-century, I have helped many riders get going on their bikes without back pain. I’ve been lucky to see the life-changing power of proper posture while riding a bicycle. I have also seen riders walk away from cycling due to simple discomforts and not understanding why. No discomfort is as debilitating as back pain. Luckily, back pain is usually caused by a few easy-fix issues. These issues manifest themselves in lower back pain and upper back pain. See more on some causes and simple fixes to enjoy cycling again.
Lower back pain
The sky-high seat rider can result in back pain.
The #1 cause of lower back pain is saddle height. Not only is this problem every day and painful but also easily fixed. Many riders will raise their saddle too high while trying to get a more efficient pedal stroke. If your saddle is too high, you will tilt your hips at the bottom of each pedal stroke, trying to reach the pedals. That tilting forces the tiny muscles in your back to do the job that the vast muscles in your leg should be doing. To find a proper saddle height check out our bike setup article, or visit your local shop for a bike fit.
The shocking truth
Another frequent cause of lower back discomfort is road shock. While riding, it is typical for minor imperfections in the road to send vibrations through the bicycle and into your body. After some time, this constant vibration can fatigue the muscles in your back. There are a few quick fixes for this problem. The first and most straightforward solution is tire pressure. Rather than maxing out your tire’s pressure, lower the tire pressure in 5 psi increments until you find a force that works for you. Another quick way to squelch road vibration is by adding a suspension seat post. A suspension seat posts absorb the shock before it gets to you.
How is your reach?
Finally, the last common cause of lower back discomfort is your reach. If the distance from your seat to the bars is too great, you begin relying on small muscles in your lower back to support the weight of your upper body instead of your core and arms. Look into having your bike properly fit at a local shop or follow our simple fit guide.
Upper Back Pain
Shrugging off your responsibilities
The leading cause of upper back pain is the riding position, specifically shoulder shrugging. In my experience, many riders don’t know they lift their shoulders when riding. It is just a nervous habit they formed somewhere along the way. Paying attention to where your shoulders are located will help you relax them, alleviating pain.
Additionally, try moving your hands to different positions on the bars. That change in grip does wonders to rest other muscle groups. Sometimes, a proper bike fit is needed to remedy shrugged shoulders, so if the problem persists, visit your local shop for a fitting.
Don’t become a pack mule.
Be careful how much weight you carry on your shoulders. Riding with a backpack is a great way to take what you need, but be careful not to overdo it. If you use a pack to commute, try leaving heavier items like shoes at work. If you need to carry a lot of weight, install a rack with panniers and move that weight onto your bike frame and off your body.
Keep on going
As stated, I have seen riders get off their bikes forever due to discomfort. It’s always sad to see, mainly because I know that simple adjustments can likely eliminate most cyclists’ pain. Be vigilant about removing discomfort. After all, minor aches today can manifest into serious problems later. Find a bike-fitting professional you feel comfortable with and talk about your issues. Your back will thank you.
About John Brown, the author
John operates Browns Bicycle in Richfield, MN as a lifelong cyclist and consummate tinkerer. It all started for him in grade school when the bike bug bit and the fever still existed. Now, and over the past thirty years, he has worked at every level in the bike industry. He is starting, like most, sweeping floors and learning anything he can about bikes. He eventually graduated as a service manager and then as a store manager. Through the years, he has spent extensive time designing and sourcing bicycles and parts for some of the largest bike companies in the world. All the while focusing on helping as many people as possible enjoy the love of riding a bike. In that pursuit, he has taught classes (both scheduled and impromptu) on all things bikes. John also believes in helping every rider attain their optimal fit on the cycle of their dreams. Please feel free to stop in any time and talk about bikes, fit, and parts or share your latest ride. You can also see more of John’s tricks and tips on the Brown Bicycle Facebook Page.
Celebrate your mid-summer bike adventures on July 27 and 28 in Winona, MN. The weekend is packed full of fun, starting with the Hotdish 100 Gravel Race. Or, if family members come along, blueberry picking may be an option. Then, on Sunday, the race event is a zinger on the mountain bike trails in Bluffside Park, overlooking the Mississippi River Valley.
These mid-summer bike adventures begin with Hotdish 100
There will be route options for all abilities! The 3 route distances are 100 miles, 100k, and 50k! The best part is that everyone enjoys the before and after parties! Don’t forget to join us for the Friday night shenanigans, as well as the post-ride party!
The race starts in the heart of the Driftless region, at Briggs Outdoor (27171 County Rd 9, Winona, MN 55987). From there, you will ride through the valleys and up/down the bluffs while enjoying the limestone gravel course.
What you’ll get at The Hotdish 100:
Post Race Hotdish to eat and enjoy while you share stories from your adventure
A beverage
Other Minnesota treats after your ride! Scotcharoos, Minnesota Sushi, etc..
Free Camping Friday night
Sponsor goodies out on the course and in your registration bag
This is a free event with two different course options. Showcasing the amazing trails in Winona, a long route will cover all mountain bike trails above the city, and a short course will cover most of the trails in Bluffside Park.
Where is it: Parking, registration, and the race start is at 925 W Lake Blvd, Winona, MN 55987. Please reach out if you have any questions till then.
Registration and the start of both races will be at Holzinger Lodge. The GPS files will be available the week before the race, and the courses will also be marked for racers on the day of the event. A tech guide with all the final details will be sent out the Thursday before the event!
Winon’a lodging options if you plan to stay the full weekend
Winona has an array of lodging options for every traveler’s needs. Whether visiting in a group or solo, whether you want to splash with the kids in a swimming pool or get away from it all at a cozy B&B, there is something here for every taste and every budget. Check here for a place to stay.
As the hometown of rock-n-roll icon Eddie Cochran, as well as Marion Ross (also known as Mrs. C from Happy Days), Albert Lea, MN, knows how to rock! You’re also likely to spot one of the many eagles, pelicans, and countless other birds and wildlife that live in the area when riding around the local lakes. If you like a beat to your pedal stroke, this year, on August 10th, Albert Lea, MN, will again host the Rock n’ Roll the Lakes. Families and friends of all ages will enjoy this fun bike tour around the scenic lakes with food and music along the way!
ON THIS BIKE RIDE, THE SETTINGS ALONG THE LAKE ROUTE ARE VERY PICTURESQUE.
The hometown of rock-n-roll, Albert Lea knows how to rock! Riders can choose from the 10, 25, or 50-mile SAG-supported routes. All three courses hug picturesque lake shores and offer a variety of beautiful southern Minnesota scenery. Along the routes, there is a great chance you will spot some of nature’s magnificent creatures. See eagles, pelicans, and countless other birds and wildlife that live in the area and love the local lakes.
The ride starts on the north side of Albert Lea, Edgewater Park
The tour starts and ends in the parking lot next to Fountain Lake Park, on N. Broadway Ave, Downtown Albert Lea. Check-in and day of registration will open at eight and close at 10 a.m. If you plan to ride the 50-mile route, please start no later than 9 a.m. The three courses designed offer the most scenic and pleasant routes around Albert Lea. Along the way on each loop, you will find food and refreshment stops offering a great lineup of music for all ages to enjoy. Protect your melon; helmets are required!
Bike-friendly Albert Lea
THE BLAZING STAR STATE TRAIL OFFERS OVER SIX MILES OF RIDING FROM ALBERT LEA OUT THROUGH THE STATE PARK.
Less than two hours down Interstate 35W from the Twin Cities, pull into Albert Lea and prepare for a weekend of outdoor fun. The town is also known by another name: The Land Between the Lakes. That’s because the city sits between Fountain Lake and Albert Lea Lake, and both are prime destinations for soaking in the rays. Getting around on your bike in Albert Lea is easy with the city’s low-traffic bike lanes and trails, especially with the Blazing Star State Trail that takes you to Myre-Big Island State Park.
After checking in at one of the hotels, it’s exciting to ride around this southern Minnesota community.
The ‘Rock-n-Roll the Lakes’ is a fundraiser brought to you by the good folks at Albert Lea Area Cyclists (ALAC), a chapter of Bike MN (Bicycle Alliance of Minnesota). ALAC is a bicycle and pedestrian education and advocacy group for Albert Lea, Minnesota, instrumental in helping Albert Lea become an official Bicycle-Friendly Community and continuing to refine the Rock-n-Roll the Lakes ride. Stay up to date with ALAC by following them on Facebook.
When you need a break from biking around the lakes, there are plenty of fun options to keep your visit to Albert Lea memorable. With locally owned shops, one-of-a-kind restaurants, and area history to add to your bike adventure, there is something for everybody. Check out more here.
Visiting a bike skills park (also known as a pump track) in Minnesota is a fun and easy way to improve the technical skills needed to make riding more enjoyable. But how many of us have learned to ride a bike instead of merely staying upright and confidently moving forward without falling?
By engaging in some essential cycling tips at a bike skills park or pump track, you’ll not only have a greater appreciation for your bike. You will also improve your skill level to enhance your riding ability, especially on a mountain bike trail. These parks consist of a circuit course of rollers, banked turns (berms), and other features designed to improve a rider’s skill level. The term “pumping,” by up and down body movements, generates momentum instead of pedaling or pushing. It was initially designed for the mountain bike and BMX scene, and now, due to concrete constructions, it is also used by skateboarders, roller skaters, and other similar activities. Pump tracks are relatively simple and cater to various rider skill levels. Here in Minnesota, you will find many options listed below for bike skills parks.
A pump track at a bike skills park adds to the fun.
Fun bike skills parks and pump tracks to improve your skills
The Little Giants Skills Park is designed for learning by exposing new riders to the varied terrain of mountain biking in an approachable setting. The four distinct trails offer berms, rollers, rock gardens, wooden features, small tabletop jumps, and gentle drops, allowing cyclists to grow their confidence riding various obstacles. Many park features here offer a ‘ride-arounds’ that enables riders to mix and match to suit their ability level while providing opportunities to try and test new skills individually.
The Lions Park Pump Track is s a circuit of dirt rollers, berms, and jumps that loops back on itself. The track here is a fun and easy way to learn the skills needed for better mountain bikehandling.
Tioga Rec Area has over 20 miles of professional, machine-built cross-country and downhill flow trails. There are trails for every level of rider, including kid-friendly skill-building loops.
The park is a 3-acre urban-style bike skills park open from dusk till dawn that includes a 4x track, pump tracks, two mountain bike skills areas, dirt jumps, and a tot track!
Cyclists of all ages, beginners, and advanced levels are welcome to conquer Cuyuna’s 2,000-foot-long Lee McCormack (nationally renowned bike pump track designer) designed pump track. The facility includes three tracks (tailored for beginners, intermediate and expert riders.
A perfect park for a first-time riding any “downhill” trail system is to go for a lap or two in their Skills / Jump Park located above the bottom terminal of our Express Chairlift. There are trails with all levels of difficulty in this skills park. Start easy on their pump track to learn how to ride berms and rollers. Then, when you feel ready, practice on some of the park’s berms, jumps, drops, and more. The Skills Park is a great way to get a feel for the downhill trails before moving on to the lift.
Located next to the trailhead parking lot, Lebanon’s skills/terrain park is great for kids. The practice area features varying levels of skinnies, rollers & jumps, berms, and rock sections to practice improving your technical ability. Each segment of the Skills Park and all mountain bike trails are marked using the IMBA Trail Difficulty Ratings System to inform riders of technical difficulties.
The newest addition to the park is a bike skills playground. The bike skills course is available seasonally in a hockey rink and provides a fun rider of all ages and levels. There are nine features to explore, including ramps, beams, and rumble strips.
Tartan Park is located within the town limits and is a skills park that caters to beginners and advanced. With many features crammed into a half-acre footprint, this is a fun place for riders to improve their skill level.
Info: A single-track trail system with a new skills area was completed in the Fall of 2020. There are some bigger jumps on one side, but overall the park is kid-friendly and perfect for beginners.
At the Kiwanis Recreation Area trailhead, you will find a skills/terrain park with many wooden features and teeters, and a beginner/kids loop around these features.
This small skills area in Theodore Wirth Park is slightly more advanced than the other skills parks in the Twin City metro. The park area offers three skill-level loops making this an excellent spot for any rider to develop their skills. This is one of four bike skills systems in Minneapolis. Trail Map
Located at 2401 E Minnehaha Pkwy, Minneapolis, MN, This small bike park offers kids eight wooden features on an old tennis court. This is one of four bike skills systems in Minneapolis.
Located at 1615 Pierce St NE, Minneapolis, MN, this skills park is also on an old tennis court. With wood track features low to the ground, this is an excellent place for kids to build confidence. This is one of four bike skills systems in Minneapolis.
This pump track is the first of its kind in Minnesota. The skills area consists of 210 feet of looped track with waves and berms for bicyclists or skateboarders to use their body weight and gravity to propel themselves. The pump track accommodates bicycles of all sizes, skateboards, rollerblades, and scooters.
This new bike skills park offers several off-road bike features, including berms, rollers, and jumps in the pump track setting. The center of the track features sloped wood decking obstacles perfect for tots to learn. The track is located on the west side of Taft Park at 62nd Street and Bloomington Avenue,
Both parks are free and open to the public, with BMX Park use limited to May through September. Inline skaters or skateboarders may use the skate park.
The bike park playground is located at Carver Lake Park in the open field area just off the main park entrance road. The bike park playground has four designated areas to provide a complete progression of riding and learning, including a tot track, pump track, and an advanced skills loop with technical trail features. The advanced trail loop includes dirt rollers, wooden berms, wooden technical trail features, and rock gardens.
No matter your age, these bike skills parks will help make that next adventure more enjoyable.