
By John Brown, HaveFunBiking.com
Tubeless tires are one of the best upgrades you can make to your bike. They are more resistant to flats, ride better, and are lighter. With all their benefits, the fear of setting them up keeps many riders from enjoying the tubeless world. If you are still refusing to take the leap for fear of having to care for them, read on. This is the HaveFunBiking guide to tubeless tire setup and troubleshooting.
Are tubeless tires compatible for your bike wheels?
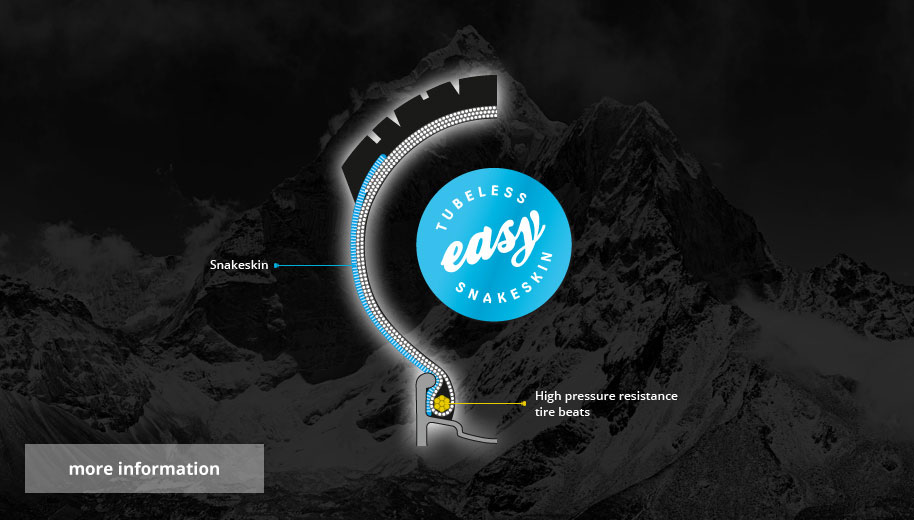
First step in setting up your tubeless wheels is to verify you have all the right parts. First, verify with the manufacturer that your bike rim and tire are tubeless ready. Review the rim and tire for a tubeless ready designation. Common terms for Tubeless are “Tubeless ready”, “TLR”, “TCS”, “Tubeless Easy”, “TNT”, and “TR”. Once you assure that the rim and tire are tubeless ready, you can move on to getting your wheels and tires ready.
Prep
First, take the wheels off your bike. Once they are off remove the existing tires and tubes off the wheels. For the next step, you need to verify what type of rim tape you have. Rim tape is the barrier in the center of the rim that holds the innertube’s pressure from pressing into the spoke holes. If you have cloth tape or a nylon belt, you need to remove it. If there is an adhesive plastic tape applied to the rim (frequently yellow or blue), leave it in place. Next, clean the rim thoroughly with soap and water. Also clean the beads of you tire with soap and water.
Tubeless tire bike tape
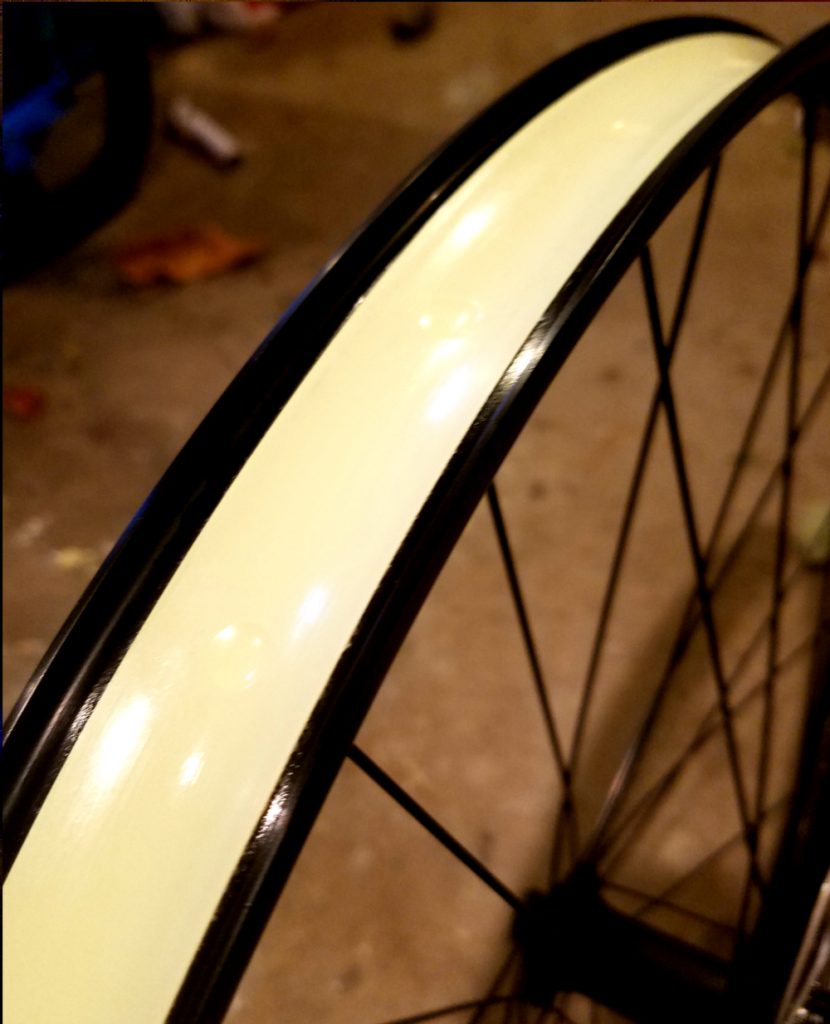
If you had to remove a nylon belt or cloth tape, you will need to replace it with a tubeless rim tape. There are many different brands and they all work well, the only thing you want to make sure of is that the rim tape matches your rim width. I like to pick a tape that will cover the inside of the rim from edge to edge. That means, if the rim has a 23mm inner width a tape with a 23mm width fits perfectly ensuring an airtight fit between tire and rim. When you install the tape, start opposite to the valve hole, Stretch the tape slightly as you go, and overlap the end by at least four inches. Once the tape is in place, use your fingers to burnish it down into the rim.

Installing the valve
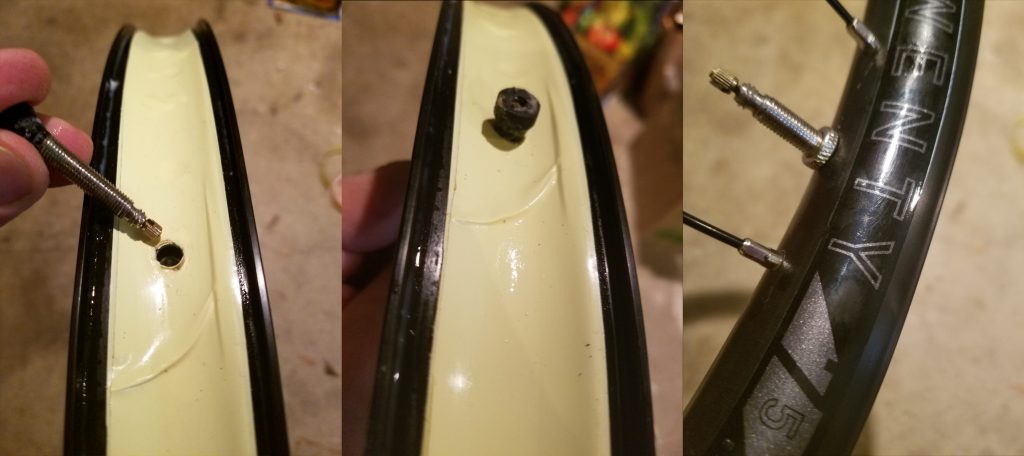
Now that the bike rim is taped and ready for a tire, you need to install the tubeless valve. A tubeless valve looks just like a standard presta valve except instead of being attached to an innertube, it has a small seal at the end of it. To install the valve, first locate the valve hole in the rim and pierce the rim tape. I like to use an awe that has a diameter just a bit smaller than the tubeless valve. Once you pierce the tape, push the tubeless valve through it and tighten it into place with a valve nut. You can also dip the valve’s seal in a little tire sealant before you install it to maximize the airtight seal.
Seating the tire
Installing a tubeless tire is almost an identical process to installing a standard tire, except there is no tube. Start by installing one side of the tire bead onto the rim, before installing the second bead, you can add sealant (more about this in the next section) or just put the tire all the way onto the rim dry. I urge you not to use a tire lever to install the tire. Quite often, tire levers can damage the tire or tape, limiting their ability to hold an airtight seal.
Sealant
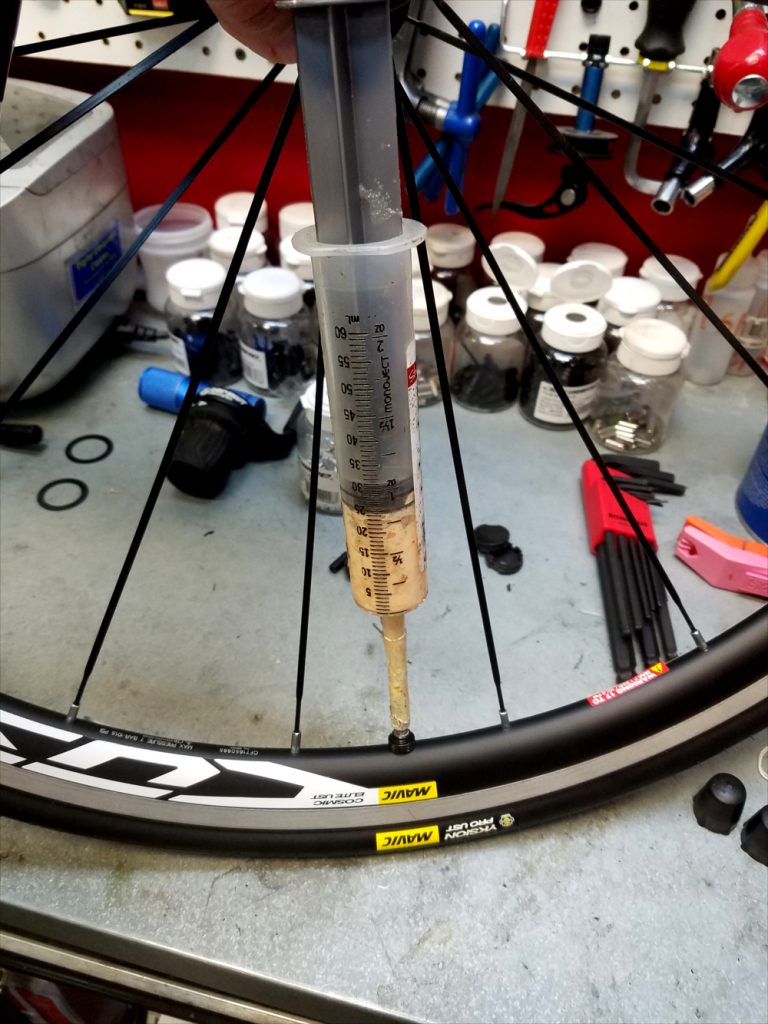
The tire sealant I mentioned in the last section is the fluid that goes into your tire, that helps everything stay airtight. There are heaps of sealants on the market, but for the most part they all get installed one of two ways. You can either pour the desired amount into the tire before it is completely installed, or you can inject the sealant through the valve. Sealant can dry out within the tire over time, so you should plan to add more sealant to the tires on a quarterly basis. To add sealant through the valve, you will need to remove the valve core from the tubeless valve, and use an injector to force fluid into the tire
Airing it up
One of the most difficult parts to installing a tubeless setup can be getting it to hold air. I know this sounds strange, but with all the different rim and tire manufacturers out there, getting consistent tolerances between the two is difficult. This variation in tolerance is what can lead to some difficulty airing the tires up for the first time. Thankfully, as an industry, tolerances are getting closer every year.
There are two schools of thought on airing up the tire initially: with sealant or without. While there are benefits to both ways it breaks down to this. With sealant in the tire, you stand a better chance of having the system seal initially. Without sealant, if there is any issue with the tire seating, you don’t need to fool with the mess of sealant correcting the issue. Overall, I like to be careful with my prep, tape application, and valve installation so I can air up the tire with sealant.
With Sealant
To air up the tires with sealant in the system, ensure the tire is seated on the rim well. Inspect that the tubeless valve is sitting inside the cavity of the tire (it I possible for the tire to be sitting completely off to one side of the valve on wider rims). Then, with a good floor pump, start adding air as quickly as you can. It is ok if the system leaks a bit of air and fluid at first, but after 30 seconds of pumping you should have a tire that is beginning to hold air well. I like to bring the tire up to max pressure initially to guarantee it’s seated completely, then I lower the pressure down to my desired PSI.
Without Sealant
Airing the tire up dry follows the same procedure, but after the tire is seated, you must release the air pressure, remove the valve core, inject sealant, then re-inflate.
Common issues and fixes
Wont air up – It is totally possible that regardless of how much you pump, the tire won’t take air. There are a few things you can do to help. First thing is to hang the wheel by the rim, rather than having it sit on the ground. Often time, taking pressure off the tire completely will let it seat. Also, you can use more air. I find a compressor or floor pump with a reservoir works exceptionally well. If both these things don’t work, you can remove the valve core from the tubeless valve and try again (it allows slightly more air to get into the tire).
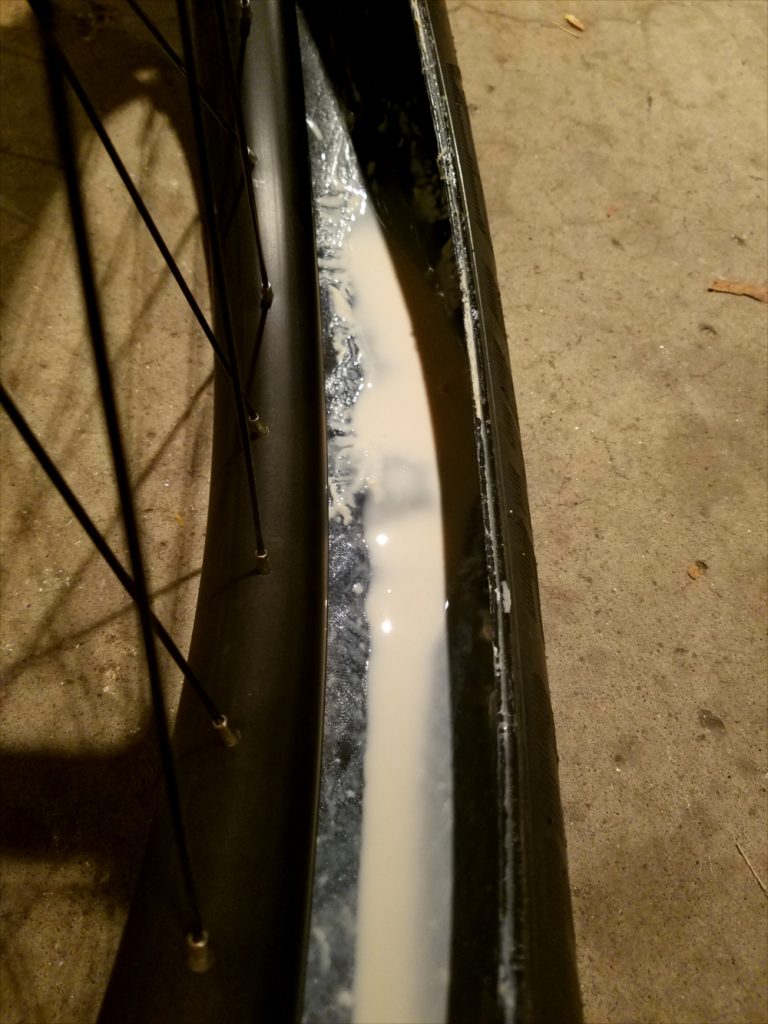
Leaking fluid – Depending on the tire you use it’s common to see some fluid weeping from the area where the tire and rim meet, or from the actual sidewall of the tire. In both cases, I find it helps to lower the air pressure and allow the sealant to dry. Pressures that are too high will often time keep fluid weeping faster than it can dry and seal. If you see fluid leaking through the base of the valve, or through the spoke holes, chances are you have a valve that isn’t airtight or rim tape that isn’t sealing. Like the sidewall, lower the pressure and see if it seals. If it continues to leak, you may need to tighten the valve, or worse yet, replace the rim tape.
I think with these tips and a little practice you will find that installing tubeless tires is a breeze. Also, you will find that the ride quality and flat prevention benefits are well worth the slight learning curve.
Comments
6 responses to “Tips and tricks for setting up your tubeless tires on your bike”
What if you have no desire to have a standard presta valve on your bike ? This is one reason I will change my wheels so that I can use the old fashioned valve. I have walked away from some bikes because I have had a salesperson tell me that this is the new way of doing things. Sorry but I find the standard presta valve one of the hardest to work with.
While the Presta valve is most popular, some companies like Stan’s are making tubeless Schrader (also called American) valve. Basically, the real difference between a Presta (also called french) valve and a Schrader valve is how they seal. A Presta valve relies on the internal pressure of the tube (or tire) to keep the valve closed. Schrader valves use a spring to keep the valve closed. Overall, Presta valves seal better at higher pressures.
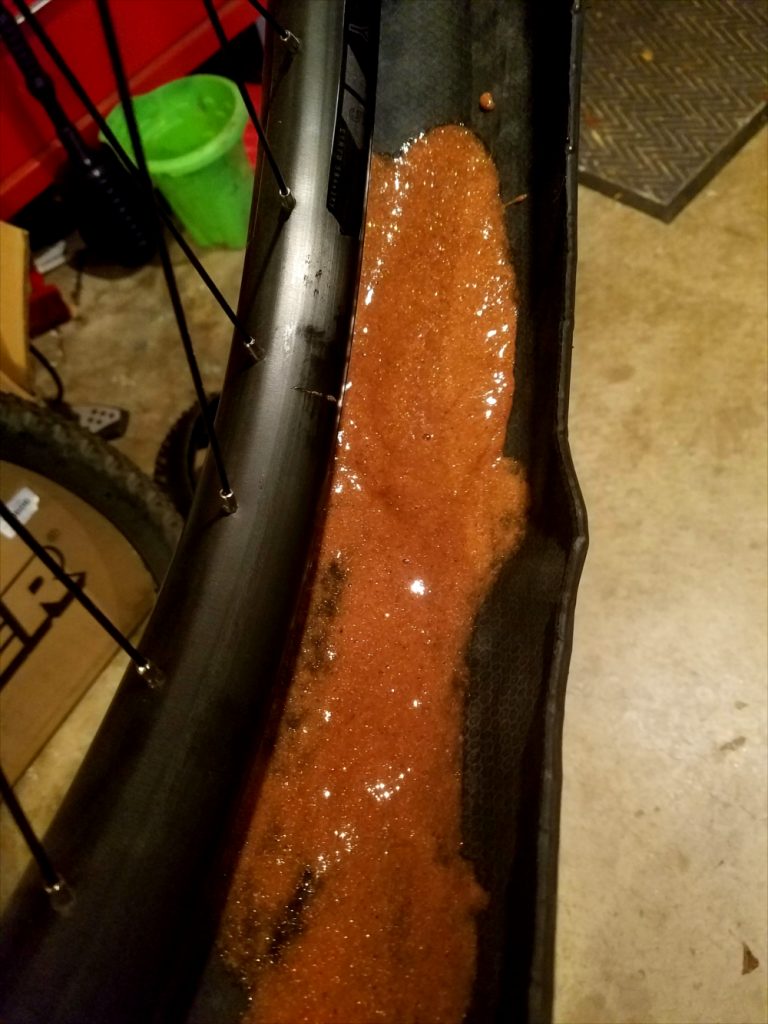
Be aware that not all tubeless wheels are compatible with sealants, or some types of sealants! I ride a Specialized S-Works Roubaix with tubeless clinchers. My Dura-Ace wheels were not compatible with Stans NoTubes sealant and the wheel actually deteriorated to the point where Shimano said to trash the (aluminum and carbon) wheels, after only 5 years of use. These were top of the line wheels which I now run with tubes to get some additional miles out of them. My LBS was not aware of the Shimano warning to NOT use Stans and proceeded to use sealant when I had them change tires during maintenance and repairs. Following their example, I also used Stans and it helped seal the tire but I didn’t realize it was ruining the wheel. The product warning was NOT clear enough from Shimano or Stans in their literature and even the trained LBS techs missed it. User beware, do some checking before using sealant.
There are other steps in changing a tubeless clincher that will help: Note that it’s not as easy to change a tubeless tire as described in this article, I’ve seen grown techs nearly cry over tubeless tire changes because of the carbon fiber in the bead. It really depends on the wheel and tire combination you’re using. 1. Spray the edges of the tire with a soapy solution before you mount it to aid in sliding it onto the rim. Be sure to carefully wipe the wheel rim afterwards to remove all soapy residue, or your braking will be affected! 2. Also, a pump doesn’t often have enough pressure to provide that last tight seal (you’ll hear a “pop” when the bead seats). I keep a few CO2 cartridges handy that will usually set the bead. A compressor works if you have one. 3. Check the edge of your tire after its inflated. I use the Schwalbe Pro One (a great tire) and it has a very thin line around the edge of the tire that shows if the tire is symmetrically seated on the rim. If the line is not correct the tire will wobble during your ride and this can bring the tire out of true. 4. Don’t attempt tire changes, using sealant, without a pair of glasses AND in safe area like a garage, basement, or outdoors. When you pressurize the tire, sealant can fly everywhere if the tire doesn’t immediately seal!
My luck with tubeless flats has been up and down. Some punctures did seal on the road, but probably 60% did not. I run my tires at 95 psi and the leak tends to stop at 90 psi and won’t allow any pressure above that without leaking again. Changing this tire and wheel combination on the side of the road is very difficult, especially in cold weather. Bring a spare tube along and use it in an emergency. There are now road compatible plug kits for tubeless tires, adopted from the mountain bike industry. I bought one but now that my wheels have to use tubes I’ve never used it.
Some manufacturers have come up with better wheel/tube integrated products that do not use carbon beads and thus are supposed to be easier to change flats. Mavic is advertising this system and is probably worth a look.
I’ve been riding 6,000 miles per year the last few years and have changed my share of tires. Tubeless perform well, but they come with drawbacks. Do your homework before buying, check with other riders.
Good luck!
Wow Tom, You have a lot of great tips there. As for the Stan’s sealant and your Dura Ace wheels. From what I have been told, Stan’s used Ammonia at one point in their sealant. As you found out, Ammonia and aluminum don’t mix. Luckily, Stan’s has taken steps to eliminate all the Ammonia from their solution and should not have the same corrosive properties it once did. Additionally, your comment about the difficulties in seating tubeless tires is an accurate one when dealing with older product. Thankfully, most brands are working to make things easier now.
One thing I didn’t mention in this article (to be fair it is more of a repair than setup product) is tire plugs. There are now a few companies making plugs that will quickly seal a larger hole in your tubeless tire. They look like little rubber worms that get inserted into the puncture and take up space so the sealant can do its job.
On the subject of Sealant, take a look at our quick article on “The Flatstopper” tire sealant. I am doing some testing on it now and should have a more in depth review in the net few weeks, but it has been impressive thus far.
Thanks for reading and thanks for all the comments!
So what do these modern wonders cost? Agree with Stephen about Schraeder vs Presta valves … hate them.
Hey Tim,
Tubeless wheels start in the $200 dollar range, but are coming stock on most bikes now, so check yours before investing in new hoops. The tires vary widely depending on the brand and size, but expect to pay at last $50 per tire. After that the valves cost about the same as an innertube, and sealant is a few dollars more. All in all, it isn’t an inexpensive upgrade, but the ride quality is really remarkable.