By John Brown, HaveFunBiking.com
Tubeless tires are one of the best upgrades you can make to your bike. They are more resistant to flats, ride better, and are lighter. With all their benefits, the fear of setting them up keeps many riders from enjoying the tubeless world. If you are still refusing to take the leap for fear of having to care for them, read on. This is the HaveFunBiking guide to tubeless tire setup and troubleshooting.
Are tubeless tires compatible for your bike wheels?
First step in setting up your tubeless wheels is to verify you have all the right parts. First, verify with the manufacturer that your bike rim and tire are tubeless ready. Review the rim and tire for a tubeless ready designation. Common terms for Tubeless are “Tubeless ready”, “TLR”, “TCS”, “Tubeless Easy”, “TNT”, and “TR”. Once you assure that the rim and tire are tubeless ready, you can move on to getting your wheels and tires ready.
Schwalbe’s Tubeless easy logo
Prep
First, take the wheels off your bike. Once they are off remove the existing tires and tubes off the wheels. For the next step, you need to verify what type of rim tape you have. Rim tape is the barrier in the center of the rim that holds the innertube’s pressure from pressing into the spoke holes. If you have cloth tape or a nylon belt, you need to remove it. If there is an adhesive plastic tape applied to the rim (frequently yellow or blue), leave it in place. Next, clean the rim thoroughly with soap and water. Also clean the beads of you tire with soap and water.
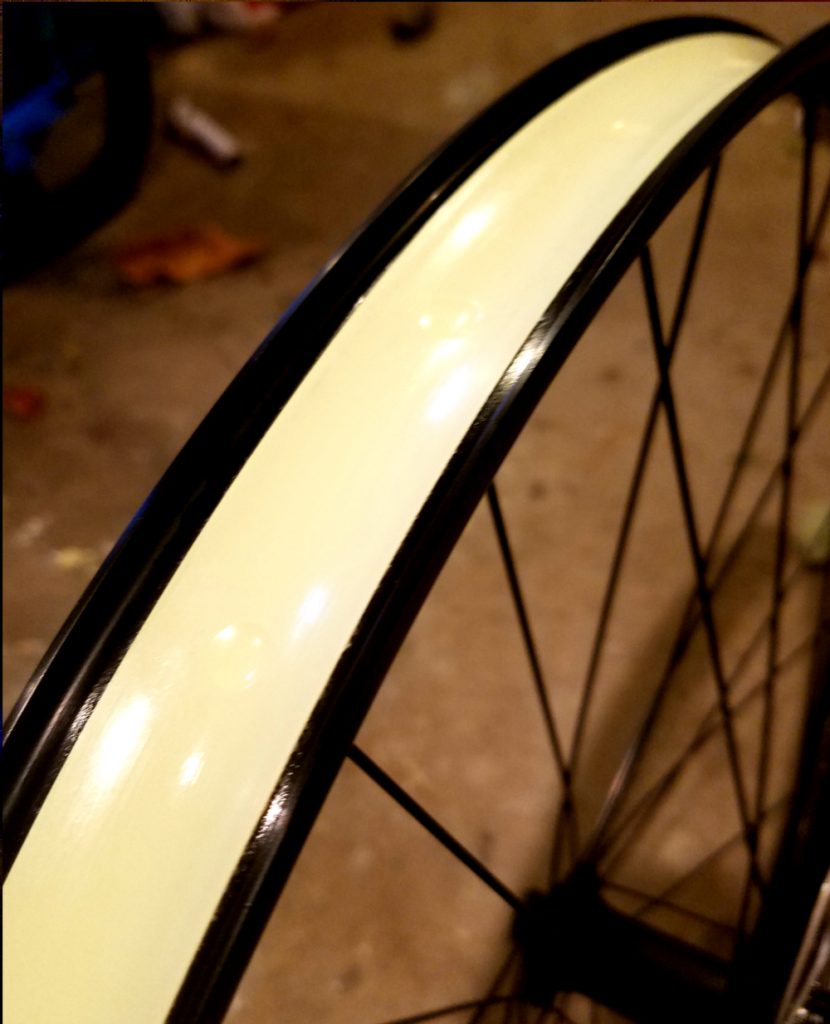
Yelow Tubeless rim tape is well applied here
Tubeless tire bike tape
If you had to remove a nylon belt or cloth tape, you will need to replace it with a tubeless rim tape. There are many different brands and they all work well, the only thing you want to make sure of is that the rim tape matches your rim width. I like to pick a tape that will cover the inside of the rim from edge to edge. That means, if the rim has a 23mm inner width a tape with a 23mm width fits perfectly ensuring an airtight fit between tire and rim. When you install the tape, start opposite to the valve hole, Stretch the tape slightly as you go, and overlap the end by at least four inches. Once the tape is in place, use your fingers to burnish it down into the rim.
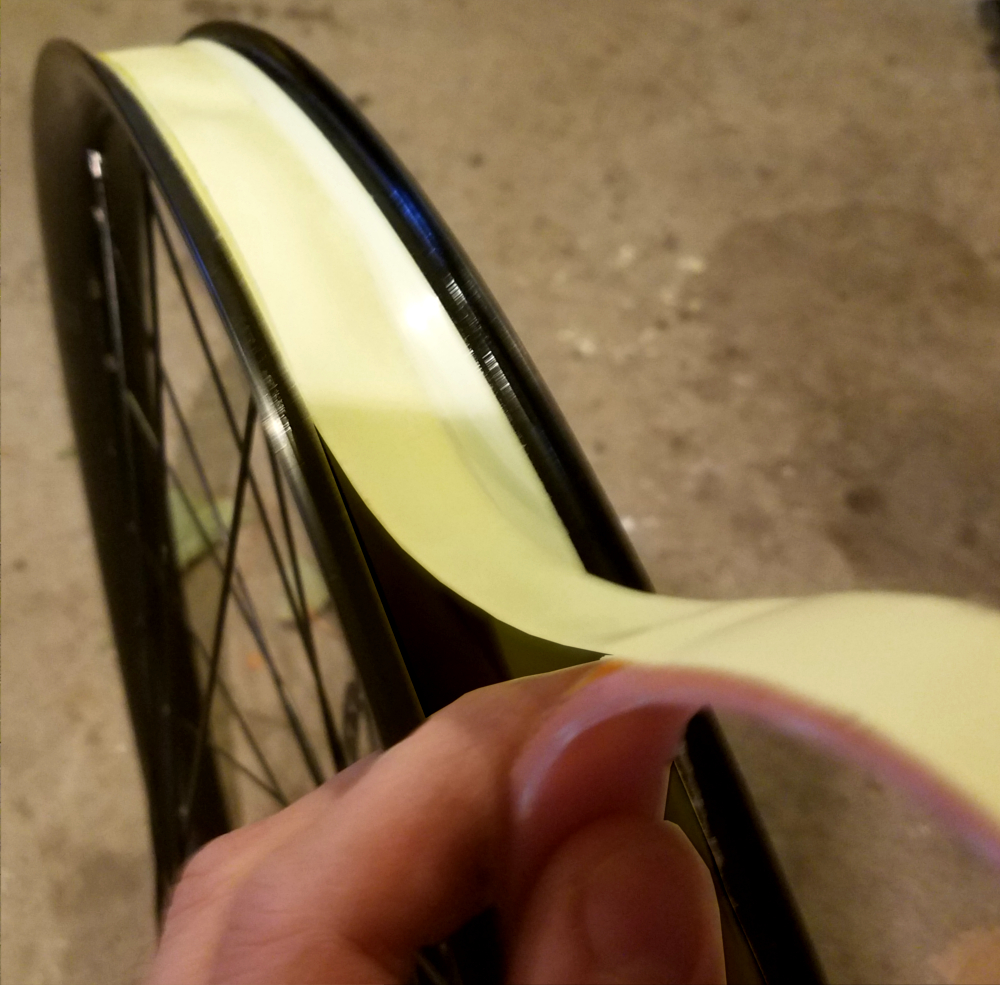
Installing tape on a clean bike rim.
Installing the valve
Now that the bike rim is taped and ready for a tire, you need to install the tubeless valve. A tubeless valve looks just like a standard presta valve except instead of being attached to an innertube, it has a small seal at the end of it. To install the valve, first locate the valve hole in the rim and pierce the rim tape. I like to use an awe that has a diameter just a bit smaller than the tubeless valve. Once you pierce the tape, push the tubeless valve through it and tighten it into place with a valve nut. You can also dip the valve’s seal in a little tire sealant before you install it to maximize the airtight seal.
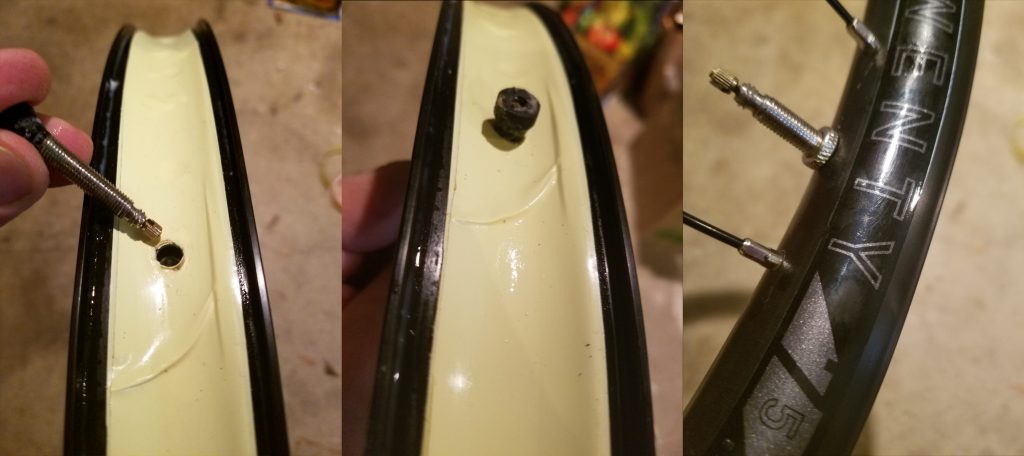
Valve installation process
Seating the tire
Installing a tubeless tire is almost an identical process to installing a standard tire, except there is no tube. Start by installing one side of the tire bead onto the rim, before installing the second bead, you can add sealant (more about this in the next section) or just put the tire all the way onto the rim dry. I urge you not to use a tire lever to install the tire. Quite often, tire levers can damage the tire or tape, limiting their ability to hold an airtight seal.
Sealant
The tire sealant I mentioned in the last section is the fluid that goes into your tire, that helps everything stay airtight. There are heaps of sealants on the market, but for the most part they all get installed one of two ways. You can either pour the desired amount into the tire before it is completely installed, or you can inject the sealant through the valve. Sealant can dry out within the tire over time, so you should plan to add more sealant to the tires on a quarterly basis. To add sealant through the valve, you will need to remove the valve core from the tubeless valve, and use an injector to force fluid into the tire
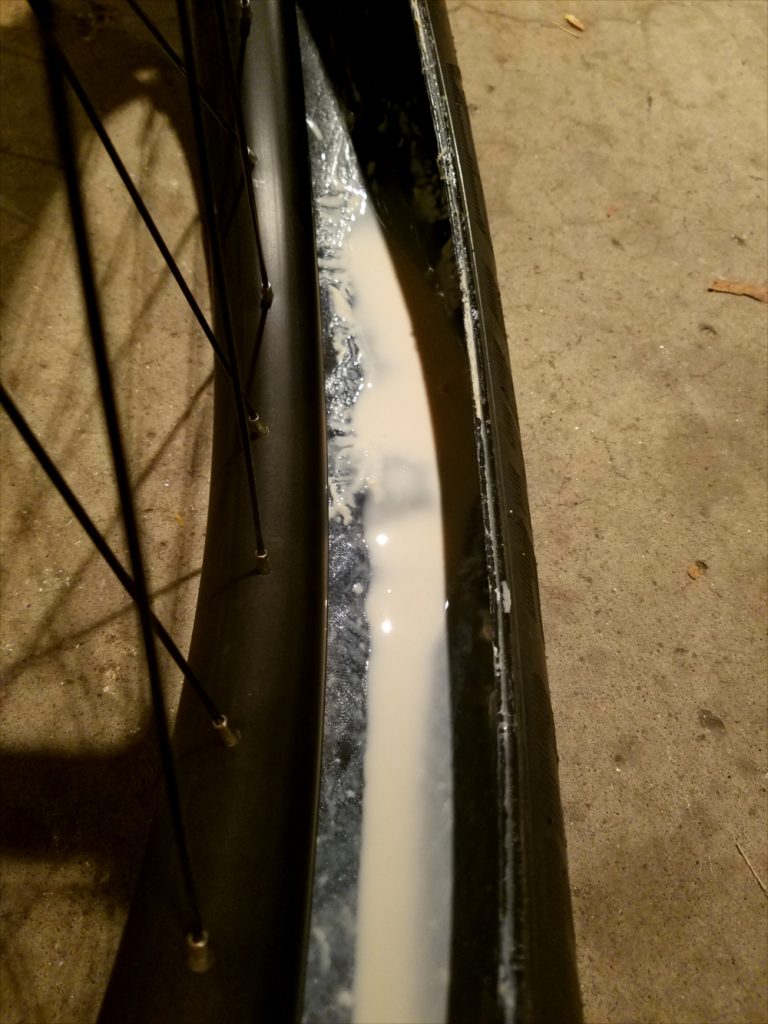
Sealant in the tire. You can see the dried sealant on the tire
Airing it up
One of the most difficult parts to installing a tubeless setup can be getting it to hold air. I know this sounds strange, but with all the different rim and tire manufacturers out there, getting consistent tolerances between the two is difficult. This variation in tolerance is what can lead to some difficulty airing the tires up for the first time. Thankfully, as an industry, tolerances are getting closer every year.
There are two schools of thought on airing up the tire initially: with sealant or without. While there are benefits to both ways it breaks down to this. With sealant in the tire, you stand a better chance of having the system seal initially. Without sealant, if there is any issue with the tire seating, you don’t need to fool with the mess of sealant correcting the issue. Overall, I like to be careful with my prep, tape application, and valve installation so I can air up the tire with sealant.
With Sealant
To air up the tires with sealant in the system, ensure the tire is seated on the rim well. Inspect that the tubeless valve is sitting inside the cavity of the tire (it I possible for the tire to be sitting completely off to one side of the valve on wider rims). Then, with a good floor pump, start adding air as quickly as you can. It is ok if the system leaks a bit of air and fluid at first, but after 30 seconds of pumping you should have a tire that is beginning to hold air well. I like to bring the tire up to max pressure initially to guarantee it’s seated completely, then I lower the pressure down to my desired PSI.
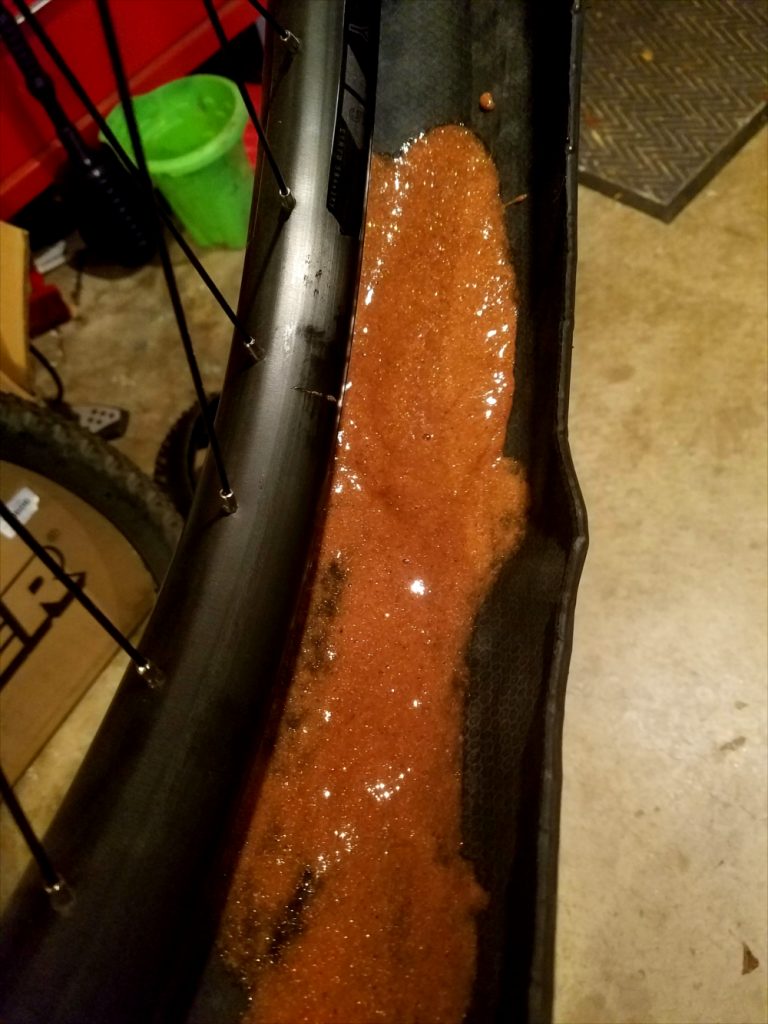
Flatstopper sealant poured directly into a tire
Without Sealant
Airing the tire up dry follows the same procedure, but after the tire is seated, you must release the air pressure, remove the valve core, inject sealant, then re-inflate.
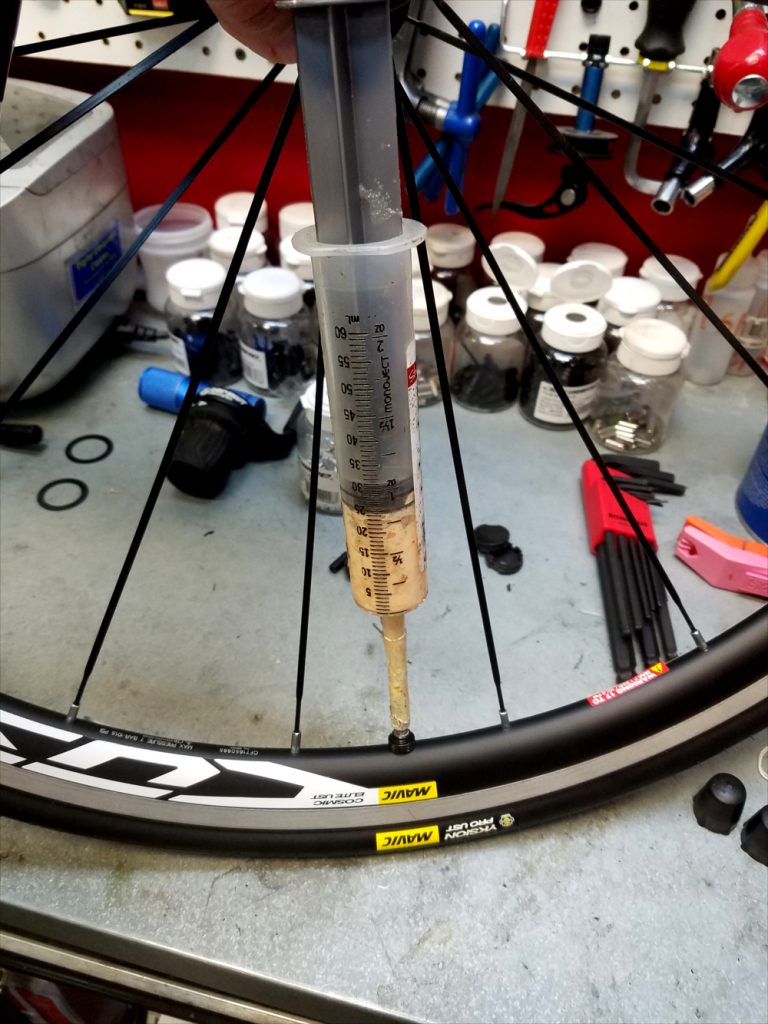
Sealant being added through the valve.
Common issues and fixes
Wont air up – It is totally possible that regardless of how much you pump, the tire won’t take air. There are a few things you can do to help. First thing is to hang the wheel by the rim, rather than having it sit on the ground. Often time, taking pressure off the tire completely will let it seat. Also, you can use more air. I find a compressor or floor pump with a reservoir works exceptionally well. If both these things don’t work, you can remove the valve core from the tubeless valve and try again (it allows slightly more air to get into the tire).
Leaking fluid – Depending on the tire you use it’s common to see some fluid weeping from the area where the tire and rim meet, or from the actual sidewall of the tire. In both cases, I find it helps to lower the air pressure and allow the sealant to dry. Pressures that are too high will often time keep fluid weeping faster than it can dry and seal. If you see fluid leaking through the base of the valve, or through the spoke holes, chances are you have a valve that isn’t airtight or rim tape that isn’t sealing. Like the sidewall, lower the pressure and see if it seals. If it continues to leak, you may need to tighten the valve, or worse yet, replace the rim tape.
I think with these tips and a little practice you will find that installing tubeless tires is a breeze. Also, you will find that the ride quality and flat prevention benefits are well worth the slight learning curve.
