by John Brown, HaveFunBiking.com
In the late 1920’s, in France, there was a bike race under way and it wasn’t the Tour De France. Instead, this race was a technological race that brought the derailleur into the light. Before 1928, bicycles had a maximum of two speeds, and you needed to remove the rear wheel to change those gears. As there was need for quicker shifting, the bicycle derailleur was born. Initial derailleurs consisted of nothing more than paddles that were actuated by steel rods located between the rider’s legs. Needless to say, there was a lot of finesse that went into shifting those bikes. Then after the second world war parallelogram derailleurs, what we use today, were developed so riders could shift their gears with ease. Read on to see how to get the most out of 100 years of technological advancements. You will find adjusting your front derailleur is easy if you follow these steps.
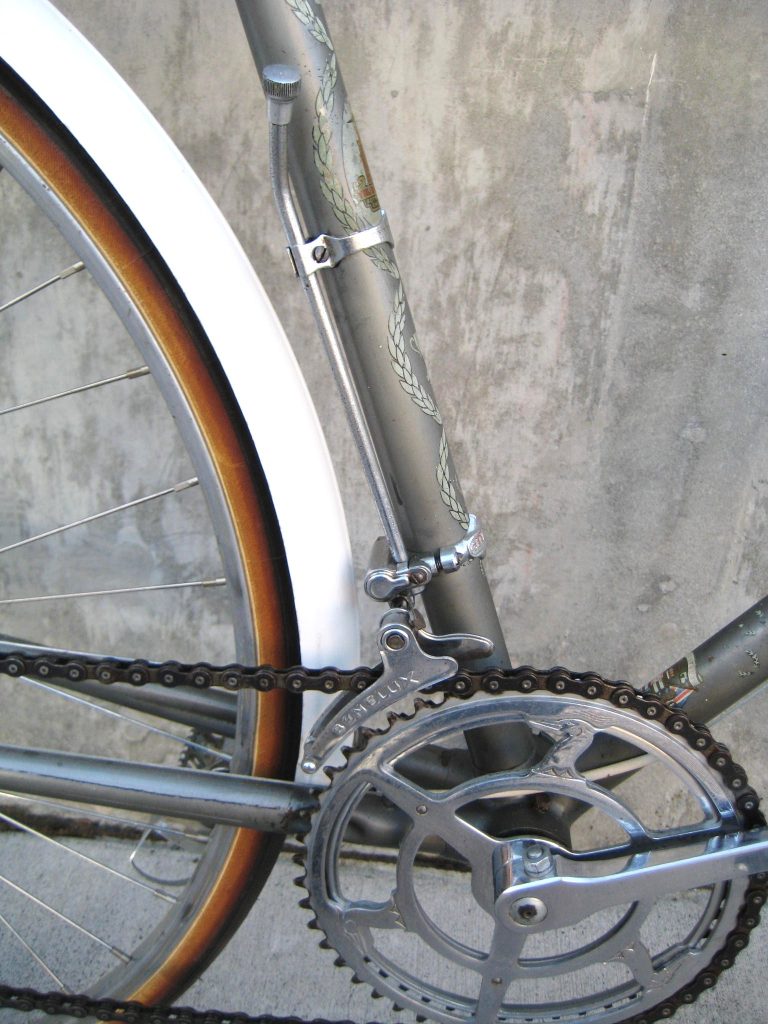
Early “Rod Style” Benelux front derailleur – Yikes
Front Derailleur parts
Limit screws (A) – The front derailleur needs to work within the largest and smallest ring. Limit screws work to stop the front derailleur from shifting outside of its intended range. They are adjustable as to match different types of cranks.
Derailleur Cage – The cage is what holds the chain on gear and what presses on the chain to move it from one gear to the next. The outer portion of the cage (C) is what helps the chain move from larger gears to smaller ones. In contrast, the inner portion of the cage (B) forces the chain from smaller gears to larger ones.
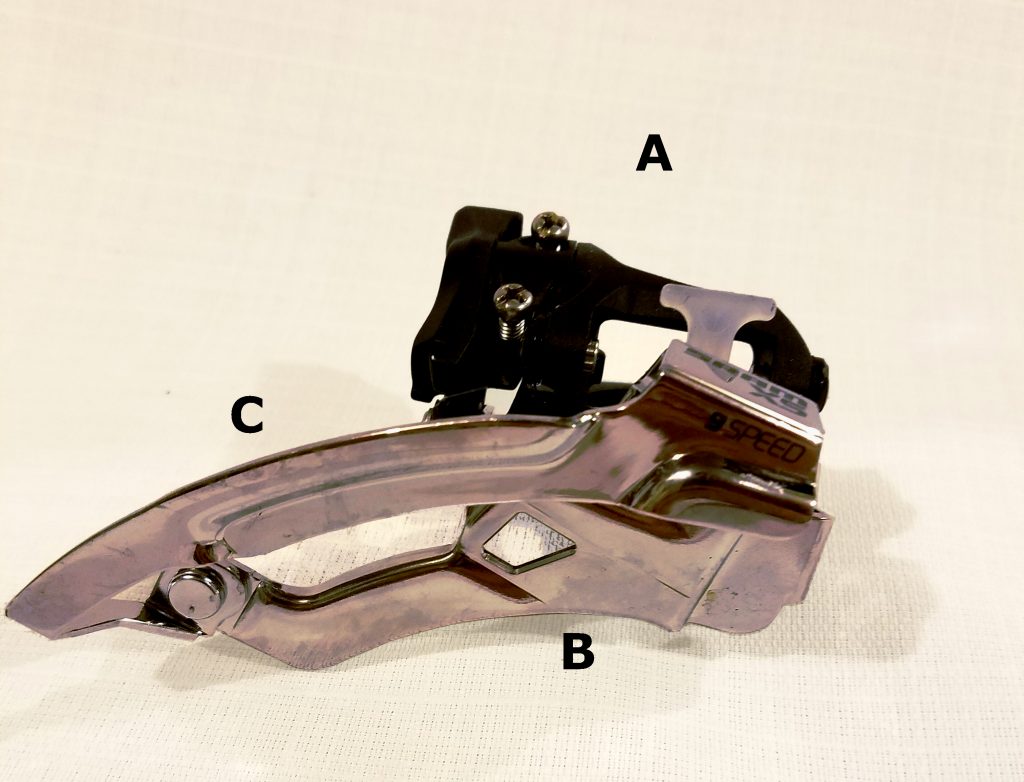
Common parallelogram front derailleur found on Hybrid and Mountainbikes
Derailleur Fixing Bolt (D) – The bolt that holds the derailleur in place on the frame. By loosening this bolt, you can re-position the derailleur for angle and height.
Cable Pinch Bolt (E) – The Cable that controls shifting needs to be held firmly in place. The pinch bolt does that job.
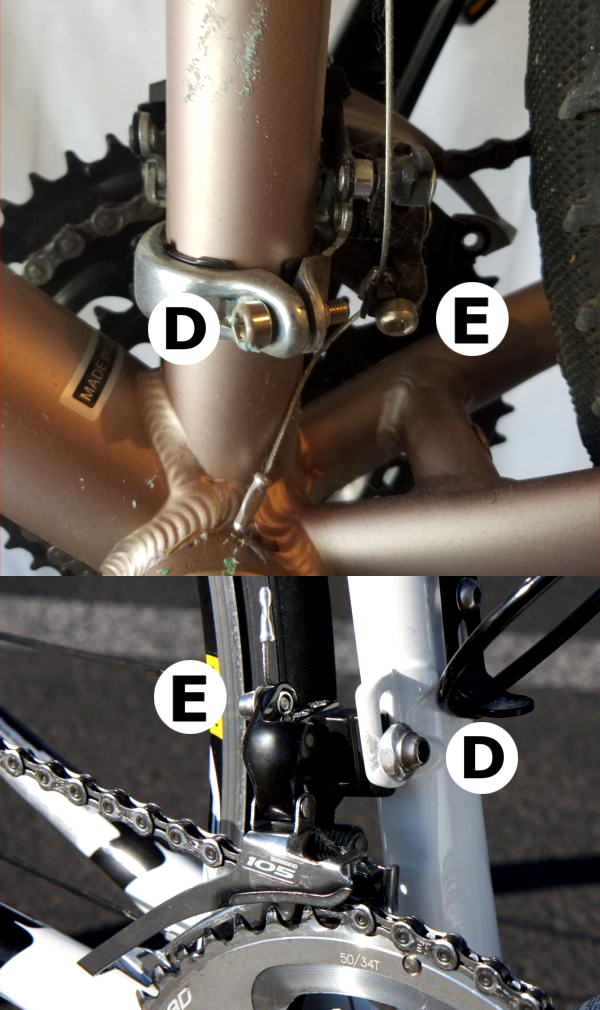
Different Pinch bolt and fixing bolt position for MTB/Hybrid (above) and Road (below) derailleurs
Location, location, location
You guessed it, the most important part of adjusting the front derailleur is its location. If the derailleur is not positioned properly, you will never achieve proper, noise free, shifting in all gears. The reason location is so important is that the front derailleur cage is formed to position the chain in very specific locations.
First step in adjusting the front derailleurs location is to set its height. You need enough room to fit a Nickel between the teeth on the largest chainring and the bottom of the outer cage when they are lined up. Any more clearance than that and the derailleur tends to have issues pulling the chain down from larger gears.
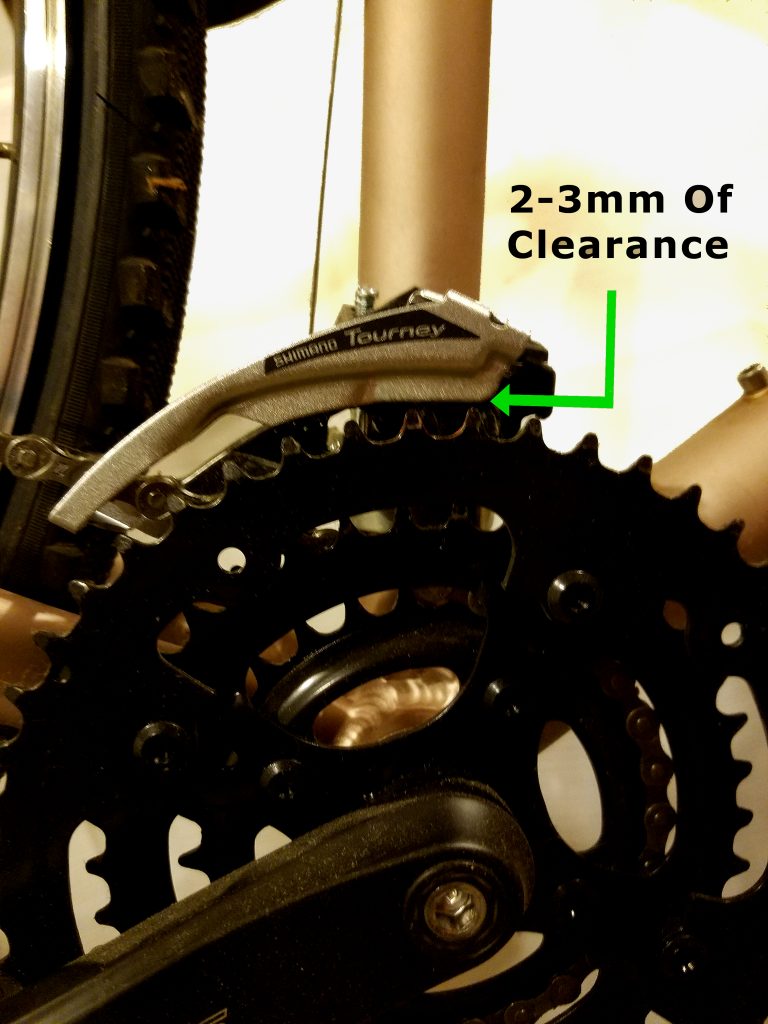
you should be able to fit a Nickle between the derailleur cage and chainring
Once you have the height set, adjust the angle of the front derailleur so that the outer cage and chainrings are parallel. Any misalignment will result in poor shifting and excess noise.
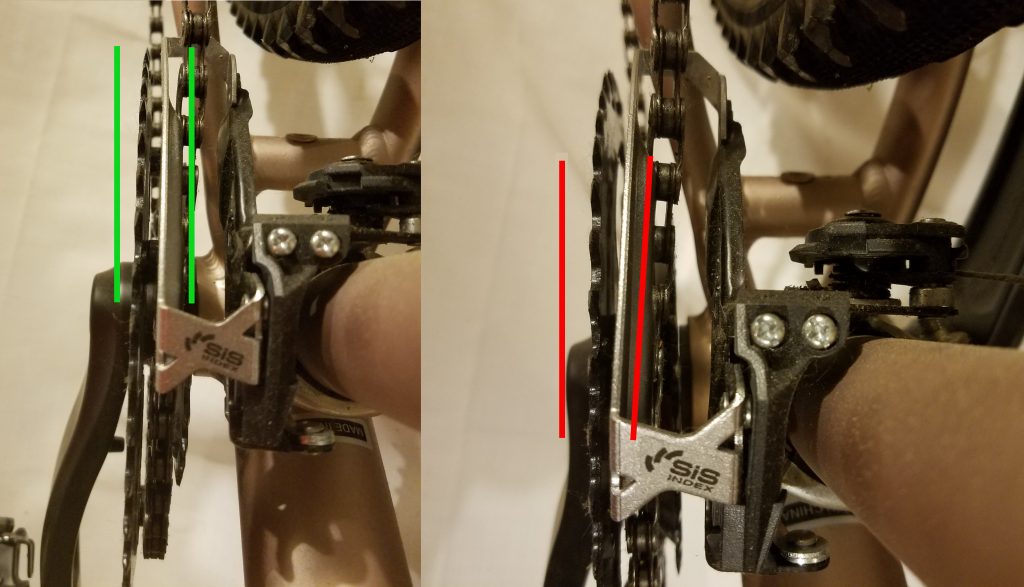
Proper alignment on the left, and misalignment on the right
Lower Limit
Set the lower limit by adjusting the screw marked “L”. To do this, shift the rear derailleur all the way up into the largest cog. Next check to see if there is clearance between the chain and the front derailleurs inner cage with the chain on the smallest chainring. If the chain is running on the inner cage, thread the limit screw out until you have 2-3mm (that nickel distance again!) between the chain and inner cage. When the opposite is true and you have too much clearance between the inner cage and chain, thread the limit screw in until there is 2-3mm of clearance.
Cable tension
Your Front derailleur should be properly aligned and the lower limit should be set at this point. The next step is to attach the cable to the Pinch bolt. Attach that cable by first making sure your shifter is in its lowest gear, Then pull the cable tight, and finally tighten the pinch bolt onto your cable. Usually, you can shift smoothly up from the smallest ring into the next gear right away, but if there is hesitation going up add cable tension either through a barrel adjuster or by loosening the pinch bolt, pulling the cable tighter, and tightening the pinch bolt down again. If the chain wants to shift up from the small ring over the next ring, release some tension. You know you have it right when the chain can pass from one gear to another smoothly and confidently without any banging or skipping noises.
Upper Limit
Setting the upper limit is as easy as getting the chain onto the largest chainring and threading the limit screw to offer 2-3mm of clearance between the chain and the outer cage. While shifting, ensure the chain cannot be shifted over the large ring and off the crank.
Trouble shooting
This guide is great if all the parts are new, but won’t overcome many issues related to worn or dirty parts. The most common shifting issue with older gears is poor upshifting. Chainrings are built with ramps on the inner surface to easily guide the chain from smaller to larger rings. As chainrings wear, these ramps wear as well. If you are having serious issues going from smaller to larger gears, but the gears are silent and problem free otherwise, you may want to consider replacing the chain, chainrings, and gears in the rear.
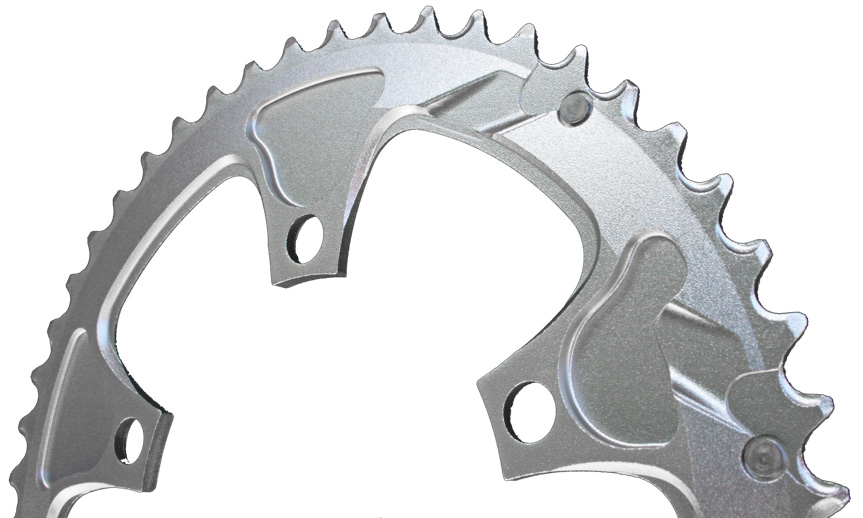
These Praxis Works chain rings have some of the best shifting thanks to carefully placed ramps.
Another key wear item is the front derailleur itself. Derailleurs are designed to pivot off a parallelogram design that requires each pivot run smooth and precisely. As the Front Derailleur wears, these pivots can begin to bind, while they generate play, leading to poor shifting.
Finally, dirty or corroded cables are a key cause in poor shifting. Replace cables once a year and lube them intermittently to keep them running smooth and freely.
When is enough, enough
Working on your bike is fun, but can be frustrating if things aren’t going according to plan. When things get out of hand, don’t be afraid to start from scratch and go back to step one. Any missed initial steps will make further steps impossible to complete. Also, remember that if it gets too tough, your local bike shop is happy to walk you through the process. You will pay a fee, but the one on one instruction is well worth it.
