Author Archives: John Brown

The Patrol 672 mountain bike was well worth the ride

Testing mountain bikes at Interbike’s Dirt Demo: Review Patrol 672

by John Brown, HaveFunBiking,com

I have to admit it, Interbike was more fun before the internet. The reason for this is that you would walk isle after isle and see all the new, awesome products. In the age of digital media it becomes a lot harder to find something new and even harder still to find something new and awesome. Well, I’m happy to report that I did find a diamond in the rough (more specifically desert) while I was out there. That diamond was Patrol bicycles, specifically the Patrol 672.

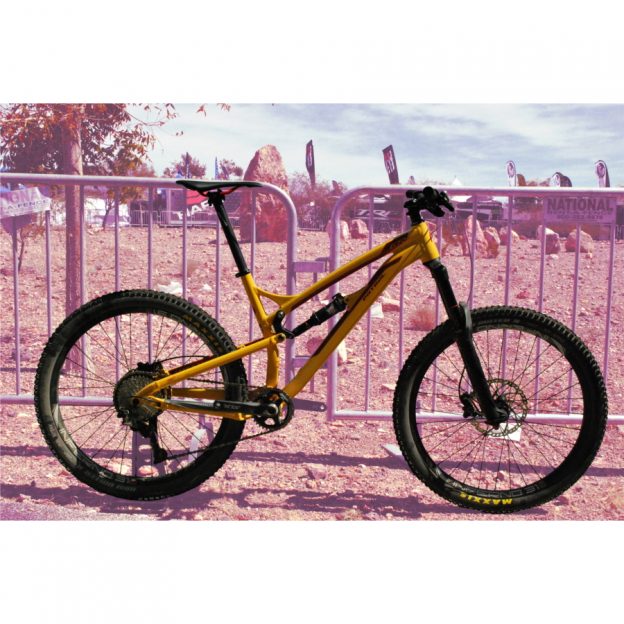
The Patrol 672 bike

The Patrol 672 is a 160mm travel mountain bike, equipped with 27.5” wheels. In the landscape of today’s bike market, it is relatively normal. It uses the tried and true Horst link suspension design and an all aluminum frame. Throughout the build kit you will find Rockshox and Shimano parts. What all this means is that Patrol hasn’t cut any corners. Overall the bike felt light and roomy in the cockpit with the suspension easily adjusted through air pressure.

Patrol 672

The Patrol 672 I rode in Bootleg Canyon

The Patrol ride

By the sound of the spec and design this bike should be unremarkable. That couldn’t be further from the truth. This bike just begged to gobble up rocks and loose sandy turns. While the top tube (and by extension wheelbase) isn’t as long as some other bicycles on the market, it was still sure footed and stable when things got hairy. I think that shorter overall wheelbase is what lends to this bikes snappy handling and playful demeanor. With any long travel bike like the 672, climbing is almost an afterthought, so I really didn’t expect much. Fast forward to the first loose climb and I was taken aback by this little goat. With the suspension set into its “full open” position (meaning that the suspension moves freely and is not stiffened to make for more efficient pedaling) there was some slight pedal bob under hard effort, but nothing that would be considered inefficient. With the suspension set to its climb mode, the bike shot up hill. My feeling is that for loose climbs, this bike works best in full open, but for extended smoother climbs, the climb mode eliminates any loss of effort.

Patrol 672

The Rocky and loose trails of Bootleg Canyon, served as a perfect test track for the Patrol 672

The Patrol 672 components

For this category of bike, short stems, wide bars, and single chain rings have become the standard. The 672 checks all these boxes with some really nice house brand aluminum bars and stem. For the drivetrain, they use a Shimano SLX group which will perform flawlessly for a long time.

Value

At $2,900 the Patrol 672 is really reasonable by comparison. If this were a bike from a larger name, you could expect it to cost well over $3,000 dollars. Now, why do you ask does this bike justify what seems like a hefty $2,900 price tag? Let’s start with the frame. Patrol uses sealed ball bearings and oversized hardware throughout all of it’s suspension. These features lead to better performing suspension that will continue functioning smoothly for seasons to come. Additionally, the 672 uses carefully manipulated tube shapes, created through a process called hydroforming, that allows the bike to be stiff, durable, and exceedingly light. Finally, Patrol has equipped this bike with parts that are as durable as the are functional, This ensures a lifetime of happy riding (even if you crash a few times along the way).

Why is it a diamond in the Rough?

Simply put, this brand is considered rough only because of their distribution. Take a look at their website and you will see Patrol offers bicycles across all categories, and at affordable prices. The bikes themselves are as polished as anything you will see coming out of a major brand. The only difficulty is you probably won’t see them at your local bike shop. But, I have a feeling as more people discover this diamond, it will become more available. In the meantime, if your interest is piqued, contact them directly and they can help you out.

If you look between the isles at Interbike you can see the future. I’m excited to say, when it comes to bicycles, children's bikes are the future.

Interbike’s Cascade of Clever Concepts for Children’s Bikes

by John Brown, HaveFunBiking.com

If you look between the isles of Interbike (figuratively) you can see the future. I’m excited to say, when it comes to bicycles, children’s bikes are the future. Interbike had loads of unique and exciting bikes, accessories and programs for all the little riders out there.

Children’s bikes are the future

Most bicycle companies make kids bikes as part of their overall line, but very few make only kids bikes. Frog Bicycles exclusively produces children’s bicycles and was born out of a doctoral thesis on proper fit for kids bikes in England. Through exhaustive testing, it was found that children need a more unique bike fit than what the standard bike offers. Frog used that exhaustive research to develop their first bicycles and has been flying down the road ever since. Through clever frame design they are able to build bikes that fit kids with almost no proprietary parts. This leaves no concerns about replacing any hard to find bits if little Timmy breaks anything. Additionally, all the Frog Bikes are tested to adult standards rather than the less demanding children’s standards. Hopefully that can give you some peace of mind as your child’s body and abilities grow.

Frog Bicycles are making children’s bikes more comfortable through smart design.

Parts for kid’s bikes

While most of us aren’t going to start pulling our kid’s bikes apart to upgrade them with fancy components, there are plenty of high performance products available. One of the great things about your bike shop attending Interbike is, if they look closely, they can see things that aren’t readily available now, but will show up on production bikes the following year.

This lightweight suspension fork is made by Kay Xin Technologies for 20″ wheeled kid’s bikes

As I combed the Isles of manufacturers, it was impossible to miss suspension forks designed to meet the specific needs of smaller riders, brakes that allow children to easily control their bicycles and cranks and pedals made for smaller feet and legs.

Teaching them young

Project Bike Tech is a new program designed to getting school aged kids in front of a bicycle with a wrench in their hands. By working with local schools, they develop programs that tach kids engineering, and mechanical skills through bicycle maintenance. Although this program is in very few schools, it has been in existence for over ten years, and has introduced over 3000 students to the cycling industry.

A student of the Project Bike Tech learning to adjust a hub bearing

Sharing the experience

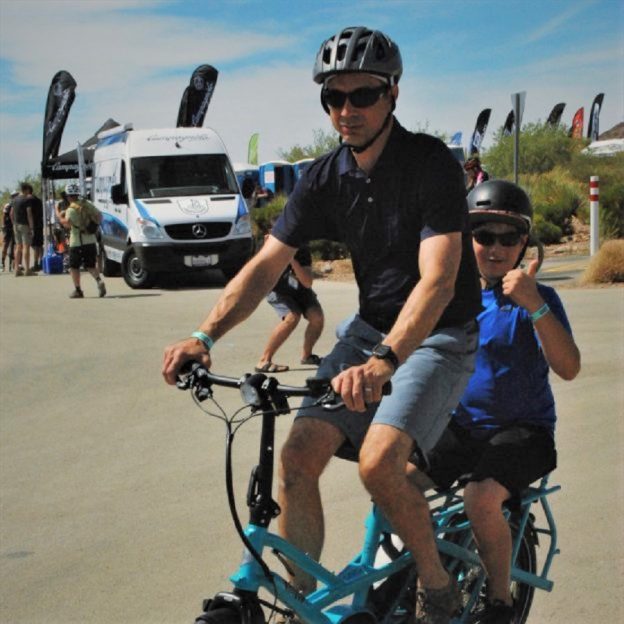
On top of all the products for kids, there were also ample ways to carry your kids along for the ride. Tern Bicycles showed their GSD, a new folding E-bike built with the capability of carrying your kids on the back. Additionally, Burley trailers had their line of children’s trailers on display.

Super fun on the Tern GSD

You can also see our recent article Kid’s Bikes; Why they are different and what’s best for your kids.

If you look between the isles of Interbike (figuratively) you can see the future. I’m excited to say, when it comes to bicycles, kid's bikes are the future.

If you look between the isles of Interbike you can see the future. I’m excited to say, its kid’s bikes.


Tern Bicycles showcase all their folding bike capabilities in the new GSD

by John Brown, HaveFunBiking.com

Hi all! Day two at Interbike’s dirt demo brought more fun in the sun. It gave me an opportunity to review a load of new folding and E-bikes. It seemed any direction you turned, there was an e-bike waiting for you as Tern showcased its latest folding bike model, the GSD.

Tern Bicycles is a relatively new company who burst onto the cycling scene a few years ago with a clean and hyper functional line of folding bikes. Over the past few years they have built a name for themselves through developing folding bikes that not only look great but ride more like a full size bike. In addition to making great bikes, their forward thinking design team has worked to solve problems that plague cyclist with limited storage space.

The Tern GSD folding bike stands for “Get Stuff Done”

Given Tern’s ability to make revolutionary products, I expected a lot from their new bike the GSD. Why GSD you may ask? Well, it stands for “Get Stuff Done” and given the wide capabilities of this bike, that’s exactly what it can do. You see, the GSD is what’s called a mid-tail e-bike. A Mid-tail bike has an extended rear triangle designed to carry additional cargo, people, or accessories. The typical problem with extending the rear triangle is that it can make the bike handle poorly. In the same vain, adding additional cargo to the bike makes pedaling difficult due to the weight.

How Tern gets around these issues and to keep the overall length low is by using the same 20” wheel size as their other folding bikes. They also add folding features to make storage of the bike easier. On top of that Tern also equips the bike with a robust motor and dual battery capable of powering the bike regardless of how much weight is on board.

GSDThe Tern GSD uses folding bike components and a keen rack design for upright storage

Other Tern features

If the GSD were just an Mid-tail ebike, it wouldn’t be that exceptional. However, it isn’t just any old electric assist bike. It seems that Tern has thought of nearly everything. To start, they have custom bags that mount onto the back, but if those don’t tickle your fancy, you can mount waterproof bags from Ortlieb as well. If it’s human cargo you want to carry, there are retractable foot pegs, and a cushioned seat that can mount to the back. As well as carrying people, the GSD also is available with cool stylized front and rear cargo baskets.

Several options for accessories for the GSD folding bike

Several options for accessories for the GSD folding bike

How the GSD rides

The most impressive thing about the GSD is actually the ride and by that I mean how normal it is. Hop on, pedal away and you will immediately feel at home. The GSD doesn’t suffer from many of the idiosyncrasies typically associated with a mid tail bikes. There is no tiller feeling when you turn the bars. Additionally, the common feeling like you are dragging a trailer behind you is replaced by smooth, quick handling. Overall, the GSD is the most comfortable, maneuverable and capable mid tail bikes I have ridden.

Sizing

The GSD is designed for both the short and tallest of riders. They accommodate all those different sized riders by using a remarkably adjustable bar and seat post setup

The GSD folding bike with the saddle in its lowest and highest (inset) position.

Power

Tern went a step further to make the GSD capable by adding an E-motor from Bosch to the bike. This motor helps riders power through their duties with speed and confidence. Considering that the GSD will most likely be loaded with more weight than a standard bike, Turn accommodates for a second battery on the bike to extend its range.

Conclusion

While the “Get Stuff Done” model might not be for everyone. Although, it’s details, quality, and stunning ride quality speak volumes for the attention to detail, that Tern brings to all their bikes. Stay tuned for additional reviews of the amazingly well thought out Tern bicycles.

I was amazed at how well the B17’s operated. Even when thrown down rocky chutes or around jagged turns this bike soaked up anything I threw at it.

Dirt Demo Reviews: Thoughts and Feelings on the Marin B17

By John Brown, HaveFunBiking

Interbike’s Dirt Demo is always good for a few things, red dust, high winds, and some really expensive bikes just waiting to be ridden – and wow, was I impressed with the Marin B17. Typically the brands at Dirt Demo bring their biggest and best bikes in an effort to wow the throngs of bike shop staff members visiting. Happily, this year many brands brought their price point bikes and I have to say they were all awesome. OK, OK, I realize that calling them all awesome isn’t the type of hard hitting journalism that makes for a serious review. But, with that said, I honestly have to share just how much bike you get for a reasonable amount of money.

Bootleg Canyon

Dirt Demo is held about thirty miles east of Las Vegas in a place called Bootleg Canyon. This high plateau offers a great stage for dozens of brands to create a tent village from which to show their product. Bootleg also has paved bike paths, winding roads and miles of offroad trails. For these reviews, I used their trails, and small pumptrack. The trails are predominantly sand, rock and what riders call “kitty litter. While sand and rock is self explanatory, “kitty litter” needs some explanation. Basically “kitty litter” is loose rock, typically smaller than gravel, which is deposited over a firm surface. While sand will slow you down, and rock will make for fun obstacles, kitty litter requires a bike to have excellent traction, and handling to navigate it well.

Out in Bootleg Canyon there is plenty of room to test out the latest bikes manufactures are showcasing.

Out in Bootleg Canyon there is plenty of room to test out the latest bikes manufactures are showcasing.

Marin B17

This pump track was fun and a good way to see how the Marin B17 handled

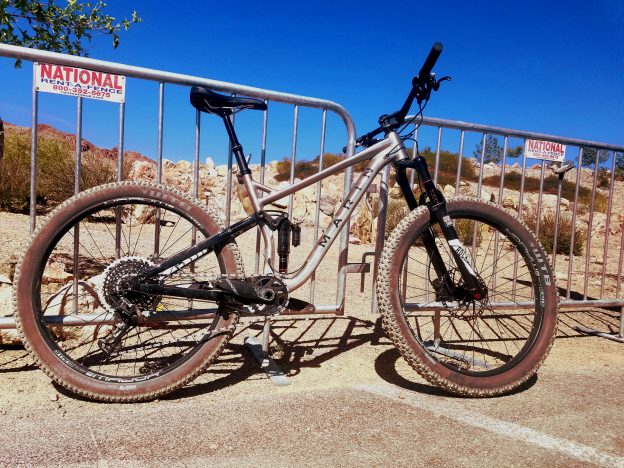
The Marin B17

The first bike I tried was the Marin B17. The B17 is one of the new crop of aluminum full suspension bikes using 27.5+ (27.5 x 3”) tires. It boasts 130mm of travel up front and 120mm in the rear and a 1×11 speed drivetrain.

Marin B17

The Marin B17 I rode

Thankfully, the B17 uses an air shocks which made it easy for the the Marin mechanics to quickly adjust the suspension to my riding weight. When testing out any bicycle, it is important to try to isolate problems, adjust, and see if you can get the bike to ride its best. Initially, I felt the suspension offering good control but the bike seemed a bit harsh. Rather than adjusting suspension though, I lowered the tire pressure. For the B17, the harshness came from the tire’s air pressure being too high. Happily, once I lowered it, the bike absolutely lit up.

I was amazed how well the bike handled! To start, it had a near telepathic handling character. Simply think about changing direction and the bike did it. Following that, I was amazed at how well the B17’s suspension operated. Even when thrown down rocky chutes, or off camber, jagged turns, the B17’s suspension soaked up anything I threw at it. Even more, when it was time to turn the bike uphill, the suspension resisted bobbing and transferred my pedaling effort to the rear wheel while still allowing the rear wheel to find traction.

Keeping things Consistent

I tested the B17 3 (Marin’s Top end model at $3699.99). While $3700 dollars isn’t exactly wallet friendly, Marin also produces a B17 1 AT $2099.99. That makes the B17 1 an excellent deal for such a full functioned bike. however, you may be concerned that the ride quality of B17 I rode was associated with the high end suspension parts and not the frame design. I ran both the fork and rear shock in their full “open” position. I did this to see if the frame design or shock function is responsible for the ride quality. If the function of the high end shocks were responsible the bike would behave differently in “full open”. Happily I can say that with the suspension setup in “full open” that the B17 happily climbed and descended with control and confidence.

More to come

Stay tuned for my Review of the Marin Wolf Ridge, Hawk Hill, and Haro Shift. As for right now, I am off to Dirt Demo to bring you more great product reviews. Feel free to comment below if there is anything you want to see in more detail.

In the U.S. bike markets it all happens at Interbike.

HaveFunBiking will share many new bike products from Interbike

by John Brown, Havefunbiking.com

Show season is at hand in the cycling industry and HaveFunBiking.com will be on the show floor. We are excited to try the newest product and deliver to our readers the most curated list of new products over the next couple months. On Monday September 18th , before dawn, we embark to Las Vegas to try countless bikes at Interbike’s Dirt Demo. Following that, on Wednesday the 20th, the doors open to the last Interbike in sin city. Stay tuned to our Blog to see all the newest products and news from the show floor at HaveFunBiking.

Interbike

Interbikes’s Dirt Demo is a great way to try new product.

HaveFunBiking goes to Interbike in Las Vegas

Don’t worry, the fun doesn’t stop when we leave Vegas. Following the show we will be reviewing product we will see over the course of next week, so stay tuned.

Here the manufactures of Tern Bicycles is showing and demonstrating the latest line of folding bikes out at the Iterbike's Canyon Demo location.

Here the manufactures from Tern Bicycles is showing and demonstrating the latest from their line of folding bikes out at the Interbike’s Canyon Demo location.


Here a bike shop representative takes a fat bike out for a test ride so she can share the highlights with her customers.

Here a bike shop representative takes a fat bike out for a test ride so she can share the highlights with her customers.


On Wednesdays Interbike official begins with several thousand exhibitors showing off their latest products in bike wear and fad.


Interbike

Miles of product at Interbike 2017!

Here the manufactures of Alter Bicycles is showing and demonstrating the latest line of there line of bikes at Interbike.

Here the manufactures of Alter Bicycles is showing and demonstrating the latest line from their their line of bikes at Interbike.


Here a manufacture is showing and demonstrating a colorful line of helmet mirrors at Interbike

This manufactures rep is demonstrating their colorful line of helmet mirrors at Interbike

Feel free to let us know what new products you want to hear about and what topics you need more info on.

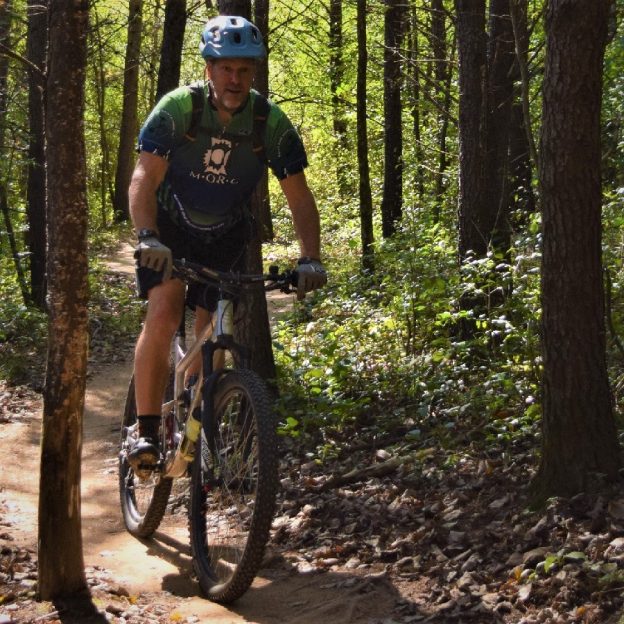
Here in this bike pic a member of MORC (Minnesota Off Road Cyclists) checks out a mountain bike trail in Lebanon Hills Regional Park. With an alliance created between Dakota County Parks and MORC, eighteen years ago, members of the Off Road organization have been volunteering their time each year to build and maintain the popular trails in the park.

Tubeless tires on bicycles: The basics of this exciting new technology

by John Brown, HaveFunBiking.com

In the spring of 1999 the french rim maker MAVIC launched the first viable bicycle tubeless system. By working closely with their french neighbor, the tire maker Hutchinson, they engineered a simple system that could give riders the benefits of larger air volume, greater traction, lighter weight and greater durability that tubeless systems offer. Since 1999, tubeless has evolved to be lighter, more serviceable, and lighter.

Now, with more bicycles coming from the manufacturer with these tires as standard equipment, please read on to see how the current family of tubeless systems can benefit you.

What are tubeless tires

Tubeless tires are exactly what they sound like, tires that use no innertubes. Specifically, these tire and rim systems use the air pressure, combined with a sealant, to keep your tires seated and inflated on the rim.

Why tubeless

There are a few reasons as to why tubeless tires have become popular. In essence, they are less prone to flats, they ride more comfortably, they are lighter and they offer better traction.

Less flats

Tubeless tires protect against the most common type of flat tire, a pinch flat. How a pinch flat works is the tire is compressed between a solid object and the rim. When compressed the rim and object work like scisors and cut a hole in the innertube. Considering tubeless tires have no innertube, they cannot pinchflat. This isn’t to say you cannot cut the tire in the same circumstance, but that is far less likely.

Tubeless Tires

The innertube on the left (blue) is susceptible to pinchflats, while the tubeless setup on the right is immune.

Less weight

Innertubes are relatively heavy. The pair can easily weigh a pound. While a pound may not sound like a lt of weight, we need to consider were that weight is. Tires, tubes, and rims have a profound effect on the feel of a bike. Heavy rims, tubes or tires can make the bike feel very heavy (even if it’s overall weight is low). The reason for this is that when you pedal, the weight you are constantly accelerating, only to have it decelerate and need to be accelerated again is rotating weight (ie. Rim, tire, tube). Reducing the rotating weight will decrease the mass you need to constantly accelerate, and lead to a lighter riding bicycle.

More comfot

By doing away with the innertube, you automatically increase the air volume of the tire. This increased air volume allows for a greater degree of flex in the tire when you ride over objects. Increaseing that flex allows the bike to more comfortably float across road and trail.


More traction

Tires and tubes don’t actually play well together. A tire is built with high thread count fabrics that are designed to conform over objects, but not collapse under the efforts of turning and pedaling. That delicate balancing act is made more difficult when you introduce an innertube. An inflated innertube will press against the inner surface of the tire an hinder it from conforming over objects. This is because that pressure creates friction between the tire attempting to conform, and the tube exerting force on it. This, if you eliminate the tube, the tire is free to do what it was intended to do

Tubeless Tires

Air Pressure (Green) forces the tube into the tire causing friction (Red)

Types of tubeless tires

There are two primary tubless systems. Tubeless, and Tubeless-ready. A true tubeless system (like the tires on most automobiles) requires no sealant to inflate the tire. The tire is built with a airtight material grafted to the inner surface. Tubeless-ready tires require you to use a sealant because they have no airtight material applied. Overall, the tubeless-ready tires has become more popular because they ride better, are lighter and less expensive. For all those benefits, the trade off is that a sticky solution must be installed into the tire to seal it.

What you need to go Tubeless

There are four primary items you need to go tubeless. They are a tubeless compatible rim, rim tape and valve, a tubeless-ready tire, and sealant. In many cases new bikes are coming stock with tubeless compatible rims (the largest expense) so check with your shop to see if you are already half way there.

What happens if you get a flat with a tubeless  tire

In the rare instance where you do get a flat tire, you can simply remove  the tubeless valve core, and install an innertube. There is a bit of added mess with the sealant, but otherwise changing a flat is simple.


Disc brakes are more powerful, consistent, and durable than a standard brake. read on to learn the tips and tricks of removing disc wheels.

Don’t be Afraid of Removing Wheels with Disc Brakes

by John Brown, HaveFunBiking.com

Disc brakes are taking over the cycling world. It is becoming more difficult to find a new bike without them and that’s for some good reasons. Disc brakes are more powerful, more consistent and more durable than a standard brake. With any new product there are new things you need to learn and here are a few tips we would like to share.

The wheel with disc brakes is the same as with rim brake

Just because your new bike has disc brakes, doesn’t mean that everything is new. In fact, the skills you learned to take the wheel off your old bike with rim (pad) brakes are still completely relevant. Specifically, if you know how to operate a quick release, you can take the wheel off a bike with disc brakes. Consequently, with a disc, there is actually less to worry about than with a standard rim brake. However, if you don’t know how a quick release or thru axle works, read below.

How does a Quick Release work

A quick release allows you to remove your wheel without tools. Moreover, the quick release is installed through the center of your wheel allowing you to clamp the wheel into the bike. Basically, a quick release is a very long bolt with a cam lever on the end. It’s the cam lever that gives the quick release its powerful clamping force. To remove your wheel, simply flip the lever open, and remove the wheel. If it’s a front wheel, you will also need to unthread the quick release nut on the opposite side from the lever.

Disc brake

Flipping the lever open widens the quick release. This action is what gives a quick release it’s clamping force.

Disc Brake

Quick release levers are marked “open” and “closed” on the lever. Be sure to always close the lever when tightening the quick release lever in place. If the wheel is tight, and you can read “open” the quick release lever is not installed properly.

How does a Thru Axle work

Thru axles work similarly to quick release levers. The main difference is that a thru axle needs to be threaded out of the frame and removed completely for the wheel to come out. Consult your bike manufactures manual for the details on how to remove your thru axle.

disc brake

Thru Axles slide through both frame and wheel and thread into place.

So what is difference between mechanical or hydraulic disc brakes?

When it comes to removing a wheel, the main difference is knowing if your disc brakes on your new bike are mechanical or hydraulic disc brakes. The differences come with the way that lever force is transferred to the caliper or pad around the brake disc rotor. At one end there is a cable that operates the brake system, sometimes referred to as mechanical disc brakes. In contrast hydraulic disc brakes use a sealed, fluid filled system as the means apply pressure. In the case of the mechanical disc brake you don’t need to worry about anything. You can open the quick release and remove the wheel with no other issues. For hydraulic disc brakes, you only need to take care not to squeeze the brake lever if the wheel is not in place in the bikes caliper.

You shouldn’t squeeze the lever without a disc rotor in place. This is because of hydraulic disc’s auto adjusting pad (caliper) wear valve. If you make the mistake of squeezing the lever without a disc rotor in place. The valve adjusts as if you just wore through 3mm of pad material (the thickness of a rotor). If this happens, don’t worry, just get a flat piece of clean, oil free, metal to pry the pads back apart again. Even if you spread those pads too far out, once the rotor is back in, a few squeezes of the lever will get the brake adjusted properly again.

Putting the Wheel back In

When replacing the wheel on a disc bike, there is one new detail to take into consideration. Generally speaking, the wheel fits into the bike normally. Just verify that the rotor is inserted into the caliper (pad) properly. For instance, if the rotor isn’t centered into the caliper, it will rub. Therefore, verify that the wheel is centered in the bike straight.


With all the great things about fall bike riding there are some dangers as well. Read on to learn how to enjoy the fall riding season safely.

Finding fun and fitness in fall bike riding through the colorful foliage

by John Brown, HaveFunBiking.com

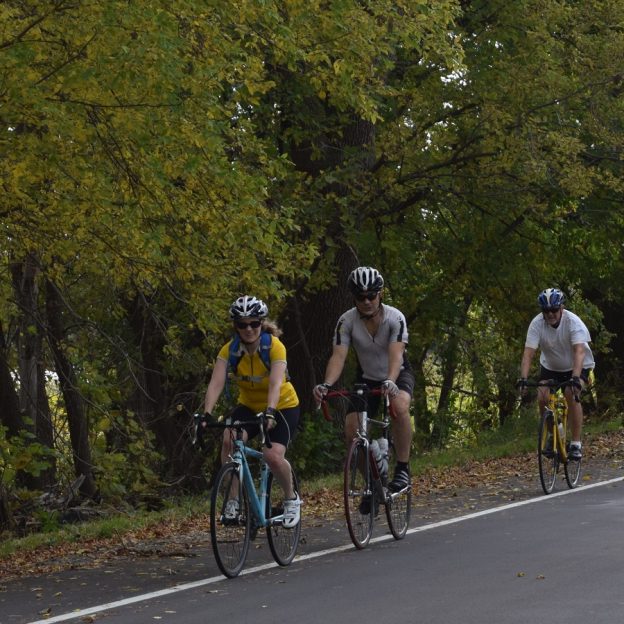
Now that the kids have gone back to school, the days are getting shorter and temperatures begin to drop it is the best time of year to ride your bike. From a trail perspective, the dirt becomes softer as the fall rolls in because of lower temperatures and increased rainfall. Additionally, riding off road in the fall is a beautiful way to enjoy the change in foliage. That doesn’t mean you can’t enjoy the leaves changing if you choose to ride on the path or road. In fact, great fall rides often have specific vista points built into the ride. With all the great things about riding through the fall there are some dangers as well. Read on to learn how to enjoy the fall riding season safely.

Fall bike riding road hazards

Those beautiful fall colors are enjoyable, but also a sign of falls largest hazard. Falling leaves that mix with fall rains begin to break down and decompose on road surfaces. What is left behind is a slick slurry of organic matter perfectly suited to eliminate traction and cause a crash. As you ride in the fall, avoid riding too far off the edge of the road. Likewise, don’t ride too far into the middle of the road where leaves tend to accumulate.

Fall bike riding off road hazards

The same problems with traction and decomposing leaves exists off road, but it’s not as large an issue as on the road. Thanks to the soft dirt and rough surface, riders have a better chance of finding traction when the leaves get wet. What you should be on the lookout for is what you can’t see. Makes total sense, right?! Whenever you are on a trail that has fallen leaves, objects can hide in those leaf piles.

Being seen while fall bike riding

As the days get shorter, you need to be concerned with being seen in low light situations, that’s where proper lighting comes in. Lights, no matter your level of bike riding skill, are essential to make sure you have the safest ride possible. Plus, most states require bike lights to ride on a roadway (here is Minnesota’s law). The two types of lights on the market are lights that allow you to see, and lights that allow others to see you.

Seeing the trail

A great side effect to the shortened days is going for night rides with your mountain bike. Night riding was first born out of the necessity of riding, but has quickly become a fun part of the sport in and of itself. With this in mind, get yourself a high output light, strap it to your bike and head into the woods. In the long run you will see that riding at night changes how you see your local trails, and makes then new and fun.

Dressing the part for fall bike riding

Universally across on or off-road riders, the fall brings colder temperatures. To combat these temps you want to dress accordingly. Early fall rides force us to break out the arm and knee warmers, with long sleeve jerseys marching quickly behind. When dressing for colder weather, be sure to not overdress. Being too insulated will cause you to sweat past your cycling clothings ability to move moisture. At that point, you get wet, and cold, which defeats the purpose of wearing more clothing.

Lights are essential to make sure you have the safest ride possible. Here in this photo Brian Will, from Iowa's Cedar Valley Cycling Club lead a safe ride using trails and roads near sunset.

Falls unique events

Many charity rides are scheduled through the fall because of its great weather, and ambient beauty. One event type that is completely exclusive to fall is the sport of Cyclocross. What is Cyclocross you ask? Well, the best way to describe it is it’s just fun. A Cyclocross race is a timed (30,45,60 minutes) event that covers a one-mile course including, road, off road, grass, and sand sections with manmade and natural barriers. The best part of Cyclocross is that spectators can enjoy the action easily. Additionally, Cyclocross races are very family friendly and usually include things like food trucks, kids bike rodeos, and beer tastings.

How ever you decide to spend you fall, try and spend it outside on your bike. The Fall is a great time to get back on the bike, steal a few more hours in the saddle, or enjoy natures last show before the winters long sleep.

With 20 years in development your disc brakes are more powerful and serviceable than ever before. Read on for some simple steps to keep them working well.

A simple look at your bikes disc brakes function and maintenance

by John Brown, HaveFunBiking.com

Disc brakes were introduced on bikes as early as the 1950’s with Shimano making an actual hydraulic disc in the mid 1970’s. There were versions of the Schwinn Stingray series (released in 1971) that came stock with a rear disc brake. Let’s fast forward more than 25 years to the first market acceptable disc brake -The Hayes Mag disc. From its release in 1997, disc brakes have found their way onto most mountain bike, hybrids and now road bikes. With 20 years in development, disc brakes are more powerful and more serviceable than ever before. Read on to learn the basics on how your disc brakes work and how to keep them working well.

Disc Brake

Original Schwinn disc and 1997 Mag brake, both made by Hayes

How Hydraulic Disc Brakes Work

At their most basic, the brake lever moves fluid through a system and that fluid flows to the pads that press on the rotor. There are more details that make one brake work better than another. However, at the root, all disc brakes are very simple. The reasons the system is so simple and works so well is based on the following. Both the pad and rotor materials produce excellent friction. Additionally, the natural properties of fluids help transfer lever force without compression and absorb excess heat.

How Mechanical Disc Brakes Work

Mechanical disc brakes share the same pad materials and rotors as hydraulic systems; Therefore, they have very similar stopping power. Where mechanical system differ is they use a standard brake cable to actuate the brake instead of hydraulic fluid. Mechanical discs have a small lever on the brake caliper that is pulled by the brake cable, moving the brake pads and stopping the bike. The benefits to mechanical disc brakes is a larger lever shape choice, lower cost, and easier adjustment. On the other hand, because mechanical systems don’t use fluid, they are not as powerful and don’t manage heat as well as hydraulic systems. For that reason, on longer descents, mechanical brakes can under perform compared to their hydraulic counterparts.

Why disc brakes are more efficient

Unlike rim brakes, disc brakes don’t rely on a wheel being straight and round. Even if you were to accidentally dent of bend your rim, with a disc, you can still brake confidently. Another reason disc brakes are more efficient is that they produce a massive amount of friction. That friction, in concert with the venting on the disc rotors clears debris off the rotor and allows the brakes to work through all conditions. Ultimately, disc brakes are more efficient because they require less maintenance. In fact, hydraulic disc brakes self-adjust for pad wear they don’t require you to adjust them.

Why adjust the disc brakes caliper

Adjusting the brakes caliper is necessary if you hear the brake rubbing, or if they aren’t helping you stop well. Before adjusting a hydraulic brake, squeeze the lever to determine if you system needs to bled. If the lever feels spongy when you squeeze it, you need to bleed the system. It’s best to take it to your local shop and have the pros handle it. However, If the lever moves freely through its range, then has a firm feel once the pads hit the rotor, you can proceed without bleeding the system.

How to adjust the caliper to eliminate noise on hydraulic brakes

To adjust the caliper, loosen the two fixing bolts on top of the caliper (they may be under the chainstay on road bikes or in front of the rear quick release). Then snug both bolts up until the caliper stays in place, but is still move able with some effort on your part. WARNING! The rotor can be sharp and cause serious injury to your fingers. While spinning the wheel, keep your fingers clear of any spinning part.

While looking into the caliper, try to position it so there is equal space between each pad and the rotor. Once the caliper is centered spin the wheel slowly – in a perfect world there is no noise. If you are hearing the rotor rub on the pads, readjust until you get no noise. In some cases, you may need to straighten the rotor, this is a job best left to a bike shop professional. Once you are happy with the calipers position, tighten down the fixing bolts and you are done!

disc brake

Here you can see equal between the rotor and pads on both sides.

Adjusting mechanical brake performance

If your mechanical disc brakes have recently lost power, or the levers pull too close to the bar, you can easily adjust them for better performance. Before you adjust the brake, inspect the rotor and pads for any contaminants. Usually, contaminants come int he form of chain lube splattered from an over lubricated chain. If you see any oily residue on the rotor, the rotor needs to be cleaned, the pads will also need to be cleaned or replaced before you can proceed (denatured alcohol works well).

Most mechanical disc brakes have a fixed pad, and a moving pad. The moving pad pushes the rotor into the fixed pad, and creates stopping power.  Because these brakes operate differently than a hydraulic system, they need to be adjusted differently. First, you want to align the caliper so the rotor is as close as possible to the moving pad without touching. Next, thread the fixed pad in until it is as close to the rotor, but not touching. With both pads in place, loosen the cable pinch bolt on the side of the mechanical brake, pull the cable tight, then snug the pinch bolt again. Continue to adjust until you get the performance and lever feel you prefer.

disc brake

The Lever (green) is pulled, pushing the moving pad (also green) into the rotor (red). The Rotor is then flexed into the fixed pad (blue).

Trouble shooting disc brakes

Lever squeeze

Hydraulic brakes have a mechanism built into the master cylinder that auto adjusts for pad wear. It’s a great little valve that eliminates the need to re-bleed the brake continually as the pad wears. This valve can also lead to problems if you squeeze the brake lever without the wheel in your bike. The brake will adjust as if you just wore through 3mm of pad material (the thickness of the rotor) and not leave enough room between the pads to fit the rotor back in. To solve this issue you can either take the bike into a local shop or find a wide, flat, clean, metal tool to fit within the pads, and pry them apart again.

In cold temperatures

In temperatures below freezing, hydraulic discs that use mineral oil as a fluid can behave differently. As the mercury drops, the mineral oil can thicken and make the lever feel sluggish. You will find that once the temps rise, the brake will feel normal again.

Overall, disc brakes are the next step in brake evolution. They are more consistent, more powerful and easier to actuate than any other type of brake on the market. With every new evolutionary step, there will be some hesitation to try “the new”. Even though there may be some hesitation, you should not fear buying a bike with disc brakes. Thanks to years of iteration and market demand we now have disc brakes that are inexpensive and functional.

In the western part of Bloomington MN you will find Hyland Park with over 1,000 acres of parkland act as the Twin Cities best destination for active families, recreational riders, and beach goers.

Enjoying the nearly endless possibilities of Hyland Park

by John Brown, HaveFunBiking.com

In the western part of Bloomington Minnesota over 1,000 acres of parkland act as the Twin Cities best destination for active families, recreational riders, and beach goers. The Hyland Park Reserve encompasses over 8 miles of paved bike path, A family friendly beach, breathtaking prairies, a Ski resort, seven miles of cross country ski trails, a spectacular playground, and countless other attractions. Read on to learn about what possibilities you could explore.

Biking Hyland Park

While not a loop, the trail system in Hyland Park is well laid out to get you to every corner of the park. However, there are small loops within the trail system. The trails in the southernmost part of the park loops around through dense forest and winds along the Hyland Lake. As you move further north, the trails navigate through the most developed portion of the park, passing the Shoots and Ladders Playground and the visitor center. While traveling north, Hyland park reveals it’s true beauty while sending you through vast prairies. In the northernmost part of the park, the trails pass under the shadow of the Hyland Ski and Snowboard area. Even though the trails pass through very different topography, they all are well maintained, relatively flat, and wide enough to offer comfortable riding for all ability levels.

Attractions

Hyland Ski and Snowboard Area

The Hyland Ski area is a downhill ski area with two terrain parks, Ski jumps and a park featuring an 18-hole disc golf course. Through the winter, it is a popular place for lessons and cold weather sports for metro area residents. In the summer, the park periodically operates it’s lifts for mountaintop concerts, bonfires and general outdoor merriment.

Shoots and Ladders Playground

Tucked into the middle of Hyland Park is the most amazing playground you could imagine. It’s tallest 3 story tall tower soars over scores of other structures amassed to put your kids in a state of playground frenzy. Most surfaces are covered in soft rubber, woodchips, or sand offering safe areas for kids of all ages. The park is open to all two-legged creatures, but please leave your four legged friends at home. Additionally, when the mercury rises Shoots and Ladders has a water misting play area for the kids and enormous umbrellas over the picnic areas for he parents.

Richardson Nature Center

Hidden in the dense foliage of Hyland Park is the Richarson Nature Center, a stunning natural gateway for visitors young and old. After parking in their ample lot, stroll a few feet down the path up to the nature center. The center is a two story home to Raptors (upstairs) and amphibians (downstairs). They have classrooms and events in the center throughout the year for anyone looking to learn more about the ecosystem. One of the best parts of the Richardson Nature Center is the kids park they have cleared just down the path. In an open area of forest, kids can build forts and structures with deadfall collected from around the park.

Bush Lake Beach

While not technically in Hyland Park, Bush Lake Beach sits adjacent to Hyland. It is a man-made sand beach on the east shore of Bush Lake. The entrance to the beach just off East Bush Lake Road and just south of the Richardson Nature Center. Through the summer season, you can purchase a one day or season pass for parking. The Aquatic Center at Bush Lake Beach has a snack area and great bathroom amenities.

Year-Round Fun

What is best about Hyland Park is the number of events it has. Throughout the year Hyland Park schedules outdoor and indoor fun for every kind of nature lover. I’ve enjoyed the “Movie Nights on the Hill” a few times and the 4h of July celebration is spectacular. I strongly recommend making the Hyland Park your first stop, when planning an outdoor excursion.

Find more information about this park and the many other fun activities Bloomington has to offer, here.