Welcome. We're your premier source for fun places to explore by bicycle or on foot. Offering guides, maps and articles on road and trail riding for the novice to seasoned cyclist - helping you find your #NextBikeAdventure
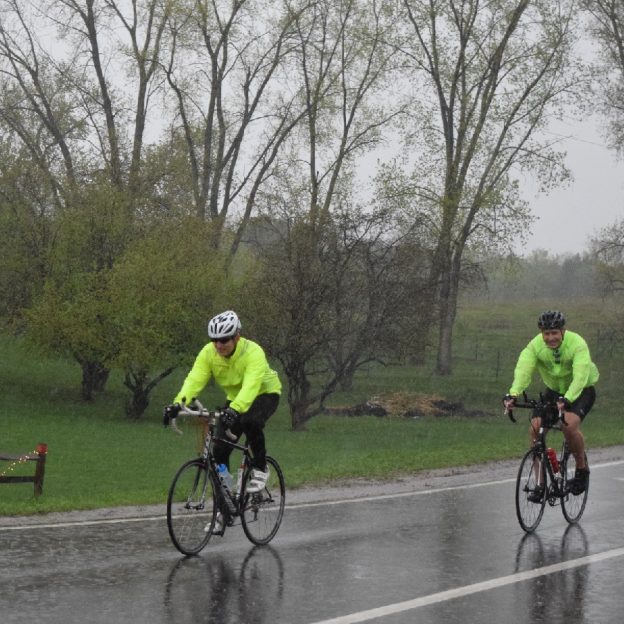
With wet pavement a possibility, this bike pic Friday, give your ride a little TLC soon after so your ready for the weekend. Here are some bicycle maintenance tips to keep your equipment in top shape. HaveFun!
So, adjust to the warmer temps, have your rain gear ready, and get into the zone when continuing your time outdoors for that #NextBikeAdventure. View all the great ideas and bike destinations in the latest Iowa or Minnesota Bike/Hike Guide. Then plan your next outing with family and friends, and check out more stories at Let’s Do MN.
Thanks for viewing our bike pic
As we roll through our 21st year as an outdoor media, enjoy!
As we pedal forward, we aim to encourage more people to bike and have fun while highlighting all the unforgettable places you can ride. As we continue to showcase more places to have fun, we hope the photos we shoot are worth a grin. Enjoy the information and stories we have posted as you scroll through.
Do you have a fun bicycle-related photo of yourself or someone you may know we should post? If so, please send your picture(s) to [email protected]. Please Include a brief caption for the image, who shot it, and where. To be considered, the photo (s) sent to us should be a minimum of 1,000 pixels wide. If we use your photo, you will receive photo credit and acknowledgment on Facebook and Instagram.
As we continue encouraging more people to bike, please view our Destination section at HaveFunBiking.com for your #NextBikeAdventure. Also, check our 15th annual mobile-friendly MN Bike Guide, a handy booklet full of maps of fun places to bike and hike.
Bookmark HaveFunBiking.com on your cell phone and find your next adventure at your fingertips! Please share our pics with your friends, and don’t forget to smile. With one of our cameras ready to document your next cameo appearance while you are riding and having fun, we may be around the corner. You could be in one of our next Pic of the Day.
Have fun as we pedal into a summer of fond memories!
Sadly, it’s sometimes unavoidable to ride in the rain. In my experience, the rain actually waits for me to get as far from home as possible before starting. So, when you do get caught in wet conditions, how do you protect your bicycle from the damage from water? Read on for a few helpful bike maintenance tips.
The first step In Bike Maintenance Tips is to get it clean!
The first step after riding in the rain is to get your bike clean. Road grime, mud, and other muck that has accumulated on your bike will hold moisture and encourage corrosion. A bucket of warm soapy water and a sponge is the best way to clean out that crud. Try to resist the urge to point a hose at the bike because pressured water gets into bearings promoting wear.
The second tip – get it dry
Once your bike is clean, use an old towel to get it dry. Rubber parts like tires and grips don’t need a lot of attention, rather focus on all the metal parts. Really try to address the steel hardware and make sure it’s dry to the touch before you’re done.
Then, clean the rims
Unless you have disc brakes, riding in the rain takes a toll on both the rims and brake pads. All the road grime that attaches itself to the rim works like sandpaper, wearing both the rim and the brake pads when you stop. Therefore, after riding in wet weather you will want to focus on getting all that abrasive grime off the rims and pads. If the dirt is left in place, your brakes can start making noise, be less efficient, and wear out quicker.
Lube The Chain
Water and motion will do a good job of scouring all the lubricant off your chain. Additionally, the same road grime that wears rims and brake pads will wear your chain. Additionally, that wear leaves your chain particularly susceptible to rust. To lube your chain, start by propping the bike up so you can rotate the cranks backward freely. Next, Backpedal the bike, while dripping lubricant onto each chain link. Once the chain is well saturated, give a few moments for the lubricant to penetrate the chain. Finally, wrap a rag around the chain, backpedal, and remove all the excess lubricant. Done!
Lube The Cables
Like the chain, cables will lose lubricant and wear quicker in the rain. To keep your bike shifting and braking well, drip a small amount of lubricant onto the cables where they enter the housing. Once capillary action carries a few drops of lubricant into the housing, shift through your gears a few times and squeeze the brakes repeatedly to help the lubricant find its way.
Drain The Bike
A bicycle may appear to be sealed from the elements, but it is, in fact, able to take on water when you ride in the rain. The water that collects inside the frame of your bicycle can destroy bearings, rust a frame from the inside, or freeze in the winter and burst frame tubes. To drain a frame, pull the seat and seat post out of the bike, and turn the bike upside down. Leave the bike for a few hours to drain and then replace the seat and post.
Overall, when servicing your bike after you ride in the rain be aware of the corrosion and wear rain can cause. Focus on getting the bike clean and re-lubricated, ready for your next ride.
About John Brown, the author
As a lifelong cyclist and consummate tinkerer, John operates Browns Bicycle in Richfield, MN. It all started for him in grade school when the bike bug bit and that particular fever is still there. Now, and over the past thirty years, he has worked at every level in the bike industry. Starting, like most, sweeping floors and learning anything he could about bikes. He eventually graduated as a service manager and then to a store manager. Through the years, he has spent extensive time designing and sourcing bicycles and parts for some of the largest bike companies in the world. All the while focusing on helping as many people as possible enjoy the love of riding a bike. In that pursuit, he has taught classes (both scheduled and impromptu) on all things bikes. John also believes in helping every rider attain their optimal fit on the bike of their dreams. Please feel free to stop in any time and talk about bikes, fit, parts, or just share your latest ride. You can also see more of John’s tricks and tips on the Brown Bicycle Facebook Page.
A inexpensive way to keep you bike clean, especially when you are away from home is to invest in a garden (hand pump) sprayer tank to keep you bike clean and easy to maintain after each use. Just like rinsing your dishes after a meal, rinsing your bike after a ride, with a low pressure garden sprayer saves a a lot of elbow-grease when you do your routine cleaning. Plus, you will have less of a mess in your car when hauling, in storage, and it’s easier to inspect and work on keeping it clean.
I have found these garden sprayers work nice for both mountain biking and road riding. It’s great to have a portable water source along to rinse off the bike, along with a couple towels to dry off your bike when you are done. If you know it’s going to be muddy or rain is in the forcast, a small pail, a brush and some detergent might be wise to have along. Also, for the final rinse, the wands can be adjusted for the best spray pattern to help protect your gear.
Once clean, wipe down your bike and inspect the tires. Here, look for sidewall cuts or tread wear. Signs that it’s time for a new tire. When wiping around the brakes and derailleurs, check the cables to see if there is any fraying or rusting. And look at the cable housing for cracking, a sign that it should be checked and possibly replaced. After finishing the job of drying and inspecting your bike apply a spritz of lube to the chain, derailleur and brake pivots. Then, when you get home you will be ready to store it away for your next adventure.
You can find a one or two gallon poly hand tank sprayer at most box store-garden centers starting at around $15.
Caution:
Use care when using any spray device or a garden hose to rinse off your bike. These garden tank sprayers are ideal, normally ranging from 35 to 50 PSI (pounds per square inch). Where, using a power washer that generally puts out more than 1,200 PSI, may cause damage to sensitive bearing, seals and decals on your bike. With most of the low pressure tank sprayers on the market the PSI here shouldn’t be an issue, but check the manufactures rating to be safe.