Author Archives: John Brown

Cycling shoes can help you ride longer, faster and in greater comfort.

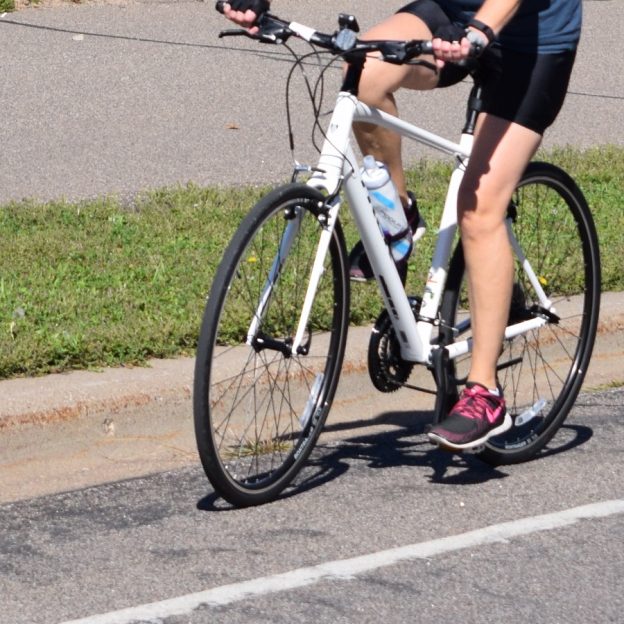
Cycling Shoes: What Are The Differences and How To Make Sure They Fit

by John Brown, HaveFunBiking.com

Cycling shoes can help you ride longer, faster and in greater comfort but only if you get ones that fit well. Read on to see what makes cycling shoes unique and how to find the right ones for you.

Benefits of Cycling Shoes, Clipless or Not

Cycling shoes have a very stiff sole to disperse pedaling pressures along the entire length of your foot. In contrast, normal sneakers have flexible soles that centralize most of your pedaling efforts onto the sesamoid bones, causing a lot of discomfort. Therefore, a cycling shoe is also a great option for riders who don’t plan to use a clipless pedal. Once you add the benefits of a clipless pedal, cycling shoes will make riding easier and more comfortable.

Types of Soles for Cycling Shoes

What makes a cycling shoe stiff is the materials used in the sole. The most common materials are nylon and carbon fiber. Nylon is a great choice for cycling shoes because it is strong, relatively light, very durable and highly resistant to cracking. Additionally, nylon is inexpensive, so it can be used to make low cost cycling shoes. The downside of nylon is in its stiffness over time. In my experience, Nylon will generate a flex point over time, making the shoes more flexible through the years. Carbon is very similar to Nylon in that it is strong, and light. Where carbon differs is that it is far stiffer than nylon, never generates flex, and is very expensive to produce. Carbon soles are only found on high cost shoes, but offer a much longer lifespan.

Types of Cycling Shoes

Cycling shoes can help you ride longer, faster and in greater comfort and there is a large selection to choose from.

Cycling shoes can help you ride longer, faster and in greater comfort and there is a large selection to choose from.

Cycling shoes can most easily be categorized into three categories – Road, Mountain, Recreation.

Road Cycling Shoes

Road shoes are easy to spot because the sole is almost entirely smooth with only a small bit of tread on the heel. They are the only shoes capable of accepting a large road cleat, and are typically highly ventilated.  Thanks to the lack of tread, it is easy to see what the sole material is.

Mountain Cycling Shoes

A Mountain shoe will look like a road shoe above the sole. Often time the closures, ventilation and appearance are the same as it’s road sibling. Where these shoes differ is the sole design. Mountain shoes have deep treads built into the sole to offer traction in loose and steep conditions. Because the sole is covered in rubber treads it is more difficult to conclude if it is made of carbon or nylon.

Recreation Cycling Shoes

Not everyone needs a road specific shoe or the aggressive treads that come with a mountain shoe. For that reason, most companies make a recreational cycling shoe. These shoes use a soft rubber for the tread that offers tons of grip when used on a flat pedal, they also use a nylon sole for stiffness and clipless compatibility. Mostly, these shoes look like a casual sneaker even though they hide cycling specific benefits inside. Some even use a hinged sole that can flex upward when you walk, but will not flex under pedaling forces.

Insoles in Cycling Shoes

Your foot is designed to work like a leaf spring when walking or running. Your arch collapses to absorb impact and rebounds to help you propel forward. Although, when cycling, having your arches collapse can cause alignment issues in your knees, ankles, and hips. To combat arch collapse, most cycling shoes use insoles designed to support your arch. If your shoes don’t offer insoles with enough support, there are plenty of options available for custom insoles.

Trying them on

Now that you understand what you’re looking at, let’s talk about how to try the shoes on. First thing to remember about cycling shoes is that they are nothing like sneakers. Cycling shoes are often sized in European sizing and while most brands offer a conversion chart, only use it as a starting point.

When you try a Cycling shoe on for the first time, it should fit tighter than a sneaker. You want a tight fit because your foot is attempting to pull out of the shoe during a pedal stroke. In contrast, while running your foot is being slammed into the shoe so sneakers need to be more roomy. Additionally, most cycling shoes are made of synthetic materials that stretch and conform to your foot over time. Therefore, a shoe will be far more snug when you try it on than a year later. If the shoe is snug all the way around, that is good fit even if you can feather your toe off the front of the shoe. If you feel any specific point of contact, that usually is an indicator that the shoe is the wrong fit.

Installing Cleats in Cycling Shoes

If you go to your local bike shop to get your shoes, they will typically install the cleat for you. If you are doing it on your own, try to position the cleat just behind the ball of your foot and straight on the shoe. I find it helpful to grease the threads of the cleat bolts before installation.

Hopefully, you feel comfortable going to try cycling shoes on after reading this. If you do have any more questions, either leave them in the comments, or visit your local bike shop.

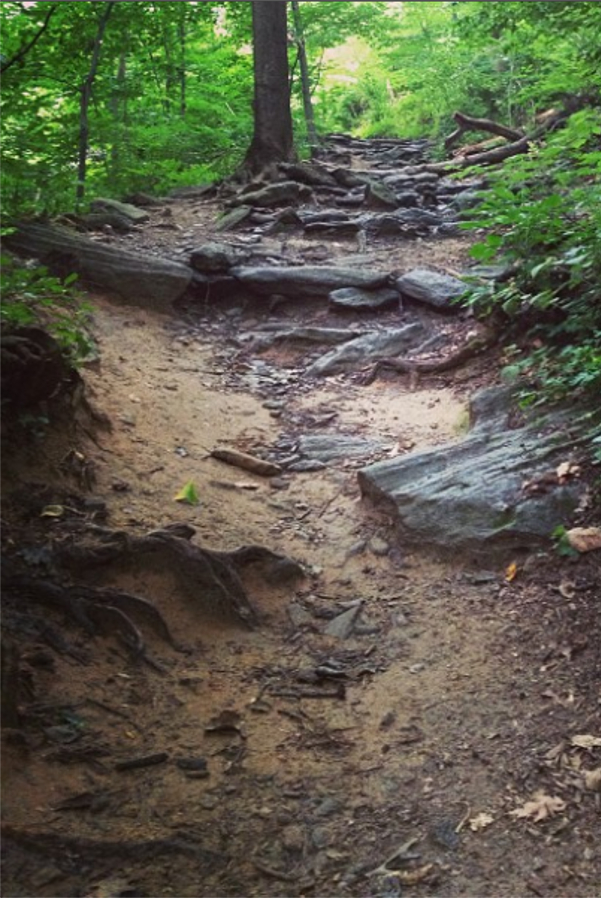
Bunny Hop and Wheelie Hop: A How to, Step by Step Guide

by John Brown, HaveFunBiking.com

Not all trails are smooth and flat. Many time’s we encounter large rocks, roots, ledges, and logs. The bunny hop and wheelie hop are simple moves that you can learn to traverse these obstacles with speed. Below, we have spelled out a step by step process to learn to hop.

Bunny hop

The Bunny hop has been around forever. While there are a few ways to pull one off, the basic motion of the bunny hop is to lift the bike without pedaling. Specifically, a bunny hop motion is to lift the front wheel, lift your legs and weight, and roll your wrists (and by extension the bicycle) over an object. The bunny hop is great move to clear obstacles at speed and while heading downhill.

Wheelie hop

The wheelie hop is similar to the bunny hop, except, rather than using your body motion to lift the front wheel, you use the pedals. Once that front wheel is up, the wheelie hop uses all the same motions as the bunny hop. The wheelie hop a is great move to use on uphill obstacles and low speed situations.

Pull up

The first motion in the bunny hop is to lift the front wheel above the height of the obstacle. To start this, stand up on the pedals, bend your knees and elbows, and lower your center of gravity. Next, spring your arms and knees, propelling your weight up and slightly backward. As your weight is traveling up and back, your front wheel should begin lifting off the ground. The basic concept is to rotate your weight and use the point where your rear wheel touches the ground as a fulcrum.

bunny hop

Prepare to spring up by bending your knees, elbows, and lowering your weight

Pedal up

The pedal up is slightly different from the pull up, but, still ends up with your front wheel in the air. Start in a seated position with your arms locked. Make sure you are in a relatively easy gear and jab your pedal through the pedal stroke as you pull the bars into your body. In about one pedal stroke your front wheel should be off the ground. Your weight should be centered over the rear wheel, your arms should have a good bent to them, preparing to spring your weight up.

bunny hop

Wheelie hops start by pedaling the front wheel up.


Lift your feet and weight

Although the first part of the Bunny hop and Wheelie hop are different, the rest of the motions are the same. Once you have the front wheel in the air, begin lifting your own weight up and off the bike. To do this, focus your weight on the rear wheel and move your body up, unweighting the bike.

Spring your weight up.

Roll your wrists

Once, both your front wheel and your weight are moving up it’s time to get your rear wheel off the ground. This is done when you roll your wrists and bars forward while your momentum is moving upward. Basically, your weight is moving up with the front wheel leading the way. Rolling your wrists forward redirects that upward momentum forward, leveling out the bike, and clearing the object in your path

Roll your wrists forward, leveling out the bike.

Practice on a curb

A great place to practice these hops is on a curb. Approach the curb at a slow speed, pop the front wheel up and onto the curb, then complete the motion and try to get the rear wheel up without hitting the square edge of the curb. Begin with a very low curb then work your way up to something higher. Once you are comfortable with the motion, try moving faster.

On the trail

There is a new variable that gets introduced when you use your bunny hop on the trail. That variable is the landing. While practicing on pavement, you can be confident that your landing will be onto a flat surface. On the trail, landings can be rocky and rough, couple that with your weight moving around the bike and you can get bucked off the bike rather easily. Therefore, try to keep your weight back on the bike while landing on the trail to resists getting bucked.

Slab Jab

So, while a slab jab is not technically a bunny hop, it does use a similar movement. Basically, a slab jab involves getting your front wheel up onto a tall object (like a rock or log) then pivoting the rest of the bike up onto the object using your front wheel as the fulcrum. Just like a bunny hop or wheelie hop, get your front wheel into the air, but unlike a hop, plant that front wheel onto an object. Next, while lifting your weight and rolling your wrists aggressively jab the bars forward. If done right, the jab motion will force your front wheel over the object and lift your rear wheel up onto it. With the front wheel over the object and your rear wheel on it, let off the brakes and simply roll on.

Like learning to descend, ride rocks, or any other riding skills, the bunny hop is a skill you should slowly build. Start on small objects and work within your comfort zone, maintaining control all the time. After a few months of practice, you will find that you can bounce around the trail like a bunny.

Need to go get a helmet? All the reasons to buy nicer helmet with fit features and ventilation to keep you cool and comfortable.

Consider Buying a Nicer Helmet That Adds Comfort to Bicycle Safety

by John Brown, HaveFunBiking.com

While talking with a neighbor over the weekend, he told me “I need to go get a helmet….to set a good example for my son.” Knowing my background in the cycling industry, he proceeded to ask a few questions about what he should get. In our conversation, I mentioned an earlier article “Riding safely with your kids” and reviewed all the reasons to buy a helmet and how to find the right one. Then I added some additional reasons why buying a more expensive helmet is a really good option.

A Nicer Helmet Adds Comfort to Safety

First, all bicycle helmets sold in the US need to pass CPSC tests. These tests are the baseline requirements for helmet safety in the US. So, if all helmets pass the same tests, why buy a nicer helmet? Well, there are more safety features that are available for helmets, like MIPS. This makes a helmet safer, but the way it makes MIPS safer is not yet specifically tested for. So the first reason to buy a better helmet is safety.

Ventilation and weight

Beyond Safety features, the most compelling reason to buy a nicer helmet is ventilation. Ventilation is the reason helmets become more expensive. As an example, the larger holes in the helmet required for better ventilation makes it more difficult for the helmet to pass safety testing. So, to pass testing more complex molds need to be used to make the helmet, more steps are required to make the helmet and more technology is added to make the helmet. All this added process, makes the helmet both better ventilated as well as more expensive. Also, more expensive helmets are much lighter than their basic counterparts. Overall, a lighter and more ventilated helmet will be more comfortable.

The helmet on the left has a very small amount of ventilation compared to the helmet on the right

A Nicer Helmet Offers More Comfort

Another great reason to buy a nicer helmet is comfort. Nicer helmets are made in many sizes that fit different sized riders more comfortably. Additionally, they use retention mechanisms that hold the sized helmet on your head properly, so the helmet is touching your head as little as possible.

Example

As an example, Lets look at Specialized’s line of helmets. Beginning with the Align ($40), you have a well ventilated one size fits all helmet. Moving on to the Echelon 2 ($70), that helmet has larger ventilation ports, as well as 4 sizes to fit riders better. Finally, we look at the Prevail ($200) which has the largest vents, lightest weight, as well as a Kevlar, internal, roll cage to hold the helmet together on impact. It has the most refined retention mechanism and comes in many sizes to fit riders comfortably.

From left to right: Specialized Align ($40), Echelon 2 ($70), Prevail ($200) and cutaway example of the Internal Kevlar Roll Cage

Testing Helmets

First thing to do is make sure the helmet you select from the many brands available Is comfortable and fits well before you purchase it. Once you find a few helmets that seem comfortable, take them for test rides on your bike (most shops will allow this if you leave an ID behind). Concentrate on what helmet is most comfortable and best ventilated. Then, buy what feels great!

With hundreds of custom bike builders in the US, and hundreds more spread across globe, how do you pick the right builder?

MinneCycle: Show Review and Why Buy a Custom Bike?

by John Brown, HaveFunBiking

With hundreds of custom bike builders in the US, and hundreds more spread across globe, how do you pick the right builder? Start with shows like Minnecycle, and when possible and have a conversation.

Minnecycle enjoyed its fifth year this past weekend in the world headquarters of Peacock Groove. Peacock Groove, in Minneapolis, is home to one of Minnesota’s most prolific bike builders, Eric Noren. Minnecycle displayed handmade bicycles from over a dozen other custom builders. Although the location is not a showroom, but rather a basement workshop, the setup created a gallery feel while still being welcoming. A location like this would be a hindrance for many groups but those who run Minnecycle are not your typical group. The workshop displayed bikes in every state of assembly, as a visual lesson on how a custom bike is built. Minnecycle can only be described as an unmitigated success. The attending builders were friendly, the feel was casual, and the work was outstanding. With a show this good, the only question left is “why buy a custom bike”?

Great Space, Cool custom bikes, and even Eric in mid-build

In Custom Bike Considerations, Size and Specificity

Custom bikes are great for riders that need something custom. I realize that statement sounds redundant and silly, but it really is the best way to define it. For instance, riders who have unique body types don’t fall into standard sizes bikes. As an example, it’s common for some riders to have a longer torso than the prototypical body type. These riders need a bicycle with a longer top tube than what is available on a standard bike.  However, a custom bike built with a longer top tube gives them the proper reach. Additionally, if a rider has unique needs, custom builders can make a bike to fit those needs. Many custom builders focus specifically on bicycle types not available through mass production. Great examples of these bikes are Cargo bikes, Adventure bikes, and utility tricycles, Hand Trikes, and Recumbent bicycles.

Quality and Craftsmanship

Being a professional custom builder is as much a calling as it is a profession. Although builders come from widely varying backgrounds, a few traits seem to be universal. Most builders are mechanically inclined, problem solvers, and are exceedingly detail oriented. Outside of those traits, a professional builder has the experience of building hundreds of bikes. So, when buying a custom bicycle, you are getting the cumulative experience and natural talents of a builder. Additionally, through every step of construction, your bike will be painstakingly reviewed for quality and alignment. That level of quality is not possible at a mass-produced level. While massed produced bikes are great, the attention to detail, quality control, and experience of a custom builder adds up to a truly uniquely riding bicycle.

Appleman builds custom bikes by positioning each piece of carbon fiber by hand to ensure the best possible ride quality.

Finding the right builder for you

Like Minnecycle, try reaching out to them digitally if you can’t meet them in person. Most builders are very accessible through email and social media. Find builders who are already making bikes similar to what you want. Ultimately, you are looking for a builder that you can get along with.

We have compiled the best list of simple bike tips to make your next ride more fun, more efficient, and more comfortable.

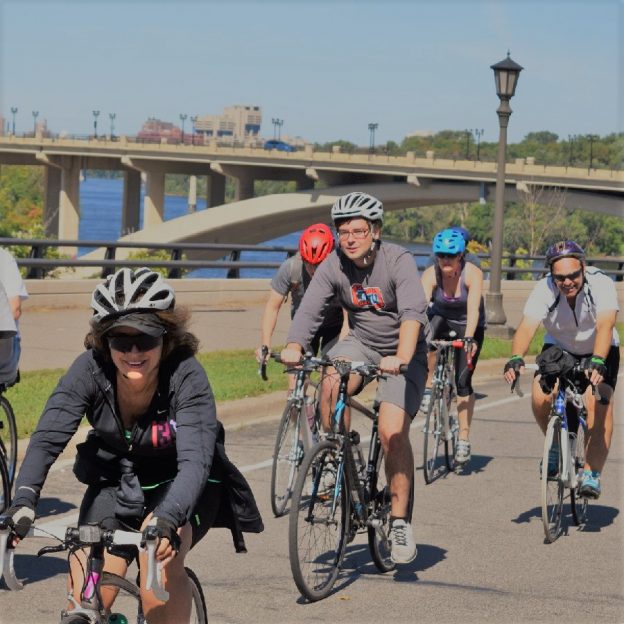
Simple Bike Tips to Get You Going Faster, Farther, and More Comfortably

by John Brown, HaveFunBiking.com

Do you want to make your bike ride more fun? How about getting all you can out of your bike? What about making your bike more comfortable? Well, we have is some great news! We have compiled a list of simple bike tips to make your ride more fun, more efficient, and more comfortable.

Lube your chain

If your chain isn’t running smoothly, neither are you. While a in-depth bike clean is great, simply keeping your chain lubricated is an easy way to ensure you bike runs well. Start by propping the bike up so you can rotate the cranks backward freely. Next, Backpedal the bike, while dripping lubricant onto each chain link. Once the chain is well saturated, give a few moments for the lubricant to penetrate the chain. Finally, wrap a rag around the chain, backpedal, and remove all the excess lubricant. Done!

Bike Tips to Find the Perfect Tire Pressure

First, fill the tires to the recommended maximum pressure as listed on the sidewall. Next, take the bike for a quick spin around the block for feel. From there, let about 5psi out of each tire (a digital pressure gauge works great) and ride it again. Continue lowering the pressure in 5psi increments until you can no longer feel the small imperfections in the road vibrate through the bike. Use these pressures as you starting point. Finally, over the next few rides, adjust pressure by 2-3 psi in search of the absolute perfect pressure. The goal is for a pressure that allows the tire to easily deforms over objects, offer ample traction, and resist compressing too far under hard braking and turning. As an example, I recently determined my mountain bike’s perfect pressure to be 28psi for my front and 32psi in the rear.

Saddle fit

Checking your saddle height is also a quick way to get more comfort and efficiency. While a complete bike fit does the most benefit, checking saddle height goes a long way to help with back pain and other discomforts. To set saddle height, sit on your bike and place your heel on your pedal. Then rotate the pedals backward. At the bottom of the pedal stroke your goal is to have your leg completely extended while keeping your hips level. If at the bottom of the pedal stroke you aren’t getting complete extension, raise your saddle. However, if you’re tilting your hips at the bottom of the pedal stroke, lower the saddle. Once you begin pedaling naturally (with the ball of your foot on your pedal, rather than your heel), you will have the proper amount of bend to your knee.

Mountain bike tips

To get your Mountain bike working it’s best try a few of these bike tips.

Cut your bars

Bicycle companies usually install all the same width bars on their mass-produced bicycles. That means that all but the largest size riders usually ride with bars that are too wide. For many riders, uncomfortable bar width is something they just get used to. But before you get used to it, realize that there are serious ramifications on using a bar that’s too wide. First, riding a bar that’s too wide spreads your arms out forcing you to use your support muscles inefficiently. Second, as you spread your arms, your back will naturally pitch forward (potentially leading to discomfort). Finally, wider bars are more prone to accidentally clipping trees or signs, causing a crash.

To cut your bars, first remove the grips (Spray a little hairspray under the grip and they will slide right off), Then measure and mark the amount of bar you intend to remove. Considering you can’t uncut your bars, only take 1-2 cm off at a time, then ride for a few weeks to verify before cutting again. You can cut the bars with a pipe cutter or hacksaw, but remember to smooth the sharp edge with sandpaper once finished.

Brake reach

Stopping the bike confidently leads to control and comfort, so make sure you adjust your brakes levers to match the size of your hands. Most brake levers have a reach adjustment built into them. By loosening or tightening the reach adjustment bolt you can bring the brake lever closer to the bar, or move it further away. I like to setup a brake so that the rider can easily reach the lever without changing their hand position on the grip. Additionally, I try to make sure the levers can’t hit the bar, or other fingers when they are squeezed.

Check your sag

A mountain bike with a suspension fork will work better once that fork is adjusted for the weight of the rider. The first step in adjusting the suspension is to set the “sag”. “Sag” is the amount your suspension compresses when you put your weight on the bike. Most suspension calls for about 25% sag, meaning, when you sit on the bike, the suspension compresses ¼ of its travel.

To set sag, first snug a zip tie around the upper leg of your suspension fork. Make sure it is snug enough to stay in place by itself, but not actually tight. Slide the zip tie all the way down until it is resting on the rubber seal of your fork. Next, find somewhere that allows you to put both feet on the pedals and balance without needing to pedal (I find a wall works well). Get on the bike, rock back and forth a few times to cycle the suspension, then sit still on the saddle in your standard riding position with both hands on the bar. Have a friend, move the zip tire so it sits on the seal once again and carefully get off the bike. You can now measure the distance from the seal, to the bottom of the zip tie and determine your sag. As an example, if a fork has 100 millimeters of travel, you want the distance between the zip tie and seal to be 25 millimeters. If you would want to adjust your suspension, see your forks owner’s manual for details.

Road Bike tips

Not to forget the road bike out there. Here are a few bike tips for the drop bars.

Re-tape your bars

On your road bike, bar tape does a big job. If installed correctly and replaced frequently, it can quiet loads of road buzz that would otherwise be transferred into your hands. Many times, riders ignore their tape because it appears OK. While your tape may look OK, the real test is to see how compliant it is. Use the tip of your finger and press firmly into the tape where your hands typically rest (usually, this is just behind the hoods). Follow up by then pressing an area of the bar that never sees wear. Compare the two to see just how compressed your tape has become, replace if needed.

Adjust your hoods

While you are replacing your tape, it’s a good Idea to review the location of your brake hoods. Verify, that when seated on your bike with your hands on the hood, your wrist is straight. If your hands bend upward or down, you are putting excess strain on your shoulders, arms and hands. That strain can lead to fatigue or pain.

Overall, a great fitting and functioning bicycle will allow you to ride longer, faster, and in more comfort. If you have additional questions about customizing your bicycle the professionals at your local bike shop can be a great resource.


You don’t need to be a mountain biker to have a bike crash, after all, accidents happen. Be sure to take a few moments post-crash to inspect your bike.

Bike Crash: What to Look for and Inspect After the Unexpected

by John Brown, HaveFunBiking

I love the feeling of riding bikes. I don’t know if it’s the freedom, the movement, or the ability it gives me to clear my head, but I can’t imagine enjoying any other sport more. As a mountain biker, that tranquil feeling is sometimes interrupted by an unexpected bike crash. While crashing my bike isn’t something I enjoy, I realize that as I try to push my boundaries, a bike crash is a real possibility. You don’t need to be a mountain biker to have a bike crash, after all, accidents happen. However, if you find yourself spontaneously dismounted from your bike, be sure to take a few moments post crash to inspect your bike.

Body, Mind, and Helmet Inspection After a Bike Crash

Nothing on your bike is more important than you. It’s tempting to jump right up after a bike crash, but take a few moments to assess yourself. Make sure your joints (particularly knees and wrists) feel and function okay. Follow that up by looking for any cuts that might need attention. Finally, remove your helmet and check to see if there are signs of impact. If there are, seek medical attention.

Wheels

After you have deemed yourself okay, pick up your bike and spin each wheel independently. Look for any wobbles or dents in the rim. Also, look to see if the tire has come unseated from the rim. Sometimes you may not be able to see a slight wobble in the rim, but you can hear the rim hit the brake pad as it rotates if you listen closely. Slight wobbles can be fixed later (as long as the brake pads aren’t hitting the tire) but larger ones will leave you calling for a ride home. If you have AAA for your car, they now offer a bike pickup service as well.

Bars and Seat

Once you have checked the wheels, make sure that the bars and seat on your bike are still straight. Look down over your handlebars and make sure they are in line with the front wheel and level. Next, look down the length of your saddle and make sure it is in line with your bike and not bent down to one side or another. If you see any bending in the seat or handlebars, it’s best to take the bike into your shop and have those parts replaced. You may see some scuffing on the side of your saddle or the end of your handlebar grips. That scuffing is a good indication that your seat or bars made a hard contact with the ground and could need replacement.

Derailleurs

Before you ride away, look at your rear derailleur from the back of the bike. The top and bottom pulley should be in line with the cog above it. If it is bent inward, do not ride the bike. A bent derailleur will still hold the chain on the gears, but as you shift into a lower gear, it will get caught in your wheel. This scenario usually leads to a destroyed derailleur and can even result in a destroyed bike.


Frame

Look at the frame and inspect each tube carefully. You are looking for any dents (on metal bikes) or cracks (on metal and carbon frames). If you see damage to the frame, have it checked at your local shop before you continue to ride it.


Brakes

The last thing to check is the brakes. Make sure they operate properly by spinning the wheels and inspecting where the pad hits the rim. If the pads hit the tire, adjust the brake before riding away. A brake pad can make quick work of a tire, leaving you in a far worse situation.

Follow up

For the next few rides, be sure to pay close attention to how you feel and how the bike feels. I have had injuries appear days after a crash. Similarly, my bike has sustained damage that I missed upon my initial inspection. Listen for strange noises coming from the bike, or any change to the way the bike handles.

Road Bike Hacks: Descending with Confidence and Skill on Your Road Bike

What goes up must come down. Descending on your road bike can be fun and safe if you learn some basic skills.

Weight down

If you have ever watched a motorcycle race, you will have seen those riders get off the side of the bike and touch the ground during turns. The purpose of that position is to get their center of gravity as low as possible. I don’t recommend matching that position on your road bike, but we can take some lessons from them. First thing, the lower your weight, the more stable you will be. Try lowering one foot to the bottom of the pedal stroke while descending in a straight line. When turning, drop your outside foot to the bottom of the pedal stroke and lean your hips toward the inside of the turn.

Hands in drops

Most riders use their drops about 10% of the time. It should be a position you can be in comfortably, if not, be sure to have your fit checked. Being in the drops while descending does two very important things. First, it lowers your upper body weight. Second, it gives you a greater mechanical advantage on your brake levers. Be careful with this new found braking power. Get comfortable with the different brake feel on gradual grades before tackling steep roads with speed.

Brake power

As you descend you are putting more weight on your front tire than rear tire. Additionally, as you apply the brakes, even more weight gets distributed onto the front wheel. With your weight shifting forward, you will notice that a rear wheel is far more likely to skid and break free while going downhill than on flat ground. The best thing to do while braking downhill, is to use the front brake to stop and slow the bike and the rear brake to control speed. New riders get taught that the best way to stop is to use both brakes evenly and that if we use too much front brake we are prone to crash “over the bars”. While going “over the bars” is a real concern it can be combated with a little practice. Simply put, as you begin to stop, brace yourself with your arms and get your weight low.

Look ahead

The world comes at you fast when heading downhill. For this reason, focus farther down the road than you would on flat ground. Keep eyes peeled for cars, pedestrians, painted road surfaces, gravel, or anything else that you will want to avoid. Also, look for the best approach for upcoming turns. When preparing for a turn, be cognizant of the exit to the turn as well as the entry. By planning how to enter, navigate, and exit a turn safely and efficiently, you will stay in control.

Trust your tires

Tires are literally where the rubber hits the road. Even though your tires only make about 3 square inches of contact with the road, they can do a lot to keep you planted. You can do a simple test to build confidence in the traction your tires give you. Try to find a place where the road surface is banked and ride along it. Under highway overpasses often have banked concrete surfaces with a sidewalk separating them and the road. Ride along that bank slowly and see how well the tires hold. You will find that the tires continue to hold fast even when the pitch becomes very steep.

Warning signs and speed wobbles

There are some normal things you want to avoid while going downhill. The most concerning things like sand, gravel, leaves, or debris could rob you of traction. Beyond outside influences, speed wobbles are an uncommon but frightening situation that some cyclist encounter. Speed wobbles are exactly what they sound like. As you get up to a certain speed, your bike will begin to wobble. There are many causes for speed wobbles, but only two things you can do when you encounter them. You can go faster (not recommended) or slow down carefully. Slowing out of a speed wobble is a matter of riding straight, and slowing under control.

Ride within your abilities

More important than the skills to ride downhill is the mentality. Riding at speeds you are comfortable with will keep you mentally, and by extension, physically calm. Calm riders make better and safer decisions. Be sure to take unknown descents with caution and build up to speed after you try it a few times. Overall, remember that it becomes harder to control your bike at higher speeds, so take it slow to start.

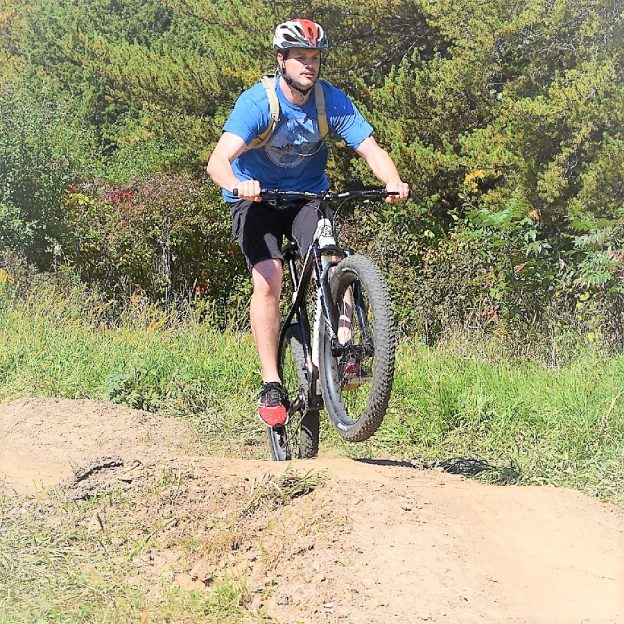
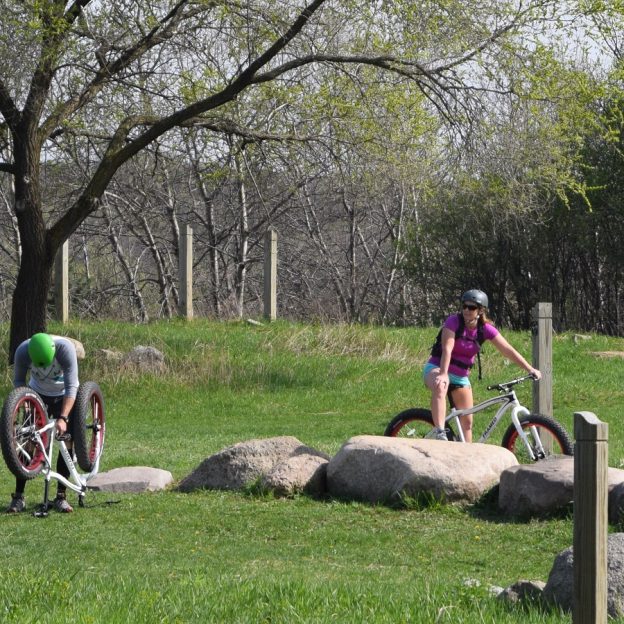
Mountain Bike Hacks: Tips and Tricks to Get You Riding Rocks Fast

One of the most intimidating situations in mountain biking is riding rocks. Places like the east coast have football field long gardens of granite that appear impossible to traverse by bike. Although they might appear impossible, just a few tips and some regular practice will have you zipping through rock gardens as if they were paved.

Look ahead

While picking your way through rock gardens, always look ahead. By “look ahead” I mean focus on points down the trail ahead rather than the rocks below your front wheel. By focusing ahead, you will naturally keep moving forward rather than getting hung up. Looking ahead also helps you prepare for what’s coming next.

Sections

Another great benefit from looking ahead, is that it allows you to plan how to attack the rocks in sections. By breaking difficult sections into manageable pieces, you can recognize a difficult rock 20 ft down the trail and choose a line that positions you for the best approach. The best way to plan a section out is to look at the approach, the obstacle, and the exit as a single section. In the approach, find the smoothest lead up to the difficult obstacle. Also, think about how to traverse the obstacle in advance and be aware of what the exit looks like. By planning the exit, you can maintain momentum after the obstacle and quickly attack the next section.

Keep it loose

As your bike bounces off and over rocks, it’s easy to lose your balance. The best way to maintain your position is to be as loose on the bike as possible. You do this by riding with your arms and knees bent and your rear off the saddle. This can feel very unnatural at first to pedal with bent knees, but it helps absorb the shock from rocks as you pass over them.

Over not under

It’s better to go over rocks than down in between them. The reason is, you can navigate down and off a rock with ease. By contrast, navigating up and out of between rocks takes a lot more effort and force. Speed also helps you stay on top of the rocks. With a little speed, your tires will ski across the tops of rocks rather than dip down into them.

Gearing and pedal strike

Life through a rock garden would be easier if you didn’t need to pedal. Pedaling moves your weight around at the very time when you are trying to maintain your balance. To help maintain your balance while pedaling pick your gear carefully. The right gear will give you enough torque to get over rocks, while still being difficult enough to push to offer resistance and aid in balance. If the bike seems to jerk forward with very little effort, you should shift into a more difficult gear. By contrast, if you can hardly get any momentum going because the pedals are so hard to push, try dropping down a few gears. Additionally, as you pedal, pay close attention to where rocks are and where your pedals are going. Banging your pedal off a rock is a quick way to lose balance. If you need to pedal, but are in fear of hitting a rock, consider pedaling only 1/4 turn, backpedaling, then pedaling again.

Little bits at a time

You shouldn’t expect to be able to clean every rocky section on your first attempt. Even highly experienced riders still have trouble on new sections. Above all else, ride within your abilities, trying new sections a bit at a time.


For many, the fun of mountain biking is going down hill. So how do you descend with speed and confidence? Find out here!

Mountain Bike Hacks: How to Descend with Speed and Confidence

For many, the fun of mountain biking is going down hill. So how do you descend with speed and confidence? You will find it is as easy as controlling your weight, position and growing skills.

Weight Distribution

Weight distribution is the most important thing to focus on when descending. The inaccurate explanation of this is to “lean back” when heading downhill. In reality, by “leaning back”, you extend your arms completely and “hanging” on the handlebar. As you descend, if your arms are extended completely and the front end needs to drop, you will get pulled forward and potentially pitched over the bar.

For many, the fun of mountain biking is going down hill. So how do you descend with speed and confidence?

For many, the fun of mountain biking is going down hill. So how do you descend with speed and confidence?

An easy trick to controlling your weight is to consider how much pressure is on your pedals. Rather than keeping even weigh distribution between your bars and pedals, concentrate most of your weight on the pedals. As you initially get used to this concept, I find it useful to imagine what would happen if a genie magically came by and made your bike disappear mid ride and you were left to land on the ground. Would you land on your feet or your hands?

Once you get your weight distributed onto your pedals, you can easily move your body forward and back over the bike as the situation requires. While moving your weight around, you will find it is easier to do if you first get your weight into as low a position as possible.


Position

While most bikes have suspension, your arms and legs offer better suspension than any shock. By bending your knees and elbows It is easy to get into a low position and absorb trail shock. Additionally, beyond well bent joints, concentrate on looking ahead rather than down. If you look down, you lose vision of what is coming down the trail and you bend your back into a poor riding position (see image). By contrast, looking forward will naturally put your chest out and hips down, and grant you more time to see obstacles and correct. Finally, having a comfortable bend in your arms and legs, will allow you to be loose on the bike. Loose means you can let the bike move freely beneath you without affecting your position. Other than being low, balanced, and loose, you need to practice a few things to build your skills.


Skills

By bending your knees and elbows It is easy to get into a low position and absorb trail shock, while descending.

By bending your knees and elbows It is easy to get into a low position and absorb trail shock, while descending.

The number one skill is to ride in straight lines. While descending, you have more speed and less traction,therefore, trying to make hard or quick turns becomes increasingly difficult. When entering a descent, look ahead and setup as straight a path as possible, going over obstacles rather than around them. When you do plan to turn, try to control your speed before the turn and lay off the brake while making the turn. To do this, find areas that are smooth to apply the brakes and try to avoid skidding. Remember that if your wheels are skidding, you have lost traction and the ability to stop under control. Moreover, if your wheels are skidding, they will continue to skid even if the ground becomes smooth. An easy trick to help you brake comfortably, is to place your brake levers in an easily accessible place.

Bike setup

One trick that helps with position, braking and weight disbursement is a higher lever position. A common incorrect brake lever position is based on a normal seated riding position rather than the descending position. The levers should be set so that you can reach out and access them easily with your weight low and elbows bent. This will look higher than what you are used to (see image). The reason this is helpful is best explained by what happens if the levers are positioned incorrectly (low). If the levers are low, you will naturally roll your wrists over the bar when reaching for the brake. This lifts your weigh, locks your arms, and positions you too far forward.

Another way to get your weight low, is by installing a dropper post. Dropper posts allow the rider to remotely lower their saddle height. A lower saddle height lets you get your weight lower, easier. Once you need your saddle up again, just hit a button and its back in place.

Ride within your skills

I don’t encourage you to find the steepest, rockiest pitch to practice these skills on. When practicing these new skills, use descents of trail that you are comfortable with. The descents that you are already doing with relative ease are the places to practice new skills. Once you become comfortable with weight and position, try some new places and slowly work your way up to difficult terrain.

Learn How to Care for Your Bike Tires for a Comfortable and Safe Ride

Learn How to Care for Your Bike Tires for a Comfortable and Safe Ride

Tires are often overlooked, but wildly important in the safety and security of your next bike ride. Learning how to inflate your bike tires properly, review their condition, and fix flat tires is something every rider should know.

How do I use my pump?

The first thing about tire care is proper air pressure. Having too much air will result in a rough ride, while too little leaves you susceptible to pinch flats and poor control. The best way to inflate your tires is with a bike pump. To use a bike pump, it’s important to understand how the bicycle tire valves work, and what pump options exist.

-Valves?

Bike pumps are great because they typically work on both type of valves. If you aren’t aware, there are two commonly used valves. The American (or Schrader) valve is the most common. It’s the same valve used on car tires. It has a spring-loaded valve, that self-seals. The other common valve is a French (or Presta) valve. A Presta valve is narrower than an American valve and uses the pressure inside the tube to seal itself. It also has a lock barrel on the end of the valve to secure it shut. With the American valve, inflation is as easy as taking off the valve cap, attaching the pump and inflating. In Contrast, the French valve adds a step. First remove the valve cap, loosen the lock nut, then attach the pump and inflate.

-Hand Pump

The most economical and portable type of bike pump is a hand pump. Hand pumps vary in size from just a few inches long to almost two feet. They won’t fill a tire to pressure quickly, but for emergency repairs, they do a great job.

-floor pump

Floor pumps are by far the best option to inflate your bike tires. They are usually around 3 feet tall, work on both valves, and have a gauge that displays the tire’s pressure. While not portable, they are the quickest way to fill a tire.

-co2

Inflators use small cartridges usually filled with CO2 gas to quickly bring your tires up to pressure. They are great for emergency repairs, but at $2-3 per cartridge, they are too expensive for everyday use.

Tire condition

Before you inflate your tires, review their condition. There are a major concerns to be aware of like dry rot, tread wear, and sidewall wear.

-Dry rot

All tires are susceptible to dry rot. Dry rot is when rubber hardens, and cracks. It is caused by exposure to UV rays, O-Zone and Oxygen. As the bike tires age, they lose elasticity, durability, and traction. Typical signs that a tire is dry rotted is discoloration, meaning a normally black tire will appear grey. Additionally, you will notice small cracking on the tread to begin, and large cracking at later stages.

-Sidewall

Bike tires are built out of rubber impregnated fabrics. The rubber gives the tire durability, and the fabric allows the tire to conform over objects. Pay close attention to the sides of your tire for damage or “threading”. Damage would look like cuts, or punctures, while “threading” is when you see the rubber and thread separating, resulting in loose threads coming off the side of the tire.

-tread wear

The tire’s life is over when no more tread is left. On road tires, you can frequently see a difference in color once you wear through the tread. Mountain tires are a bit more difficult to call. For off road use, a tire stops functioning well once the tread wears down. This doesn’t meant he tire needs to be replaced for threat of flats, but t will stop functioning properly where traction is concerned.

What pressure should I run?

Tire pressure is usually called out on the sidewall of the tires somewhere. What you will see is a pressure range like 50-70psi. Follow those recommendations for best wear and ride quality.