Welcome. We're your premier source for fun places to explore by bicycle or on foot. Offering guides, maps and articles on road and trail riding for the novice to seasoned cyclist - helping you find your #NextBikeAdventure
To lead a fulfilling life, at any age, the first thing to do is fall in love with your mode of transportation you use to get around no matter the weather. Considering a bike commute as part of your daily routine, it might add a bit of brilliance to your next story as you share some of your successes and adventures.
Heading to work or running errands here are some tips to stay comfortable when riding not matter the weather.
View all the fun ideas and bike destinations in the latest Minnesota Bike/Hike Guide. Then plan your next outing with family and friends in one of Minnesota’s HaveFunBiking Destinations.
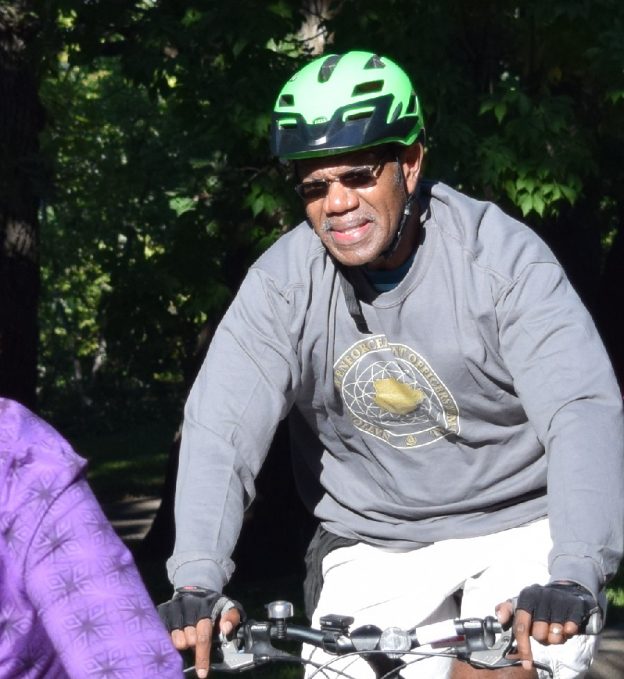
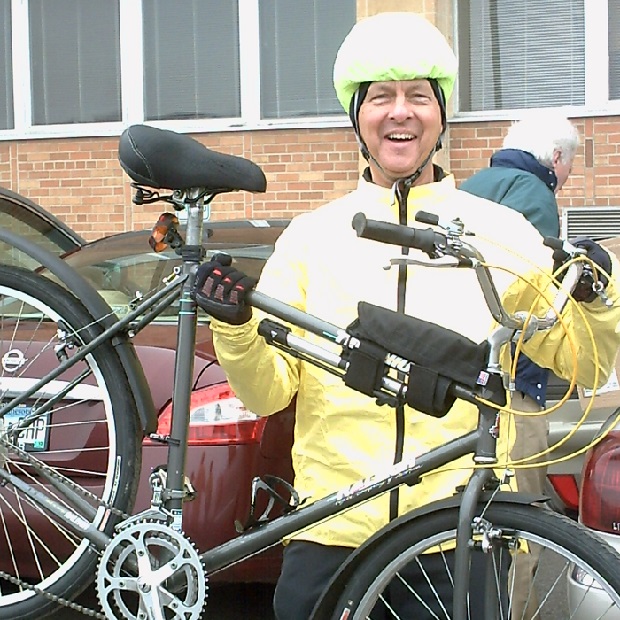
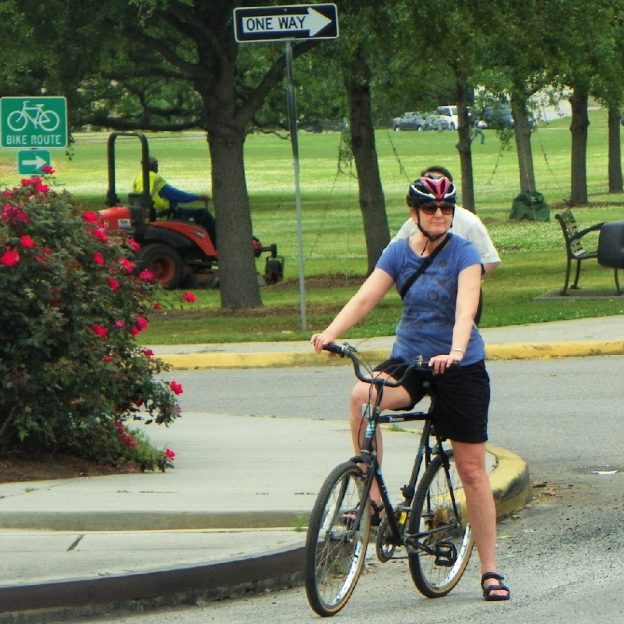
Thanks for Viewing Our ‘Commute’ Pic of the Day
We are now rolling into our 10th year as a bike tourism media. As we pedal forward our goal is to continue to encourage more people to bike and have fun while we highlight all the unforgettable places for you to ride. As we continue to showcase more places to have fun, we hope the photos we shoot are worth a grin. Enjoy the information and stories we have posted as you scroll through.
Do you have a fun bicycle related photo of yourself or someone you may know that we should post? If so, please send your picture(s) to: [email protected]. Include a brief caption (for each) of who is in the photo (if you know) and where the picture was taken. Photo(s) should be a minimum of 1,000 pixels wide or larger to be considered. If we use your photo, you will receive photo credit and acknowledgment on Facebook and Instagram.
As we continue to encourage more people to bike, please view our Destination section at HaveFunBiking.com for your #NextBikeAdventure – Also, check out the MN Bike Guide, now mobile friendly, as we enter into our 8th year of producing this hand information booklet full of maps.
Remember, bookmark HaveFunBiking.com on your cell phone and find your next adventure at your fingertips! Please share our pics with your friends and don’t forget to smile. We may be around the corner with one of our cameras ready to document your next cameo apperance while you are riding and having fun. You could be in one of our next Pic’s of the Day.
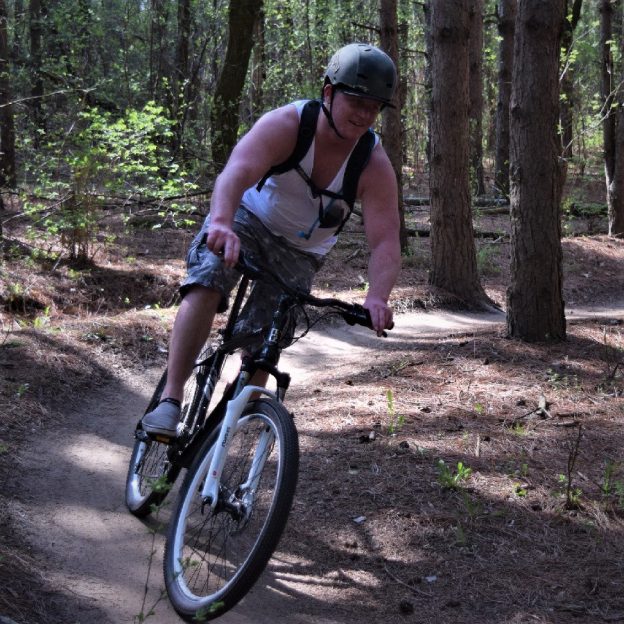
Back in the mountain bike saddle after a long holiday weekend, excited for the next challenge, here is our bike pic to start your week.
What better way to continue your summer fun and your #NextBikeAdventure. View all the fun ideas and bike destinations in the latest Minnesota Bike/Hike Guide. Then plan your next outing with family and friends in one of Minnesota’s HaveFunBiking Destinations.
Thanks for Viewing Our ‘Bike Pic’ of the Day
We are now rolling into our 10th year as a bike tourism media. As we pedal forward our goal is to continue to encourage more people to bike and have fun while we highlight all the unforgettable places for you to ride. As we continue to showcase more places to have fun, we hope the photos we shoot are worth a grin. Enjoy the information and stories we have posted as you scroll through.
Do you have a fun bicycle related photo of yourself or someone you may know that we should post? If so, please send your picture(s) to: [email protected]. Include a brief caption (for each) of who is in the photo (if you know) and where the picture was taken. Photo(s) should be a minimum of 1,000 pixels wide or larger to be considered. If we use your photo, you will receive photo credit and acknowledgment on Facebook and Instagram.
As we continue to encourage more people to bike, please view our Destination section at HaveFunBiking.com for your #NextBikeAdventure – Also, check out the MN Bike Guide, now mobile friendly, as we enter into our 8th year of producing this hand information booklet full of maps.
Remember, bookmark HaveFunBiking.com on your cell phone and find your next adventure at your fingertips! Please share our pics with your friends and don’t forget to smile. We may be around the corner with one of our cameras ready to document your next cameo apperance while you are riding and having fun. You could be in one of our next Pic’s of the Day.
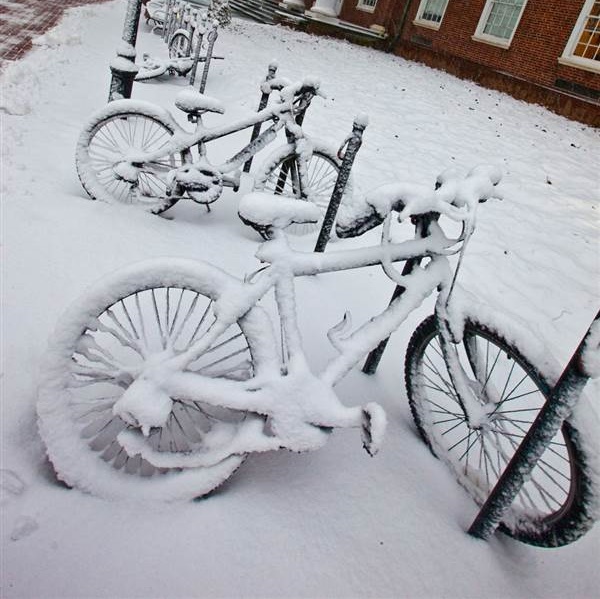
If you’re like the many people who ride bikes, you may have selected or been forced to use outside bike storage where your bicycle has to fend for itself in all the elements. It’s nothing to be ashamed of, especially since many people don’t have a place to store their bikes inside.
We mentioned in a previous article that if you’re unable to store a bike indoors, that you can usually find a nearby bike shop that can store your bike for you – especially through the winter. However, sometimes even this isn’t possible and outside bike storage is your only option. Perhaps there are no bike shops that offer that service nearby, or perhaps the cost in doing that would be out of your budget. Whatever the reason, here’s what you need to know to store your bike outside for a couple day or indefinable.
What Happens When You Use Outside Bike Storage for your Bicycle
As many can guess, bikes left outside in rain or snow can rust.
Newer bikes fare better in the outside elements because the seals on the bike’s components are tighter than on older or more worn bicycles. Being well-sealed allows it to block out moisture from making its way inside and corroding the bike from inside and out. Leaving these new bikes out for a few days or even a week might not be a problem. However, the longer it is left outdoors, the more problems the rider will see – this is especially true for older bikes. Older bikes can degrade faster since they have been weathered down over time.
What you can expect to see is rust forming on the chain and gears before affecting the rest of the bike. This can make the drivetrain brittle over time, and cause problems when shifting gears and riding.
We know rain and moisture can cause problems, but did you know humidity and heat can also be a problem? In the summer, keeping your bike in direct sunlight can cause problems in certain areas on your bike as well. The direct light can cause rubber and plastic to harden, leaving tires, seats, grips, and cable housing brittle.
Additionally, bikes that are left outside also run the risk of being vandalized or stolen. According to the National Bike Registry, over 1.5 million bikes are stolen every year with less than 3 percent being returned. Besides running the risk of corrosion, you run the risk of never seeing your bike again.
What You Can Do If Using Outside Bike Storage
Place a Bike Tent Over Your Bike
It’s not recommended to place a tarp directly on your bike because it can work like a green house, accumulating heat and moisture. Heat can affect your plastic or rubber parts and degrade them. When it’s cold or rainy, it can trap the water vapor. The moisture can then settle on your bicycle, corroding it.
A bike tent, however, allows a shelter from the elements, while also allowing air to circulate any moisture away. Bike tents aren’t expensive compared to some options and are generally easy to put together.
If your bike does get wet, wipe down the bike so the water doesn’t sit to long.
Lube and Grease Your Bike – Especcially with Outside Bike Storage
Place waterproof grease over areas that might be breached by water, such as screw holes, bolt heads, or bearings. The grease will create a barrier against water, stopping it from getting through. Lubing up your chain and other appropriate parts of the bike is also a helpful way to create a barrier from any moisture. Using a wet lube rather than dry lube is key. Dry bike lubricant will wash away easily and doesn’t provide any protection from corrosion.
Use the Bike
This doesn’t mean you should ride the bike outside during a blizzard. Instead, lift it up and turn the pedals. Moving it around can help with reducing rust. Over time, dust, dirt, or grime can get into the shifter and fine mechanical parts, so using the bike can knock this stuff off – especially if you’re riding it.
Remember, the salt from the road can affect the bike! Salt affects aluminum or alloy parts. So, if you take it for a spin, make sure to wipe down your bike afterwards and clean it.
Replacing Components to Last
Many factors affect how quickly and badly a bike can corrode. While storing a bike indoors is the best option, sometimes it’s not possible. Following the above steps should help minimize the buildup of rust. It can also limit mechanical problems that may occur.
Trying to limit corroding factors is the best you can do. Some people who know they will store bike outside under a cover or in a bike tent will opt to spend extra money to ‘upgrade’ their bikes. The bikes they tend to buy are already considered ‘durable’. Then, they change out parts to other materials that are less likely to rust over time. Some bikers also will opt for a ‘rustproof’ labeled chain. If this isn’t possible, then frequent bike maintenance and greasing is the way to go. This ends up being the key factor that many bikers rely on if they are storing their wheels outdoors.
Be aware, if you store your bike outside, there will be more maintenance required than if you stored your bike indoors. Keeping up with this maintenance might seem a little daunting, but it is well worth the effort. Why? Because come spring, your bike will be ready to go and have minimal rust and problems.
As the mercury hovers below freezing this is the perfect time for bike maintenance to prepare your bicycle for sunnier days. There are many benefits to bringing your bike into the shop during the ‘down’ winter months rather than waiting for the spring season to come around.
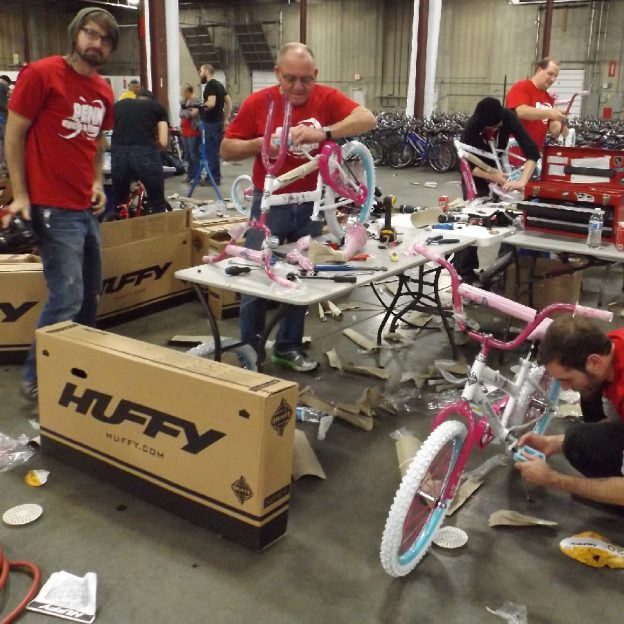
Here in the photo above these bike maintenance shop mechanic’s at Penn Cycle are waiting for your bike. While waiting they are putting bicycles together for Free Bikes 4 Kidz,
1. Bike Maintenance at the Shop
Most shops operate on a “first in / first out” repair schedule. This means during the busy months there may be weeks of bicycles ahead of yours in line to be repaired. Bring your bicycle in during the winter to be repaired. The repair time will be the same, but the waiting list will be shorter.
2. Discounts, Deals, and More!
The fall and winter weather may discourage riders from going out, but bike shops still need to do business. In order to draw customers, bike shops sometimes offer special pricing on different services, bikes, or parts. Additionally, lots of shops offer free clinics, demos, and presentations as well!
3. Employees can Offer their Expertise and Undivided Attention
It’s no secret that winter in a bike shop is slow. What better time to talk with sales people and mechanics? Need to know what bike type might work best for you? Is a fat bike right for you? Is that biking glove really better than the one you already have? If it’s a question about the service or adjustments to your bike, they are likely to spend more time with you and not be rushed.
The spring and summer packs the mechanics’ schedules, and their focus needs to be on completing repairs. During the winter they have much more time to spend with customers, educating them on how their bike functions.
Spring and summer for the sales staff is similar. They tend to be busy trying to attend to every customer in the shop. But in the fall and winter less people come in, so they can focus on one thing – you.
You’re all bundled up against the winter chill, and everything seems to be going well. Then suddenly something feels off. You look down and find you’re riding on a flat bike tire. It’s the last thing you want to deal with in the cold, but you always need to be prepared for it.
Why Are There Flats That Happen in Winter?
Flats happen for a variety of reasons. In general, there are three different types of flats. These are:
Punctures – Any time an object passes through the tread of the tire, it is considered a puncture. Usually the hole left in the tire is small enough where you can just replace the tube.
Slashes – This is when an object cuts the sidewall of the tire. Usually, if a tire is slashed it needs to be repaired or booted (a temporary patch on the tire itself) before a new inner tube can be installed.
Pinch flats (also known as a snake bite) – This happens when the tire hits a square edged object (curb, pothole, etc.) and the object “pinches” the inner tube between itself and the metal rim of the bicycle. This usually leaves two small holes in the inner tube (hence, snake bite)
No matter what season it is, these flats are common. A few reasons why flats happen to a large degree in winter:
Air pressure – Air pressure in your tire gets lower as the temperature drops. This means that a tire inflated at room temperature will have a much lower pressure when ridden near freezing. Lower pressures increase the possibility of pinch flats.
Hidden sharps – Running over sharp objects such as glass, nails, or metal that is hidden in the snow. Snow can buffer some of these objects from getting to your tires, but it can also hide these materials.
Tire flexibility – As the temperature drops, the rubber in tires typically become stiffer. A tire is built to deform over objects and absorb the impact. But when the rubber becomes stiff, the tire cannot deform as easily. This can make the tire easier to puncture.
Consider Other Tire Options for Winter
Many tire companies produce puncture resistant tires. Typically these tires will have a thicker rubber tread or use a belt under the tread designed to stop sharp objects. They also incorporate a reinforced sidewall to resist against slashes. Puncture resistance does come at a cost both financially and in the form of ride quality. Many riders will purchase these tires specifically for winter use and switch back to something lighter and better riding in the spring.
Another option is to use studded tires. Studded tires are usually built out to be puncture resistant as well as being the only option for traction on ice.
Know How to Change a Flat in Regular Conditions
First and foremost, you need to know how to change a bike flat. If you don’t know how to change a tire in the best of conditions, you probably won’t be able to do it out in the cold. Before taking the bike for a spin, take a few minutes to refresh your memory on how to change a flat if it ever happens to you.
Also, check out our article for six items to have along for your ride. These items are great to keep with you year-round.
Carry Gear to Change Your Flat Quickly
Working on your bike in the winter is a game of time – the longer it takes, the colder you get. With this in mind, pack tools and products that help you move quickly. A dedicated tire lever (rather than one that is part of a multitool or patch kit) offers a better grip and more leverage. A CO2 inflator will get you up to pressure and back riding in seconds while a pump could take minutes. Carrying a 4″ section of old tire with the beads cut off (a bead is the thick rubber portion of the tire that makes contact with the rim) can act as a quick tire boot in case you slash the tire. Most importantly, check the tire thoroughly for objects before putting the new tube in. Run your fingers on the inside of the tire, feeling for sharp objects, while visually inspecting the outside of the tire a few inches in front of your fingers.
Gloves with Good Movement, But Still Warm
This certainly sounds like a tall order! However, if you can, try to find good winter gloves that are able to keep your fingers nice and warm but also allows some dexterity. Numb fingers don’t help when changing a tire and can even hinder your ability to adequately fix your flat.
If all else fails, wear warm gloves, and if a flat occurs you can change your riding gloves for another pair that allows for more movement of your fingers.
Inspecting your Tires
Before heading out, check your bike’s tires. Inspect them carefully to ensure they are still properly inflated. Look to see if they have any nails, glass, or other debris that could puncture the tube. Check the condition of the tire by looking for cracks in the rubber, threads coming free of the sidewall, or tread that is worn.
Carry Good Walking Shoes
In case all else fails, make sure you have a good pair of walking shoes. Whether you’re already wearing them or they’re in your pack, it’s handy. Sometimes the only option you have is your own two feet. If you’re not too far away or you have to walk back to an area, good shoes are a must so you can walk the rest of the way!
Remember Your Phone
If something happens, you want to always have your phone handy. It’s cold out, and you never know when you might need to call for backup or to let a worried friend or family member know why you’re running late.
Sadly, flats are inevitable and can happen to anyone, anywhere. Even if you take all the right precautions and get puncture resistant tires, you can still find yourself sitting on the side of the road staring at a deflated tire.
Know how to repair a flat, and practice it at least twice. You will find the first time to be daunting, but the second to go quite quickly. Keep aware of your surroundings, know your route, and always be prepared.
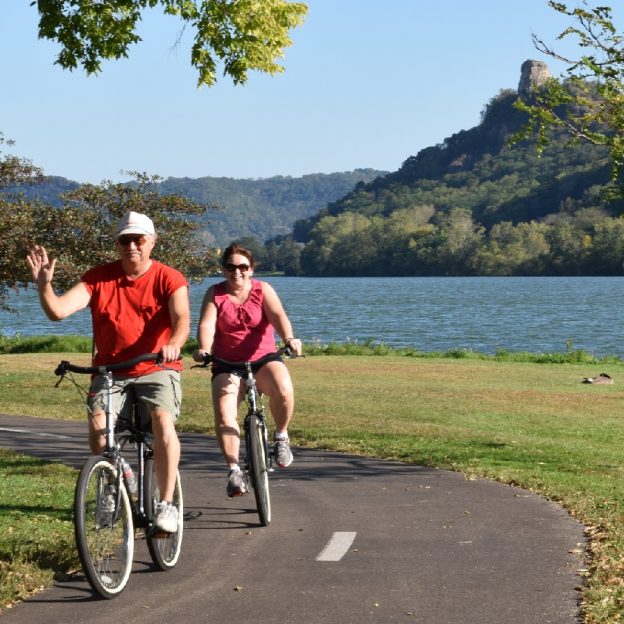
Miles of Sunday smiles while Biking on the trail around Lake Winona. A little cooler since this photo was taken this summer, in Southeast Minnesota, but its still a nice day to get one more ride in. The chimney rock in the background is a pinnacle on Sugar Loaf Bluff overlooking the City of Winona and the Mississippi River.
With the season changing, we hope you get out on your bike and enjoy some more fall riding possibilities. See many more bike-friendly places to explore in the new Minnesota Bike/Hike Guide.
Thanks for viewing the Sunday Smiles Biking Pic of the Day
Now rolling into our 10th year as a bike tourism media, our goal is to continue to encourage more people to bike and have fun. While highlighting all the unforgettable places for you to ride. As we continue to showcase more place to have fun we hope the photos we shoot are worth a grin. As you scroll through the information and stories we have posted, enjoy.
Do you have a fun bicycle related photo of yourself or someone you may know that we should post? If so, please send your picture(s) to: [email protected]. Include a brief caption (for each), of who is in the photo (if you know?) and where the picture was taken. Photo(s) should be a minimum of 1,000 pixels wide or larger to be considered. If we do use your photo, you will receive photo credit and acknowledgment on Facebook and Instagram.
As we continues to encourage more people to bike, please view our Destination section at HaveFunBiking.com for your next bike adventure – Also, check out the MN Bike Guide, now mobile friendly, as we enter into our 8th year of producing the guide.
So bookmark HaveFunBiking.com and find your next adventure. And don’t forget to smile, while you are riding and having fun. We may capture you in one of our next photos that we post daily.
Finding a Local Bike Shop with a Good Vibe to Fit Your Style
by Jess Leong, HaveFunBiking.com
Trying to find a local bike shop can seem daunting and more work than it’s worth. However, a great local shop that fits your needs can be invaluable as time goes on. When trying to find the right shop you need to consider what you value most. Is it a knowledgeable staff person, a great selection, great or quick service, or etc?
Friendly bike shop store front, showing accessibility and community involvement, is like a welcome mat inviting you in.
Everyone, from beginners to experienced cyclists, can find that choosing a bike shop can be a tough decision, especially with many shops in a given area. While confident and knowledgeable staff members are important – we all want advice from experts who know what they are talking about. But other factors should also be considered.
Stepping into a bike shop can be overwhelming, but it is a necessity to find the right fit for you.
Key Factors to Consider When Checking Out a Bike Shop:
Knowledgeable Staff
Knowledgeable staff members that can give reliable advice and speak in a way that you can understand is key. If they are using words that may be unfamiliar to you or are not willing to clearly explain it, this might not be the shop for you. They should know what they’re talking about. If they don’t know the answer, they should be willing to find the answer out for you. Even experts can get stumped on good questions!
Friendly and Reliable Staff
Knowledgeable bike shop staff, not afraid to do a little research for you, is the key to a great experience.
Expect friendly and reliable staff members at the shop you visit. You should feel comfortable approaching and asking all of your biking questions – no matter how stupid you might think a question is. (There is no such thing as a ‘stupid question.’ So, feel free to ask away!) Additionally, these staff members should be people you can rely on for your biking needs. If they aren’t focused on what you’re there for and are pushing products at you that you don’t really need, then this can be a deal breaker. You want people – at least a mechanic – who love and understand bikes. After all, you need to feel comfortable in entrusting them with your wheels.
Product Options
A decent range of products should be within the shop, unless they are a specialty shop. You want to have options and be able to look at different items and products within the shop so you can find the best fit for you – if you need it.
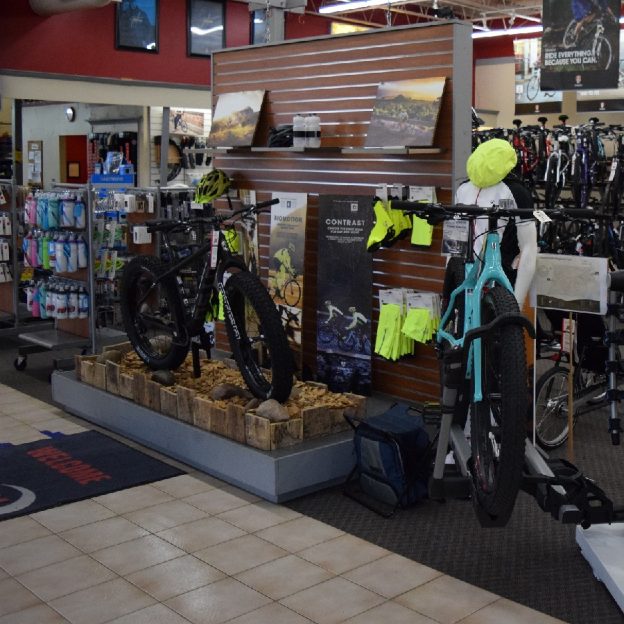
Most bike shops have a large assortment of accessories and essentials to make your #nextbikeadventure memorable.
A good bike shop will have a large assortment of cycling accessories and other essentials to make your #nextbikeadventure memorable.
Quick or Reasonable Repair Timeline
Having a bike shop mechanic who is knowledgeable and enjoys his work is an added plus.
When a problem arises with your bike, you want it repaired in a quick manner so we could get out riding again, as soon as possible. No one wants to wait weeks for their bike to be repaired. A quick, or at least reasonable, repair time might be what’s most important for you.
Shop Hours that Work for You
Reasonable hours that work for your schedule is something you can easily find out without ever going to the store. Today, you can look up stores online to find their hours and see if it will work for you.
Some bike shops are open only on the weekend, others are open from early morning and close by 5 p.m. or earlier, and yet others might be open late into the evening. Depending on what works for your schedule, this can help eliminate potential bike shops. If you have a job from 8 a.m. to 5 p.m. every day, a bike shop that is only open during the weekday during that period of time might not be the best fit.
Customer Satisfaction
A good shop will check in with the rider and ask them asking how they are. If a relationship is built they will ask about a product the rider might have bought. If a mistake occurs, the shop will work with the rider to try to correct it, or apologize.
It is important to note that while a bike shop might be perfect for one person, it may not be the ideal bike shop for another. While many bike shops have knowledge of different types of biking styles, some will have more specific knowledge of a particular type. In other words, every bike stop has different vibe and it just depends whether or not it suits you.
Tip: To save time, many riders would suggest checking on websites that rate bike shops to find ratings of their service, what they may offer, and if they are worth looking into.
Don’t lose heart, if after researching the first bike shop you discover it isn’t ideal for you, visit the next one. Many times, riders need to visit several shops, and sometimes go through a service or two, before finding the perfect fit for them.
Finding the shop that is best suited for you might take some time, and that’s okay. It’s worth it because if you ever have questions or your bike needs repair, they got your back. Plus, it ensures good service and fewer problems in the future.
Did your favorite bike shop make America’s Best Bike Shop list?
The National Bicycle Dealers Association has recently published its 2016 list of America’s Best Bike Shops. Retailers who made the cut this year not only offer great shopping experiences and expert staff, but are also rated on dedication to their communities and support for bicycle advocacy locally and nationally. See here if your bike shop made the cut.
In Review
Less hassle, better vibes is something we can all get behind. Happy shopping!
Cutting Through Bike Grease: Avoiding a Chainring Tattoo
by Jess Leong, HaveFunBiking.com
The accursed chainring tattoo is something that many bikers – whether a beginner or not – has experienced. While known as a ‘noob’s problem’ (a newbie or beginner’s problem), even experienced riders have had their fair share of chainring tattoos.
What is a Chainring Tattoo?
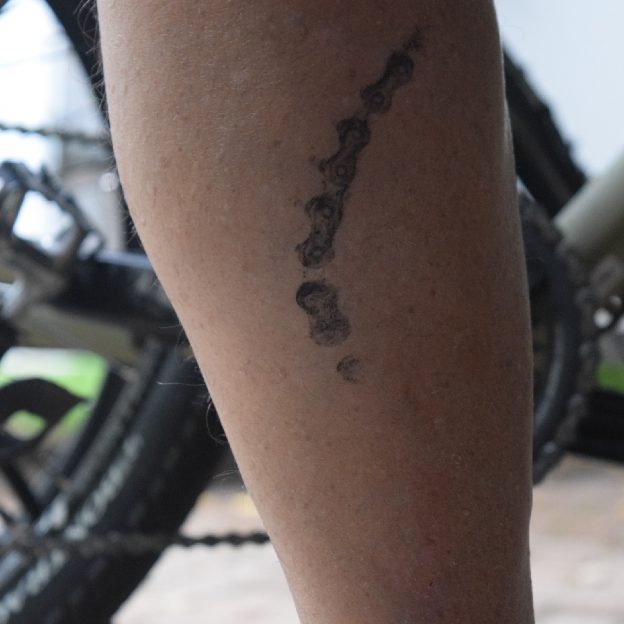
Characterized by the ebony spikes reminiscent of the triangular rays drawn on a sun picture, the design is made from oil and grease. Oil, grease, and debris can gather in the various components of a bike’s chain, cassette, and chainring. When this builds up, it can spill over and a calf can touch it.
The chainring tattoo is coined as such because the grease can be annoying to remove. How does this happen? It occurs when the rider accidentally presses their leg against the side of the bike where those components are. This generally happens at stoplights or stop signs when a rider puts down their leg to brace themselves, but the leg isn’t far enough from the bike. The leg may bump or touch the bike’s side and its very own tattoo.
Why is it Called a “Newbie’s Problem” Tattoo?
Plenty of seasoned riders and pros can be seen supporting a chainring tattoo if one pays close enough attention. However, generally it is considered a “Beginner’s Problem” because many riders learn tricks or find a method that works for them to avoid having their leg touch the bike’s chain, cassette, or chainring. It takes practice and experience, but sometimes that doesn’t even save their calves.
Rest assured that while beginners may seem to get it more often, there are seasoned riders and pros that can still be affected – you just might not notice it!
Having a chainring tattoo just marks you as a rider – and some people go so far as to actually get an ink tattoo. For those riders, the tattoo will stay with them forever as a tribute to how much they love riding their bikes. As some riders say: It’s a mark of a true cyclist.
What’s the Easiest Way to Remove it?
Since it is grease, regular hand soap and water isn’t likely to remove the tattoo from your calf. Instead, opt for some dishwashing soap, water, and a rag or paper towel. Dishwashing soap generally is made with surfactants to remove grease. While different dish soaps can vary in effectiveness to cut through grease, they still work well for us cyclists. Plus, they’re safe to use!
A bicyclist with a dirty bike chain can easily experience a chainring tattoo.
Additionally, you can also use olive oil or baby oil to remove the chainring tattoo with ease. Some riders will either leave the grease on their calves until they return home. Others will carry around some wipes and oil to help remove it on the go.
How Can I Avoid Getting the Tattoo?
Besides trying to avoid touching your leg to your bike when stopping or getting off/on your bike, there’s a few options that other cyclists have been throwing around and some have found useful.
Use dry lube rather than wet lube: There is a much lower chance of getting grease stains because dry lube is a lighter lube and therefore isn’t as sticky. Wet lube – what most use for bike maintenance – is known to be a lot stickier. It, therefore, picks up more debris while one is riding their bike. The downside with dry lube is that it tends to need to be put on more frequently and since it is a light lube, it is easily washed away if it gets wet, whereas wet lube would not wash away and has more ‘staying’ power. Dry lube should be used in drier times/climates whereas wet lube should be used in wet locations. Either way, make sure not to layer the two lubricants on one another. Also, always remove excess lubricant to reduce buildup of grease.
Clean your chain, cassette, and chainring fairly often. The reality is that grease, debris, and oil builds up: Cleaning your bike chain can be a hassle, but it is something worth doing. It keeps the bike lifespan long and gives less grease marks! Check out our article for information and tips on how to clean your bike chain in 5 simple steps.
Chain guard: This puts a physical barrier between you and the culprit. It ensure that your leg doesn’t touch any of the components that can give you a grease tattoo.
Can’t Avoid it? Cover it Up!
Roll up your pants legs: This won’t necessarily stop you from getting the grease on your calves, but at least it won’t be on your clothing. Plus, after you get to where you’re going, you can roll down those pants legs and cover up any tattoos. It’s like they were never there!
Cleaning your bike chain and crank ring will help in avoiding a chainring tattoo.
Whether or not you decide to support the chainring tattoo with pride or want to cover it up, don’t let it get in the way of your next bike adventure. HaveFun and just Ride On!
Thanks for viewing the Bike Pic of the Day here at HaveFunBiking (HFB).
Now, rolling into our 10th year as a bicycle media, our goal is to continue to encourage more people to bike, while showcasing unforgettable places to ride. As we search and present more fun photos worth a grin, scroll through the information and stories we have posted to help you find your next adventure. Then, while out there if you see us along a paved or mountain bike trail, next to the route you regularly commute on, or at an event you plan to attend with your bike, be prepared to smile. You never know where our camera’s will be and what we will post next!
Do you have a fun photo of yourself or someone you know that you would like to see us publish? If so, please send it our way and we may use it. Send your picture(s) to [email protected] with a brief caption (of each), including who is in the photo (if you know?) and where it was taken. Photo(s) should be at least 620 pixels wide for us to use them. If we use your photo, you will receive photo credit and an acknowledgment on Facebook and Instagram.
As HaveFunBiking continues to encourage more people to ride, please reference our blog and the annual print and quarterly digital Bike/Hike Guide to find your next adventure. We are proud of the updated – At-a-Glance information and maps we are known for in the HFB Destination section on our website and in the guide. Now, as the Bike/Hike Guide goes into its seventh year of production, we are adding a whole new dimension of bicycle tourism information available for mobile devices where you may see some additional bike pics – maybe of yourself so.
Bookmark HaveFunBiking.com and find your next adventure – we may capture you in one of the next photos we post.
The Banjo Brothers Waterproof Saddle Trunk is a versatile bag that I have come to love. I have put it to the test it in all types of weather on the fatbike and my road bike. One of the things I like most is it gives me that extra carrying capacity without having to install a rack for a trunk bag. This bag has a big 400 cubic inches (12.5” L x 7” H x 8.5” W) of space to carry hat I need for those longer rides or commutes to work.
Installation is easy and only takes a few seconds. With two straps that attach to the seat post and two more that secure to the saddle rails, it stays in place even when fully loaded. Depending on the load of the bag, the saddle rail straps and the flap closure can be adjusted for a snug fit.
The outer pocket on the back flap of the Saddle Trunk is nice for little things like keys, money or a multi-tool and tire levers. There is even a spot to attach a tail light.
The “waterproof” part of this bag is made possible by a replaceable welded liner. I have been caught in the occasional downpour and my gear didn’t get wet, even without fenders. This proved invaluable when commuting to work and arriving with a dry change of clothes.
I found this bag especially useful for rides on the fatbike in the fall and winter. It came in quite handy on those cool morning rides that turn into warm afternoon rides. The compartment is big enough for me to ditch the jacket and gloves to continue riding without overheating. Other items like goggles, pogies/gloves, snacks and extra water bottles easily fit into the Saddle Trunk so I was always prepared for changing weather conditions or an all day ride. The waterproof qualities of the Saddle Trunk made sure my items stayed dry on warmer days where slush and puddles are common.
My overall impressions of the Waterproof Saddle Trunk is, it’s a quality bag at a reasonable price that keeps my items dry and has the extra storage space I need. What more could I ask for?
With easy on and off installation it is very convenient to use with multiple bikes making it a flexible bag choice. Along with the Banjo Brothers Frame Pack, it is standard equipment for all my long distance gravel/road rides also.
The Banjo Brothers Waterproof Saddle Trunk is available from the Banjo Brothers Online Store, Penn Cycle and other fine bike shops.