One inevitability of riding a bicycle is that you will get a flat tire. With a little practice and planning, you can fix a flat tire, and finish your ride. To be prepared, you will need a few tools and you should practice how to fix a flat on your bicycle at home a few times to get it down. Read below for a step by step on how to change your first flat.
Needed Items
To easily fix a flat tire be sure to carry the following items:
Pump
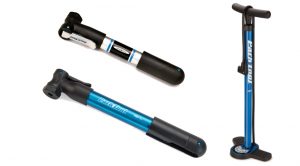
Pumps come in many shapes and sizes. Most are portable in a jersey pocket or on the bike. Be sure to look for a pump that is capable of meeting your tires pressure.
Tube
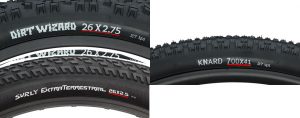
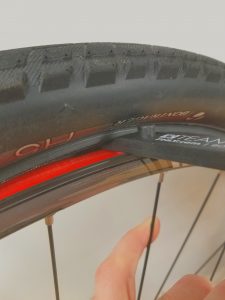
Tubes are sized specifically to tires. Find the right size tube for your bike by looking on the sidewall of your tire. Common sizes are 700×23 and 26×2.1″. Tire sizes above are underlined in red. Tires size may also be molded into the sidewall of the tire.
Patch kit

Patches seal small holes in innertubes. There are glueless versions and versions that require glue.
Tire lever
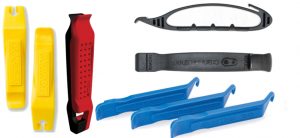
Tire levers come in many shapes and colors, but almost all of them include the same features – A shovel shaped end to scoop the tire bead off the rim, and a hooked end to secure the lever onto the wheel.
FIX A FLAT: Getting Started
The first step to fix a flat is to remove the wheel from your bike. Consult your bicycles owner’s manual for the proper way to remove the wheels.
Begin by removing all the remaining air from the tire. Depress the valve while squeezing the tire until all remaining air is out. Also try to push the bead of the tire into the rim well, doing this will make it easier to remove the tire from the rim.
Taking the Punctured Tube Out
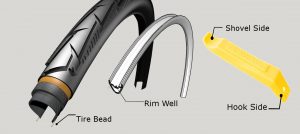
Tire, Rim, and Tire Lever Terminology
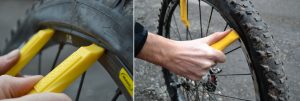
With the wheel in one hand and the tire lever in the other, try to position the shovel end of the tire lever under the bead of the tire. (see picture below)
Once the lever is positioned beneath the tires bead, push the hook side of the lever down (using the rim as the fulcrum) and lift the tires bead. Once you have lifted the bead with the tire lever, you should be able to push the lever around the perimeter of the rim, freeing one bead from within the rim. (See Video)
Some tire and rim combinations are too tight to allow this method. If you can’t make headway pushing the tire lever around the rim, use the hook side of the tire lever to capture a spoke. Use a second tire lever a few inches away from the first to remove the bead, the bead should be loose enough to remove easily at this time (see pictures below).
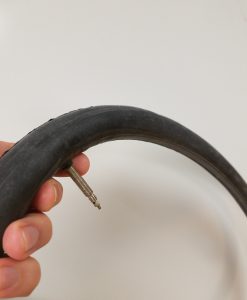
Remove the innertube and either patch it or take out a new one. Before installing a new innertube, run your fingers along the inside of the tire while inspecting an area a few inches in front of your fingers.(See Video)
You are looking for the object that caused the flat. You won’t always find something in the tire, either it fell out, or stayed in the road.
Installing a New Tube
When putting the innertube back in the tire, inflating it a little helps. Add enough air to give the tube shape, but not so much that it doesn’t fit into the tire
Start by putting the valve through the valve hole in the rim, then feed the rest of the tube into the tire.
Once the tube is in the tire, begin moving the tube into the rim well.
Begin at the valve, and feed the tire bead back into the rim well. It will be easy to get the bead moved over the edge of the rim initially, but will get progressively more difficult as you get farther away from the valve. It is normal for the last few inches of bead to be the most difficult to seat, don’t get discouraged and don’t attempt to use a tire lever to put the bead back. Tire levers can pinch and puncture innertubes. Instead of a tire lever, use your thumbs and the heel of your palm to force the bead back onto the rim. (See Video)
Once the tire and new innertub are reinstalled begin airing the tire up. Once there is a small amount of pressure in the tire, check to see if it is seated properly. A quick spin usually tells you visually if everything is even. (See Video)
If you are sure the tire is seated evenly, bring the tire up to pressure completely. Tire pressures are usually marked on the sidewall of the tire if you aren’t sure of how much to put in. Put the wheel back into the bike, reengage the brake, and you are off.