Category Archives: Riding Tips

Take a look below at some of the most common and damaging cycling mistakes and solutions made by newbies and seasoned riders alike.

Solve common cycling mistakes easily for more fun

by John Brown, Brown Cycles

Mistakes are something humans can’t escape, but nobody is perfect. That said, we can try to eliminate some of the simple errors we may make without ever realizing we are proceeding down the wrong path. Consider taking a look below at some of the most common and damaging cycling mistakes made by newbies and seasoned riders alike.

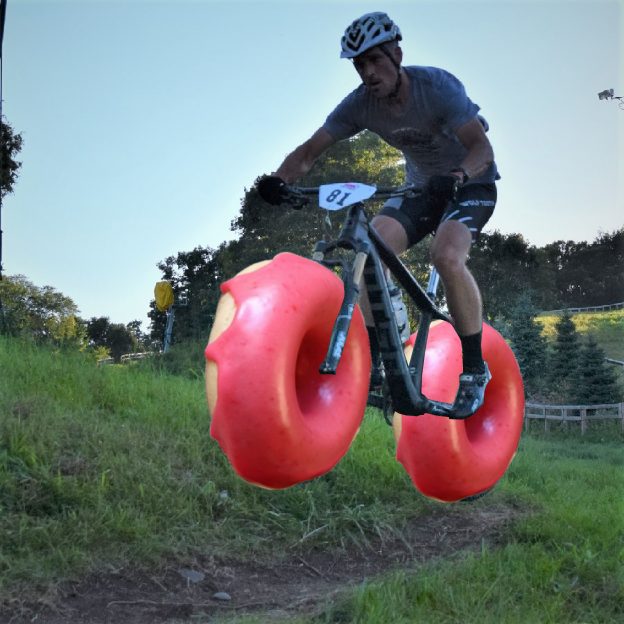
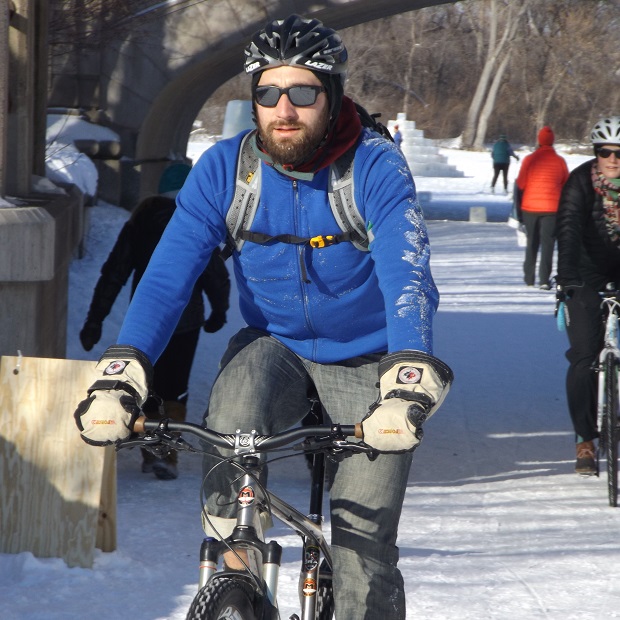
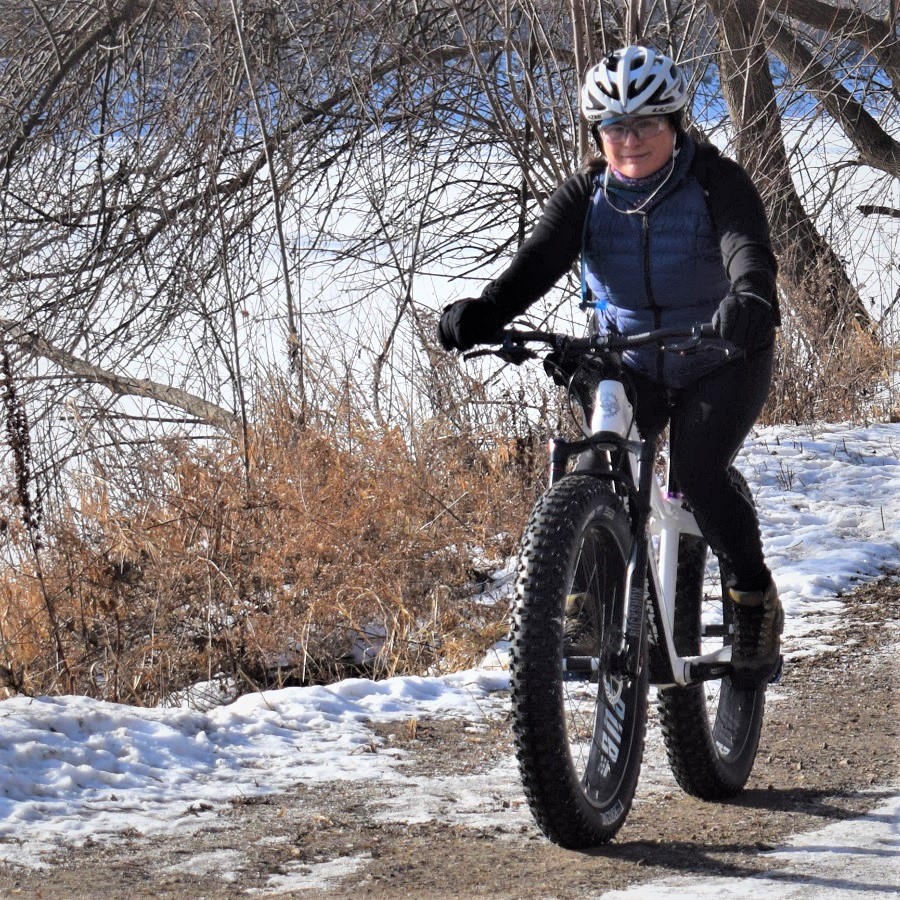
Cycling Mistakes #1 – Wear your helmet only when you think it’s needed

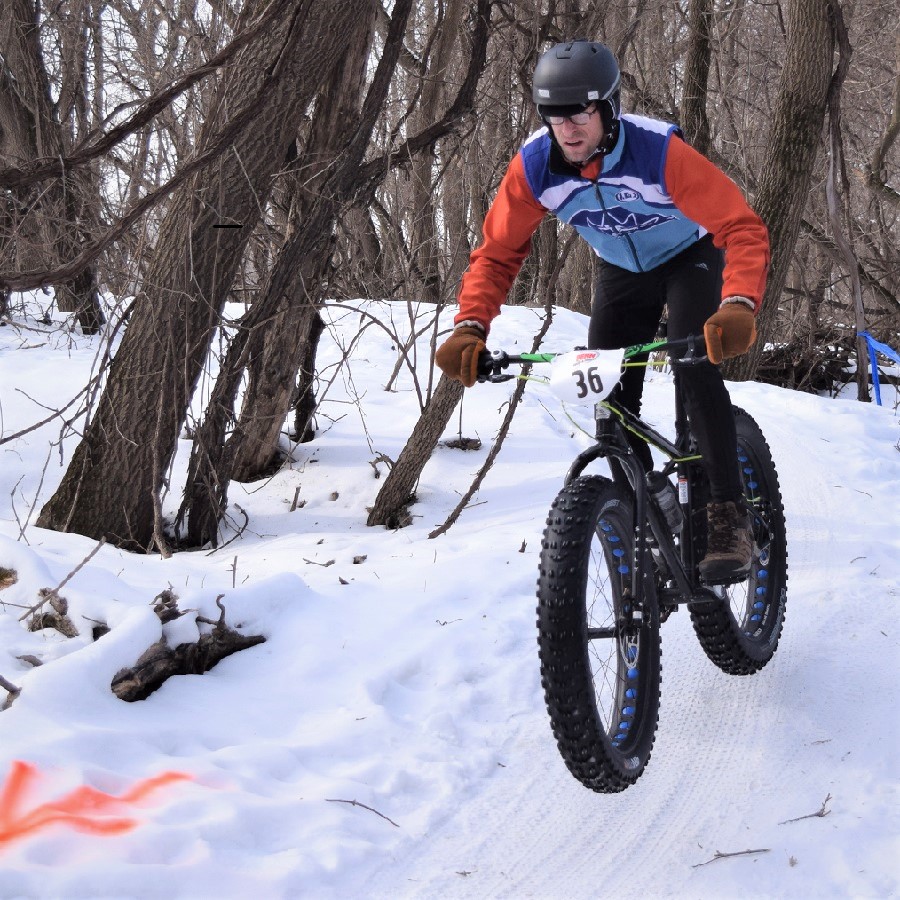
Many riders make the mistake of thinking “I don’t need to wear a helmet, I’m only going around the block with the kids”. This mentality is often responsible for catastrophes. The truth is you never know when an accident can happen, so you should always be prepared. For example, the worst crash I have ever had was riding from a campsite, down a straight gravel path to the washroom. Before I knew it, I was smack dab on the ground faster than I could get my hands up to catch myself. The moral of the story Is to wear your helmet whenever you ride your bike.

mistakes

Helmets are always in style

#2 – Believing you have plenty of air in the tires without checking

Frequently, I see riders headed down the trail with tires so low you can hear the rim bouncing off the ground with each pedal stroke. Low tire pressure can lead to pinch flats and, more importantly, loss of control. The innertube that holds the air in your tire is naturally porous and loses air naturally over time. In fact, a tube can lose between 3-5 PSI a day. At its extreme, your tire could go from full pressure to less than half pressure in the span of one week. Be sure to protect your ride by checking tire pressure before each ride.

#3 – Lube the Chain After Every Ride

Believe it or not, an over-lubed chain is more damaging than an under-lubed chain. While I do not recommend riding around with a dry chain, knowing when to lube is essential. Having a ton of lube on your chain will not better protect it. In fact, too much lube will attract dirt and debris, creating a harsh slurry that covers and wears your drivetrain. The best way to lubricate your chain is to apply lube to the chain, allowing it to soak in for a minute, and then use a rag to wipe off as much excess as possible. When done, the chain should feel almost dry to the touch.

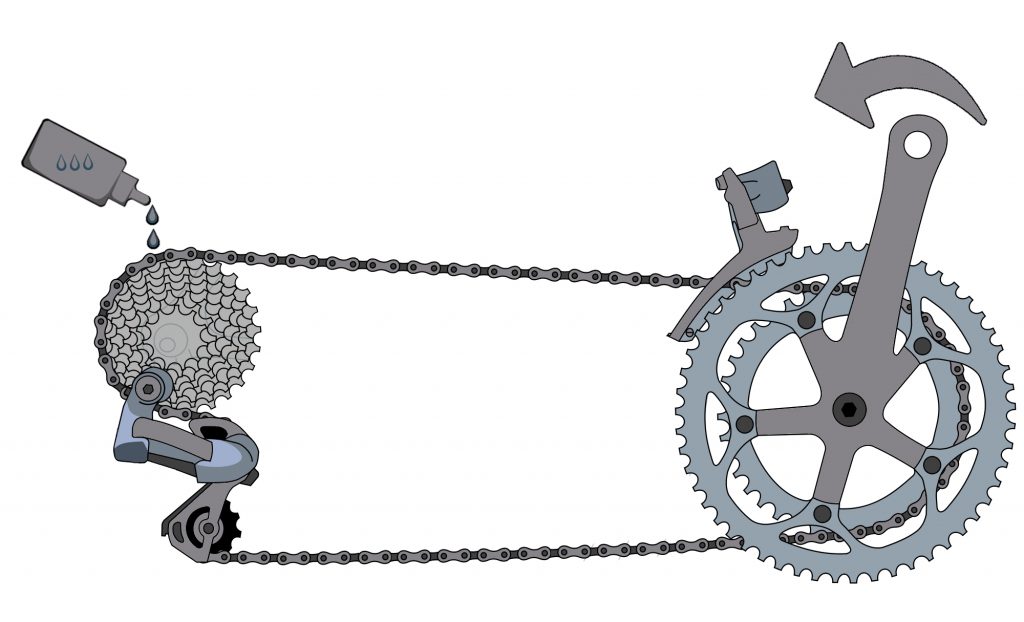
The right amount of lube is a great thing

#4 – Use the water hose to clean your bike

After a dusty or wet ride, many riders reach for the hose to spray dirt off the bike. Sadly, while the bike may look clean, it will be in worse shape than if it hadn’t been cleaned at all. Pressured water from a hose can displace grease and leave nothing behind. Now, with no grease, the bike wears out at an accelerated rate. Instead of using a hose, try a warm bucket of soapy water and a big sponge.

#5 – Bring water along only on some rides

Many times, riders will assume that because the weather is cool or a ride is short, they don’t need to bring water with them. Truth be told, the biggest drain on your energy while riding can be related to dehydration. Stay hydrated by bringing water or a sports drink along on all rides.
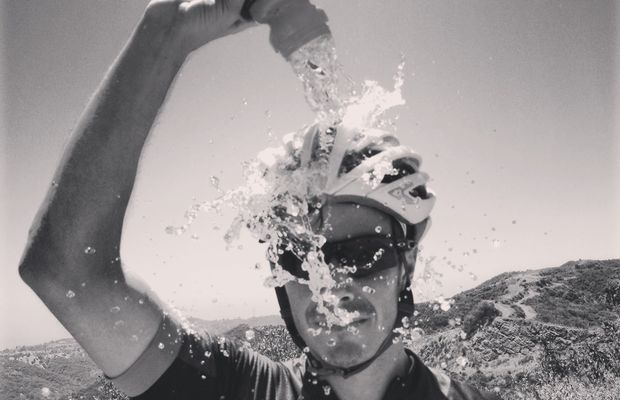
mistakes

Yay, Water!

#6 – Assume cycling shoes are only good for clipless pedals

If you don’t want to ride clipless pedals, I get that. There are many reasons clipless pedals are great, but at least as many reasons why they aren’t suitable for everybody. What you can do is use a cycling-specific shoe with your flat pedals. A cycling shoe has a stiff sole and additional arch support to disperse pedaling forces over the entire length of your foot. Therefore, you have more efficiency and less discomfort.

Mistakes in general

Overall, thinking about what you are doing before you ride your bike is a good idea. Make sure your bike is ready for the ride, be equipped to take care of yourself during the ride, and be prepared to reach out for help if needed. Once you go through that mental exercise, you will see the common cycling mistakes melt away. Have Fun!

About John Brown, the author

John operates Browns Bicycle in Richfield, MN as a lifelong cyclist and consummate tinkerer. It all started for him in grade school when the bike bug bit, and the fever still existed. Now, and over the past thirty years, he has worked at every level in the bike industry. He is starting, like most, sweeping floors and learning anything he can about bikes. He eventually graduated as a service manager and then as a store manager. Through the years, he has spent extensive time designing and sourcing bicycles and parts for some of the largest bike companies in the world. All the while focusing on helping as many people as possible enjoy the love of riding a bike. In that pursuit, he has taught classes (both scheduled and impromptu) on all things bikes. John also believes in helping every rider attain their optimal fit on the cycle of their dreams. Please feel free to stop in any time and talk about bikes, fit, and parts, or share your latest ride. You can also see John’s tricks and tips on the Brown Bicycle Facebook Page.
I recently spent some time in Philadelphia. While there I enjoyed a few rides, but the most enjoyable one was Trek of Philadelphia’s Doughnut Ride.

Add a casual doughnut ride to 30 Days of Biking in April

by John Brown

Recently I spent some time in the cradle of liberty, Philadelphia. While there, I enjoyed a few rides, but the most enjoyable one was the Trek of Philadelphia’s Doughnut Ride. I was reminded of the joys of simple rides and good company, rather than difficult efforts and a competitive pace. Now, with 30 days of Biking a few weeks away, here is a fun idea you may want to consider with friends, as warmer weather moves our way soon.

The Doughnut Ride of Philly

We left the shop with a group of eight. Our bikes were a mishmash of road bikes, commuter rigs, single-speed, and an e-bike. When we departed the shop and headed toward the center city, it was immediately clear the pace would be conversational. Our cruise headed out on the river drive bike path, through Fairmount Park, and toward the center city. Rather than stay on the path, we crossed the Falls Bridge onto West River Drive. On the weekends, Philadelphia closes West River Drive so we had our run of the entire roadway. After a bit of riding and a lot of talking, we found ourselves at the end of West River Drive and at the base of the Art Museum.

At the Art Museum, our ride began to slip through the surrounding neighborhoods until we reached our hallowed destination – Federal Doughnuts.

We hopped back on our bikes after stuffing our faces with warm doughnuts. Full of sugar and fat, we returned to the bike shop along the same route. Ultimately, the ride took under two hours, including the time spent eating. Everyone had fun, the conversation was great, and we all got the chance to meet new people.

Why does this ride work?

The ride was great because the pace and route were clearly stated in advance. Therefore, everyone knew what to expect and where to go. The route itself was carefully chosen to promote great conversation and a casual pace. Every rider could enjoy the trip stress-free by including traffic-free paths and streets and a casual destination. Additionally, the pace is controlled by the ride’s start time. For example, a competitive-minded rider has a list of fast-paced rides leaving on Saturday morning, so there would be no need to come to the Doughnut Ride to try and get a killer workout with so many other options. From start to finish, this ride is a winner.

How to plan your ride

If you already lead rides for a local club or shop, setting up a casual ride should be easy. If this is your first attempt at leading an organized ride, then there are a few things to remember. First off, you want people to be at your ride! To ensure you have attendees, start talking about and advertising (if you’re working with a local club or shop) at least two weeks in advance. Also, ensure all your information explains the pace and payoff (in this case, doughnuts) for your ride to build interest. Finally, make sure your route is friendly to a group of riders. For example, I’ve been on a few rides requiring riders to be single-file almost the entire time due to narrow roadways. in contrast, the Doughnut ride promoted conversation with wide paths and clear roads.

According to Paul T. at Perennial Cycle, Minneapolis does a great job with these types of rides and has a lot of them. Watch for the upcoming events there this season.

About John Brown, the author

John operates Browns Bicycle in Richfield, MN as a lifelong cyclist and consummate tinkerer. It all started for him in grade school when the bike bug bit, and the fever still existed. Now, and over the past thirty years, he has worked at every level in the bike industry. Starting, like most, sweeping floors and learning anything he could about bikes. He eventually graduated as a service manager and then as a store manager.  Through the years, he has spent extensive time designing and sourcing bicycles and parts for some of the largest bike companies in the world. All the while focusing on helping as many people as possible enjoy the love of riding a bike. In that pursuit, he has taught classes (both scheduled and impromptu) on all things bikes. John also believes in helping every rider attain their optimal fit on the bike of their dreams. Please feel free to stop in any time and talk about bikes, fit, and parts, or just share your latest ride. You can also see more of John’s tricks and tips on the Brown Bicycle Facebook Page.
The best way to stay dry is to wear waterproof clothing. While most synthetic fabrics still insulate when wet, being wet diminishes their ability to keep you warm.

Waterproof clothing is a surefire way to stay comfortable

by John Brown, HaveFunBiking.com

With spring approaching, staying dry is the most critical and challenging part of biking or hiking in the rain and snow. The best way to keep warm and dry is to wear waterproof clothing. While most synthetic fabrics still insulate when wet, being damp diminishes their ability to keep you warm. Therefore, a waterproof jacket and pants are a great way to start, but waterproof socks and gloves complete the outfit. While many materials are naturally waterproof, once perforated with stitching, zipped closed with generic zippers, and left to be loose at all the cuffs, their waterproofing goes out the window. Before you go out and buy anything labeled “waterproof,” read on to understand that all waterproofing is not the same.

Waterproof Clothing and Gear for Staying Dry

To keep water out, look for waterproof clothes with sealed or welded seams (see image). Also, look for waterproof zippers (pictured) or large flaps that prevent water from driving through the zipper. Make sure all the cuffs are adjustable enough to be snuggled tight against your skin.

Examples of cycling clothes with taped seams (Left), welded seams (Center), and a waterproof zipper (Right)

A waterproof garment is measured in mm of fluid. For example, a fabric that was 5,000  mm waterproof is tested as follows. The fabric is placed over the end of a long tube. Following that, the tube is filled with 5,000 mm of water and the fabric needs to support the pressure without leaking. Take a look at the table below for a quick reference.

RatingResistanceWeather Conditions
0 mm – 1,500 mmWater-resistant/snowproofDry conditions or very light rain
1,500 mm – 5,000 mmWaterproofLight to average rain
5,000 mm – 10,000 mmVery WaterproofModerate to heavy rain
10,000 mm- 20,000 mmHighly WaterproofHeavy rain

 Breathe Sweat Out

In addition to measuring waterproofness, textiles are also measured for their ability to breathe water vapor out. Breathable means that water vapor (sweat) your body produces can escape through the fabric. Breathable fabrics work because water vapor is smaller than water droplets. To breathe, the material will be perforated with holes small enough to stop water droplets from getting in, but large enough to allow water vapor to escape.

Breathability is important because, as far as insulation is concerned, it’s just as bad to get soaked with sweat as with rain. Therefore, using a breathable material in tandem with base layers designed to pull moisture off your skin is a surefire way to stay dry and warm.

Breathability is expressed in terms of how many grams (g) of water vapor can pass through a square meter (m2) of the fabric from the inside to the outside in 24 hours. To that effect, the larger the number, the more breathable the fabric. For example, in a coat with 5,000 gsm breathability, 5,000 grams of water pass through a square meter of the fabric.

Waterproof even when it isn’t raining

During the spring thaw, snow melts during the day and freezes again at night. In my commutes, during the thaw, I focus on wearing waterproof clothing to keep warm. The rivers of salty water I end up riding through would soak any non-waterproof clothing rendering it useless.

When Waterproof is Not Important

As the temperature rises, waterproofing becomes less and less important. It’s less important because, at a certain temperature, waterproof materials cannot breathe enough to keep you dry. Therefore, if it rains hard enough and it’s warm enough, you will get wet.

In the spring and fall, be sure to have your waterproof gear ready. The cool temps and wet conditions can be very dangerous if you aren’t prepared. Being dry is the #1 way to maintain comfort and safety while riding in inclement conditions.

About John Brown, the author

As a lifelong cyclist and consummate tinkerer, John operates Browns Bicycle in Richfield, MN. It all started for him in grade school when the bike bug bit and that particular fever is still there. Now, and over the past thirty years, he has worked at every level in the bike industry. Starting, like most, sweeping floors and learning anything he could about bikes. He eventually graduated as a service manager and then to a store manager.  Through the years, he has spent extensive time designing and sourcing bicycles and parts for some of the largest bike companies in the world. All the while focusing on helping as many people as possible enjoy the love of riding a bike. In that pursuit, he has taught classes (both scheduled and impromptu) on all things bikes. John also believes in helping every rider attain their optimal fit on the bike of their dreams. Please feel free to stop in any time and talk about bikes, fit, parts, or just share your latest ride. You can also see more of John’s tricks and tips on the Brown Bicycle Facebook Page.

There are tons of exercises, drills and products to help you keep your fitness through the winter riding months.

Fun and fitness when winter bike riding isn’t your thing

by John Brown

Snow, ice, and cold make for excellent conditions for fat biking, but how do you keep in shape when winter bike riding isn’t your thing? Luckily, many fun activities, exercises, drills, and products help keep you in shape through the winter months.

winter riding

Fun is fat through the winter.

Fitness ideas if winter bike riding isn’t your thing

Even the most minor efforts can help you stay fit. Trying things like taking the stairs rather than the elevator, parking on the opposite side of the retail center and walk when shopping, or taking time in the evening to walk around the neighborhood will make a big difference until the riding season returns. You can also start putting some time in at the gym. In the past, I had a gym membership that I would turn off, except for three months a year. I enjoyed yoga classes, weight training, treadmills, spin classes, and other gym-related activities.

On a bike trainer vs. winter riding

Another winter bike riding option you can enjoy through the winter is buying an indoor trainer. An indoor trainer holds your bicycle upright and offers resistance when you pedal, thus turning your bike into a stationary bicycle. When using an Indoor trainer, you can ride from the comfort of your own home or in a group setting. Most bike shops have trainer nights in their stores through the winter.

winter riding

Trainer rides are a great way to connect with other riders.

If you join a shop’s group trainer ride, there is usually a leader. However, riding alone can still be fun. Most people start riding their trainer while watching TV, and it’s a great plan at first, but that quickly gets boring. I find it interesting to use trainer-specific workouts online. There are plenty of free and for-pay versions. Additionally, depending on the trainer you buy, some of those workouts will change the resistance through your trainer.

Spin classes

Most gyms offer spin classes. These classes use a stationary bicycle, music, and instructors to guide a course through a one-hour workout. These rides are enjoyable and offer an intensity that is difficult to achieve while riding alone at home.

Winter riding

Spin Class is a fast and fun workout.

There are, however, a few downsides with spin classes to keep in mind. One issue is that a spin bike won’t fit the same as your bike. Many riders will install their saddle and pedals on a spin bike before each class. The other potential problem is that the courses you can select are not tailored toward your personal goals. The levels are usually high-tempo, high-effort workouts that might not fit your training plan.

Fun in the Snow

If you live in a colder weather climate and snow is the reality for months at a time, you can enjoy the white stuff and keep your fitness. Cross-country skiing, snowshoeing, and ice skating are fantastic ways to increase your heart rate. I love skating on our pond with my boys because I’m not good at it, so I get to use new muscles, and two, I have to work hard to keep up with those rascals.

winter riding

Our winter oasis, where I fumble through learning to skate

However, enjoy your time off the bike if you find your fitness through the winter. The brief time between fall and spring is perfect for strengthening new muscles, working on flexibility, and letting your body recover from a full season of cycling. Additionally, time off the bike always excites me to get back on it once the weather clears.

About John Brown, the author

As a lifelong cyclist and consummate tinkerer, John operates Browns Bicycle in Richfield, MN. It all started for him in grade school when the bike bug bit and that fever is still there. Now, and over the past thirty years, he has worked at every level in the bike industry. Starting, like most, sweeping floors and learning anything he could about bikes. He eventually graduated as a service manager and then to a store manager.  Through the years, he has spent extensive time designing and sourcing bicycles and parts for some of the largest bike companies in the world. All the while focusing on helping as many people as possible enjoy the love of riding a bike. In that pursuit, he has taught classes (both scheduled and impromptu) on all things bikes. John also believes in helping every rider attain their optimal fit on the bike of their dreams. Please feel free to stop in any time and talk about bikes, fit, and parts or share your latest ride. You can also see John’s tricks and tips on the Brown Bicycle Facebook Page.
Give a call to the shops closest to you and verify they have the models you want to test ride.

Winter in a bike shop is a great time to learn and get fast service

by John Brown, BrownCycles.com

The winter months are the perfect time to visit a bike shop and learn. Other than just enjoying bikes at a time when you may not be riding, there are many benefits to visiting your bike shop during the cooler months of the year. You can learn more in the slower winter months, get better deals, and have faster service.

Faster turnaround time on repairs at your bike shop.

Most bike shops operate on a “first in / first out” repair schedule. This means during the busy summer months, there will be dozens of bicycles ahead of yours in line to be repaired. Those dozens of bikes could equal weeks of waiting before your bike gets fixed. Through the winter months, there are fewer bikes in for repair. That means you can expect a speedy turnaround time. Plus, with fewer bikes in the shops to be worked on, each seems to get more attention. That’s not to say your shop won’t do a great job in the summer months. I’m just saying that it is always good when service isn’t rushed and the mechanic has more time.

Bike Shop

Quiet time in the shop is the best time for quality service.

Bike shop discounts and deals!

As fall turns to winter, bicycle brands change from one model year into the next. Because of that change, the transition becomes a sweet spot for buying a bike. In some cases, you can get last year’s models for a discounted price; if those aren’t available, the new models are readily available. Along with the new model year shift, many shops also run sales through the winter to maximize store traffic.

A bike shop visit is worth more than a discount

It’s no secret that winter in a bike shop is slow. Why not take advantage of that slow time to talk with the salesperson and mechanics? Need to know more about all the different bike types? Where is the best place to ride your fat bike? How do the new shorts differ from the ones you already have? These individuals in the bike shop can help.

If it’s a question about your bike’s service or adjustments, the mechanics will likely spend more time with you and not be rushed. Even better, at this time of the year, some shops will allow customers to watch and learn as they fix their bikes in the winter. Due to the time added to teaching, this is not an opportunity to be considered or offered through the summer.

Learn more at your bike shops, clinics, and classes

As many bike shops have evolved from regular retail locations into community cycling centers, most have adopted a strategy of education and involvement. Because shops have far more time in the winter, most schedule their programs during this downtime. In the most basic cases, you can enjoy trainer rides at most shops. Typically, these rides are a “bring your own trainer” affair, where customers come and ride together.

Bike Shop

Park tool School is in full effect.

More ambitious stores are running classes on home bike repair as well. Usually, those classes focus on one part of the bike, like wheels or derailleurs. Finally, the most forward-thinking shops are doing classes and clinics and inviting speakers to come and give presentations. Many riders have questions about bike packing or fat biking, and shops will schedule professionals to discuss those subjects.

Classes at Browns Bicycle

Don’t let simple mechanicals ruin an otherwise great ride. Learn the basics of fixing flat tires, mending a broken chain, and getting home on two wheels rather than two feet. Please bring your bicycle with you for a hands-on instruction session. All ages are welcome, although an adult should accompany minors. Check out class dates when available.

Show the love.

If for no other reason, stop by the shop and say hello. Depending on how quiet the shop is through the winter, things can get pretty boring for the staff, who would love to share their knowledge. Storage can only be cleaned and reorganized many times after all the boxed bikes are built. After that, the friendly face of a customer is a welcome sight.

About John Brown, the author

John operates Browns Bicycle in Richfield, MN as a lifelong cyclist and consummate tinkerer. It all started for him in grade school when the bike bug bit, and that fever is still there. Now, and over the past thirty years, he has worked at every level in the bike industry. Starting, like most, sweeping floors and learning anything he could about bikes. He eventually graduated as a service manager and then to a store manager.  Through the years, he has spent extensive time designing and sourcing bicycles and parts for some of the largest bike companies in the world. All the while focusing on helping as many people as possible enjoy the love of riding a bike. In that pursuit, he has taught classes (both scheduled and impromptu) on all things bikes. John also believes in helping every rider attain their optimal fit on the bike of their dreams. Please feel free to stop in any time and talk about bikes, fit, and parts or share your latest ride. You can also see John’s tricks and tips on the Brown Bicycle Facebook Page.

The Minneapolis app tells you trails plowed after it snows

Minnesota’s cyclists are a hardy bunch, but ice and snow-blocked trails can put the brakes on many rides. Just in time for winter weather, the Minneapolis Park & Recreation Board (MPRB) new Trail Plowing Status Map App. is ready and waiting when it snows.  Transponders mounted on the city’s snow removal equipment show in real-time which trails have been cleared. With the new tool, users can track over 70 pieces of city equipment as they plow over 150 miles of trails across the city of Minneapolis.

Click on the map to go to an interactive map

According to the 2015 American Community Survey by the U.S. Census, Minneapolis is one of the top cycling cities in America. With an extensive trail network, nearly 12,000 people commute by bike annually here.

That number takes a big dip during winter, especially when snow is in the forecast. The Trail Plowing Status app hopes to remove the mystery of whether your route to work is safe for riding, walking, or rolling. The MPRB hopes this will encourage more active transportation enthusiasts to use the trail network all year.

The app also allows the Park Board to collect data to analyze and improve its operations. If you run into some unplowed trails, there’s an option on the website to report any problem areas.

A final note – excuses not to ride

When talking about bicycle infrastructure in Canada, the number one excuse heard is “winter.” Many North American cyclists consider the cold and snow a fundamental barrier to year-round biking. But one city, Oulu in Finland, with winter weather worse than most upper North American cities, shows that winter cycling has nothing to do with the weather and everything to do with safe cycling infrastructure.

Here is a comparison video of why Canadians Can’t Bike in the Winter (but Finnish people can)“People will ride a bicycle in the winter if the city is designed for it.”

Visually keep an eye out hazards that may be developing in the ice.

Bike, ski, or walk on water with these ice safety tips

by Russ Lowthian, HaveFunBiking.com

For anyone unfamiliar with the bold north, biking or walking on water is a fun outdoor winter activity when incorporating a few ice safety tips into the adventure. Mother Nature’s temperature swings in the upper Midwest will determine when to venture onto a frozen body of water. From mid to late December through  February, riding a bike across a body of frozen water is a regular occurrence. This year, please take note. With above-normal temps so far this year, ice is slow to form. Delaying many of the fun activities here on many of the lakes and streams. Check the ice depth before you venture out!

Along with the proper clothing for a comfortable ride in the winter, here are some ice safety tips you need to know to ensure a safe time pedaling across a lake or stream frozen over.

Ice safety tips – First and foremost, know the thickness of the ice.

There’s no way around it. While many visual cues can help you determine if it is safe to roll out or step onto the ice, the most reliable way is to measure the ice thickness.

There are a few tools you can use to measure the ice. An ice chisel can be stabbed into the ice until it penetrates through to the water. A cordless drill with a wood bit also works well to auger a hole to measure the thickness.

Ice safety tips – What is a safe thickness?

According to the Minnesota Department of Natural Resources states on ice thickness, any ice thickness less than four inches should be avoided at all costs. At four inches, the ice can support bicycling, cross-country skiing, ice fishing, and walking. At five to seven inches, the ice can sustain the weight of a snowmobile or an ATV, while eight to twelve inches are needed to support a small car’s weight. While these guidelines are generic, and ice conditions vary, the current chart is for newly formed ice. Make sure to read more on thickness before going out there.

Measuring in one place is not enough. Measure several areas (approximately 150 feet apart) to ensure the entire area is safe. Ice thickness can vary, even over a relatively small area—especially over moving water.

Ice safety tips – Assess the area visually.

A visual assessment can help supplement your measurement and help if you rely on someone else’s measurements.

Its a perfect time of the year to jump on a fatty and hit the trail. This pic was taken last year at the Get Phat with Pat event in the Minnesota River Bottoms, in Bloomington, MN.

With safe ice, it’s a perfect time to jump on a fatty and ride across a stream.

Watch for signs of danger like cracks, seams, pressure ridges, dark areas (where the ice is thinner), and slushy areas—even slight slush signals that the icing isn’t freezing at the bottom. This is a tell-tale that the ice is progressively getting weaker.

Ice safety tips – The color of the ice

Check out the color of the ice. Clear, blue, or green ice thicker than four inches should be enough to bike on. White ice typically has air or snow trapped inside, weakening it. Dark ice might indicate that the ice is relatively thin—probably not thick enough for biking or hiking.

The Fresher, the better!

New ice is typically stronger than older ice. The bond between ice crystals decays even in freezing temperatures as time passes. When the spring thaw begins, the ice weakens considerably. Heading out for one last ride across the ice can be tempting, but it is safest to say no. Even if ice fits the measurement criteria, it can still be hazardous.

More suggestions when venturing out on “safe ice.”

Along with knowledge of the thickness of the ice and a visual assessment, here are four more suggestions to help minimize the risk when biking on the ice:

  • Carry ice picks and a rope
  • Have a cell phone or personal locator beacon along
  • Don’t go out alone; tell someone about trip plans and expected return time.
  • Before heading out, inquire about conditions and known hazards with local experts.

Know the proper rescue techniques.

Anyone doing anything on the ice outdoors should know the ice rescue technique. Kids should be familiar with the protocol, so educate them beforehand. If someone in your party falls through the ice, the first thing to do is call 911. Anyone still on the ice should slowly lie down, distributing their weight over a larger area.

Reach the person in the water using a long-reaching assist— maybe a large stick, a rope, or a ladder if available. The person in the water should be instructed to kick and slowly ease their way out of the water. Once they reach the surface, they should crawl or roll away from the broken ice area.

Anyone on the ice, including the victim and rescuer, should avoid standing up until they are far away from the broken ice. As soon as possible, get the victim into dry clothing and treat them for hypothermia.

Hopefully, soon we can have some fun!

Enjoy the ice safety tips for a safer true North experience!

For every new bike there are bike accessories you should consider getting. Accessories will make you more comfortable, more informed, and more prepared.

Quick tips for renting a bicycle when traveling

by John Brown, 

Taking your bicycle when you travel is not always possible, but don’t give up on the idea of riding altogether. Renting a bicycle or e-bike is an easy way to experience new places. Plus, it lets you try a new bike you may want to buy when you get home. So, before you travel, here are a few tips to get you going

In the photo above, a visitor to the Twin Cities is being helped by the staff at One Ten Cycles in Mendota Heights, a couple of miles south of the MSP Airport.

 Renting a Bicycle At One of Many Bike Shops

As bike trails and paths become more commonplace, bike shops are entering the rental market. Before you travel, find a few area bike shops and call about renting a bicycle. Be sure to ask about both rental fleets (typically made up of basic mountain bikes, cruisers or hybrids) as well as “Demo” bikes. Many shops that don’t rent bikes have demo units to let potential buyers try before buying. The fee for a demo is usually higher than that of a standard rental, but the bicycle quality is also typically higher.

renting a bicycle bike shop

Renting a bicycle outside a bike shop

Renting a Bicycle Consider Rental Companies

In most major cities or tourist destinations, some businesses only rent bikes and e-bikes. Finding one of these companies is as easy as a Google search or asking the hotel you are staying in. Many rental companies have services to deliver a rental bike to the hotel. If you are going to the rental shop, understand they usually operate on a first-come-first-serve basis, so be sure to get there early if you are trying to ride on a busy weekend.

renting a bicycle avalon

Rental fleet

Or Bike Share Programs

Bike shares are becoming very popular throughout the US and abroad. Companies like BCycle, and Citi bike are a couple of the companies that offer options to rent “as you go.” With tons of locations around the US, bike shares are a great option if you are touring a city. Because you can pick up a bike in one location, explore, and then drop the bike off at another docking station any time of day or night.

renting a bicycle citibike

Citi Bike docking station

Renting From A Bicycle Touring Company Is Another Option

Many bike tour companies have bike fleets. Tour companies such as Trek Travel and Backroads offer tours around the globe and supply bikes as part of the cost. The benefit of taking a dedicated tour is support. Lodging, Equipment, route, food, and guides are all included in the cost of the trip.

Getting Comfortable

The most important trick to a great bike rental experience is to ensure the bicycle is comfortable. Your own pedals, saddle, and the right size bike are great ways to start.

     -Size

If you don’t have a bike, ask for the brand and model of the bike from the rental company. Then, try to find a local bike shop that sells that model. If you stop into the shop and explain your situation, they can tell you what size you ride. As a side benefit, If you like the bike you rented, that local bike shop would be a great place to buy one to keep at home.

     -Pedals

If you use clipless pedals, remove them from your bike, drop them in a ziplock bag, store them in your riding shoes, and bring them with you. Once you get your rental bike, have your pedals installed. Having a familiar pedal can go a long way to make a new bike feel like your bike at home.

     -Position

Measure your saddle height. Do this by rotating your pedals until a crank arm is in line with the seat tube of your bicycle. Use a tape measure from the top of the saddle to the middle of the pedal (in line with the seat tube). Also, measure the distance from the tip of your saddle to the handlebars and the height of your handlebars. Once you get your rental, ask to adjust it to be as close to your bike’s measurements as possible. Remember that one bike will never fit exactly like another, so close is great.

Renting a bicycle measurments

Key measurements

     -Saddle

After measuring the height of your saddle, remove it from your bike and bring it with you. Having the rental company install your saddle on the rental is a nice way to make an unfamiliar bicycle comfortable.

Have fun on your next trip

It’s amazing what you will see and experience on the seat of a bicycle when visiting a new area.

About John Brown, the author

John operates Browns Bicycle in Richfield, MN as a lifelong cyclist and consummate tinkerer. It all started for him in grade school when the bike bug bit him, and that particular fever is still there. Now, and over the past thirty years, he has worked at every level in the bike industry. He was starting by sweeping the shop floor while learning anything he could about bikes. He eventually graduated as a service manager and then a store manager. Through the years, he has spent extensive time designing and sourcing bicycles and parts for some of the largest bike companies in the world. All the while focusing on helping as many people as possible enjoy the love of riding a bike. In that pursuit, he has taught classes (both scheduled and impromptu) on all things bikes. John also believes in helping every rider attain their optimal fit on the bike of their dreams. Please feel free to stop in any time and talk about bikes, fit, and parts or share your latest ride. You can also see more of John’s tricks and tips on the Brown Bicycle Facebook Page.
Winter fat bike season is once again upon us as the leaves fall and temps become cooler. While riding a fat bike is much like riding a regular bike, there is a certain fat bike etiquette to keep in mind when you get out there on the trail this winter season for some fun.

As the winter season progresses remember your fat bike etiquette

by Jess Leong  

Winter fat bike season is upon us again as the snow and temps drop. Like riding a regular mountain bike, there is a certain bike etiquette to follow when on the trail. Everyone on the trail wants to have a good time outdoors and make memories in the crisp, clean air. Whether biking, hiking, skiing, or snowshoeing, these are all valid activities where trail etiquette is important. The trail needs to be shared for everyone to have a good time. The rules below will keep everyone free from harm and make it fun for everyone.

Many general rules of the fat bike trail are the same as mountain biking or riding on regular trails. However, there is a major difference to keep in mind in addition to the general rules of the trial.

Practicing fat bike etiquette is an enhancement to general trail rules

The International Mountain Bicycling Association (IMBA) developed the “Rules of the Trail” to promote responsible and courteous conduct on shared-use trails. Keep in mind that conventions for yielding and passing may vary in different locations or with traffic conditions. This list is also on IMBA‘s website and in the Minnesota Bike/Hike Guide.

Before You Ride

  1. Plan Ahead: Know your equipment, your ability, and the area you are riding, and prepare accordingly. Strive to be self-sufficient: keep your equipment in good repair and carry necessary supplies for changes in weather or other conditions.
  2. Let People Know: Make sure there’s at least one other person who knows where you’re headed when you plan to start, and when you hope to return. Things can happen on the trail; someone must know where you might be if something goes wrong.
  3. Ride Open Trails: Respect trail and road closures — ask a land manager for clarification if you are uncertain about the status of a trail. Do not trespass on private land. Obtain permits or other authorization as required. Be aware that bicycles are prohibited in areas protected as state or federal Wilderness. This means you guessed it; check ahead of time!

While Riding

  1. Leave No Trace: Be sensitive to the dirt beneath you. Wet and muddy trails are more vulnerable to damage than dry ones. When the trail is soft, consider other riding options. This also means staying on existing trails and not creating new ones. Don’t cut switchbacks. Be sure to pack out at least as much as you pack in.
  2. Control Your Bicycle: Inattention for even a moment could put yourself and others at risk. Obey all bicycle speed regulations and recommendations, and ride within your limits.
  3. Yield Appropriately: Do your utmost to let your fellow trail users know you’re coming — a friendly greeting or bell ring are good methods. Try to anticipate other trail users as you ride around corners. Bicyclists should yield to other non-motorized trail users unless the trail is signed for bike-only travel. Bicyclists traveling downhill should yield to ones headed uphill unless the trail is signed for one-way or downhill-only traffic. In general, strive to make each pass a safe and courteous one.
  4. Never Scare Animals: Animals are easily startled by an unannounced approach, a sudden movement, or a loud noise. Give animals enough room and time to adjust to you. When passing horses, use special care and follow directions from the horseback riders (ask if uncertain). Running cattle and disturbing wildlife are serious offenses.

Understand ice and snow travel and how to do it safely.

Practice fat bike etiquette, follow the trail rules, and have fun.

Riding in the winter means riding on top of ice and snow. Throughout the winter, there will be times when it’s warmer or colder out, which can affect the ground beneath your tires. Know how to deal with this. Many people also ride on top of the frozen water. Riding across a frozen lake or river can be extremely dangerous if the ice were to crack. Learn how thick the ice needs to be to carry you and your bike when venturing across frozen waters.

Always bring items that can help if you’re in a situation where the ice breaks from under you. International Mountain Bicycling Association recommends that ice picks and a length of rope be carried if riding on lakes or rivers.

Fat Bike Etiquette – General Rules of the Trail

The International Mountain Bicycling Association (IMBA) developed the “Rules of the Trail” to promote responsible and courteous conduct on shared-use trails. Keep in mind that conventions for yielding and passing may vary in different locations or with traffic conditions. This list is also on IMBA‘s website and the  Minnesota Bike/Hike Guide.

Riding a trail system before it snows is advisable when possible.

Riding a trail system before it snows is advisable when possible.

Be polite and respectful to all.

Yield to all other users of the trail when riding. This includes hikers, especially skiers, since they do not have brakes to stop when traveling. Be constantly aware of your surroundings for who and what is around you. Everyone is trying to enjoy the outdoors. When on your Fatty:

  1. Ride on the firmest part of the track to prevent making a deep rut in the trail.  Cutting into the trail more than an inch is difficult, if not impossible, to repair.
  2. Stay as far right as possible on the trail. This is so that other bikers, hikers, etc., can pass on the left.
  3. Do not ride on Nordic or classic ski trails. These trails are specifically groomed, and tires that cross them will ruin the trail and cause problems for those using or repairing them. Being respectful and sharing the trail is important for everyone’s enjoyment.
  4. Respect any closures or alternative days where bikers or skiers specifically have the trail. This is also important because if the trail is closed, no one will look out for you if you fall. Plus, other trails might be closed or have maintenance going on. This can cause problems if you’re there.
  5. Wear reflective clothing and use lights or blinkers. This helps signal to others where you are from a distance. Skiers and snowmobiles travel quickly, and seeing you as far away as possible can help them change their route so there is no collision or problems that will arise.
  6. Consider donating to the shared trails to help cover the cost of maintenance. It takes people to keep the trails well-groomed and ready for people to ride, ski, or hike on them. A donation can go a long way to keeping that trail ready when you want to use it again.

If you are riding in a group, do not ride side by side. This makes it hard for anyone passing by to get through or weave around. It also can block up the trail.

Don’t Forget!

Also, always wear a helmet and appropriate safety gear. Search for an IMBA Club to join, and don’t forget to HaveFun!

Jess Leong is a freelance writer for HaveFunBiking.com.

Fun outdoor winter activities to stay healthy

by Russ Lowthian, HaveFunBiking

For many of us, being active and enjoying fun winter activities (biking, hiking, skiing, etc.) is what memories are made of while contributing to good health. Despite the lifestyle changes of new technology and evolving viruses, there’s still plenty of room to participate in some outdoor fun. Seeking out healthy activities may be even more important now as winter approaches. Doing something you enjoy can distract you from problems and help you cope with all the new life challenges that cause stress.

Page through our latest Bike/Hike Guide with many maps of Minnesota destinations offering fun opportunities. Then, layer up your dress attire for the temperature swings ahead and head out. If you haven’t already, you will soon discover that outdoor pursuits pose a lower risk of getting sick than indoor workouts.

Its a perfect time of the year to jump on a fatty and hit the trail. This pic was taken last year at the Get Phat with Pat event in the Minnesota River Bottoms, in Bloomington, MN.

It’s a perfect time of the year to jump on a fatty and hit a Minnesota trail.

Why choose outdoor adventures?

When outside, the fresh air is constantly moving, helping to digest food more effectively, improve blood pressure and heart rate, strengthen the immune system, and reduce obesity rates. Enjoying Minnesota’s fun outdoor activities offers other benefits, too. As you may have discovered this summer, being outside also offers an emotional boost that will help you feel less tense, stressed, angry, or depressed.

This Bike Pic Thursday, we caught this biker chick out having fun along the Minnesota River bottoms near Bloomington, MN.

This biker chick’s winter activities include having fun along the Minnesota River bottoms near Bloomington, MN.

Enjoy more with low-risk Minnesota winter adventures

Here in Minnesota, a winter wonderland pursuits, consider moving with these low-risk outdoor activities to stay healthy and safe. Again, use the current Minnesota Bike/Hike Guide, with all the maps, to find a place to enjoy the following hobbies.

  • Fat Biking
  • Nature walks
  • Snowshoeing
  • Downhill and/or cross-country skiing
  • Ice skating
  • Ice fishing and hunting
  • Fitness classes, held outside to allow extra distancing
  • And exploring the snow-covered trails on an ATV.

It’s Friday and HaveFunBiking George will soon melt away as the spring thaw approached,

Winter activities can also include stopping to make a snowman.

Remember, seeking healthy outdoor activities may be even more important as winter approaches. Doing something you enjoy can distract you from problems and help you cope with all the new life challenges that cause stress.